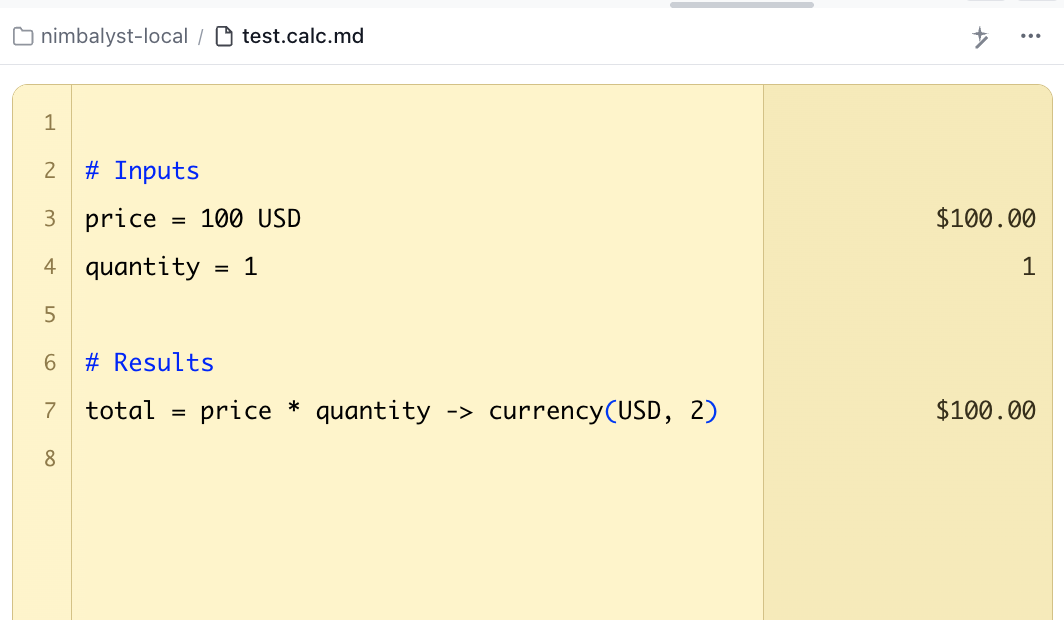
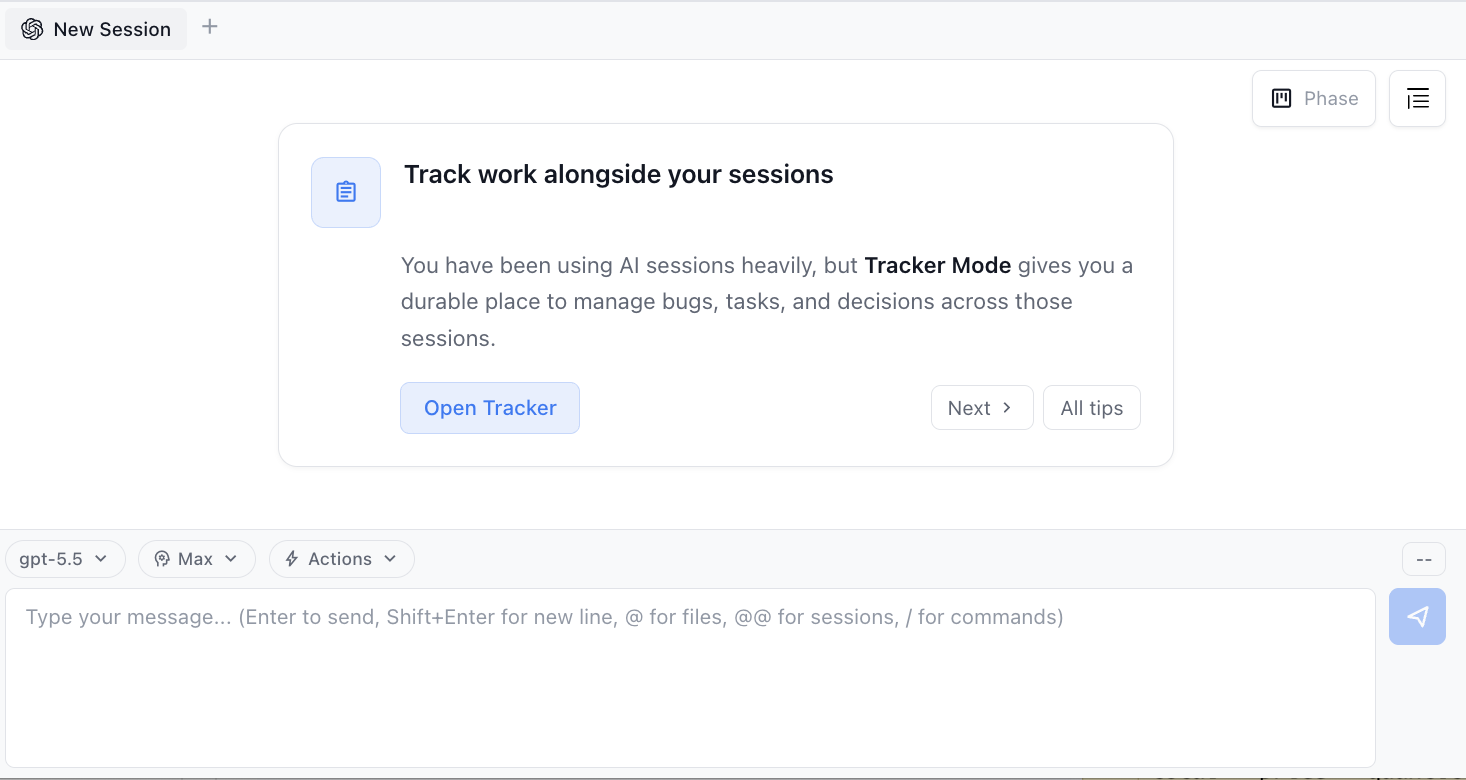
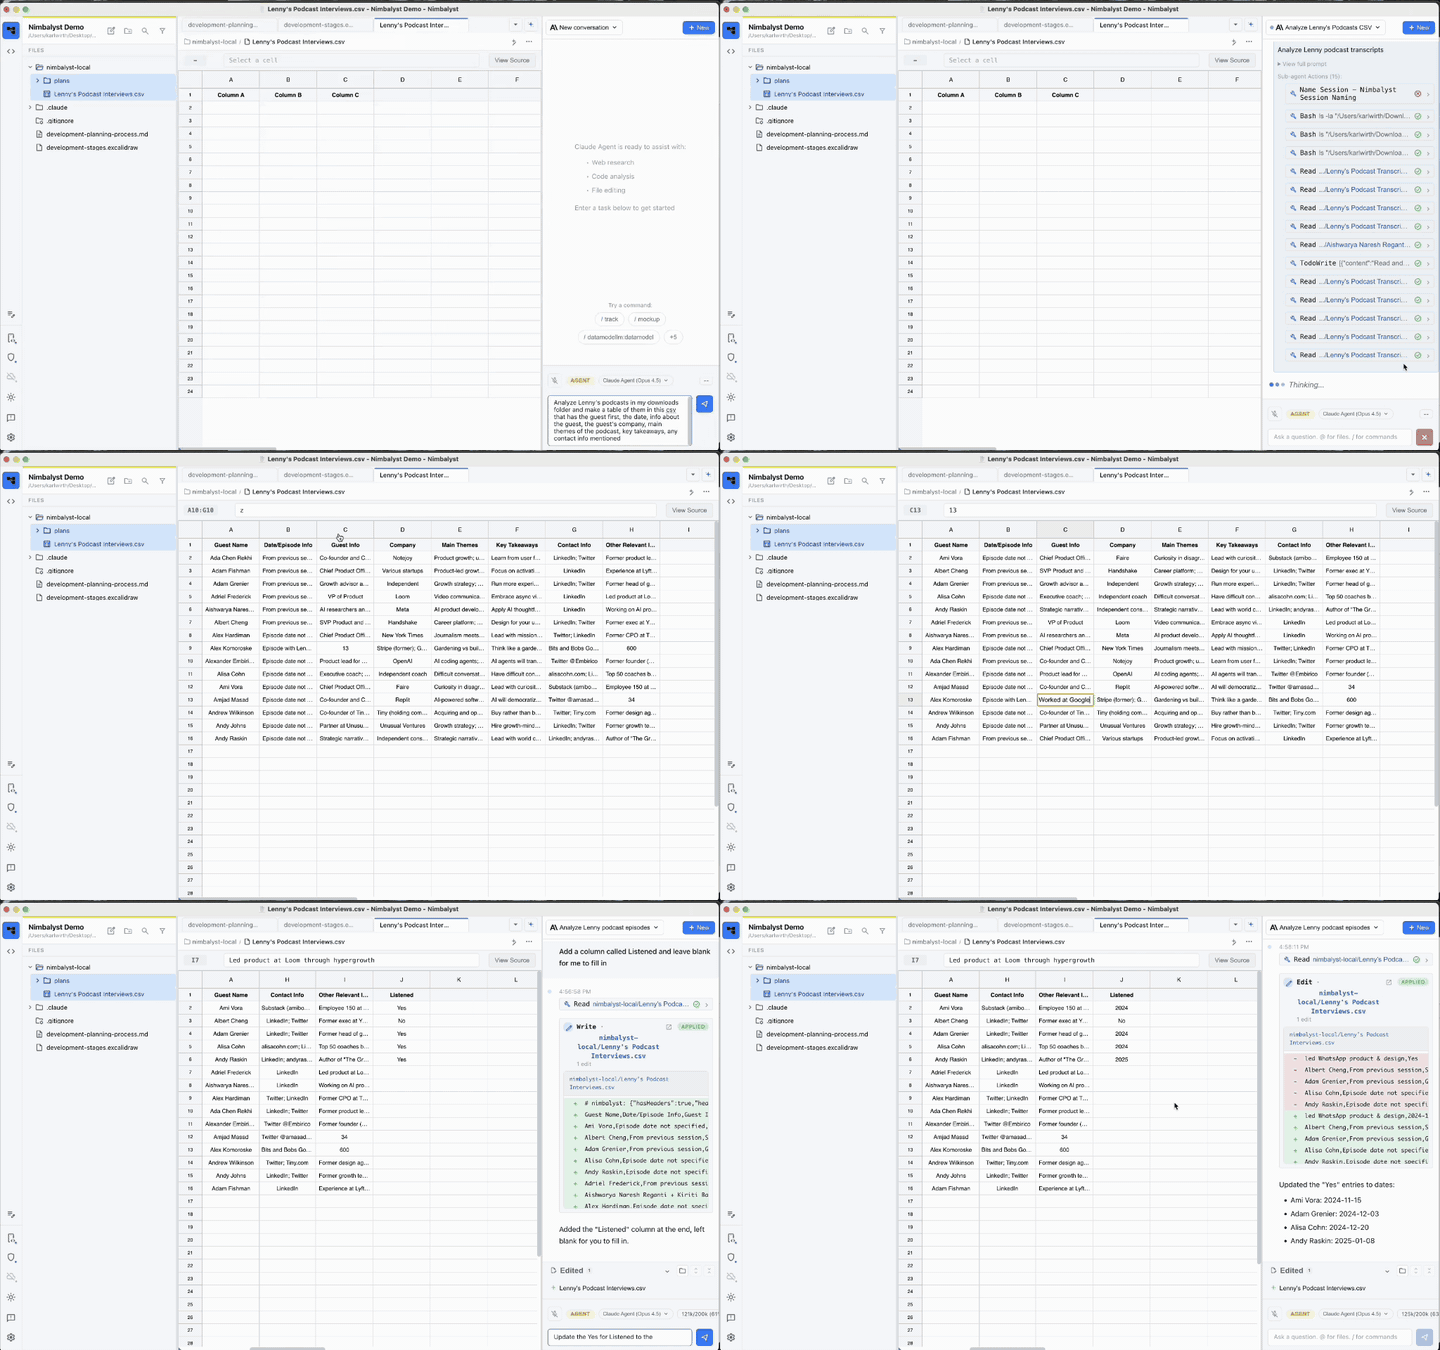
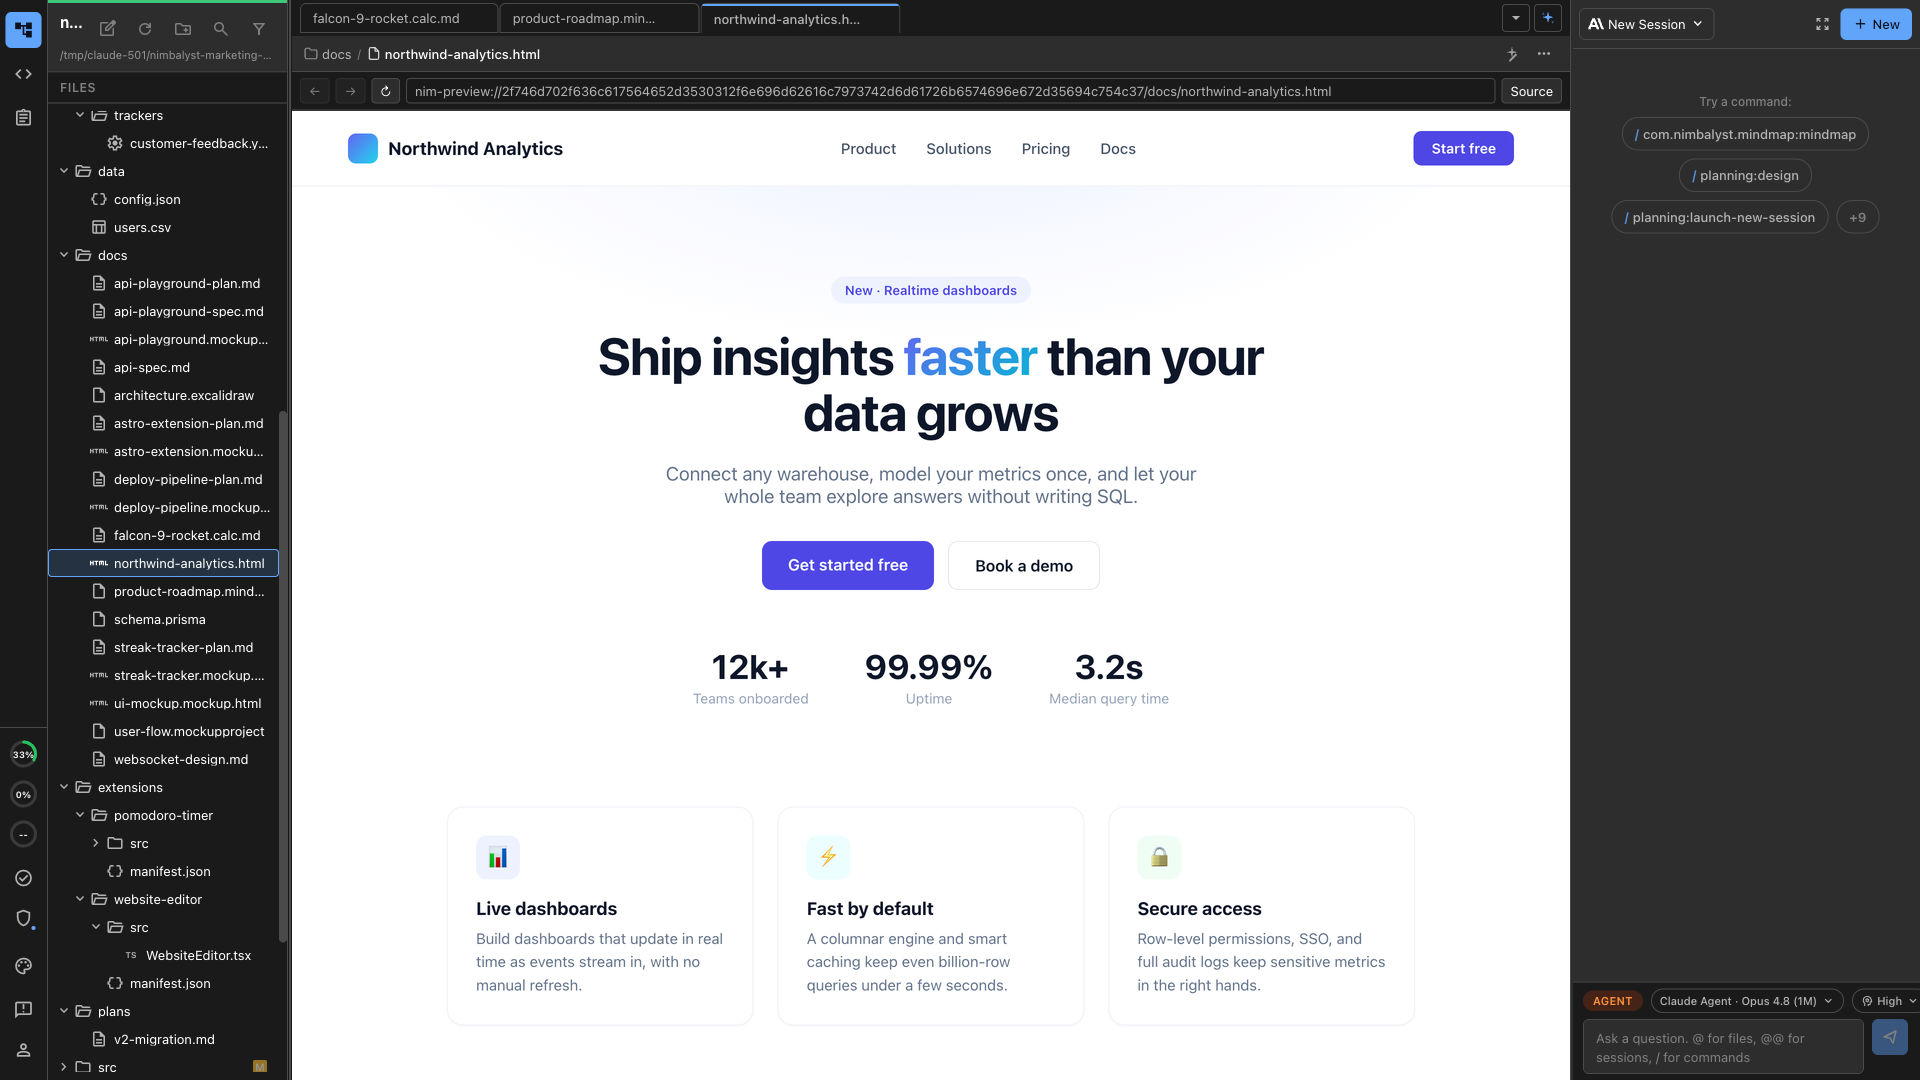
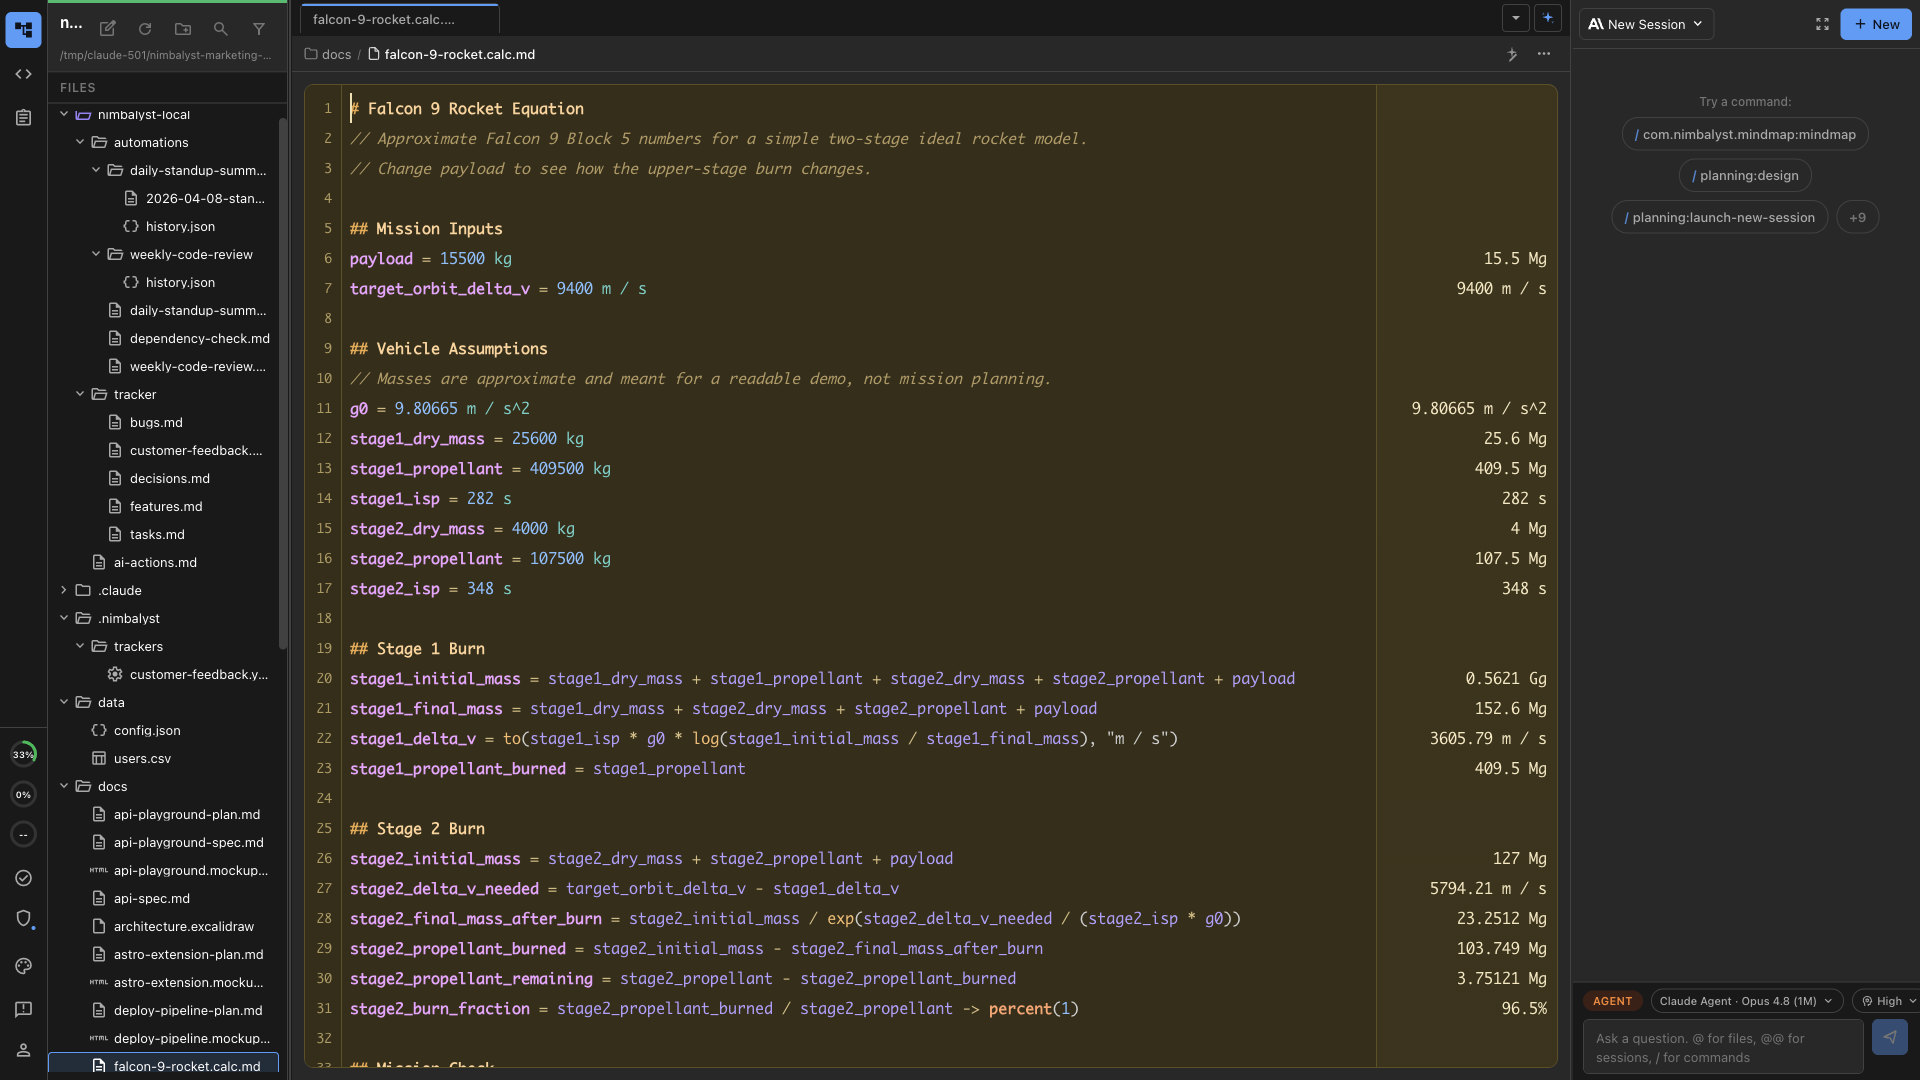
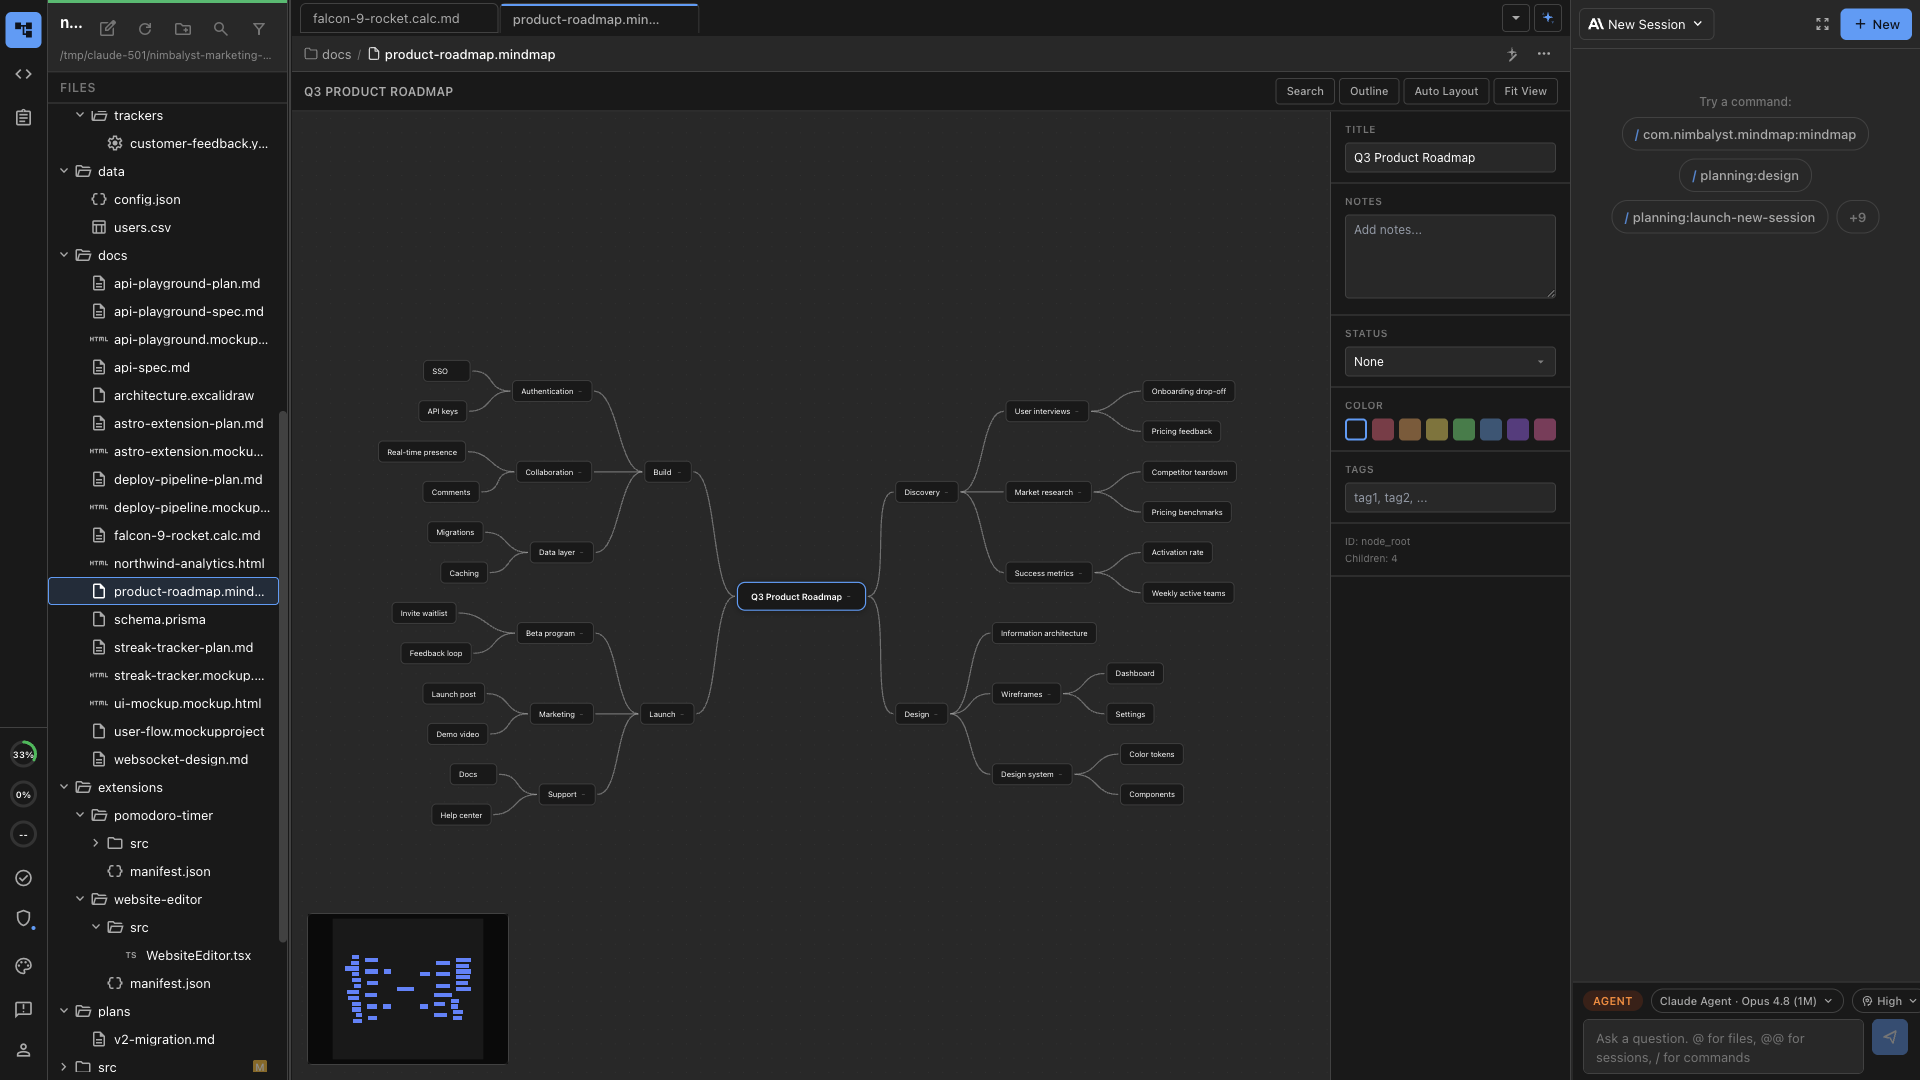
# Why Nimbalyst?

Nimbalyst is an open-source visual workspace for Claude Code and Codex. Learn what it does, who it is for, and how to start working with AI agents.

[Nimbalyst](https://nimbalyst.com/) is **the open-source visual workspace for building with Codex, Claude Code, and more**.

Get higher bandwidth with less context switching. Manage your agents, edit the work visually, and track tasks.

Work across markdown, Calc Sheets, mockups, diagrams, diffs, code, and more without leaving the workflow or rebuilding context.

Nimbalyst runs on your Mac or Windows machine on top of the coding agents you already have installed. [Download Nimbalyst](https://nimbalyst.com/download/) and open a project folder to get started.

Nimbalyst stores your files and data locally in an open format. The full source is on GitHub at [github.com/nimbalyst](https://github.com/nimbalyst), where you can read the code, file issues, or contribute.

### One integrated, higher-bandwidth workflow

Building with agents is a whole workflow. It moves through plans, source files, mockups, diagrams, data, tasks, sessions, reviews, commits, and pull requests. Nimbalyst keeps that work together so people and agents can move through it as one connected process.

* **Integrated workflow:** Plan the work, run agents, edit the result, track status, review changes, and connect the commit without rebuilding context in another tool.
* **Integrated file types:** Work in purpose-built visual editors for markdown, code, mockups, diagrams, spreadsheets, data models, and more while the same agents stay in context.
* **Less context switching:** Stop bouncing among a terminal, editor, document app, diagram tool, and task tracker or copying the same context into each one.
* **Higher bandwidth:** Visual interfaces expose more of the work at once, so people understand, direct, and review agent output faster than they can through a text-only workflow.

### Files Mode

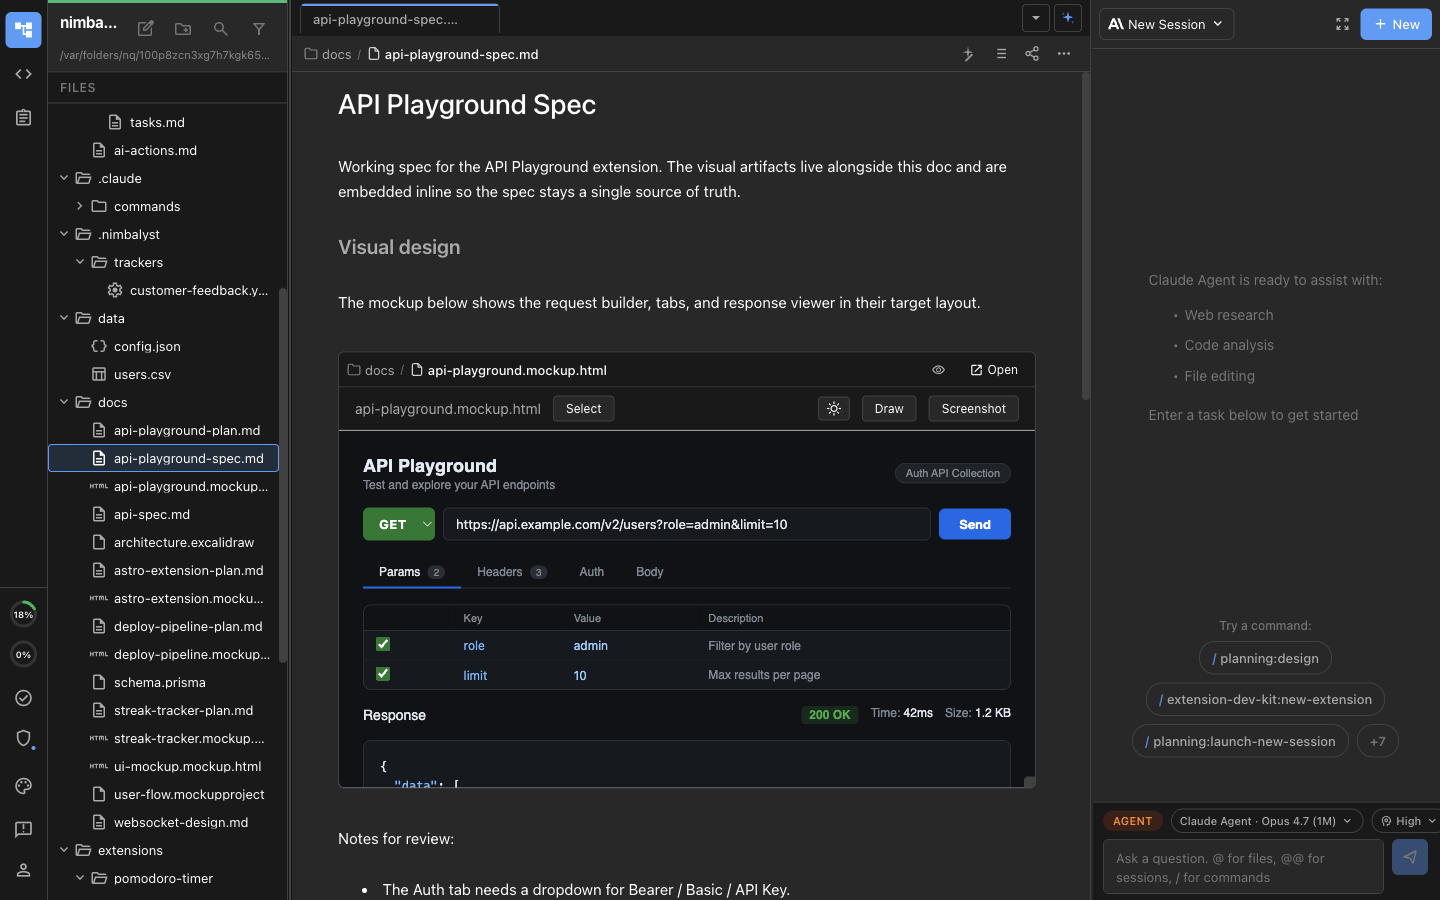
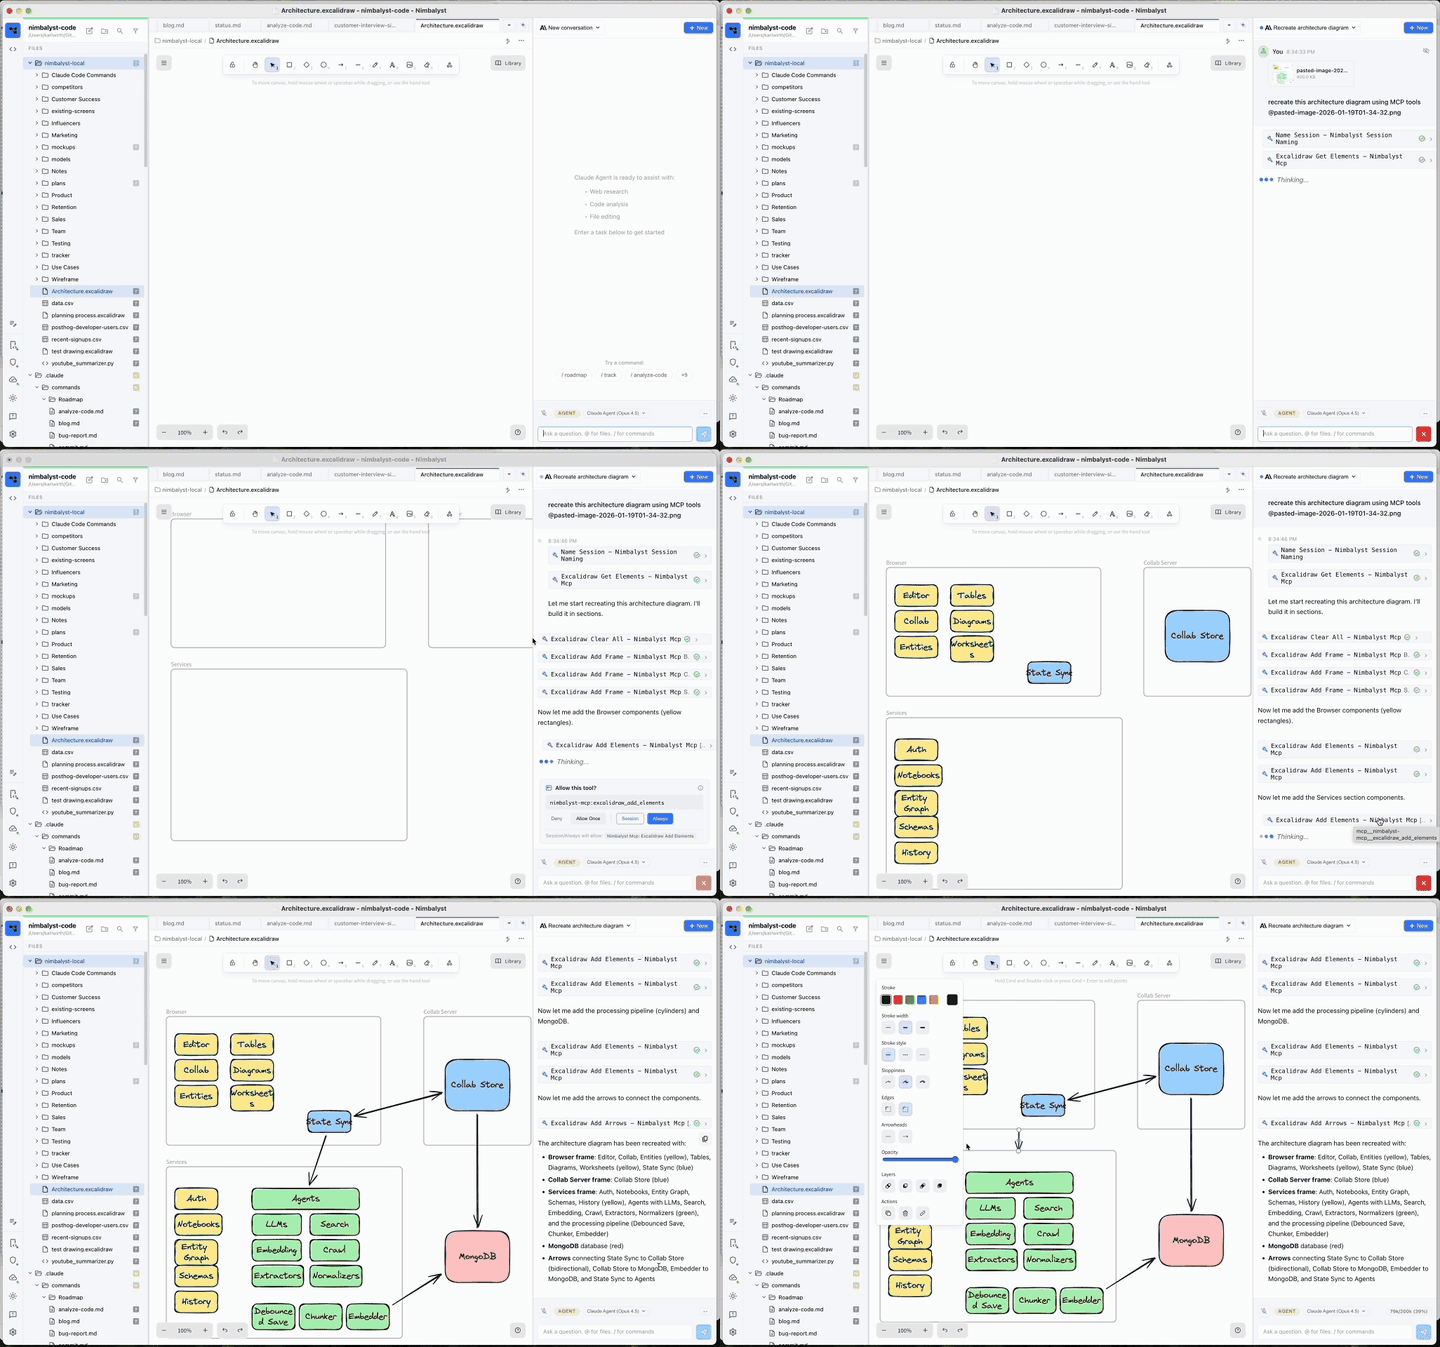
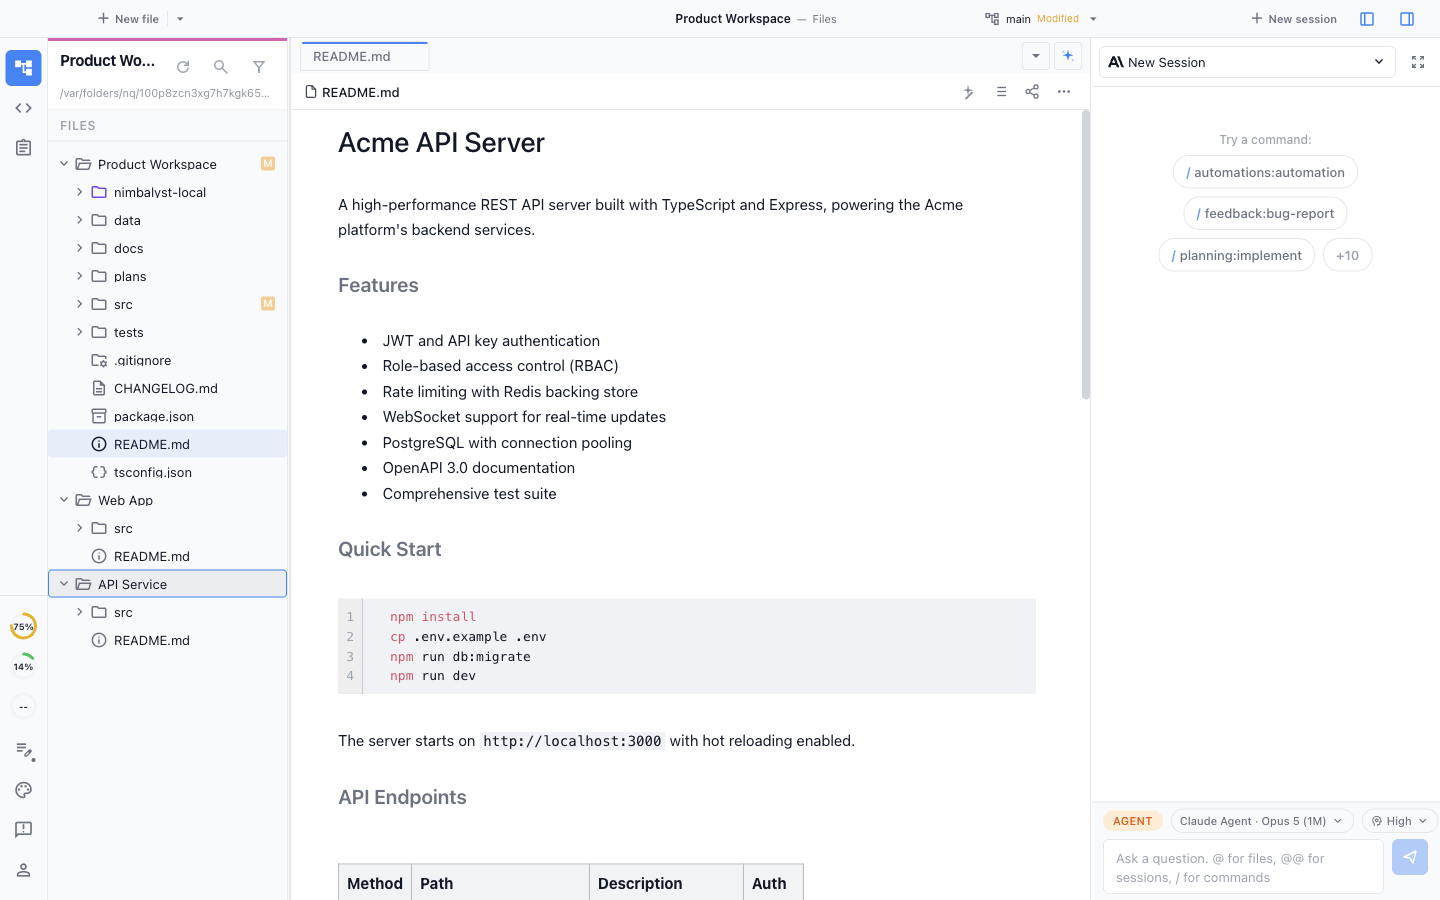
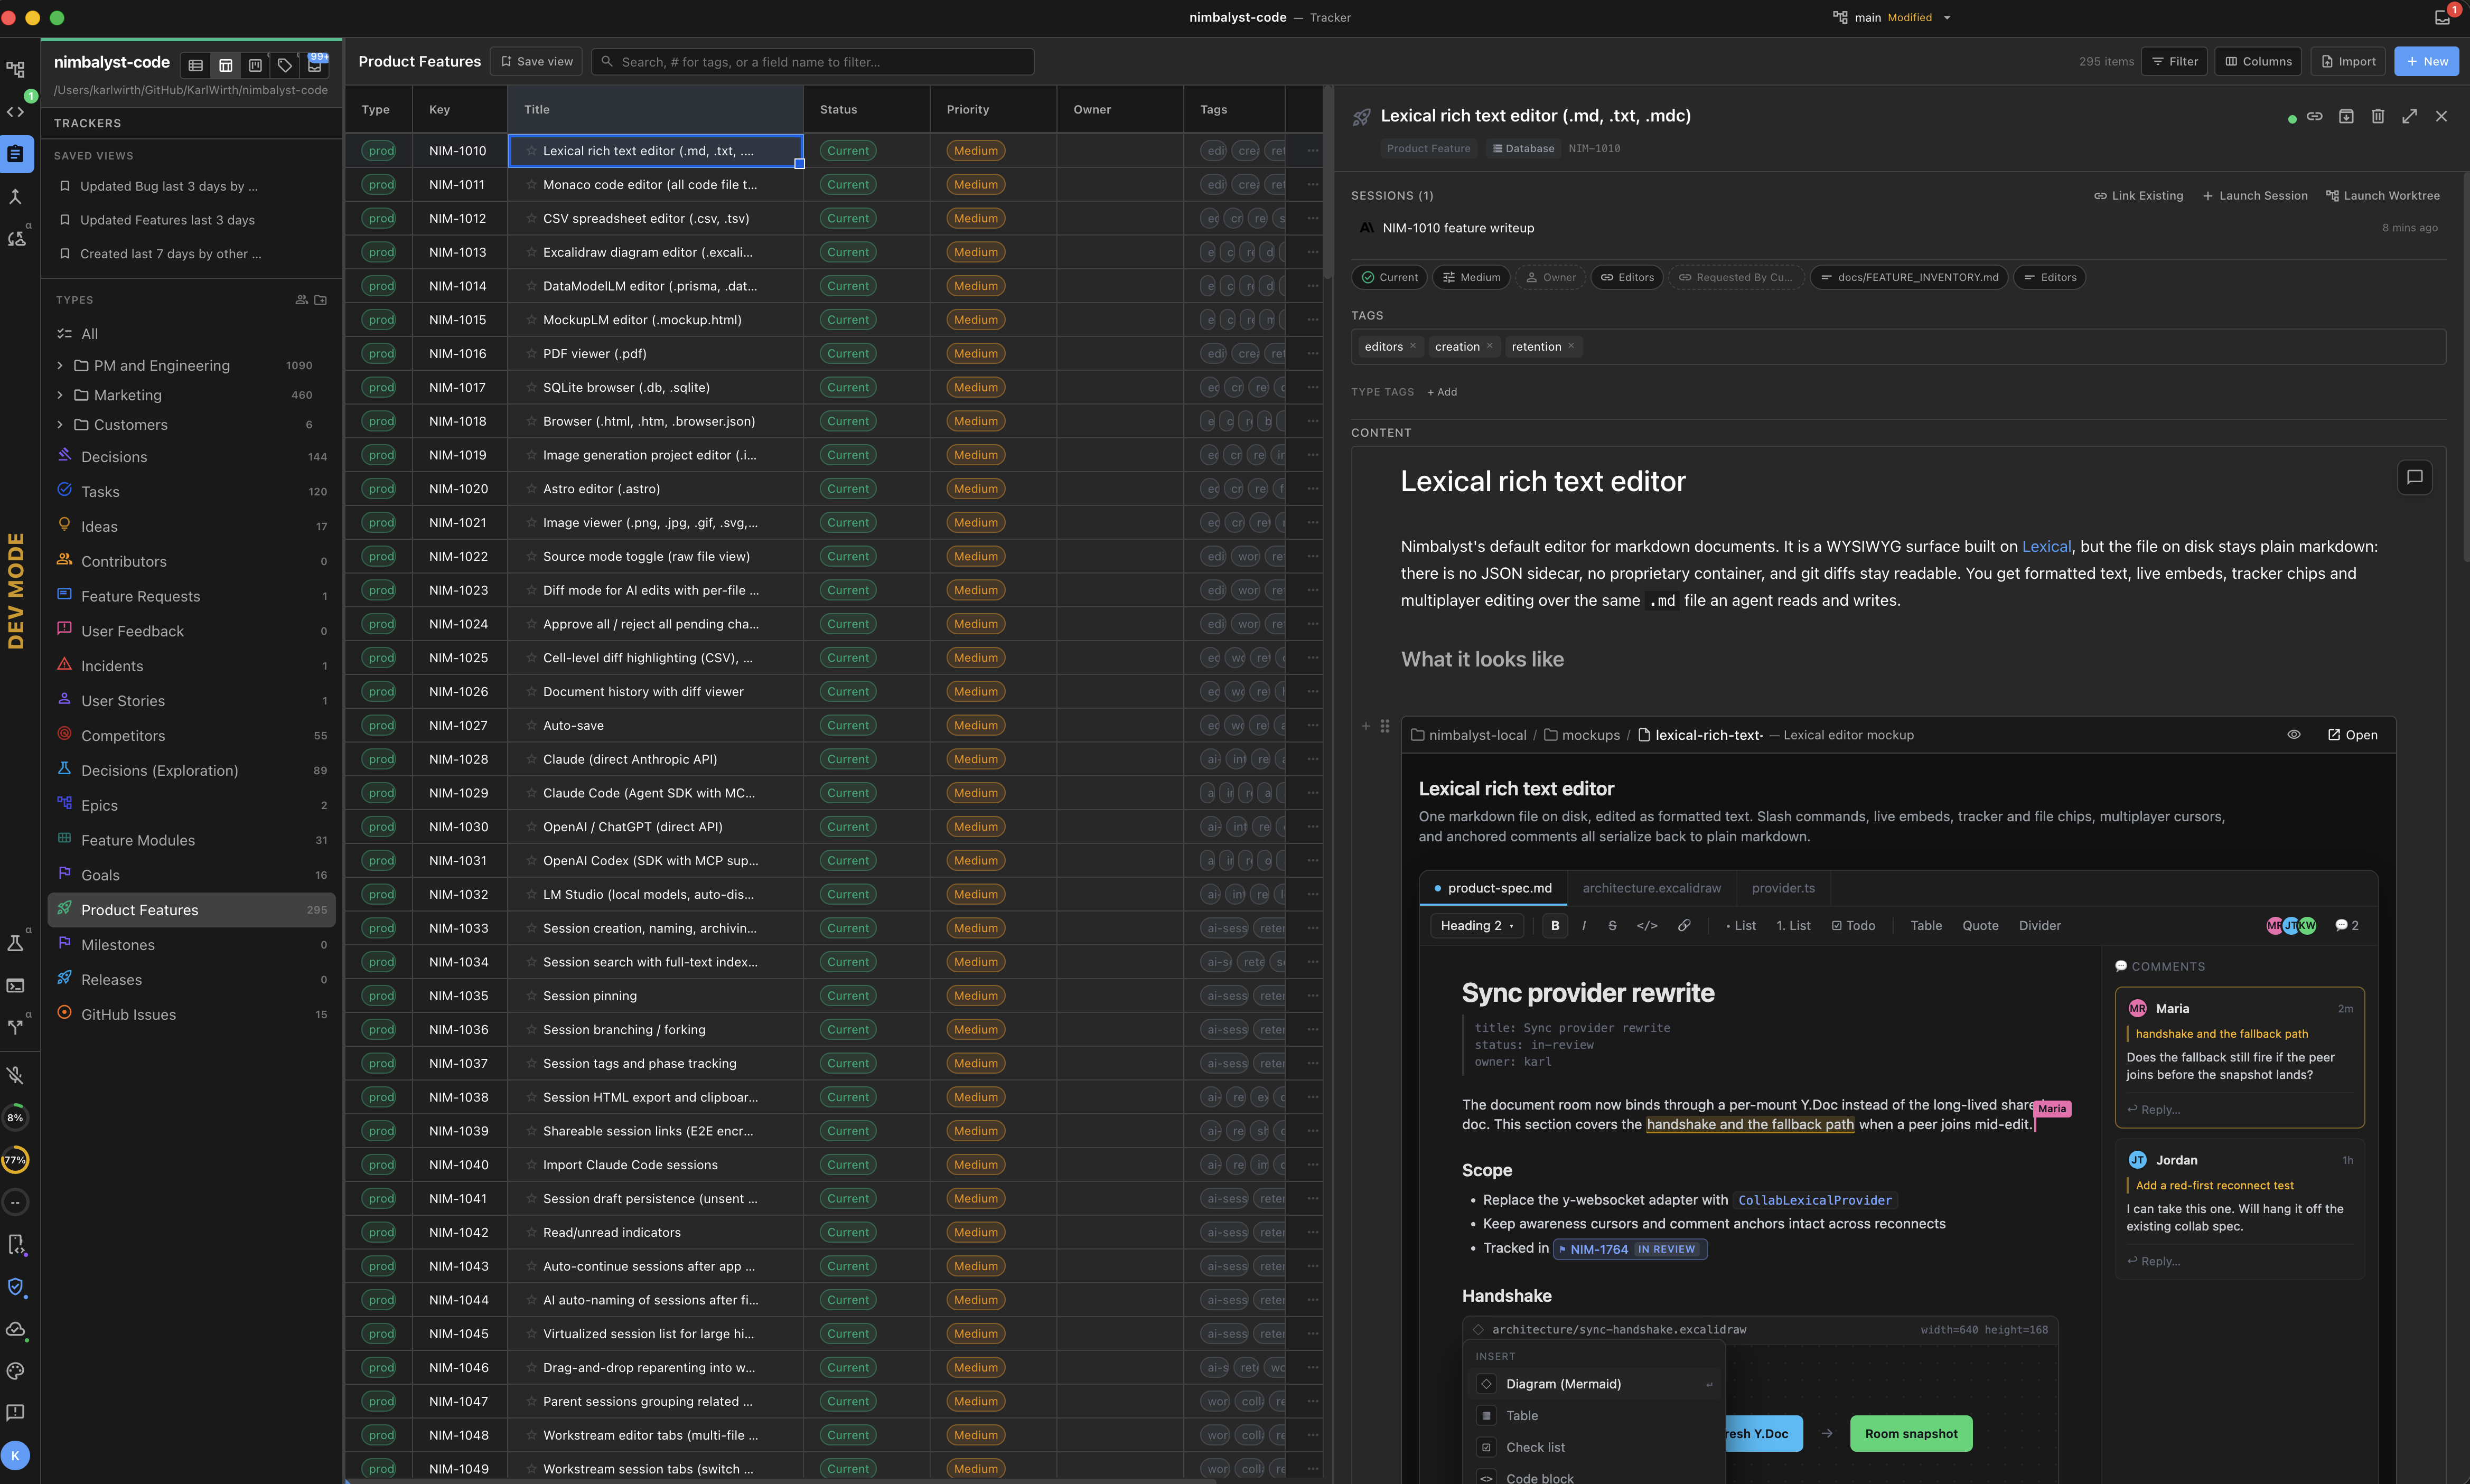
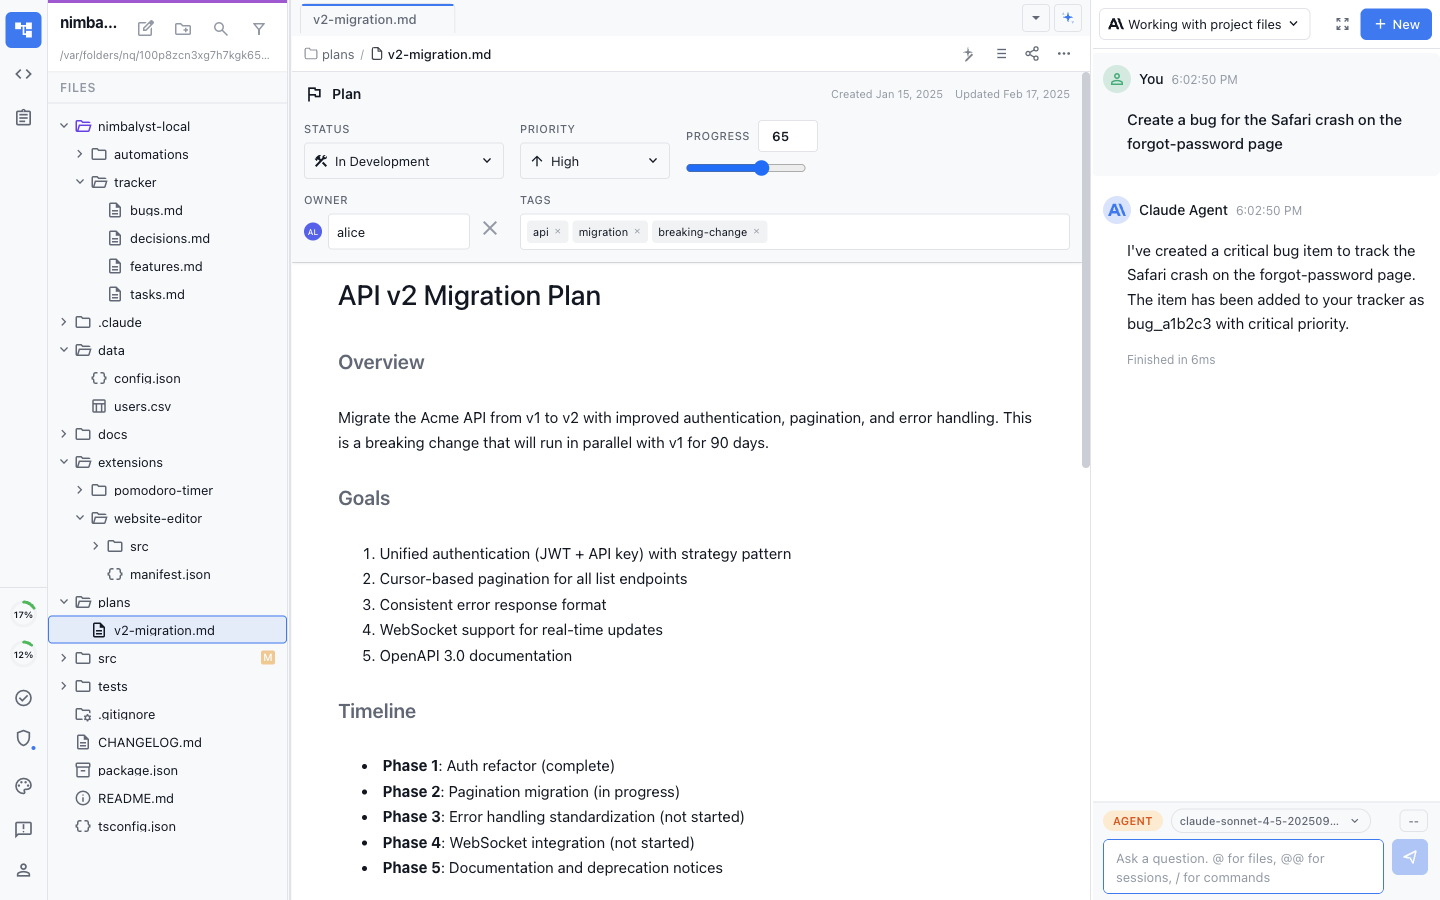
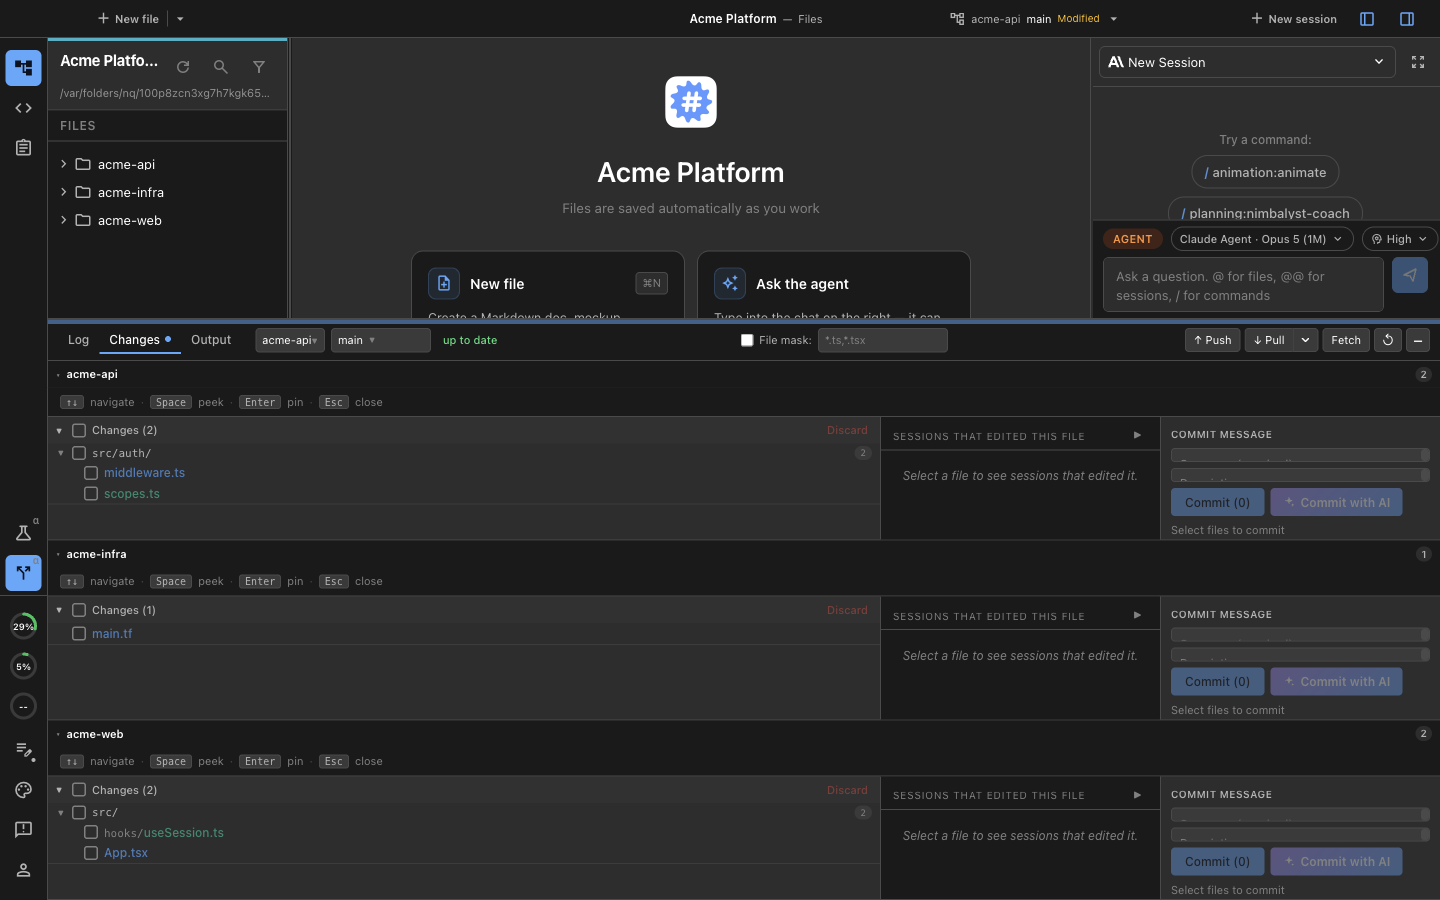
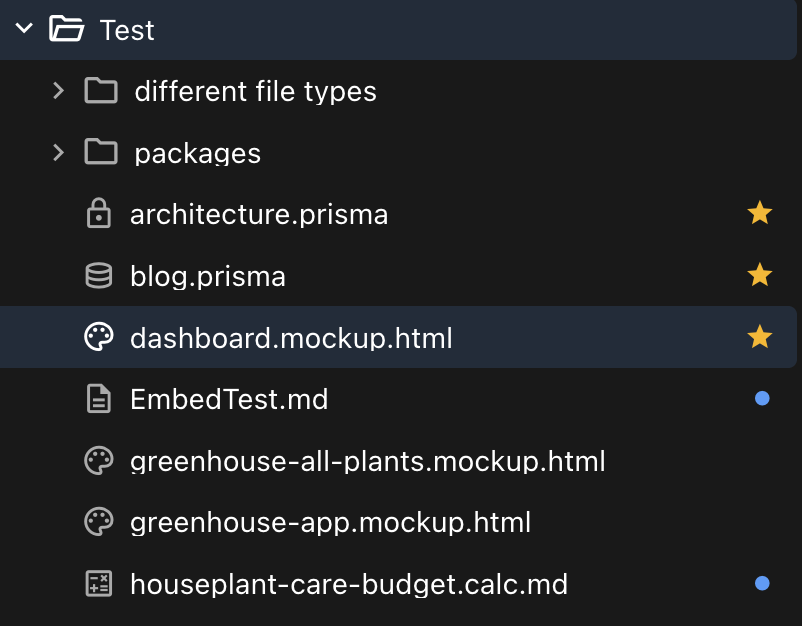
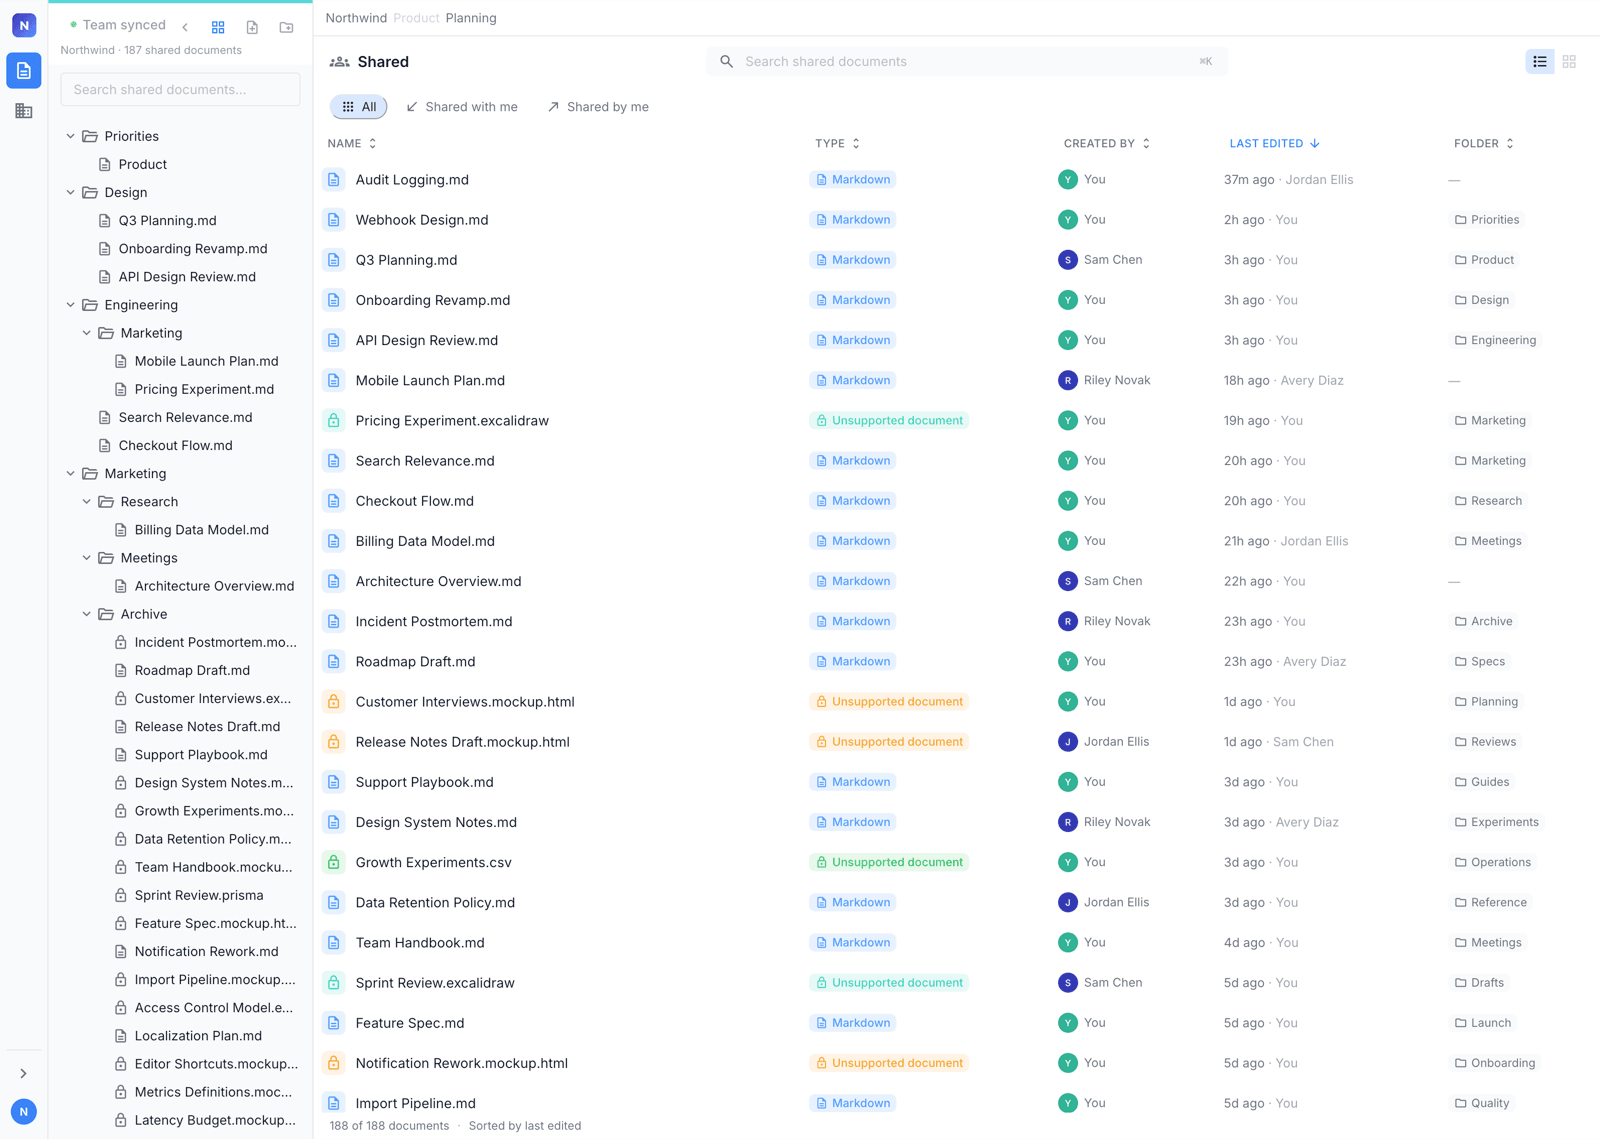
Work with Claude Code and Codex in interactive, WYSIWYG markdown docs, Calc Sheets, mermaid diagrams, excalidraw drawings, html mockups, data models, CSV files, in-app browser previews, mind maps, sessions, and code.

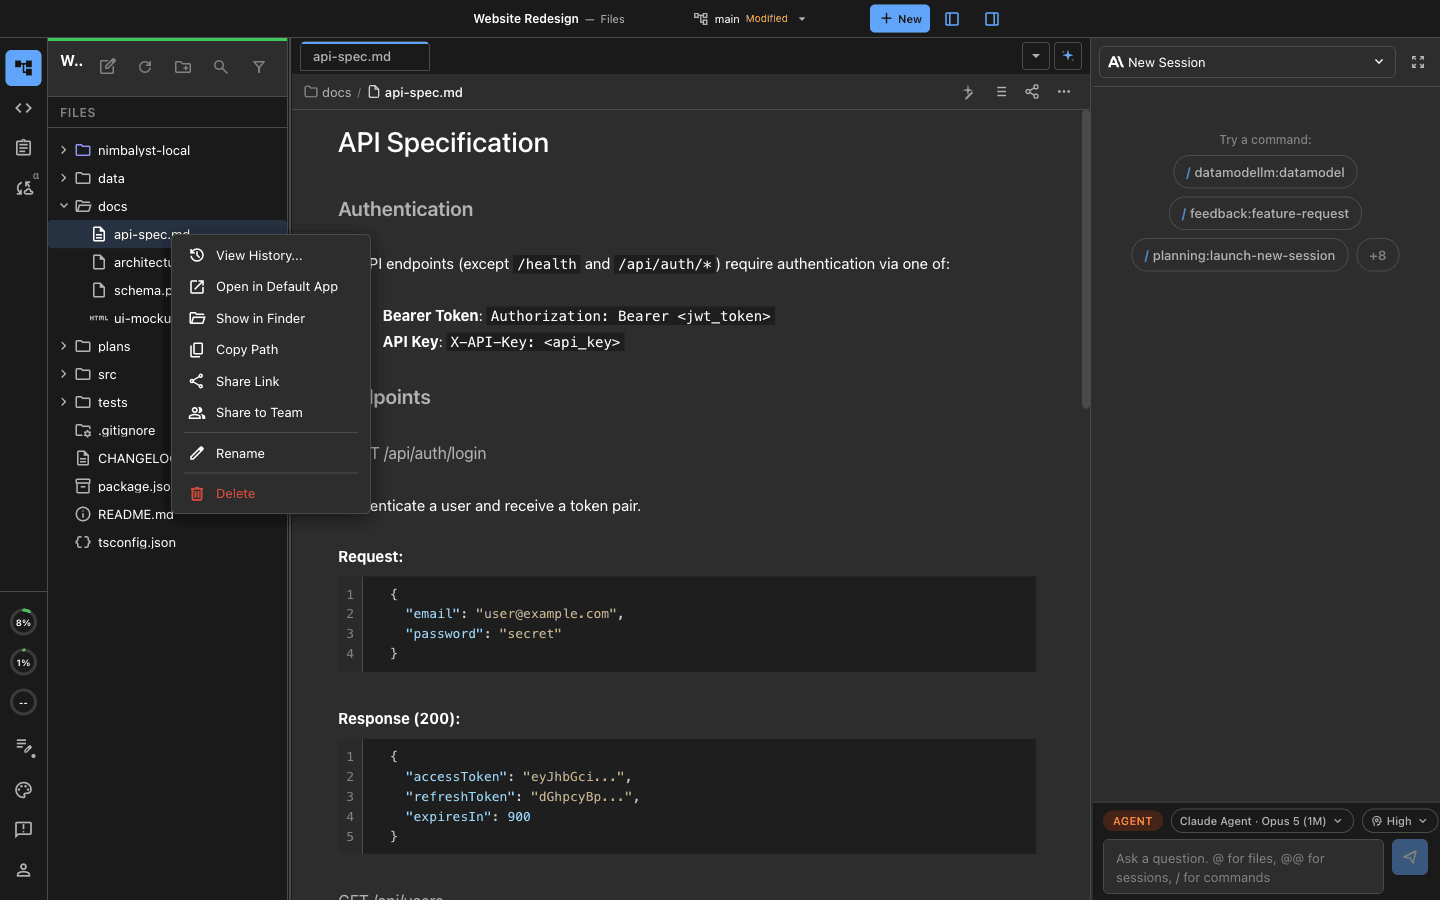
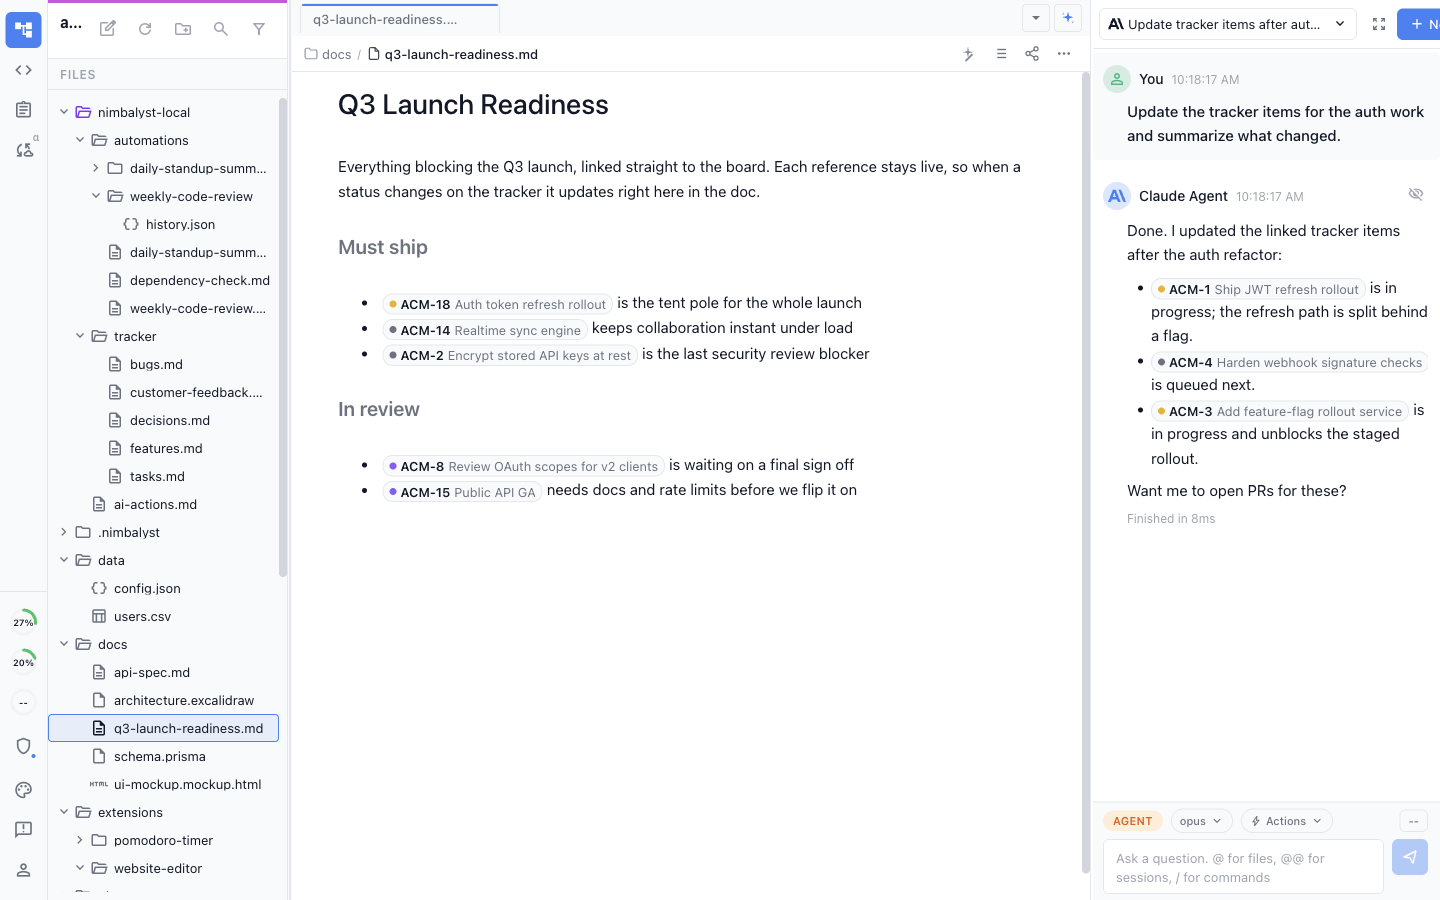
Focus on one file:

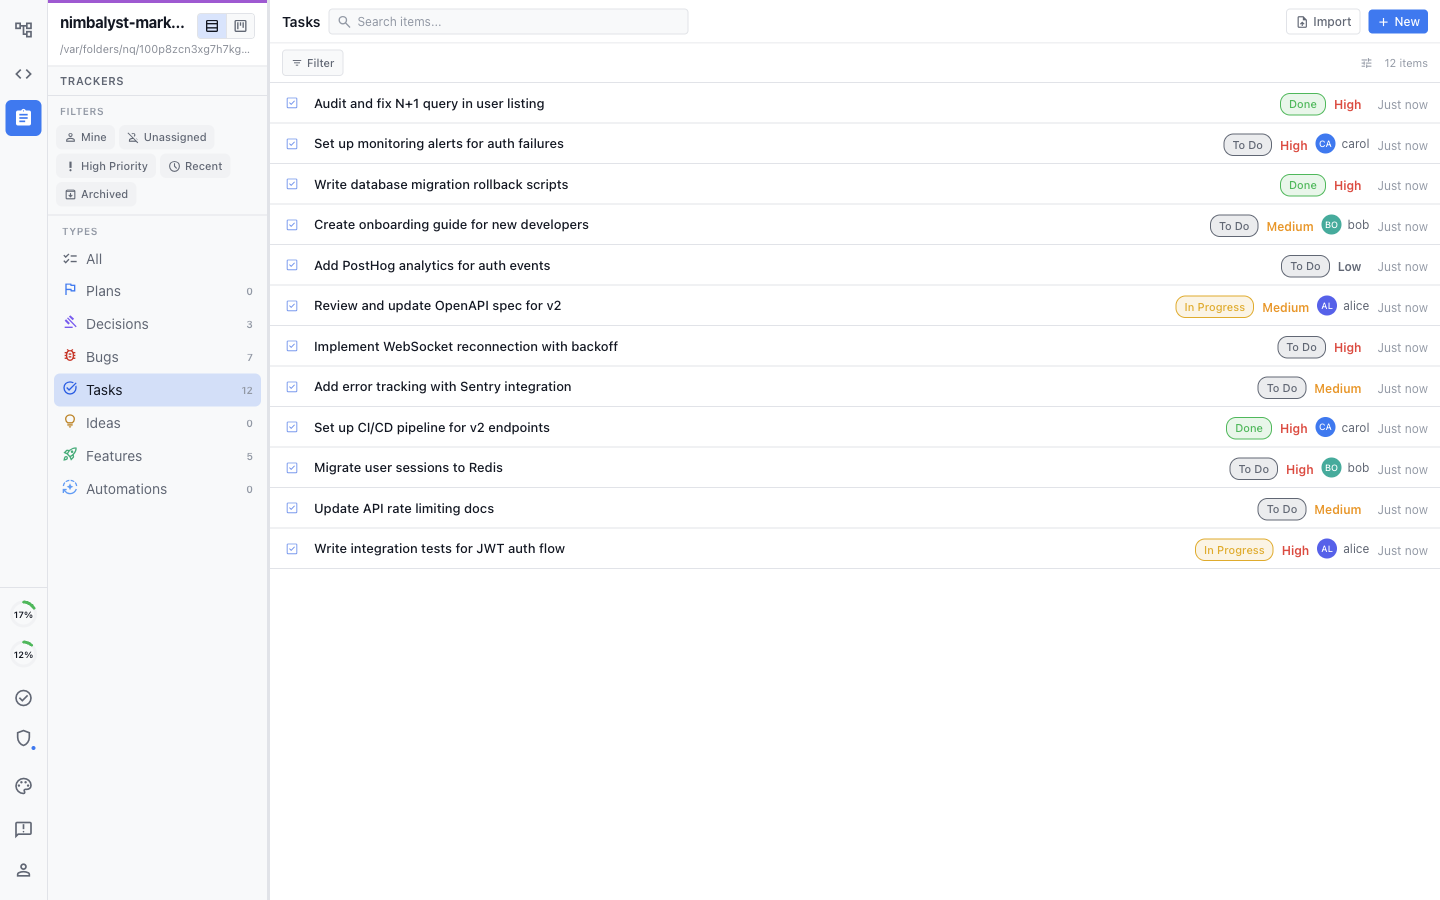
* Edit the file in the center panel. See red/green diffs from your coding agent and review, accept them.
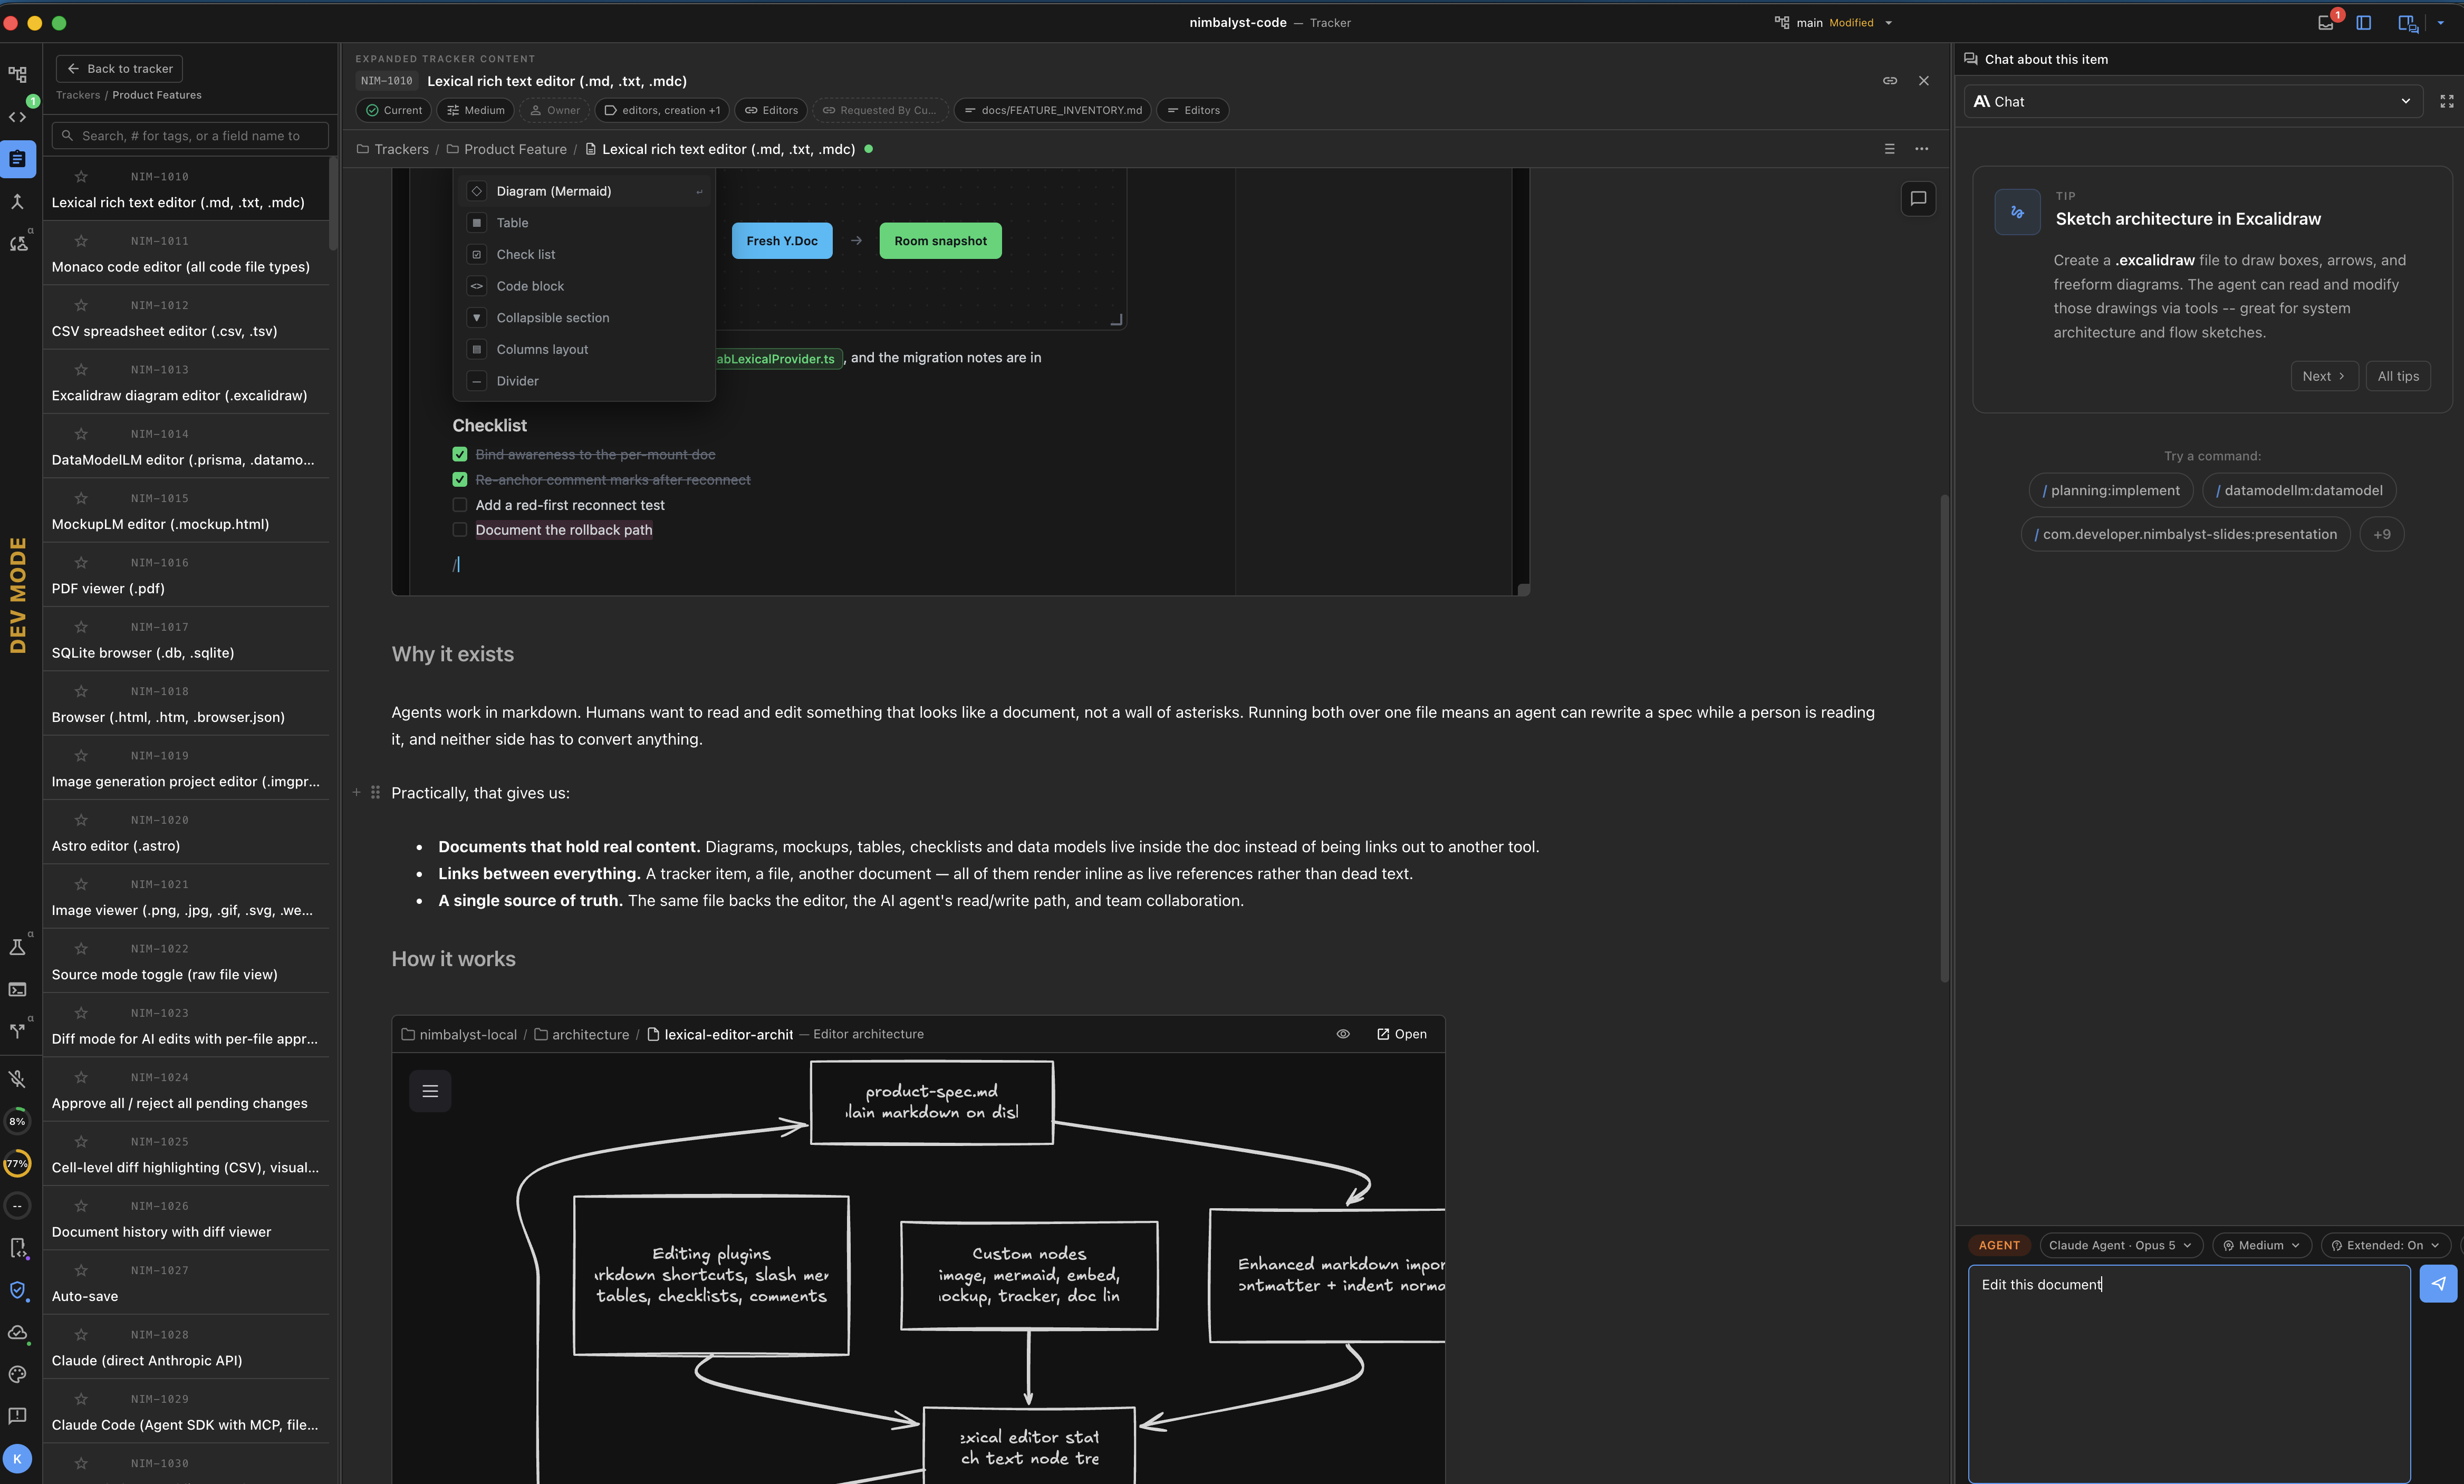
* Work with your agent in the right panel to edit this file or explore other files, research the web.
* Navigate and manage your files in the left panel file manager

<figure><img src="/files/szVDnFas4avzmTZn68KC" alt=""><figcaption></figcaption></figure>

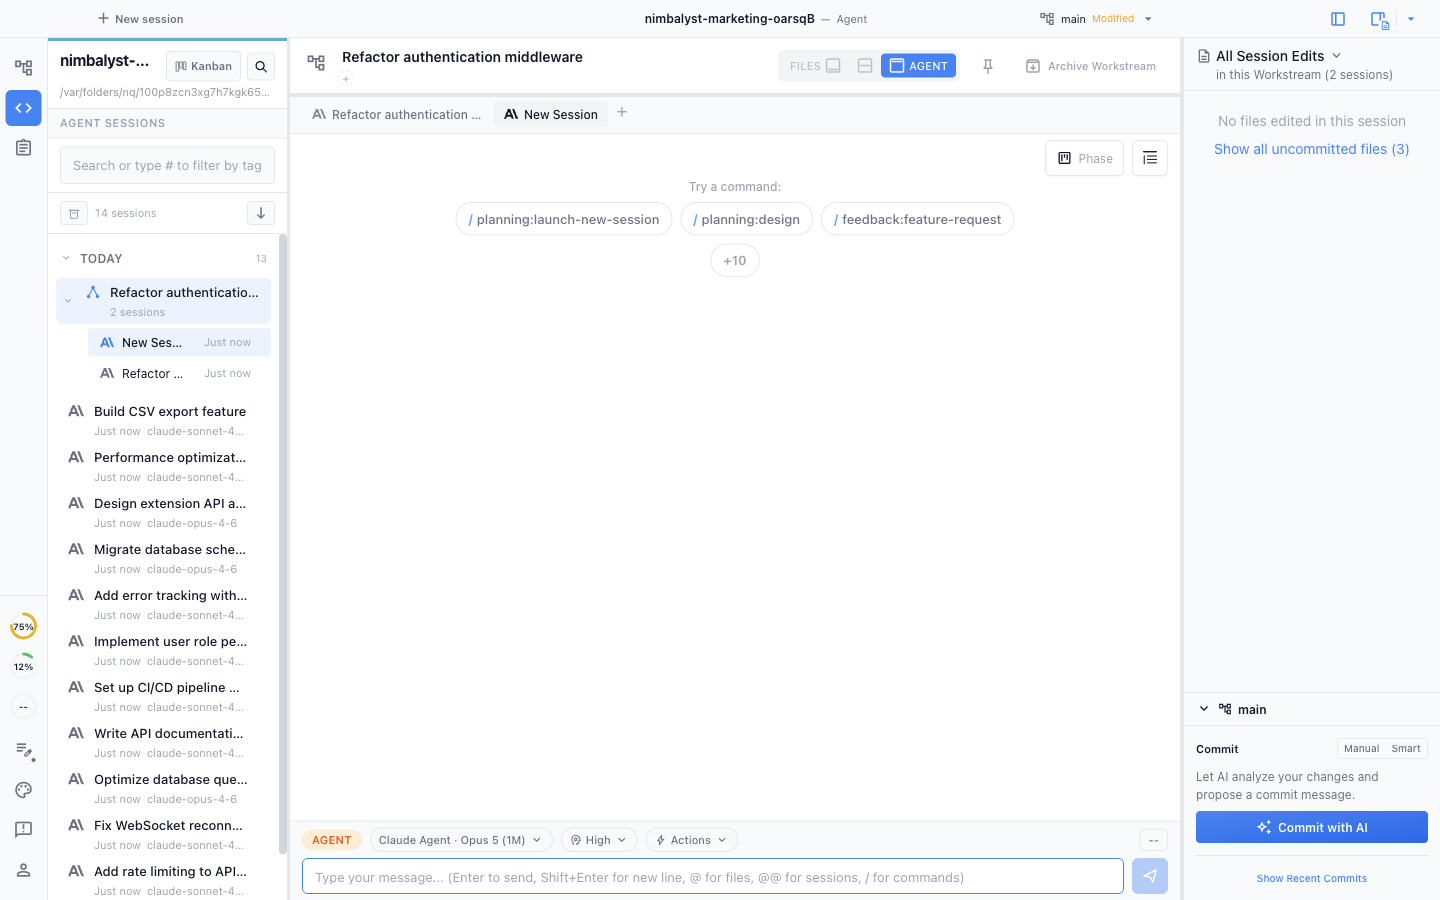
### Agent Mode

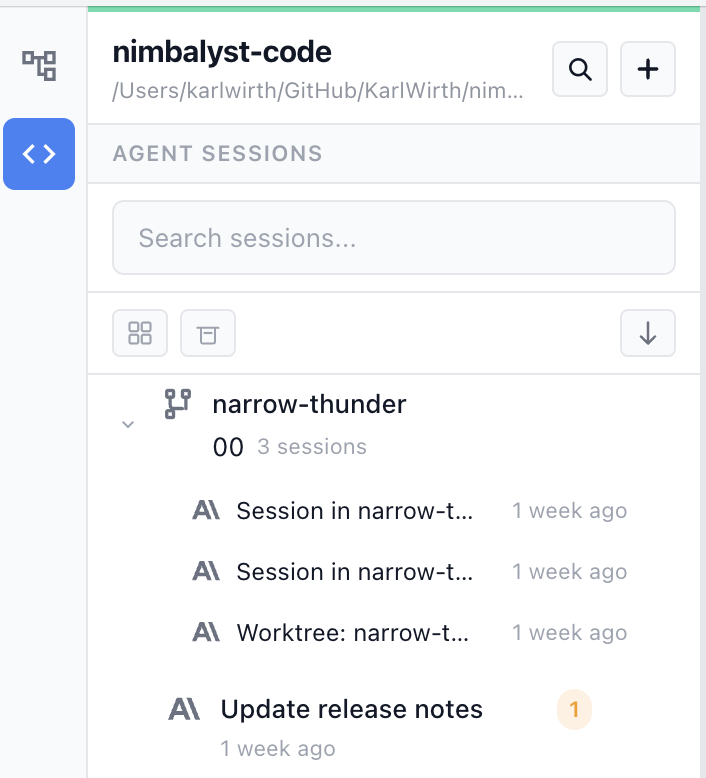
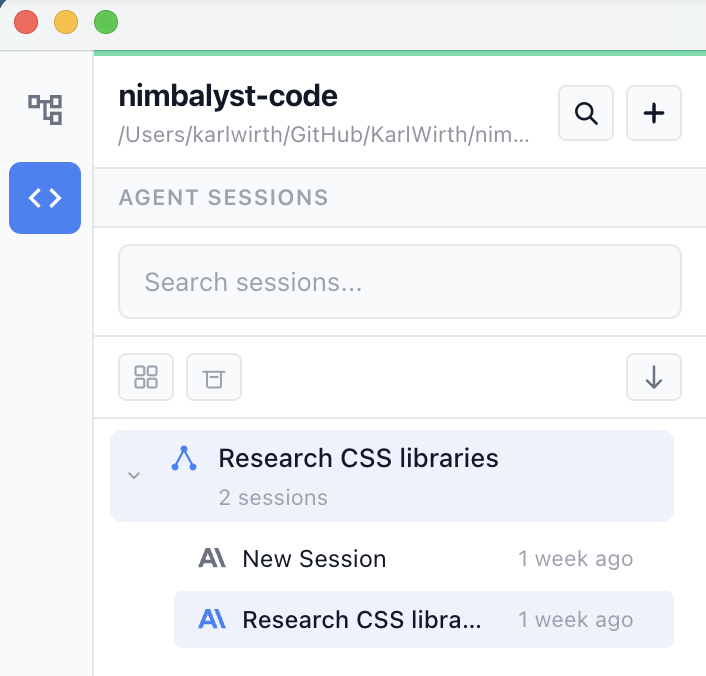
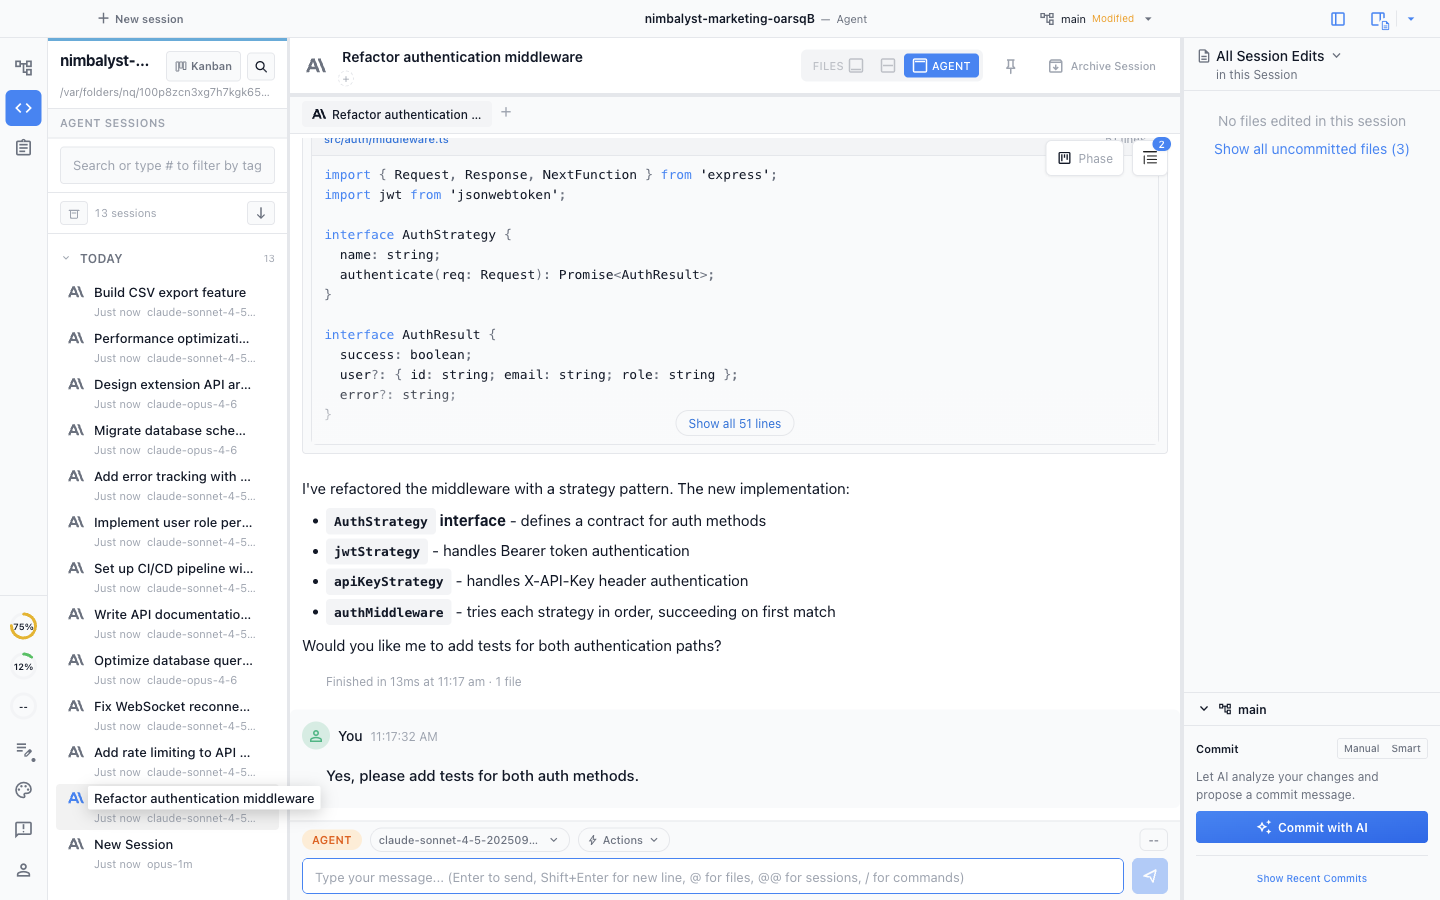
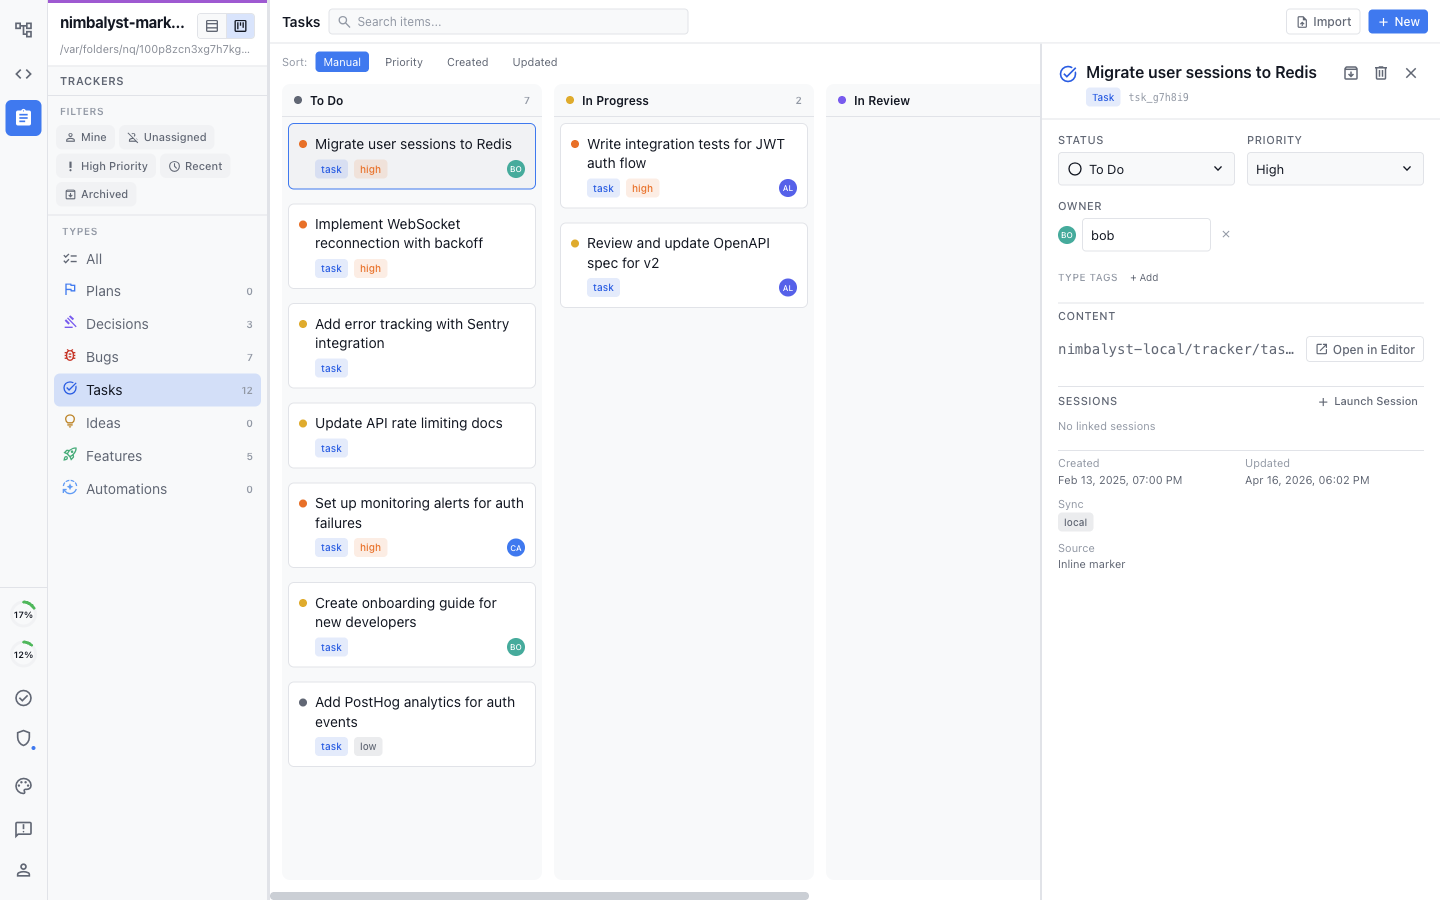
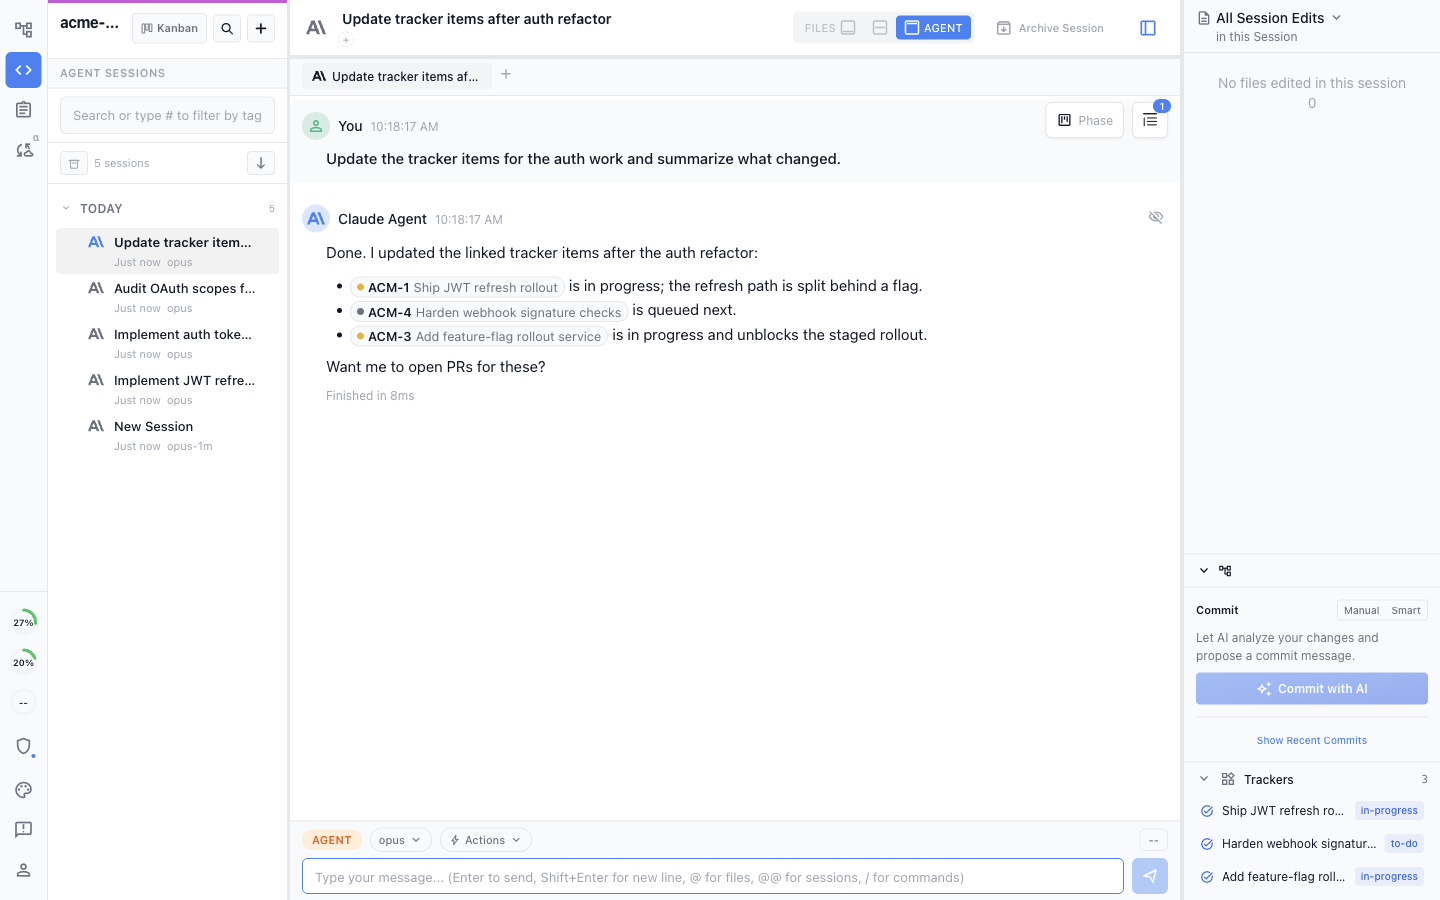
* *Session Management:* organize, find, and continue your AI conversations. Track the files changed by a session and coordinate your stepping through and approving each one.
* *Coding support:* All the power of Claude Code and Codex plus file tracking, diff visualization, code editing, and / command support with Github status tracking.

<figure><img src="/files/4nw9W1Szg81cV3Ek8ISC" alt=""><figcaption></figcaption></figure>

### Task Mode

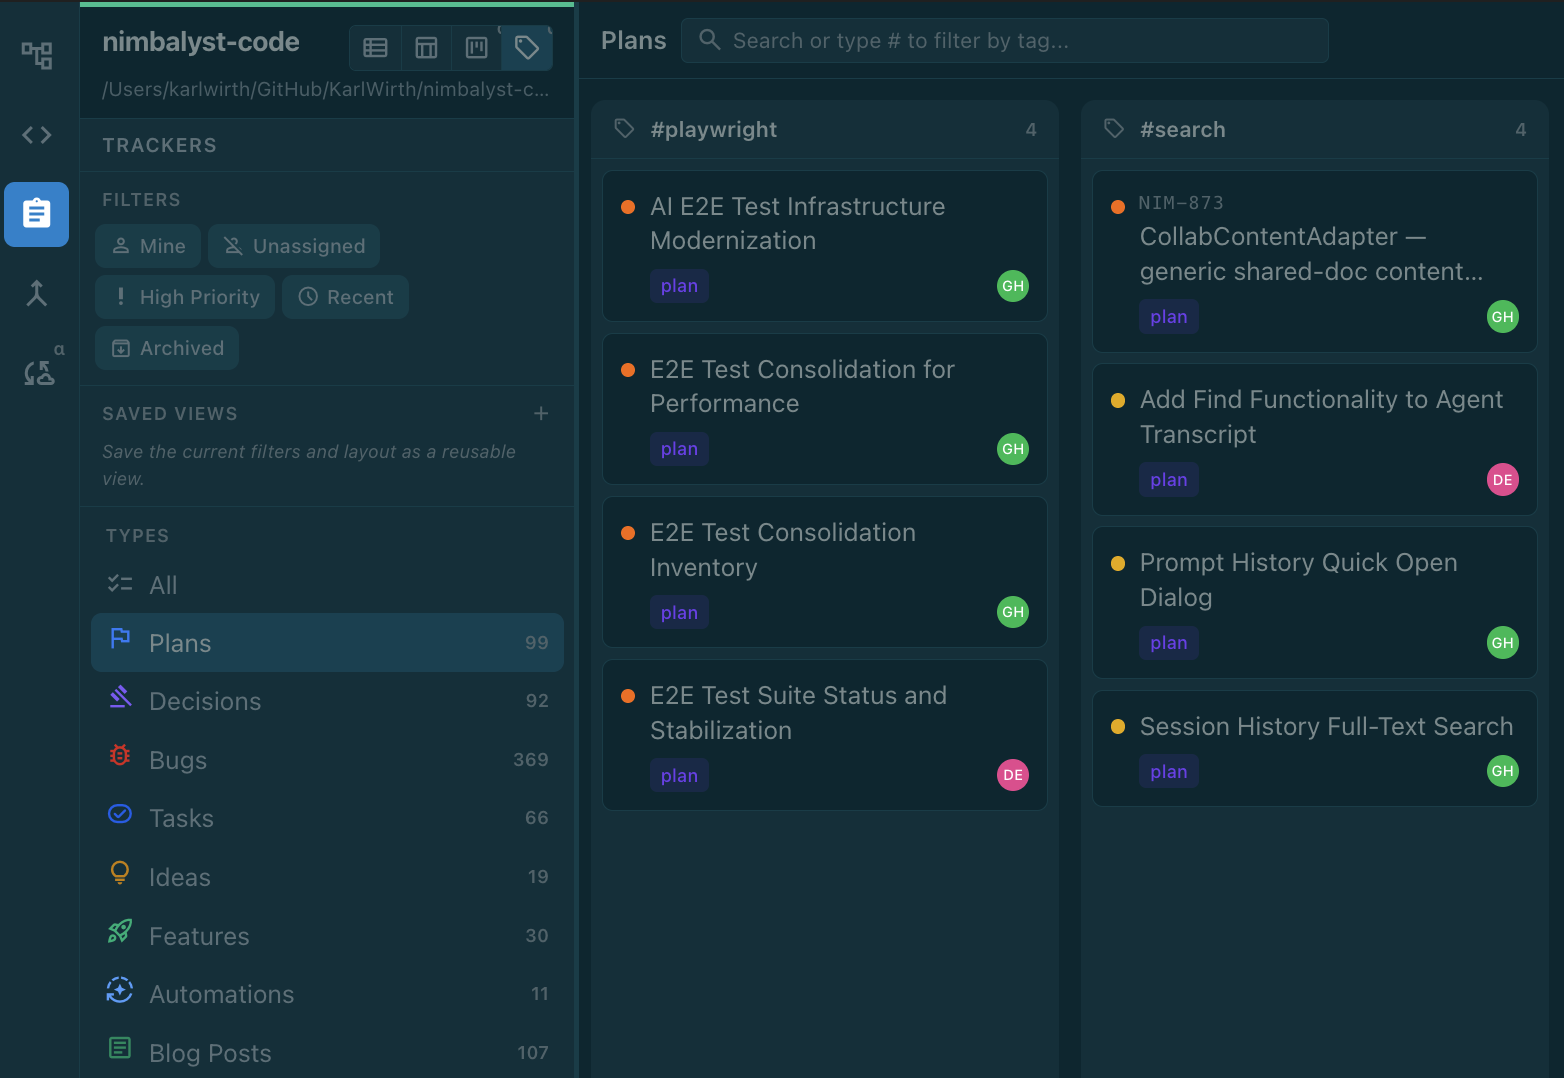
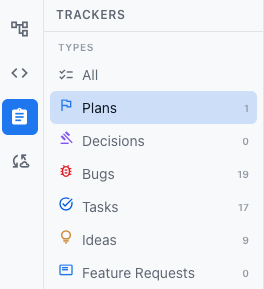
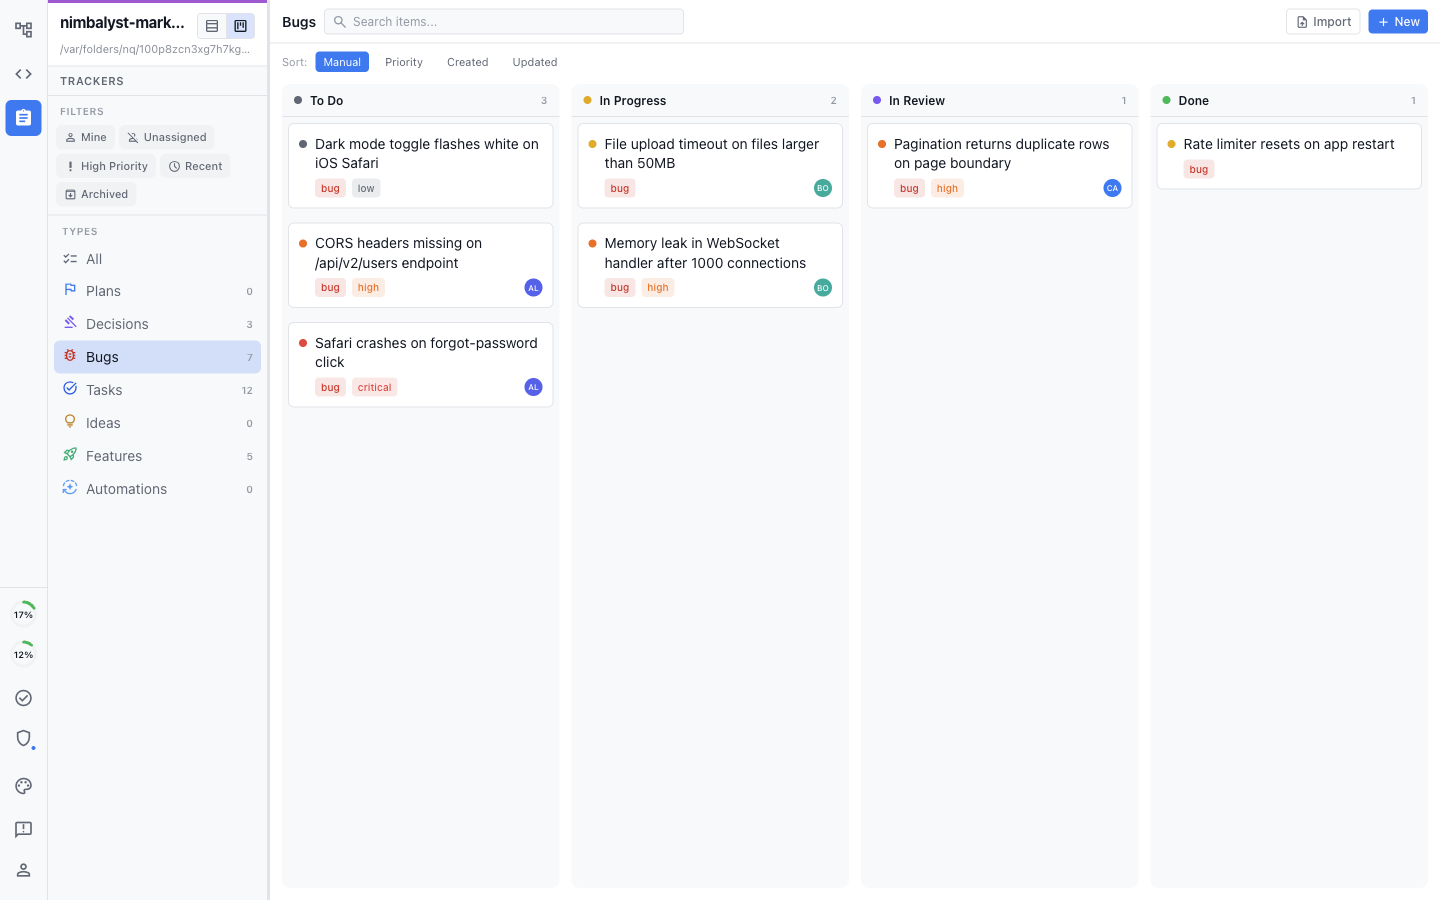
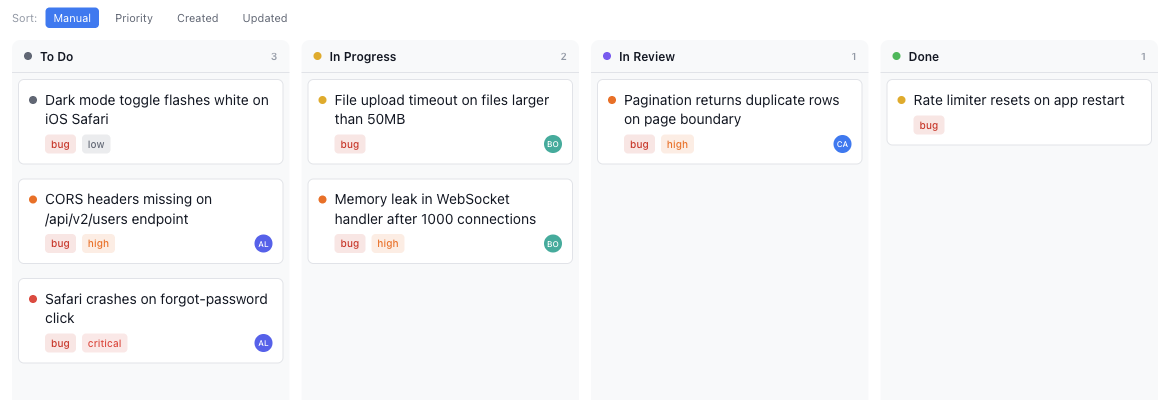
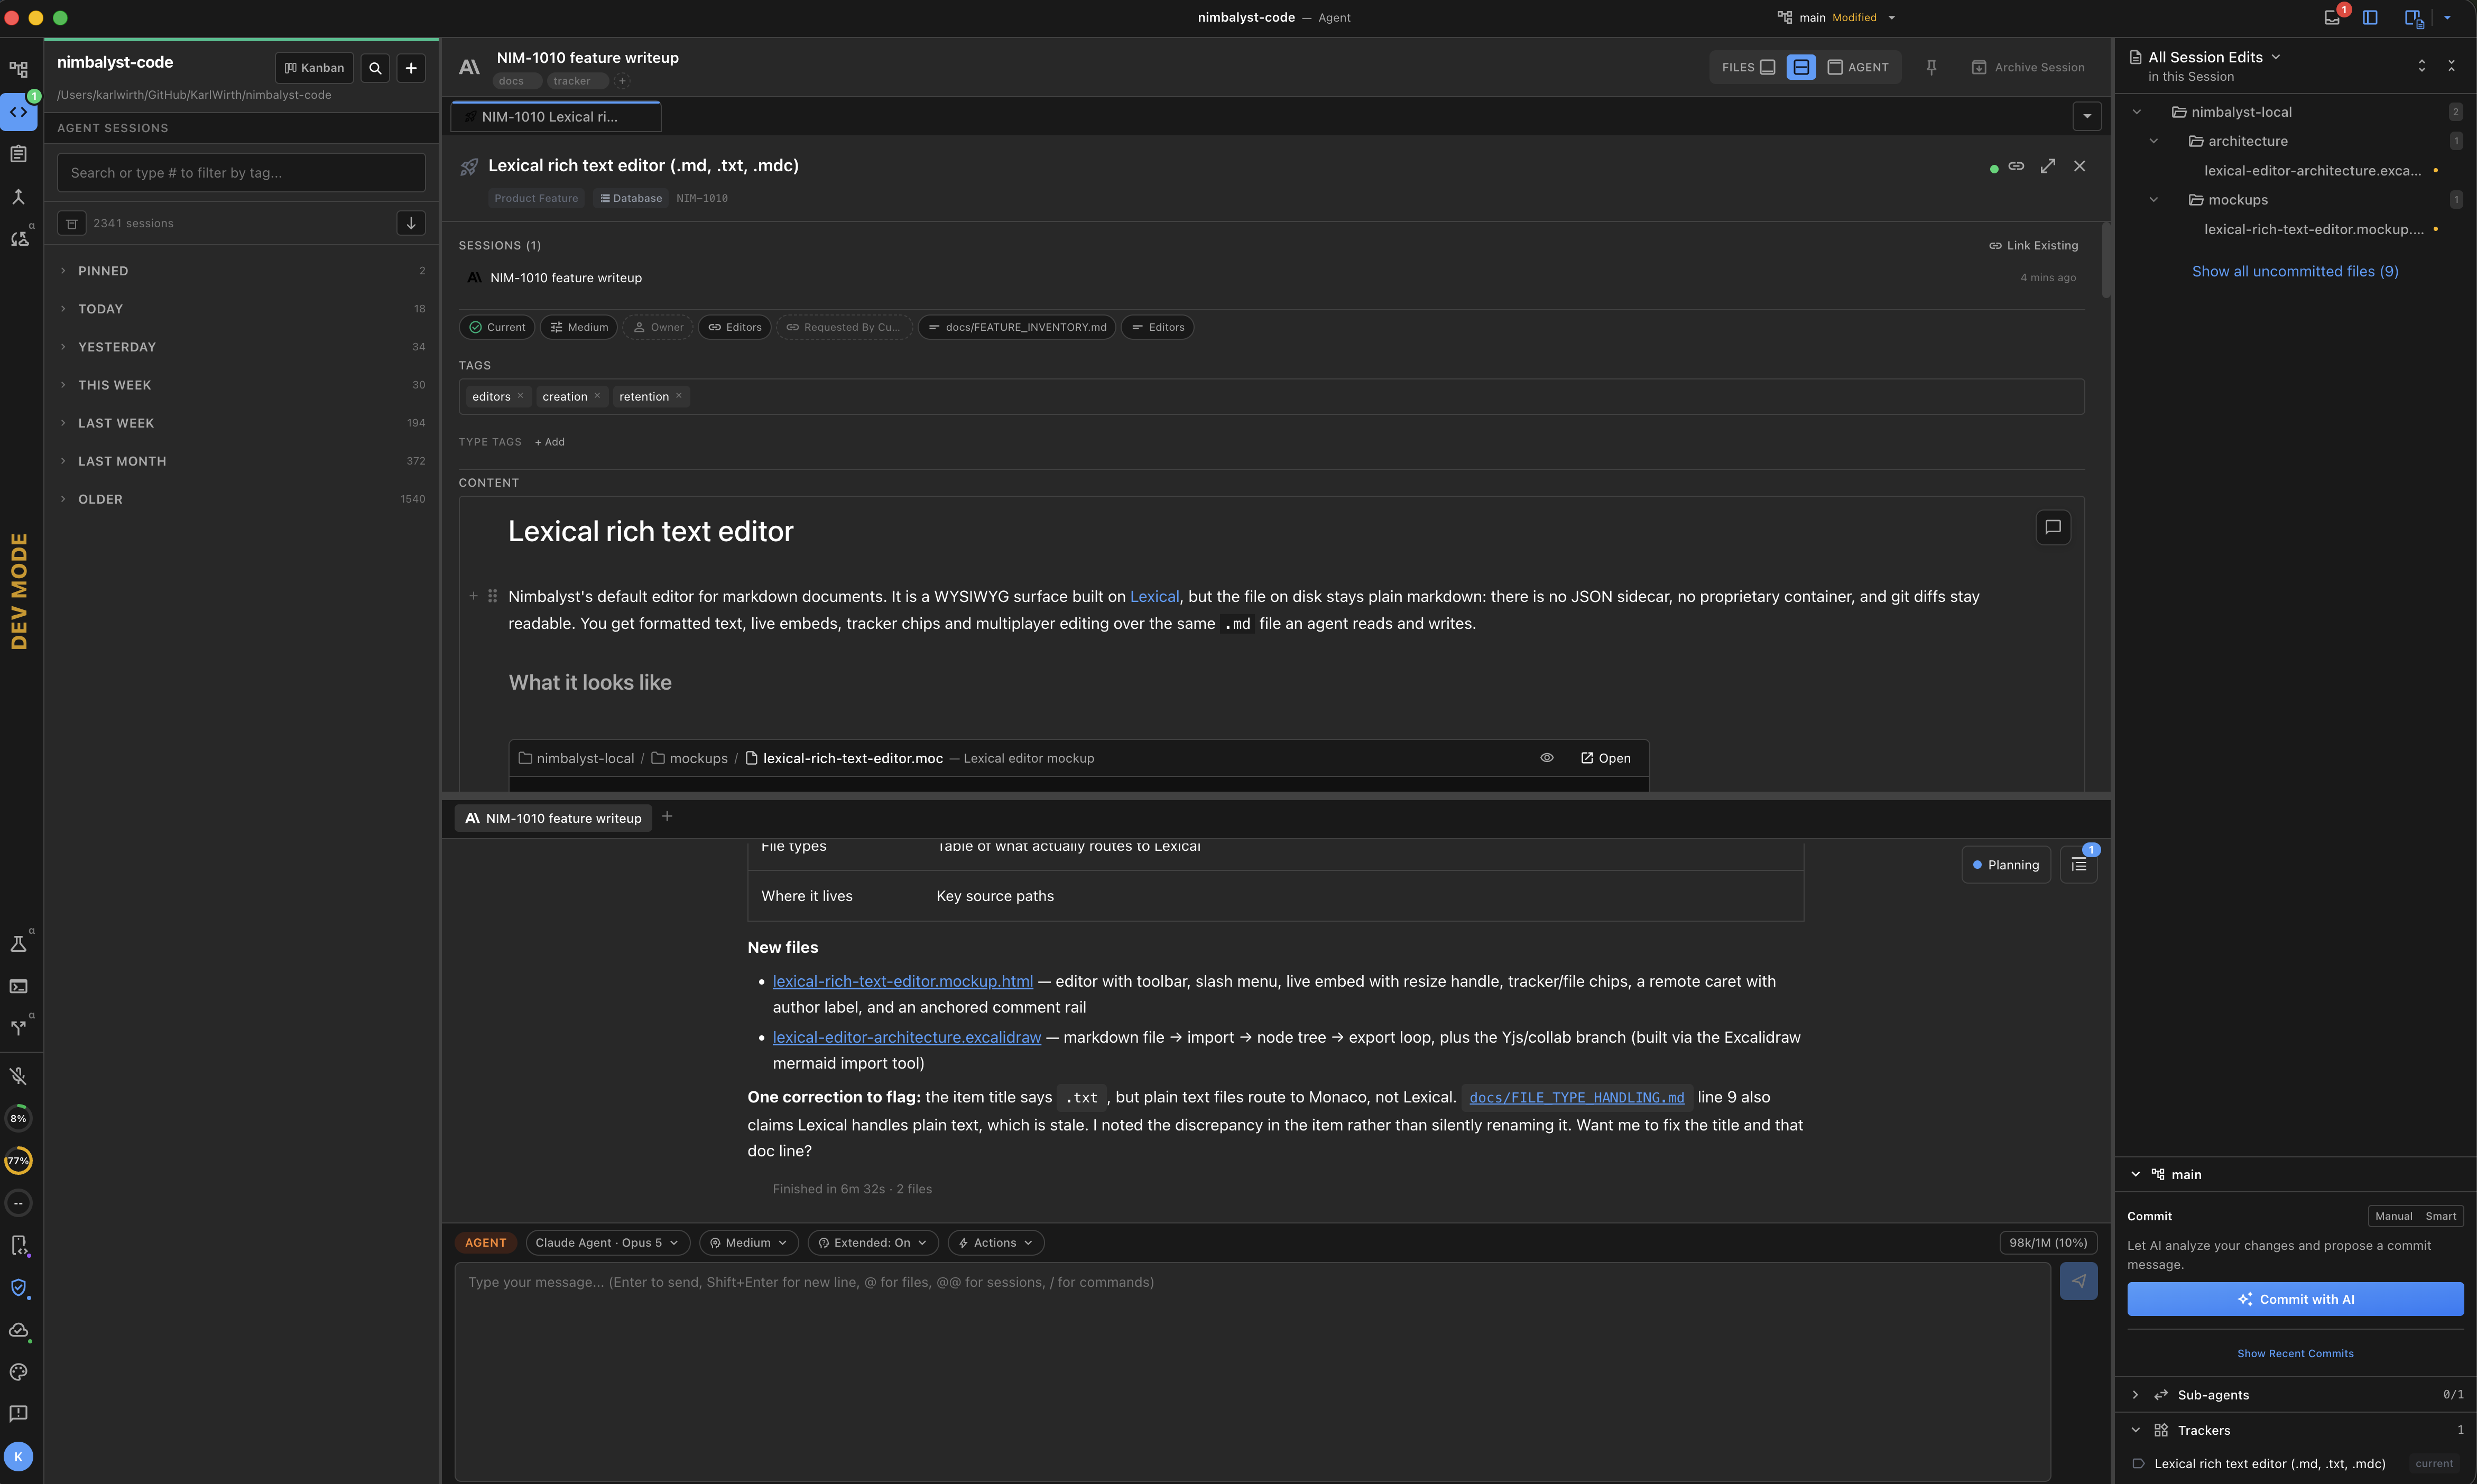
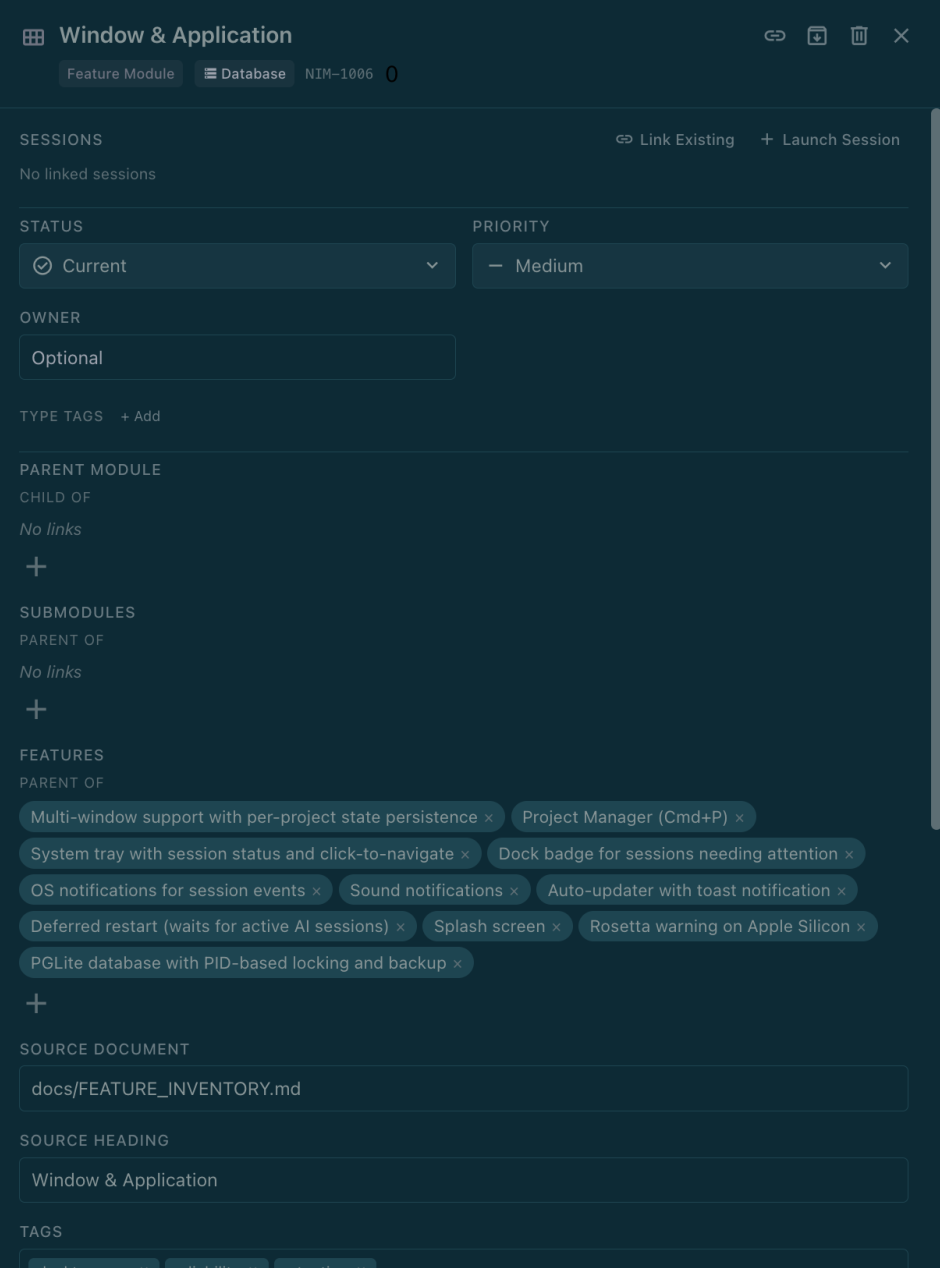
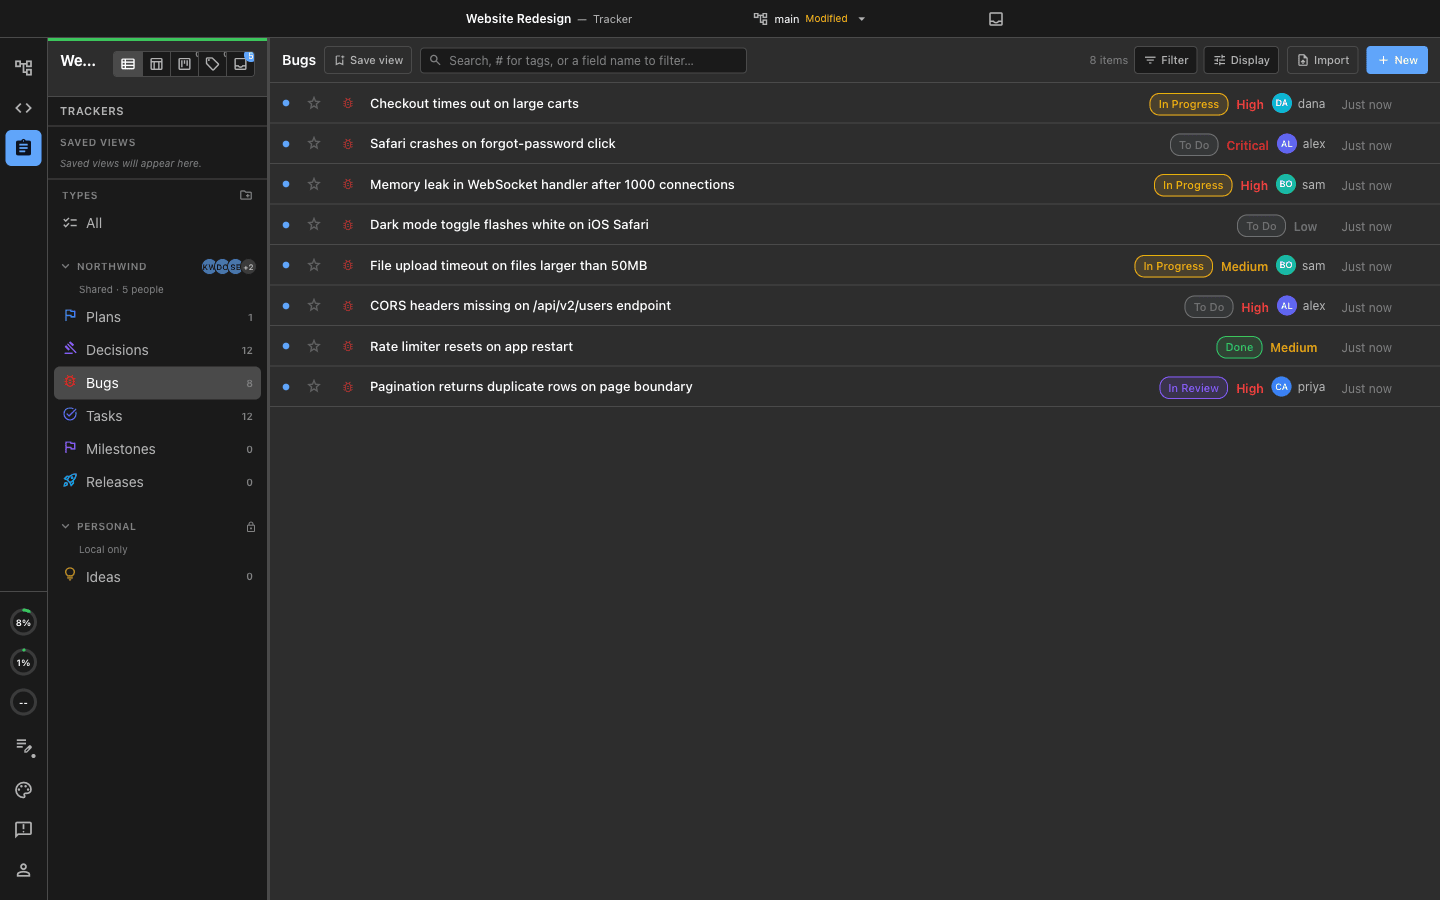
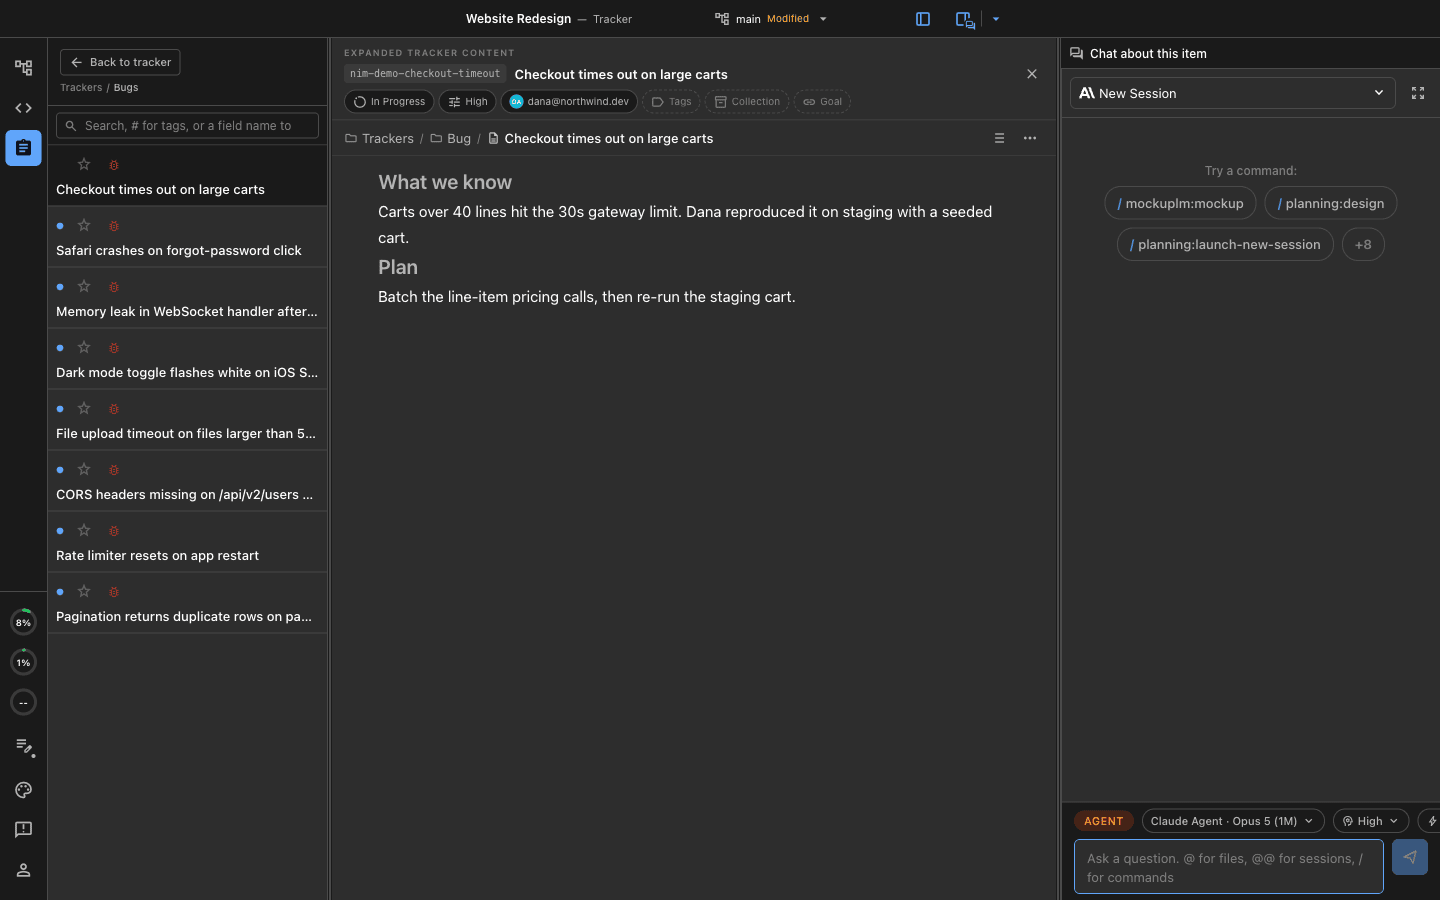
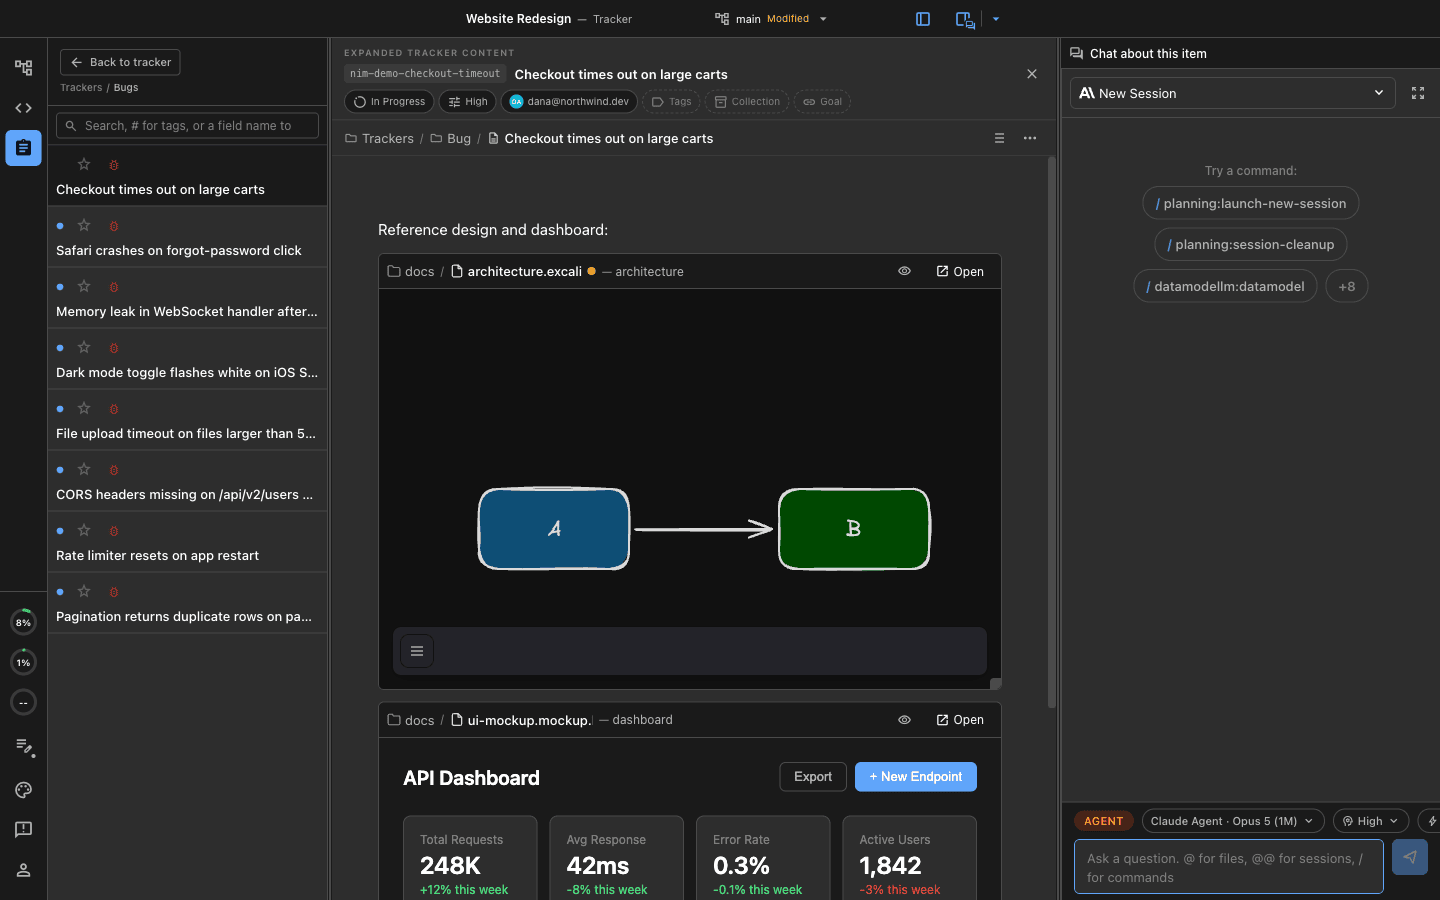
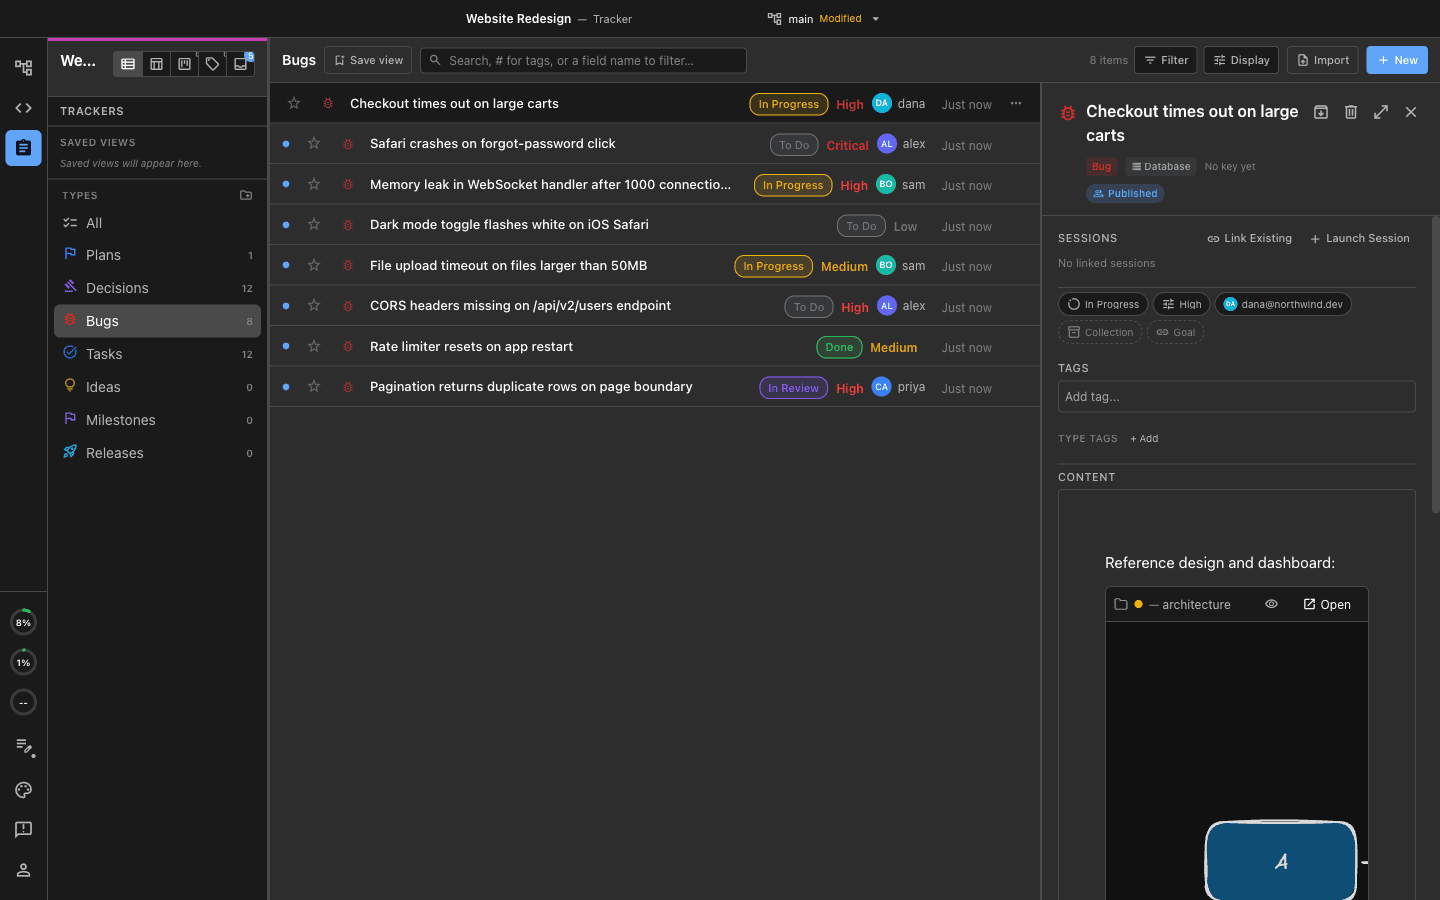
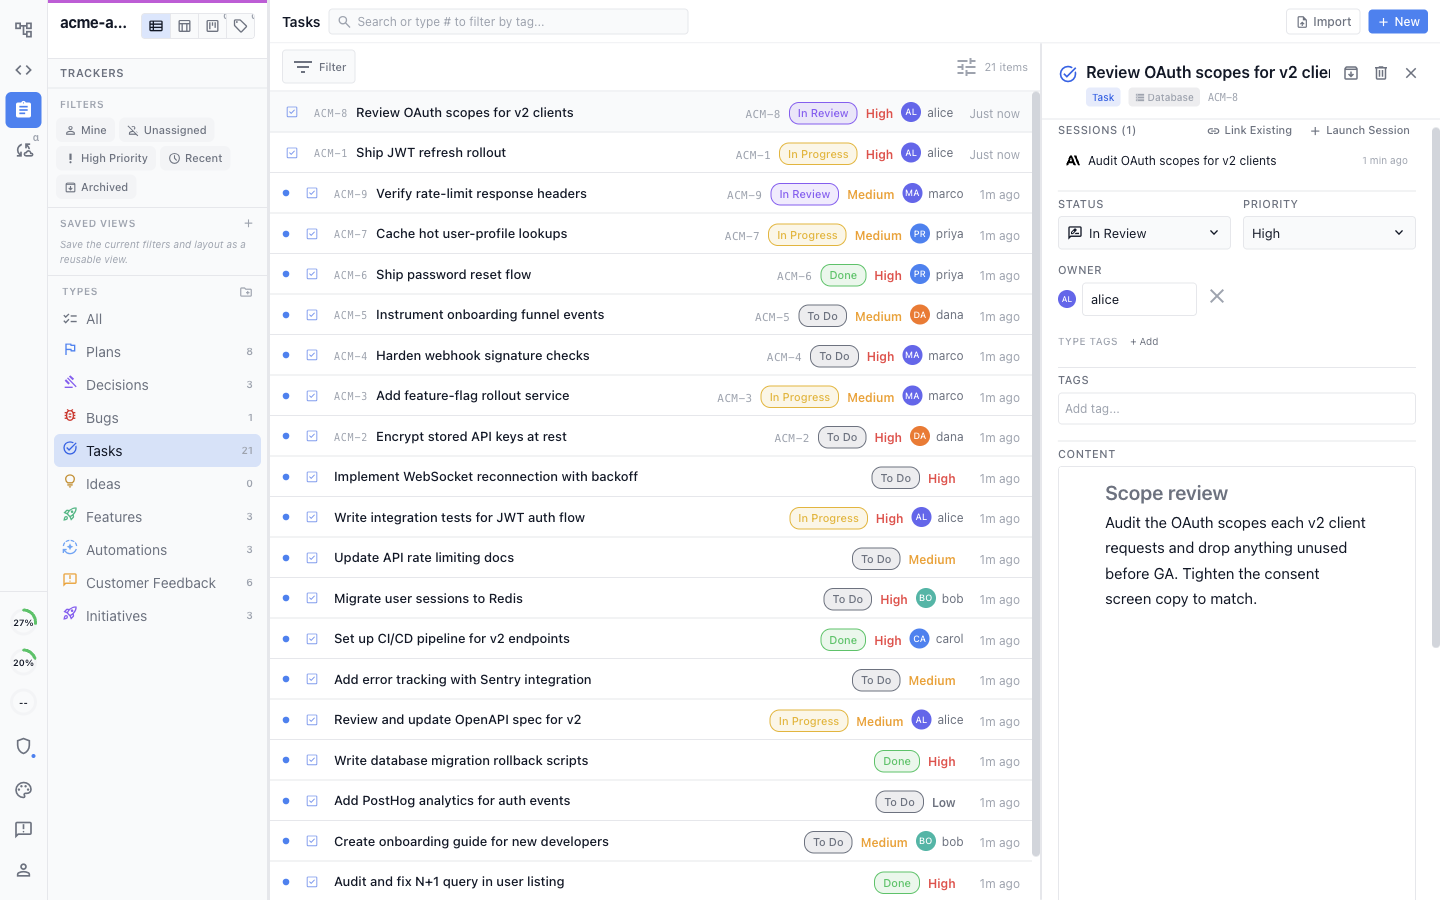
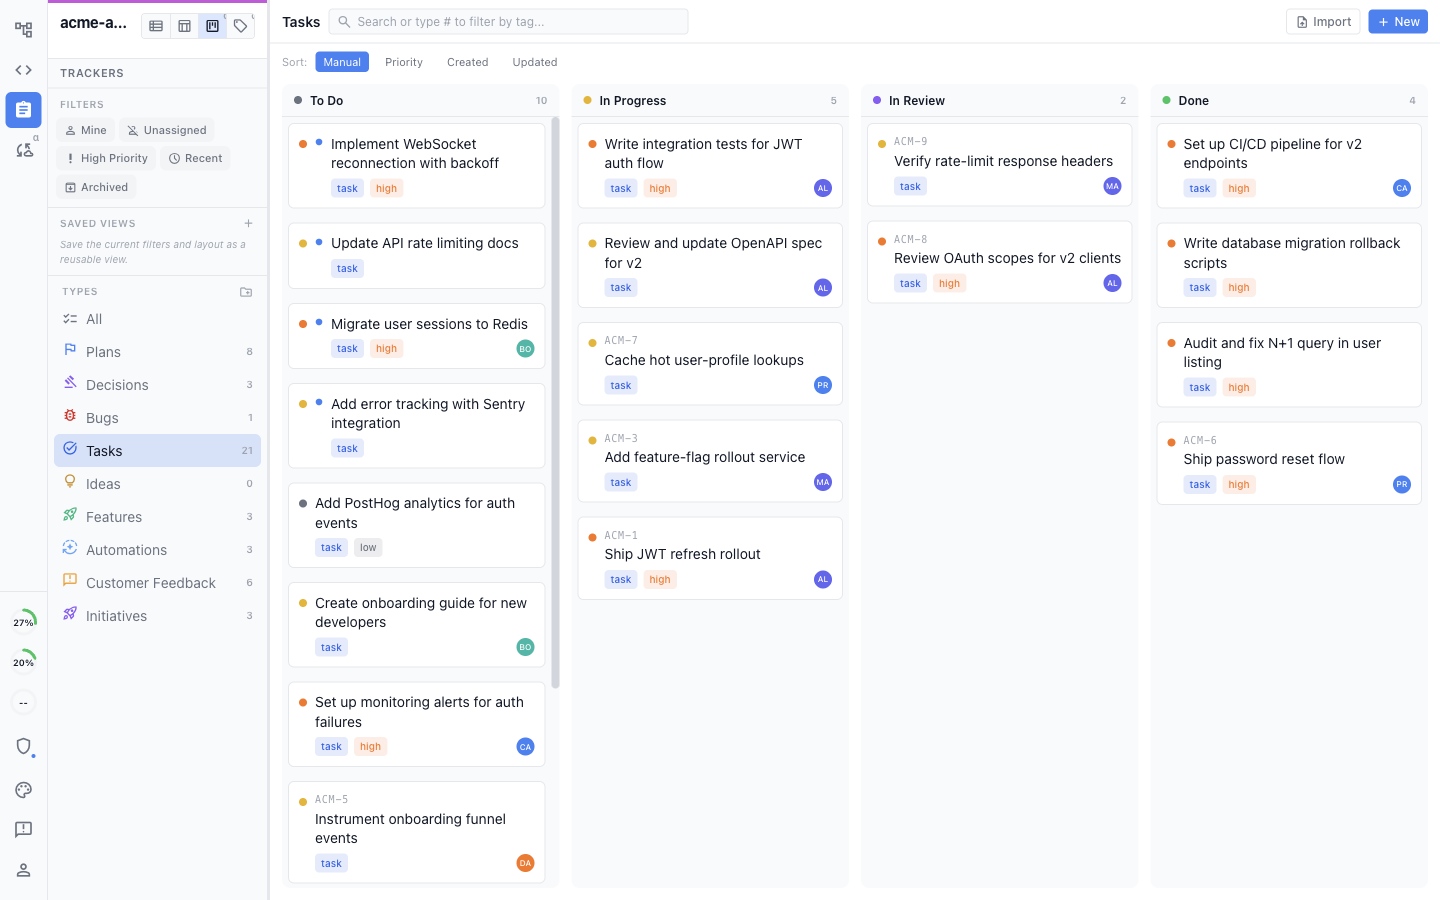
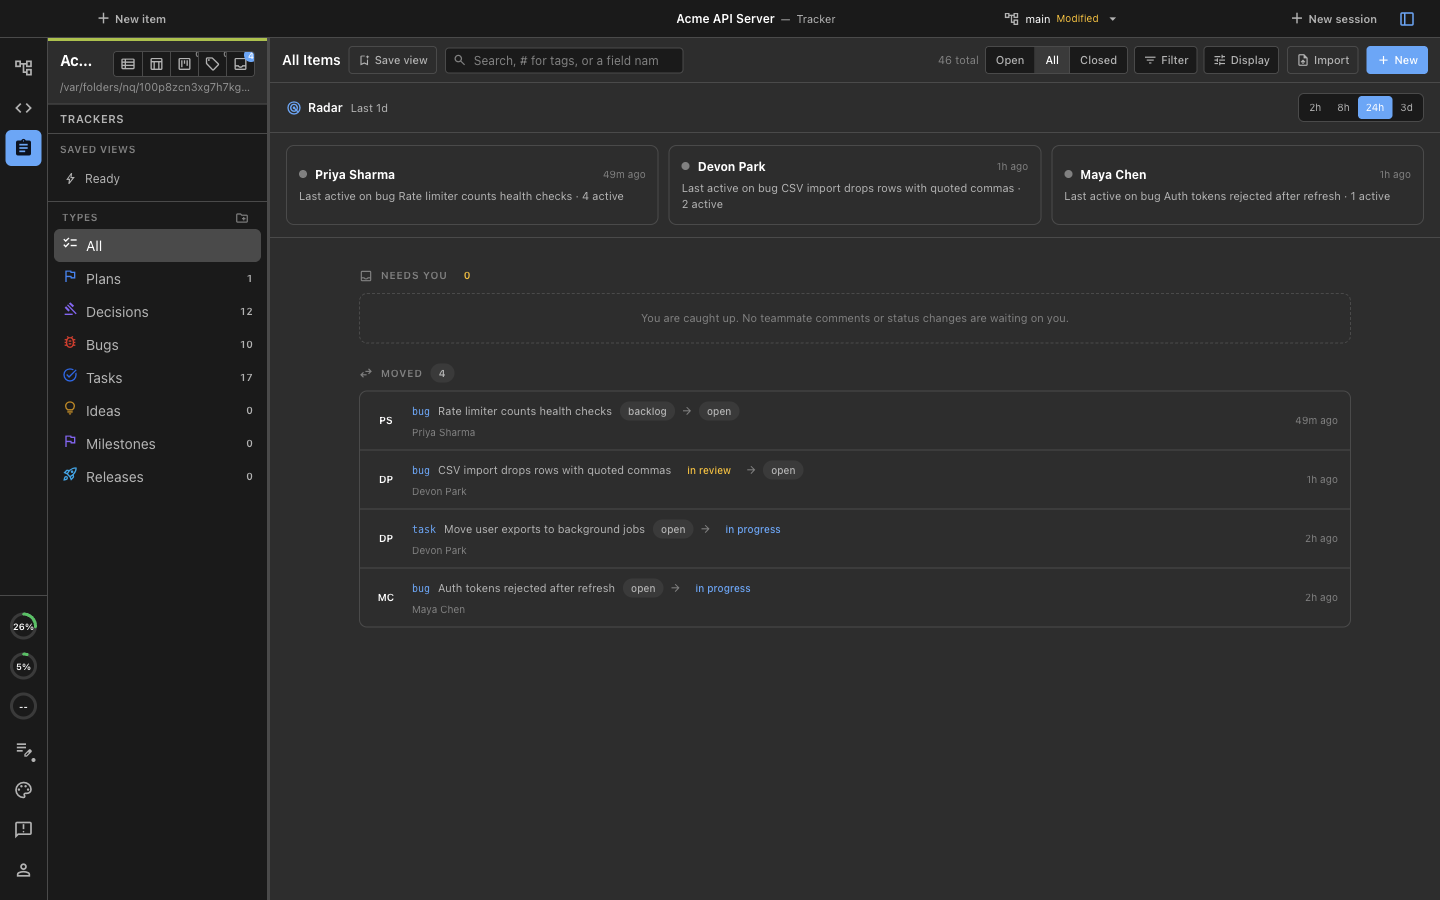
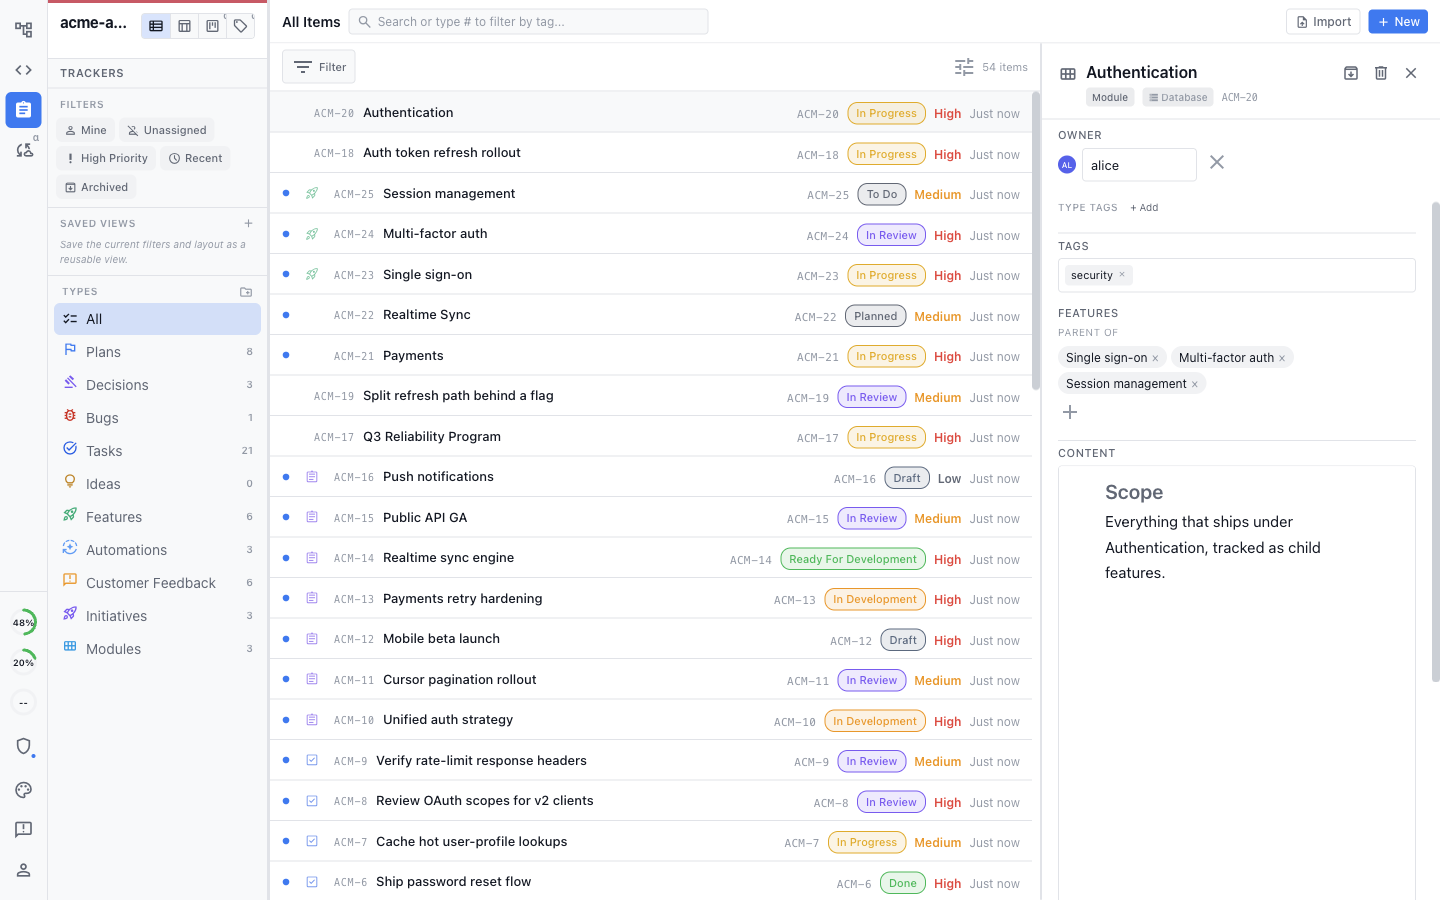
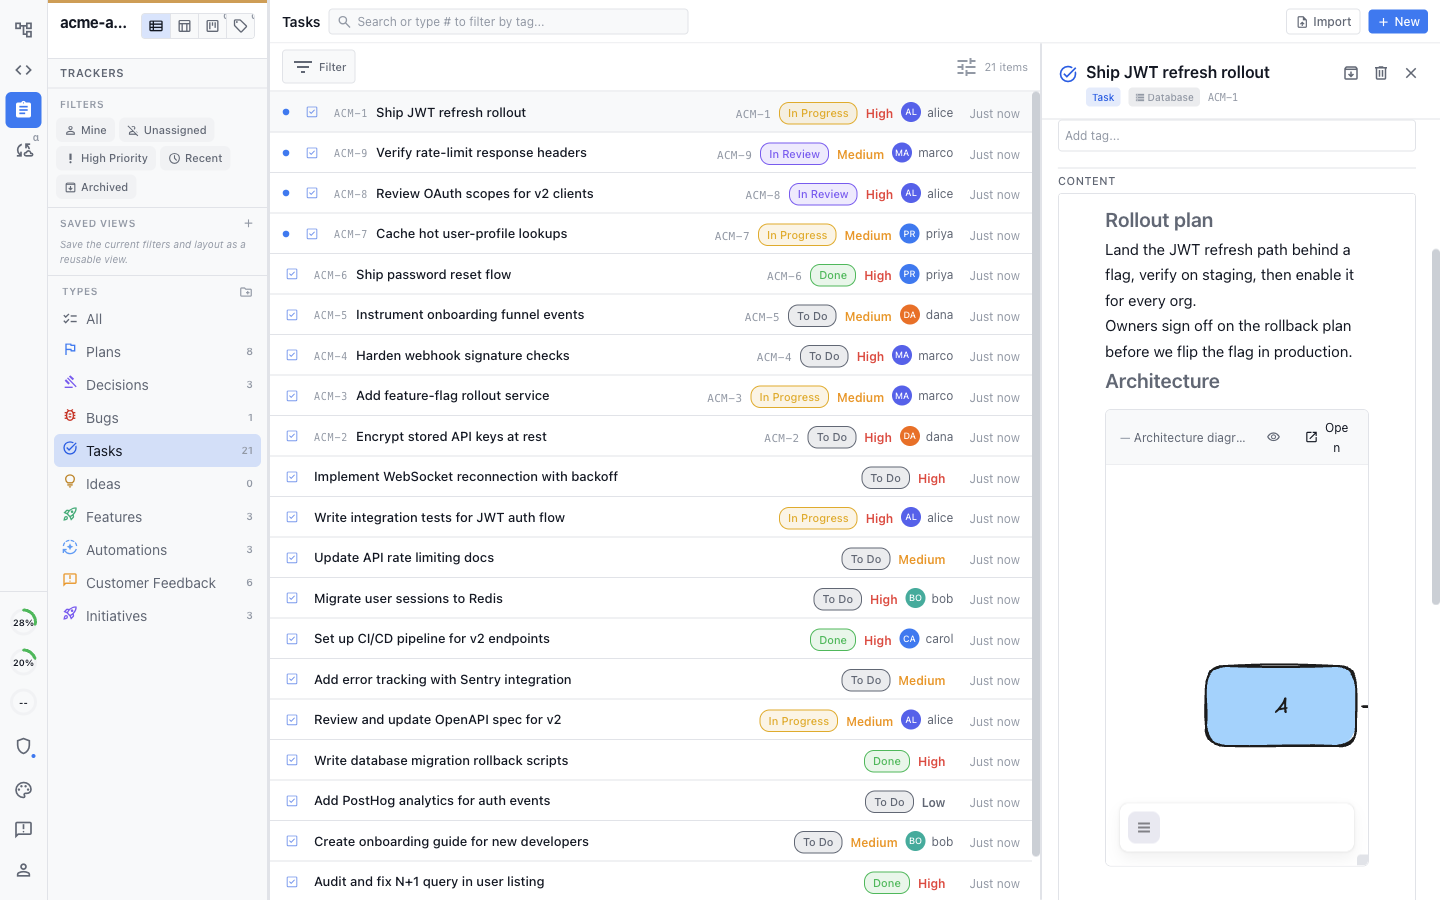
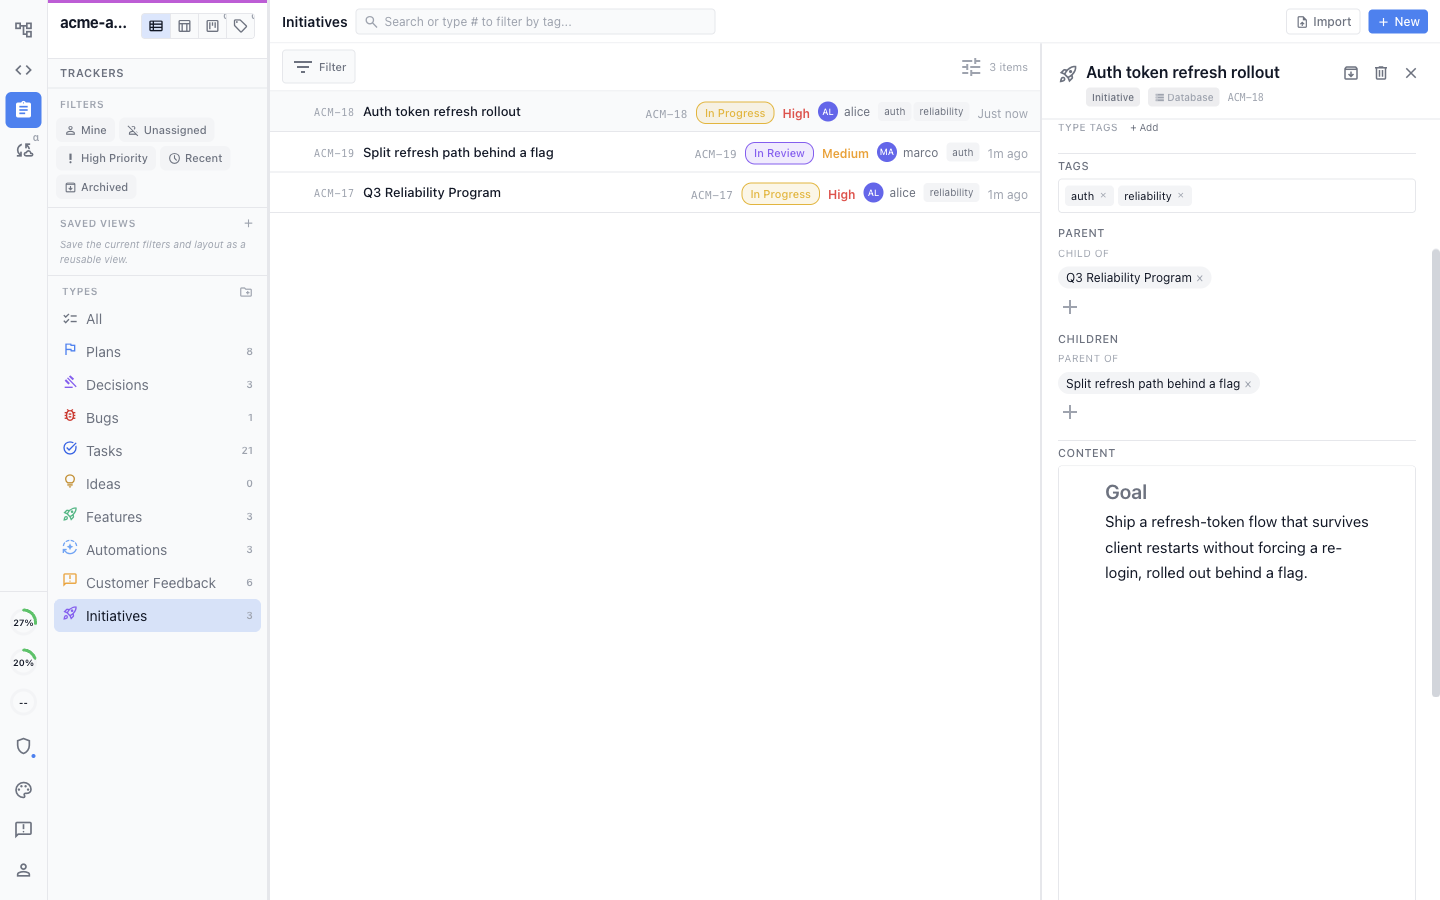
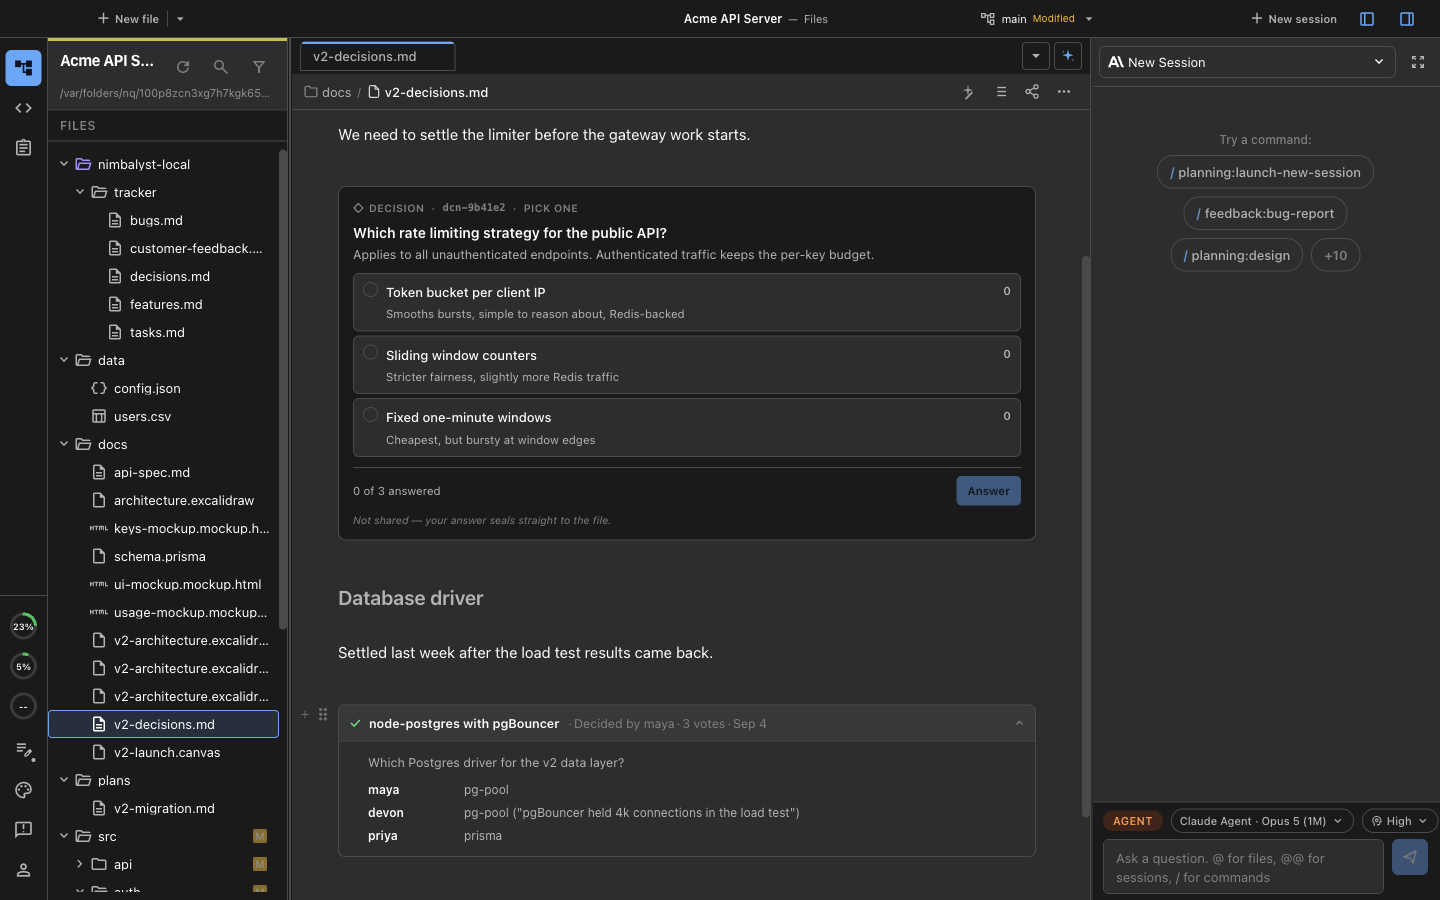
*Status & Item Tracking:* AI track and update status, bugs, to-dos, decisions, ideas directly in your markdown associated with the plan/work.

<figure><img src="/files/sTSYtkCT36rUGh20LcZk" alt=""><figcaption></figcaption></figure>

### Team Collaboration

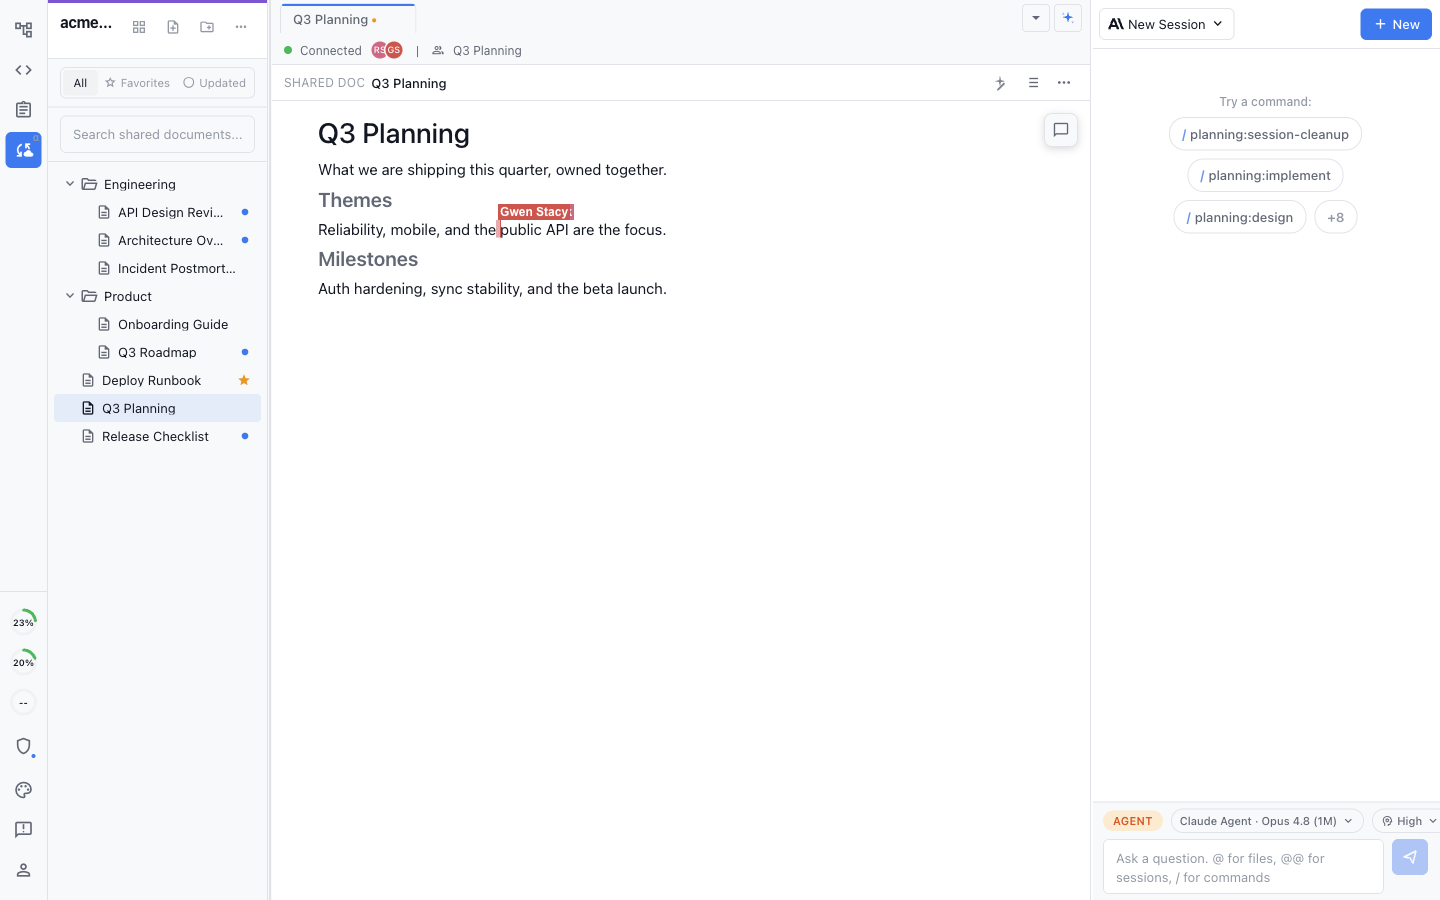
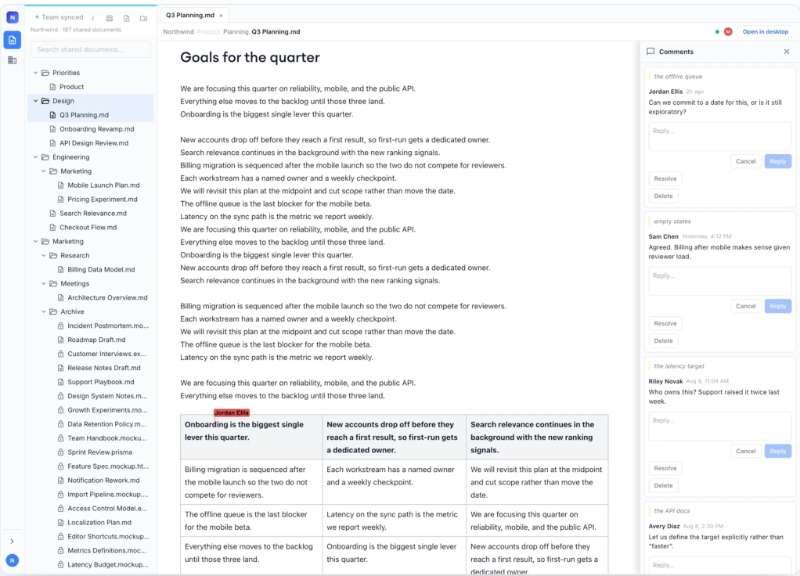
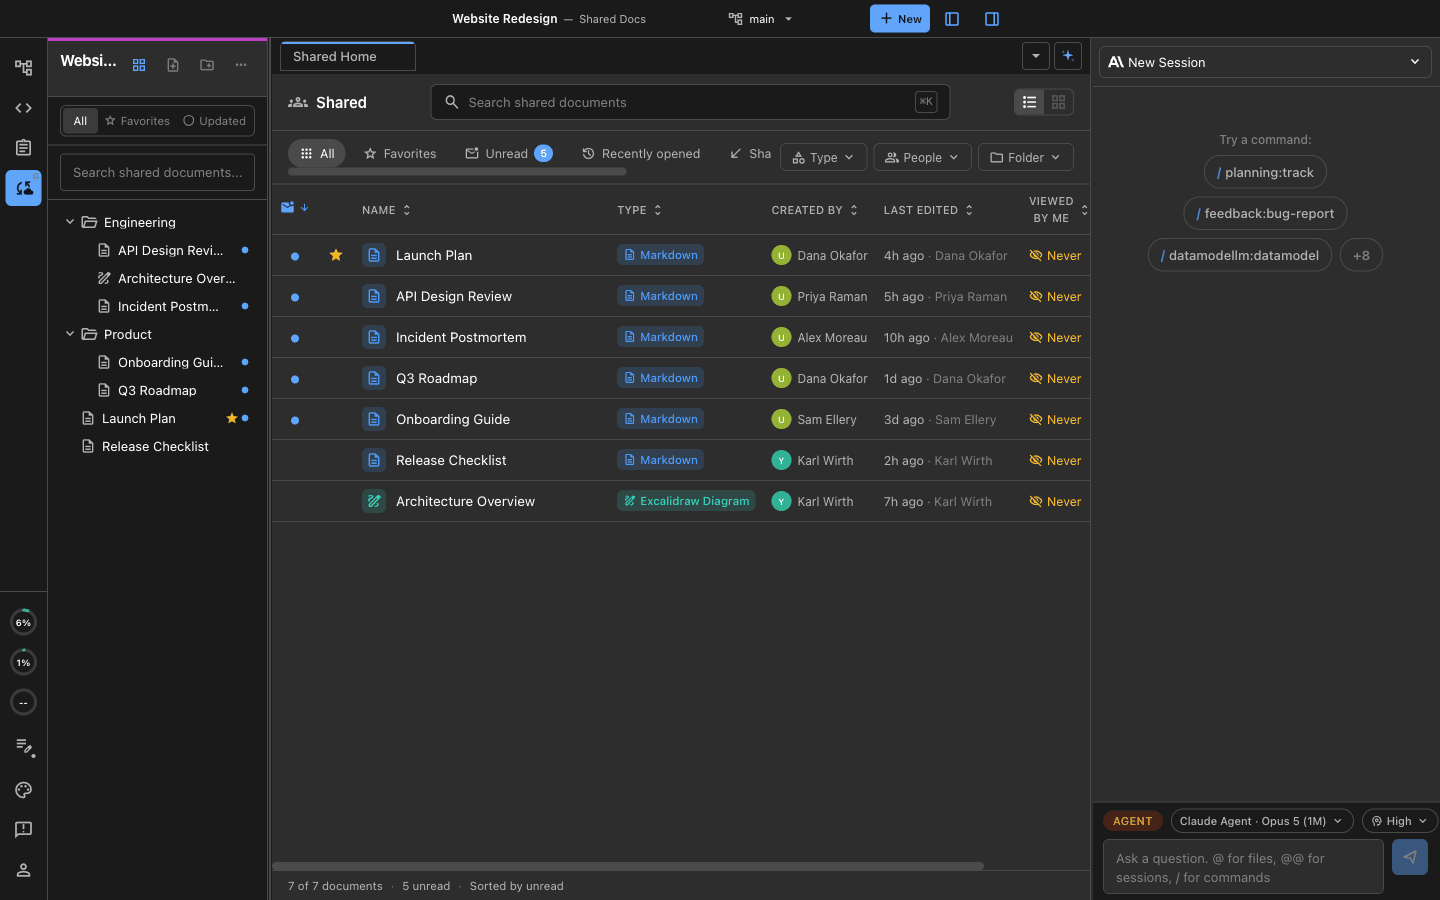
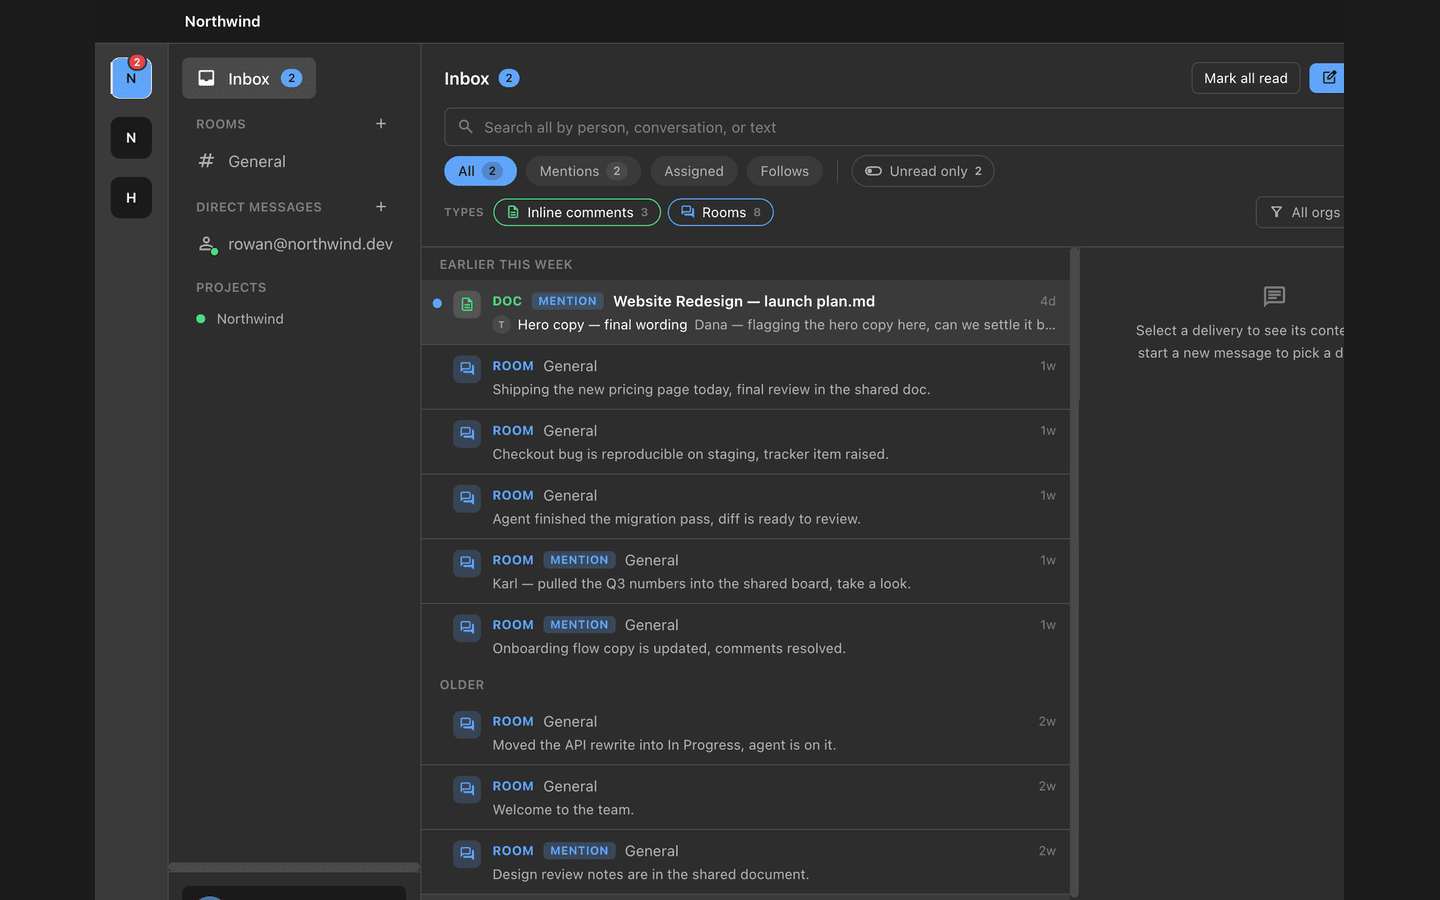
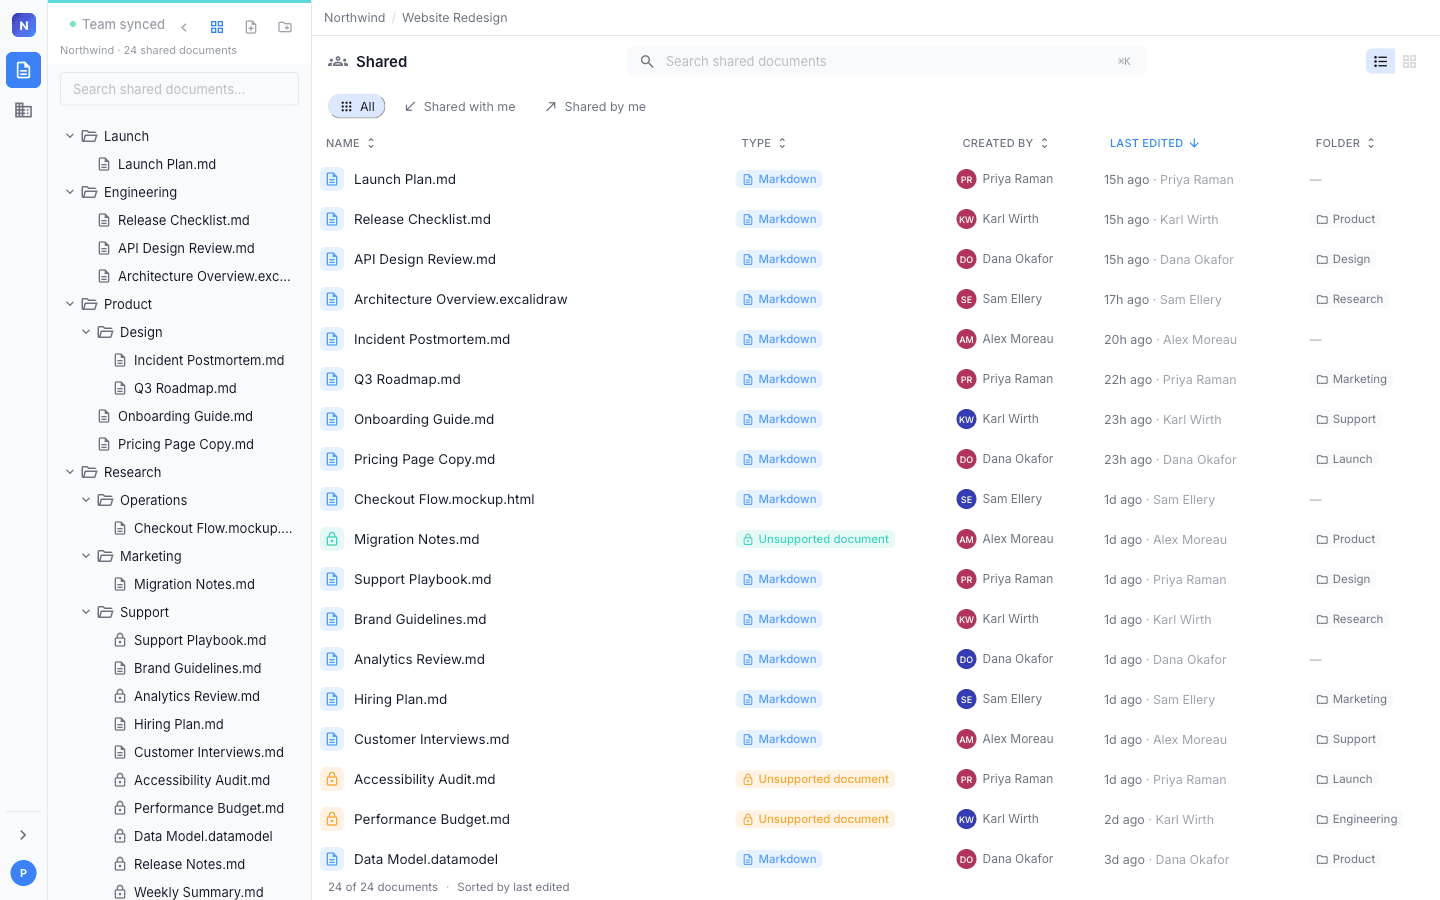
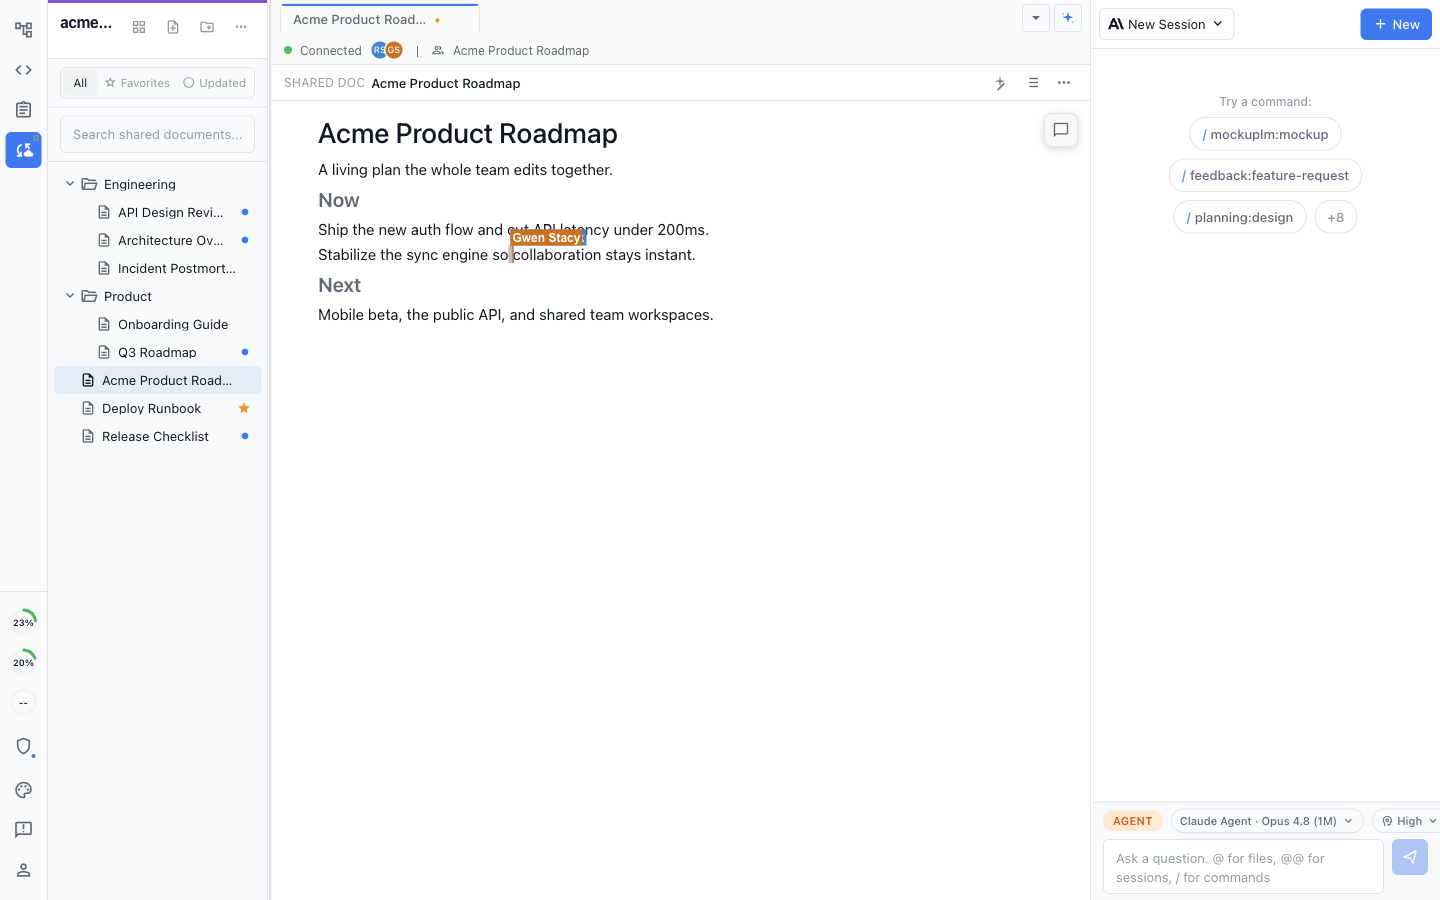
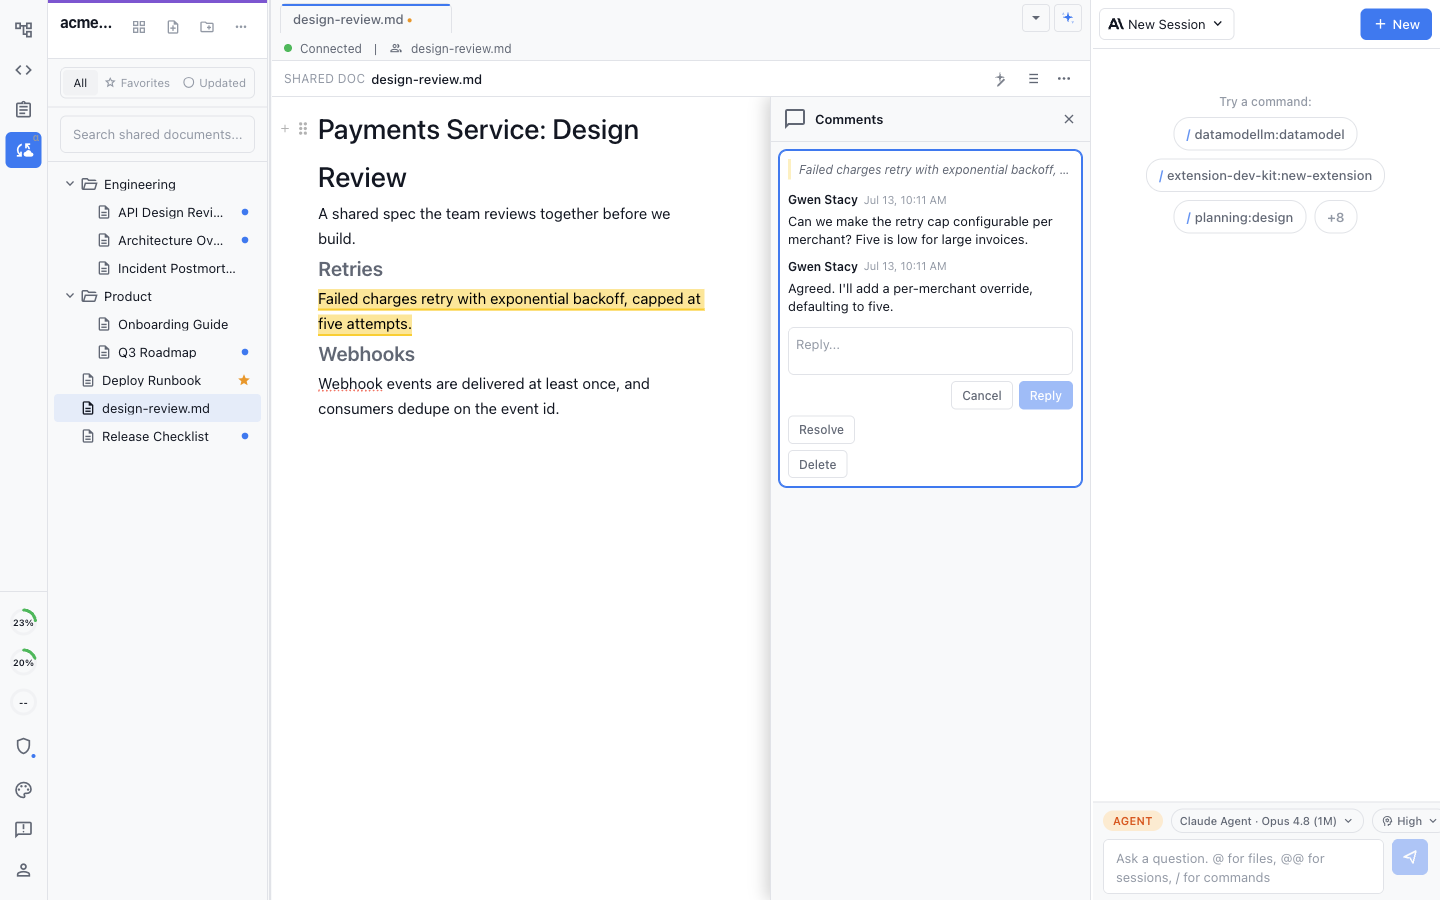
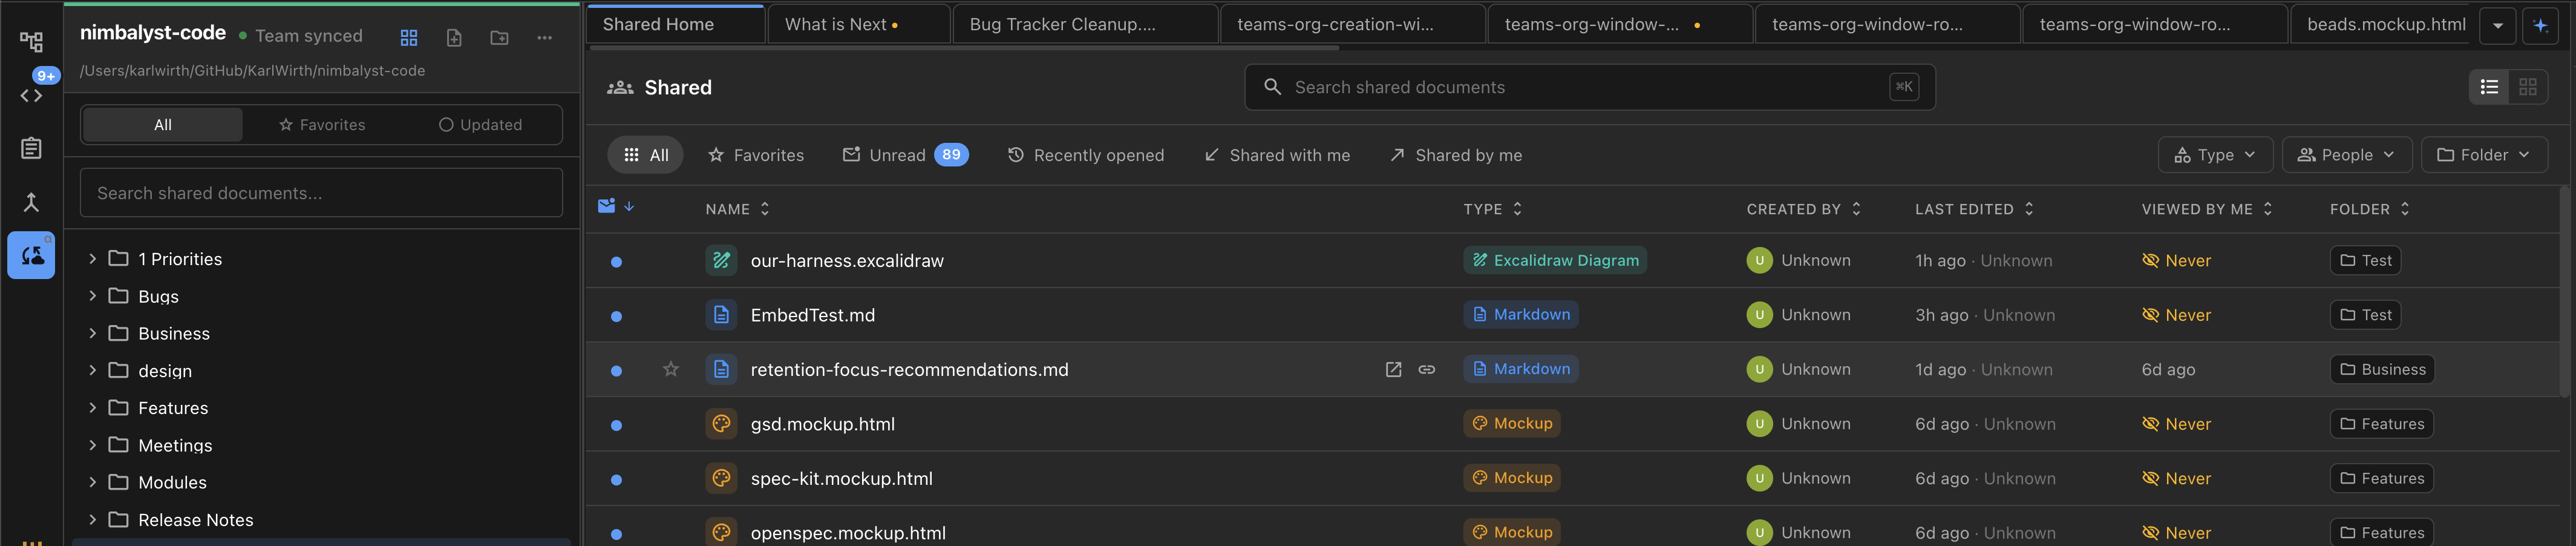
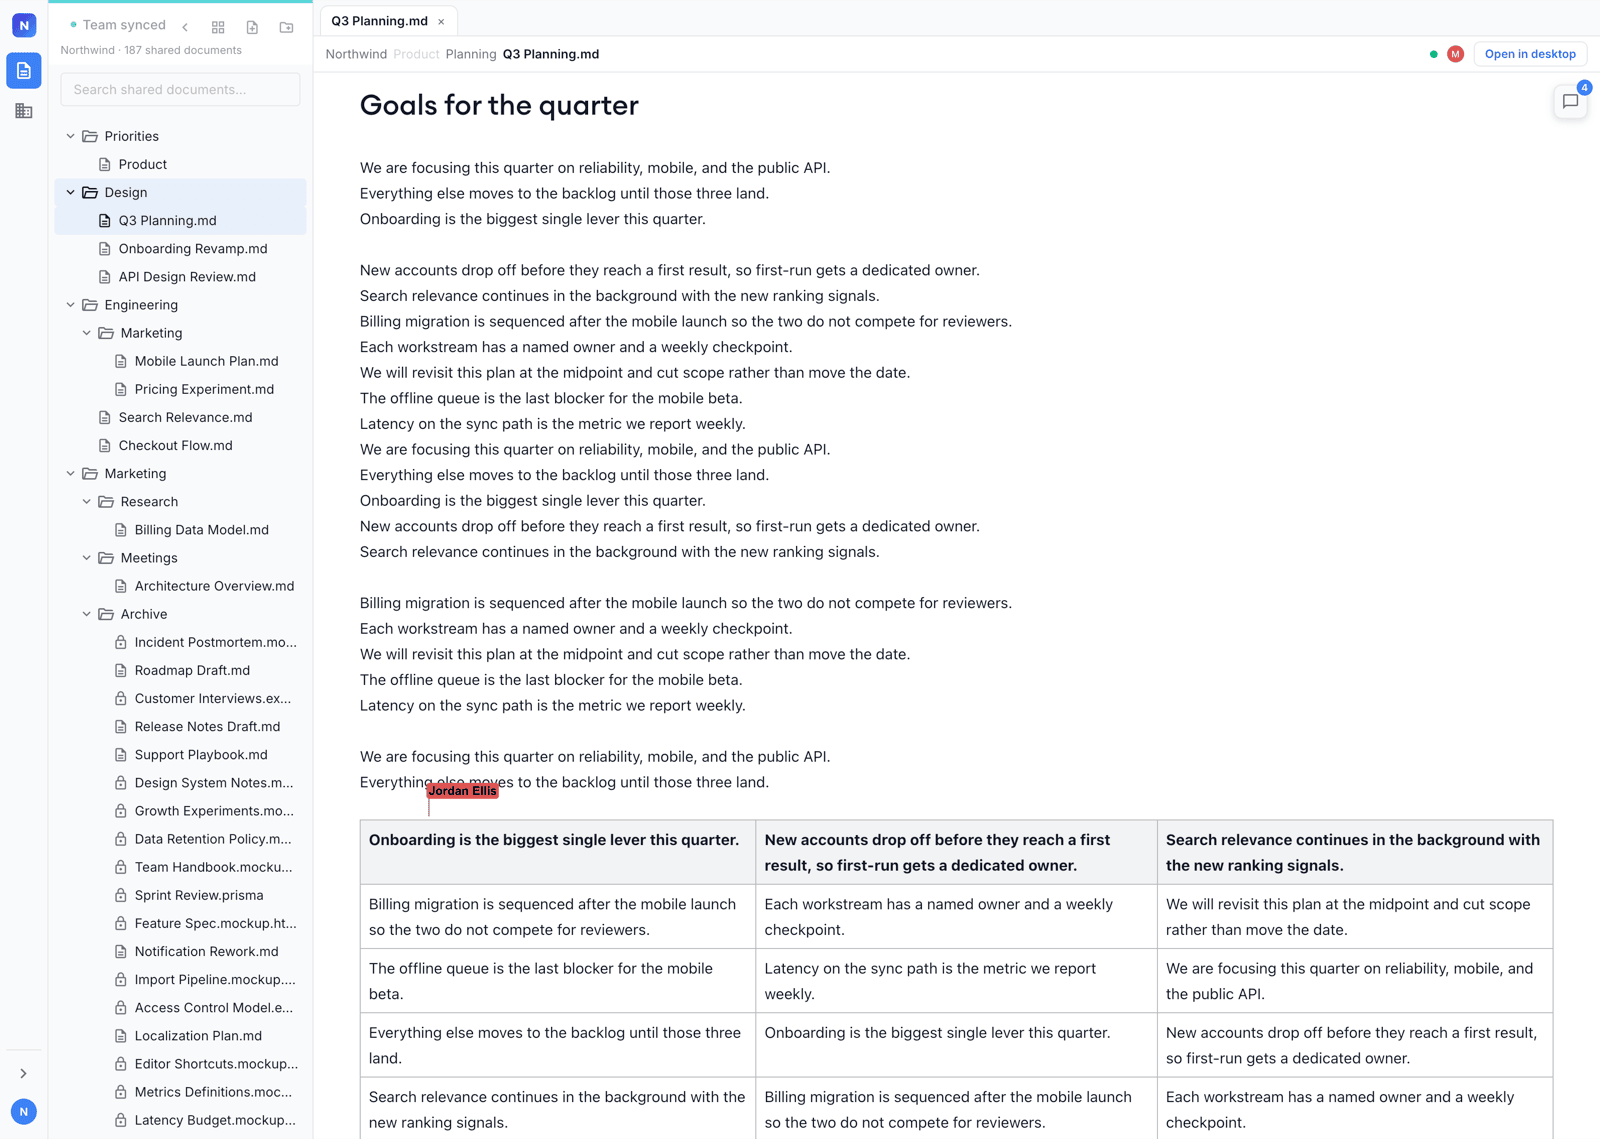
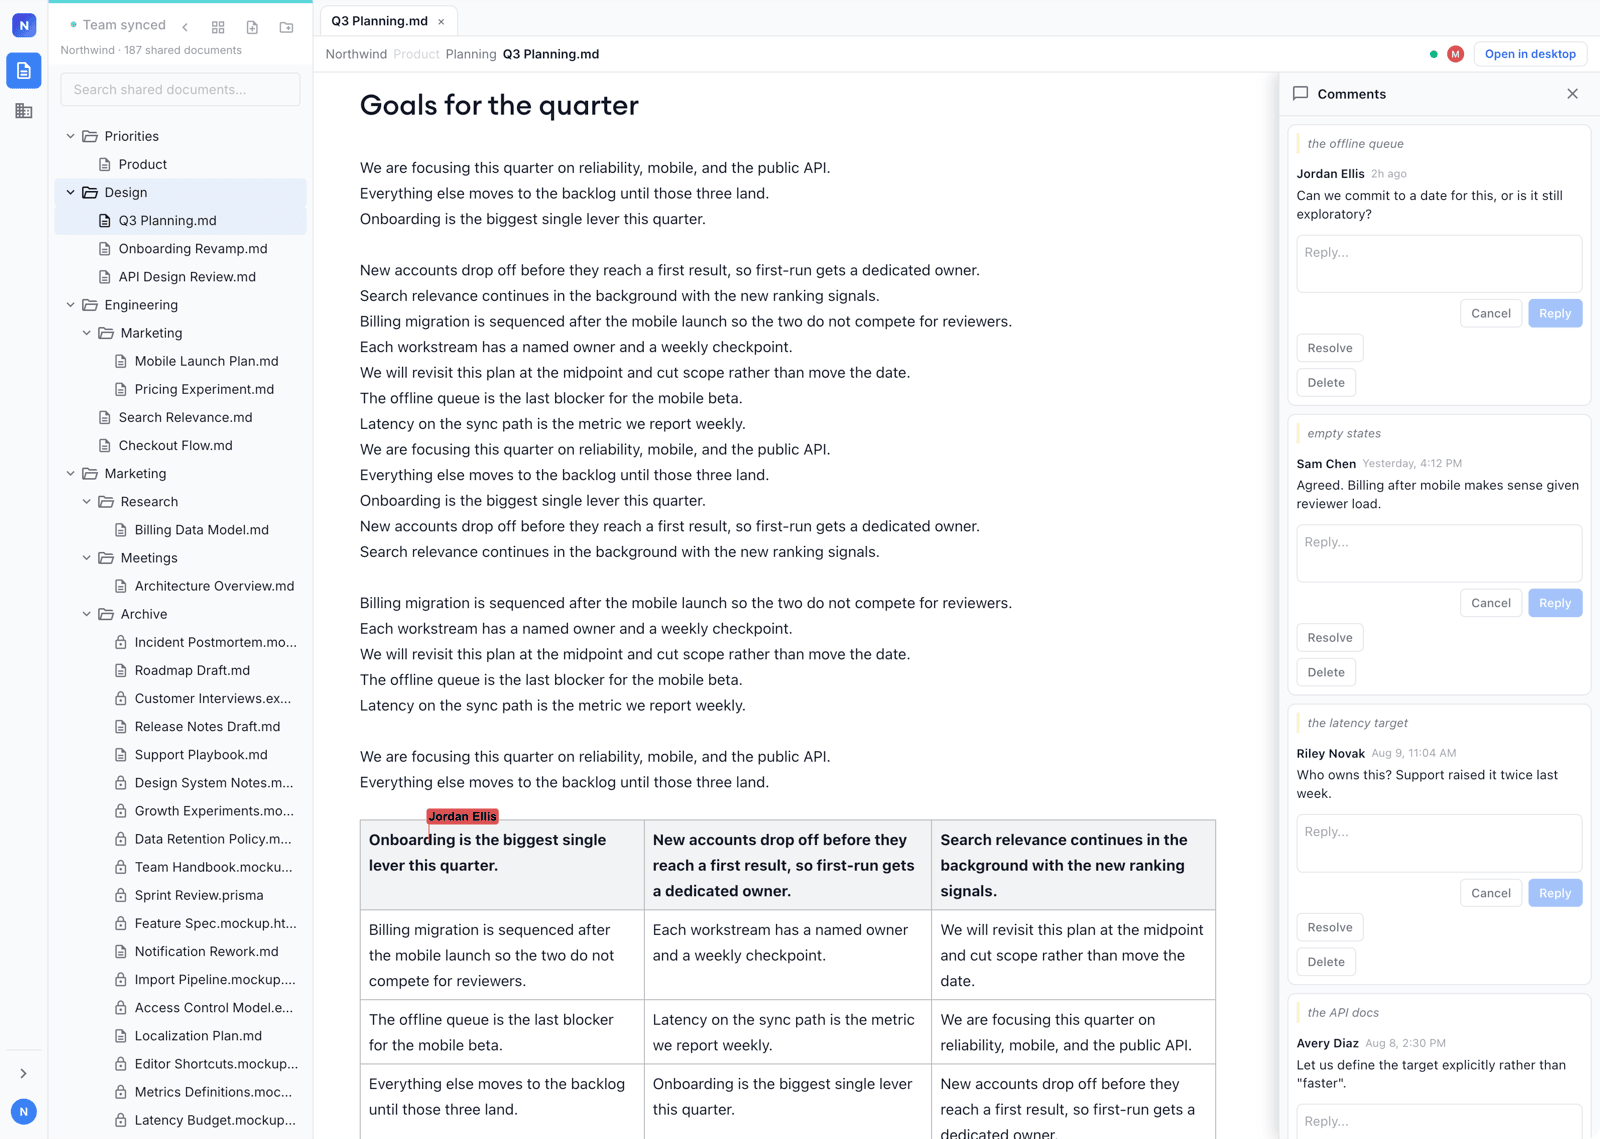
Every teammate runs the open-source Nimbalyst app on their own machine with the Codex, Claude Code, or other agents they use locally. After signing in to Nimbalyst Teams, they can promote local files into a shared team workspace and keep working with those agents.

People and their agents can edit shared files together in real time or contribute asynchronously. Shared Trackers work the same way: teammates and their agents update one team board from their own Nimbalyst installations. Only files and Tracker items explicitly shared with the team enter this collaboration flow; everything else stays outside the team workspace.

Shared team data flows through Nimbalyst's Cloudflare sync service. It is encrypted in transit and at rest and isolated per team.

See [Nimbalyst for Teams](https://nimbalyst.com/teams/) for what the shared workspace covers.

Start with the [Team Collaboration Overview](/team-collaboration/overview), then [Set Up Nimbalyst Teams and Organizations](/team-collaboration/setup-teams-and-orgs).

### Open Approach

* Open source: the Nimbalyst app itself is open source at [github.com/nimbalyst](https://github.com/nimbalyst)
* Open storage of content and status in markdown, code, html,
  * Future-proof - Your files will be readable in any text editor, forever
  * Portable - Move between different markdown tools without conversion
  * Version Control Friendly - Works perfectly with Git and other VCS
  * LLM-friendly - Work with Claude Code, Codex, and any AI
* Open storage of workflow and config in coding agent / commands
* Open storage of your files in your file tree or Github

### Ways to Use Nimbalyst

1. As an AI-integrated fast, local, WYSIWIG markdown editor
2. To mockup your UI in html, edit it with AI, provide this as context to your coding agent
3. As a planning tool to help you create and manage features, plans, to-dos, and ideas
4. To code with Claude Code or Codex
5. As a manager of your coding agent sessions integrating your plans with your agentic coding
6. To organize your work


# Nimbalyst Tutorial and Demo Videos

Three ways to learn Nimbalyst: watch a demo video, explore the sample tutorial workspace that ships with the app, or have an agent walk you through a 15-minute guided quickstart.

[Download Nimbalyst](https://nimbalyst.com/download/)

There are three ways to learn Nimbalyst, and they suit different moods. Watch a video to see what the app does. Open the tutorial workspace to click around in something already built. Run the guided quickstart when you want an agent to teach you by having you do real work.

## 1. Demo videos

Start with the overview, then pick the walkthrough that matches your job.

### 1-minute overview

The fastest look at what Nimbalyst is: agents, files, visual editors, and trackers in one workspace.

{% embed url="<https://stravu.wistia.com/medias/5js7e4kk39?embedType=web_component&seo=true&videoWidth=960>" %}

### For product managers: idea to tracked work

An onboarding revamp goes from an idea to an aligned team without anyone writing code. The agent researches the drop-off, drafts the PRD as a live document, and produces the user flow diagram and a clickable mockup beside it. One click turns the plan into tracked work on a shared board, and one more makes the document multiplayer so teammates comment in place. **1:26.**

{% embed url="<https://www.youtube.com/watch?v=jRFIVVJ3N6I>" %}

More in the [product manager playlist](https://www.youtube.com/playlist?list=PLGm3n1OZjA5WN0-JX2Ia9b1d55vU63xKM).

### For developers: research, plan, diff, review

A request for an API usage dashboard runs all the way to an approved pull request in one workspace. The first instruction is deliberately narrow, research and plan only, no code. The plan becomes an editable document with an architecture diagram and mockup inside it, every agent change shows as a diff you accept file by file, and the pull request gets reviewed in the same place. **1:13.**

{% embed url="<https://www.youtube.com/watch?v=5-5pfFnaOR4>" %}

More in the [developer playlist](https://www.youtube.com/playlist?list=PLGm3n1OZjA5XoEiKpcRp5f9M_HVySXDmg). The pull request review queue shown here needs Developer Mode turned on in settings.

### Longer walkthrough: product management use cases

A 15-minute tour through product management workflows end to end.

{% embed url="<https://stravu.wistia.com/medias/e7i2rwtl9e?embedType=web_component&seo=true&videoWidth=960>" %}

## 2. The tutorial workspace

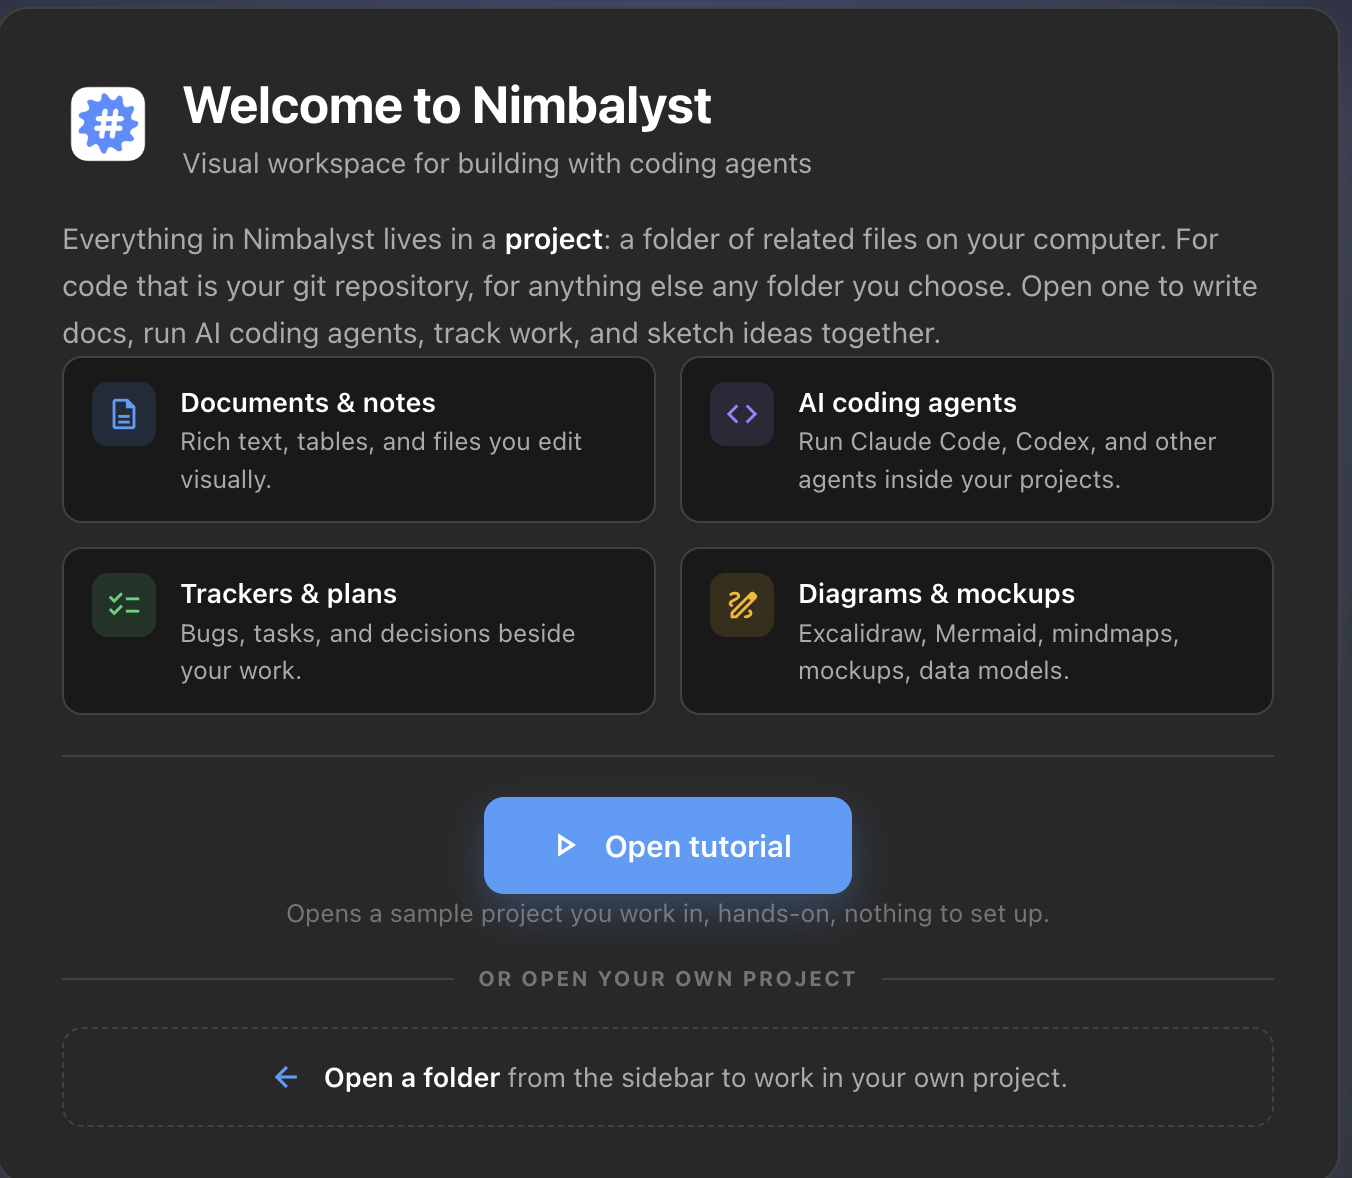
The first time you open Nimbalyst, the welcome screen asks which mode you want and offers **Start tutorial**.

<figure><img src="/files/Chg2OTl8meyJx10gKY1i" alt="The Welcome to Nimbalyst screen with Standard Mode and Developer Mode cards, role and referral questions, an optional email field, and Get started and Start tutorial buttons"><figcaption><p>Choose Standard or Developer Mode, then take the tutorial workspace or go straight to your own project.</p></figcaption></figure>

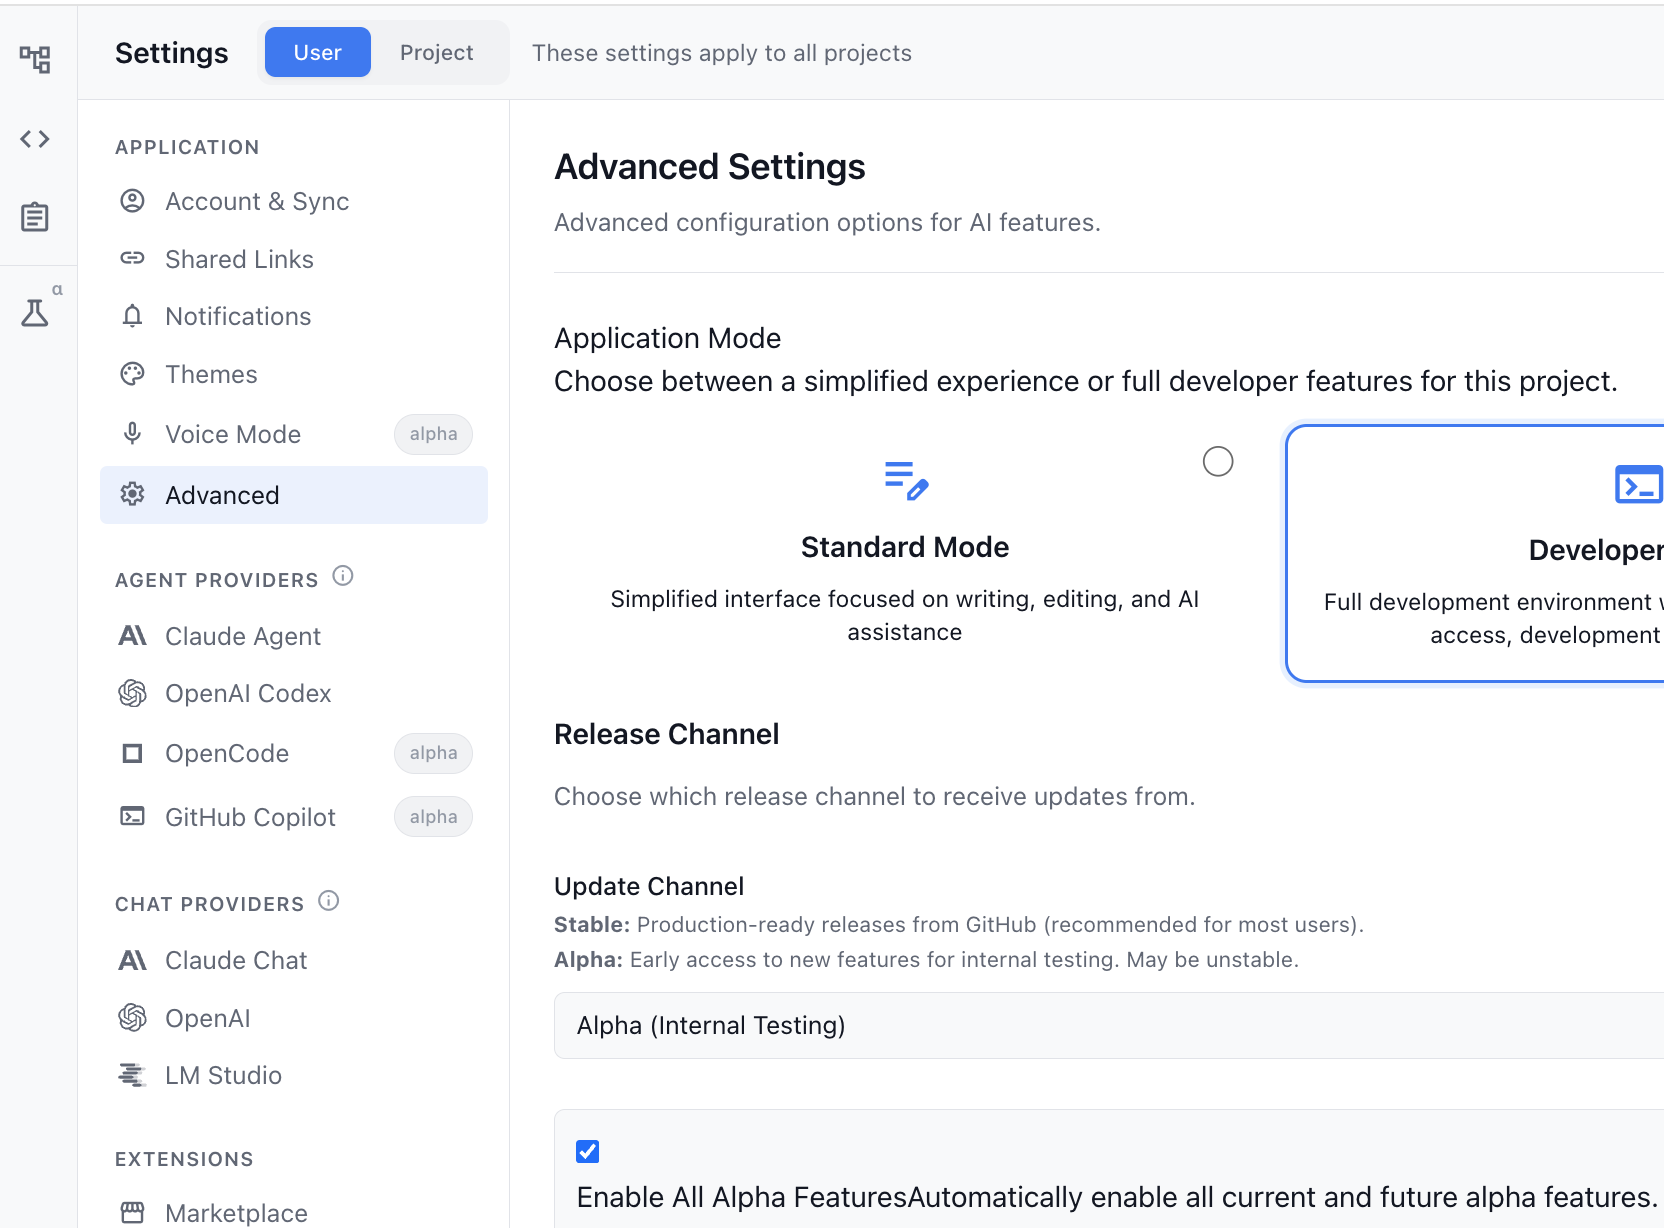
* **Standard Mode** is a simplified interface focused on writing, editing, and AI assistance.
* **Developer Mode** adds git worktrees, terminal access, and the rest of the development environment. See [Turn on/off Developer Mode](/developer-features/turn-on-off-developer-mode); you can switch later.
* **Get started…** opens Nimbalyst against a folder you choose. **Start tutorial** creates the tutorial workspace instead.

**Start tutorial** builds a small connected project called **Nimbalyst Tutorial** in your Documents folder. Nothing is set up or configured. Everything in it is a real file you can edit, break, and throw away.

<figure><img src="/files/9sUtdrT5QQfnZyed3dIU" alt="The Nimbalyst Tutorial workspace, with a README listing things to try, a file tree of planning and design files, a live mockup embedded in the document, and an agent session open on the right"><figcaption><p>The tutorial workspace is a real project. The dashboard in the README is a live embed of a mockup file, not a picture of one.</p></figcaption></figure>

The README lists things to try, and each one is a link into the workspace:

* Type in the document, and try `/`, `#`, and `@`.
* Ask the agent to add a summary at the top of the file, then review its red/green changes.
* Shape an interface in the dashboard mockup, then ask the agent to change it.
* Switch to Agents mode, look at past sessions, and click into the files they touched.
* Explore a revenue spreadsheet, change assumptions in a metrics model, and follow the work into an architecture diagram.
* Read a document with embedded project artifacts, turn a goal into steps with a launch checklist, and see a markdown document become a tracker item.

If you skipped it during onboarding, you can start it later from **Help > Launch Tutorial**, or from **Try the interactive tutorial** on the workspace manager's welcome screen. Nimbalyst reuses the existing tutorial folder rather than making a second one, so the button reads **Open tutorial** once it exists. Delete the `Nimbalyst Tutorial` folder in your Documents folder whenever you are done with it.

## 3. The guided quickstart

Learn Nimbalyst by doing your own real work in about 15 minutes, with an agent as the instructor. Product managers, founders, and designers finish with a working brief and an embedded mockup. Developers finish with a run-and-test guide, an embedded architecture diagram, and two agents running in parallel.

Open a workspace in Nimbalyst, start a new chat, and paste this prompt:

```
Fetch https://raw.githubusercontent.com/nimbalyst/skills/main/skills/getting-started/quickstart.md, save it to nimbalyst-quickstart/quickstart.md in this workspace, then run it as the Nimbalyst quickstart. Wait for me at every exercise.
```

The agent saves the quickstart in your workspace, helps you choose the product or engineering track, and waits for you at each exercise. Everything it creates stays under `nimbalyst-quickstart/`, so you can remove the folder afterward if you do not want to keep the results.

The [Nimbalyst quickstart on GitHub](https://github.com/nimbalyst/skills/blob/main/skills/getting-started/quickstart.md) is the source of truth.

## Setting up a team

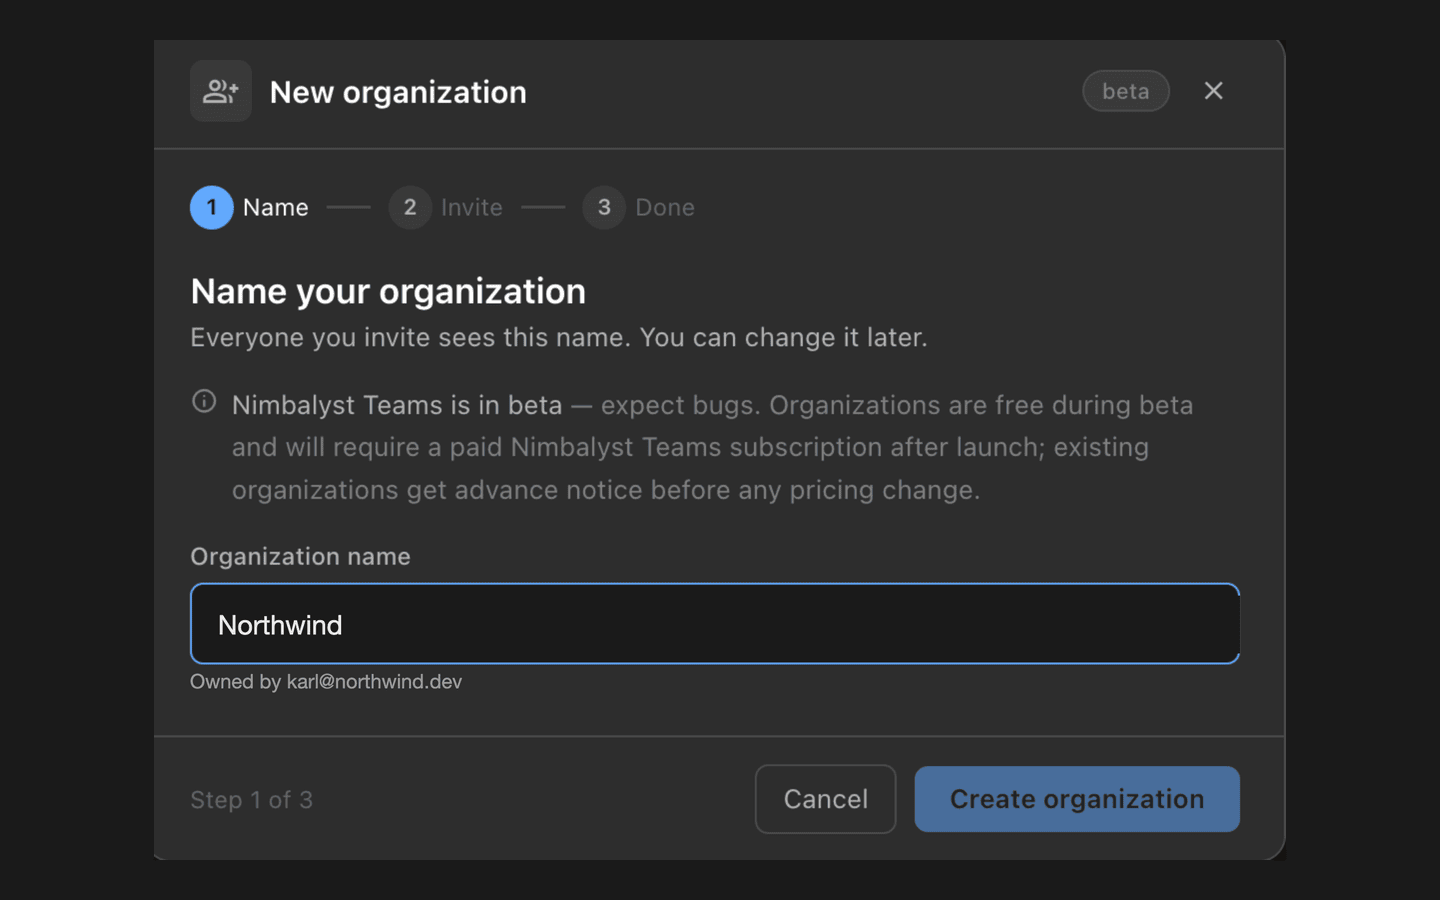
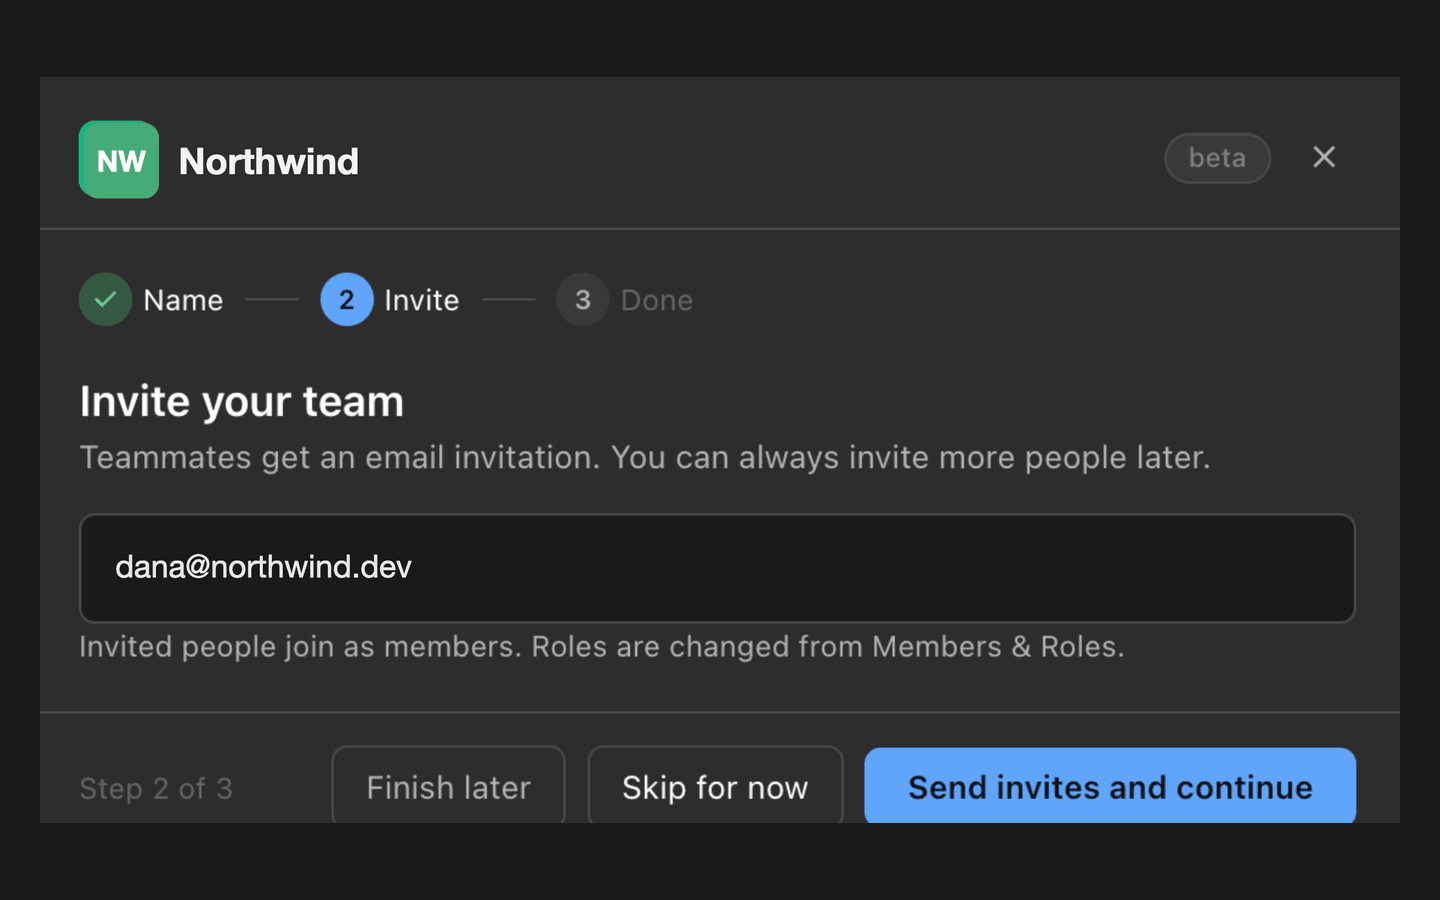
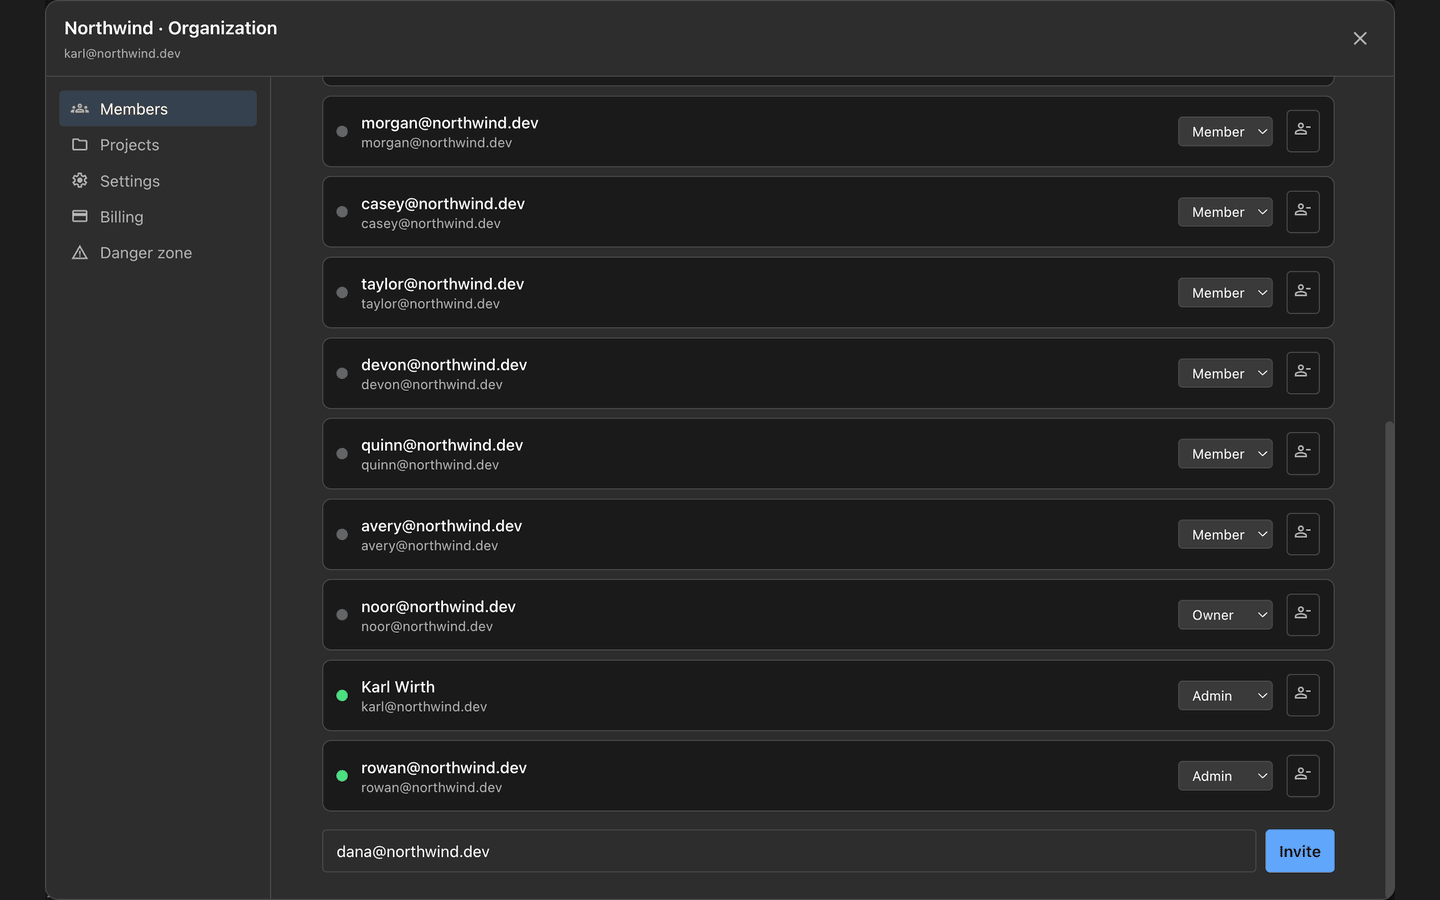
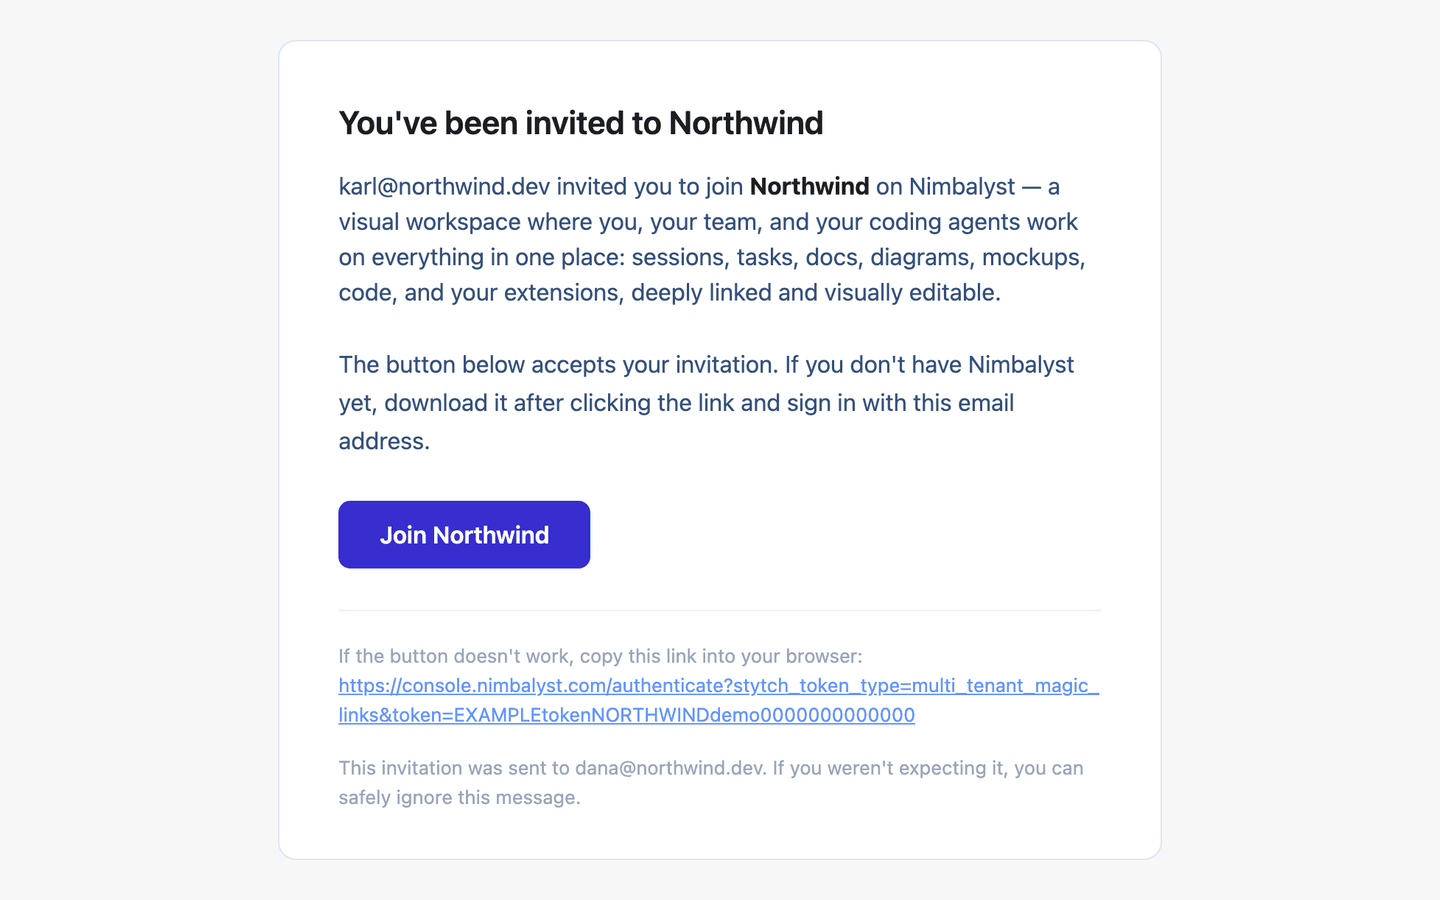
Working with other people is its own walkthrough. Sign in, create an organization and invite your team, then work together in shared trackers and shared documents while everyone's coding agents work in the same files. **2:46.**

{% embed url="<https://www.youtube.com/watch?v=UM_6pmmSbSc>" %}

The same seven steps in writing, with a screenshot for each: [Nimbalyst Teams: Step by Step](/team-collaboration/teams-tutorial).

## Use cases

* [For Product Managers](https://nimbalyst.com/use-cases/product-managers/)
* [For Developers](https://nimbalyst.com/use-cases/developers/)

More workflows, from feature planning to bug analysis to design handoff, are on the [Nimbalyst use cases page](https://nimbalyst.com/use-cases/).


# Quickstart

Set up Nimbalyst in minutes. Open a project, connect a coding agent, and run your first AI session in a visual interface for Claude Code.

Start by downloading the app from the [Nimbalyst download page](https://nimbalyst.com/download/). Mac and Windows builds are both there.
### **Open a Project**

<div align="left"><figure><img src="/files/dzPiweAJHx4y4qgzu0IE" alt="" width="563"><figcaption></figcaption></figure></div>

* A project is a folder opened in Nimbalyst that maintains its history, context, window state.
  * If you have GitHub locally, you would choose various GitHub projects
  * If you don't, create a folder in your filesystem called Nimbalyst Projects
* Open a folder into Nimbalyst and work there
* You can have multiple Nimbalyst screens open working in different projects at the same time. A consistent color will help you tell them apart.
* Project state is automatically saved and restored when you reopen the folder
* (Return to this screen from Windows -> Project Manager or Command P to open another project)
* You can only view and edit files that are in your Nimbalyst project, but you can have your coding agent read, use, manipulate files elsewhere on your computer if you give permission.

### **Coding Agents**

Nimbalyst is the open-source visual workspace for building with Codex, Claude Code, and more. At least one coding agent must be installed.

* If you already have a coding agent installed and running on your desktop, we will use it through its SDK.
* If you do not have Claude Code CLI, or Codex CLI installed, you must do so yourself prior to using Nimbalyst.
* You must either enter your API Key in the Settings in Nimbalyst or authenticate to OpenAI or Anthropic in their terminals.

### **Files Mode**

Work with Claude Code and Codex in interactive, WYSIWYG markdown docs, mermaid diagrams, excalidraw drawings, html mockups, data models, CSV files, Calc Sheets, in-app browser previews, mind maps, sessions, and code.

Focus on one file:

* Edit the file in the center panel. See red/green diffs from your coding agent and review, accept them.
* Work with your agent in the right panel to edit this file or explore other files, research the web.
* Navigate and manage your files in the left panel file manager

<figure><img src="/files/0PzRCHU1Zdqo1ZwmaC0w" alt=""><figcaption></figcaption></figure>

#### Edit Markdown

* Nimbalyst uses Markdown for everything (content, data, metadata)
* Work in native markdown mode or in the WYSIWIG Editor with markdown commands
* Open a markdown document from your folder, start editing it manually
* Or create a New Document by clicking the icon or ... File > New (Cmd+N) creates a new document
* Save with Cmd+S. Documents are saved as standard markdown files
* Remember your documents are on disk in your file system and so they can be edited by other AIs or you in other applications
* Cmd + Y will give you your file history and let you use it

#### Calc Sheets

* Create a `.calc.md` file when you want spreadsheet-style results in a markdown document
* Calc Sheets are useful for pricing, estimates, budgets, unit conversions, and planning notes with formulas
* You keep the source as plain text while Nimbalyst renders evaluated values beside it
* See [Calc Sheets](/visual-editors-powered-by-ai/calc-sheets)

#### Browser

* Open `.html` files or live URLs in a real Chromium view inside Nimbalyst
* Use the Browser to preview generated pages, inspect mockups, and verify frontend changes without switching apps
* Ask your agent to navigate, click, type, scroll, evaluate, or screenshot the page
* See [Browser](/visual-editors-powered-by-ai/browser)

#### Mind Map

* Create a `.mindmap` file when a roadmap, plan, or research topic is easier to understand spatially
* Mind maps give you an infinite canvas with branches, notes, tags, colors, and AI-assisted expansion
* The file stays readable and versionable, so agents can edit it like other project files
* See [Mind Map](/visual-editors-powered-by-ai/mind-map)

#### AI Chat Panel

* Leverage the AI Chat panel to edit your documents or do research / chats
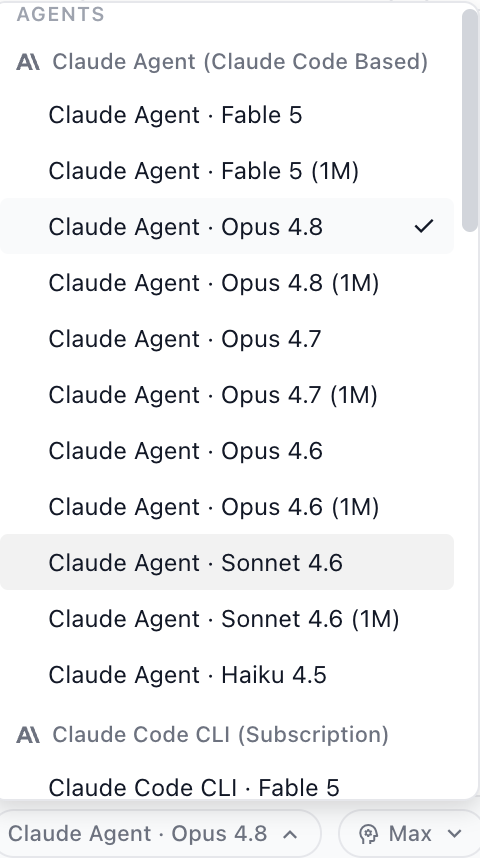
* Select a provider from the dropdown (See [AI Provider Setup and Notifications](/setup-nimbalyst/ai-provider-setup-and-notifications) to set up Claude Code, Codex, and other providers)
* The first time you try to use a coding agent, if you are not authenticated, the Agent chat will step you through authenticating.
* The AI Agent can see and operate on your current document and your whole project
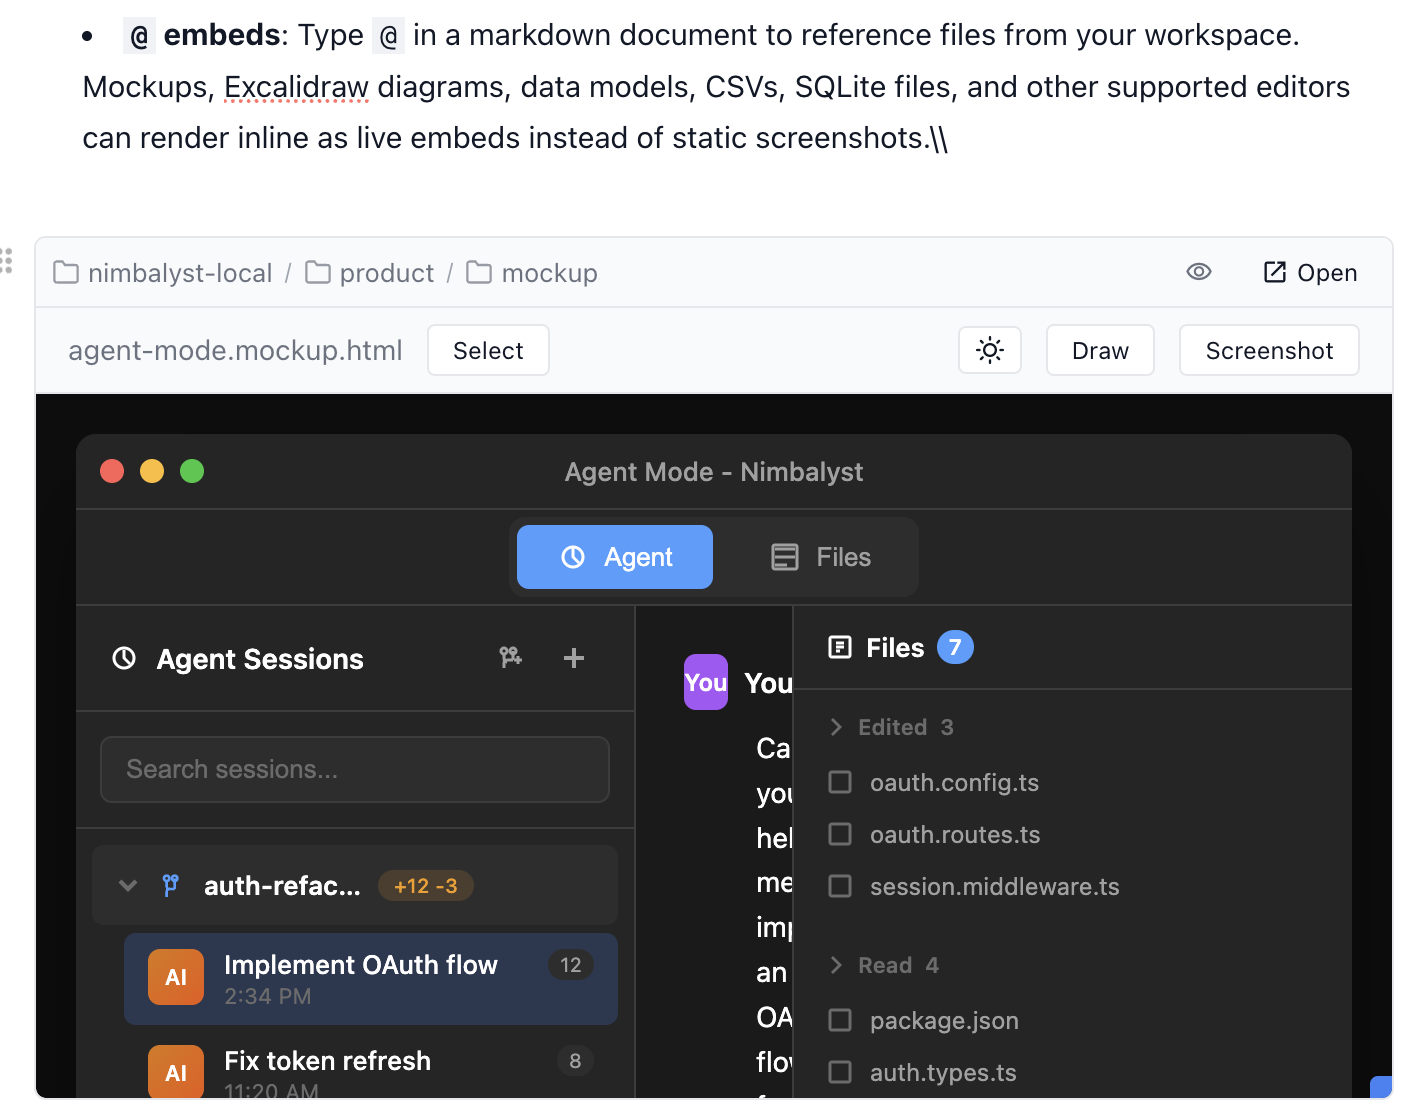
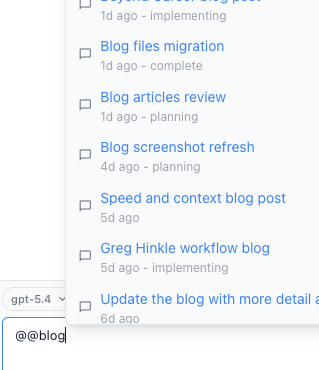
* Type `@` to attach a file or folder to the conversation. In markdown documents, putting a supported custom-editor file reference on its own line turns it into an inline embed.
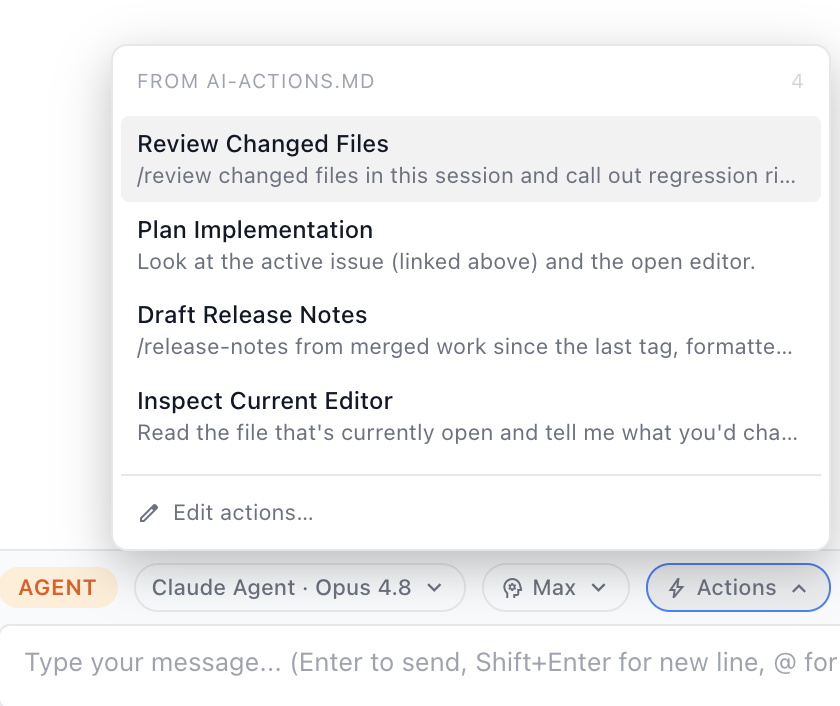
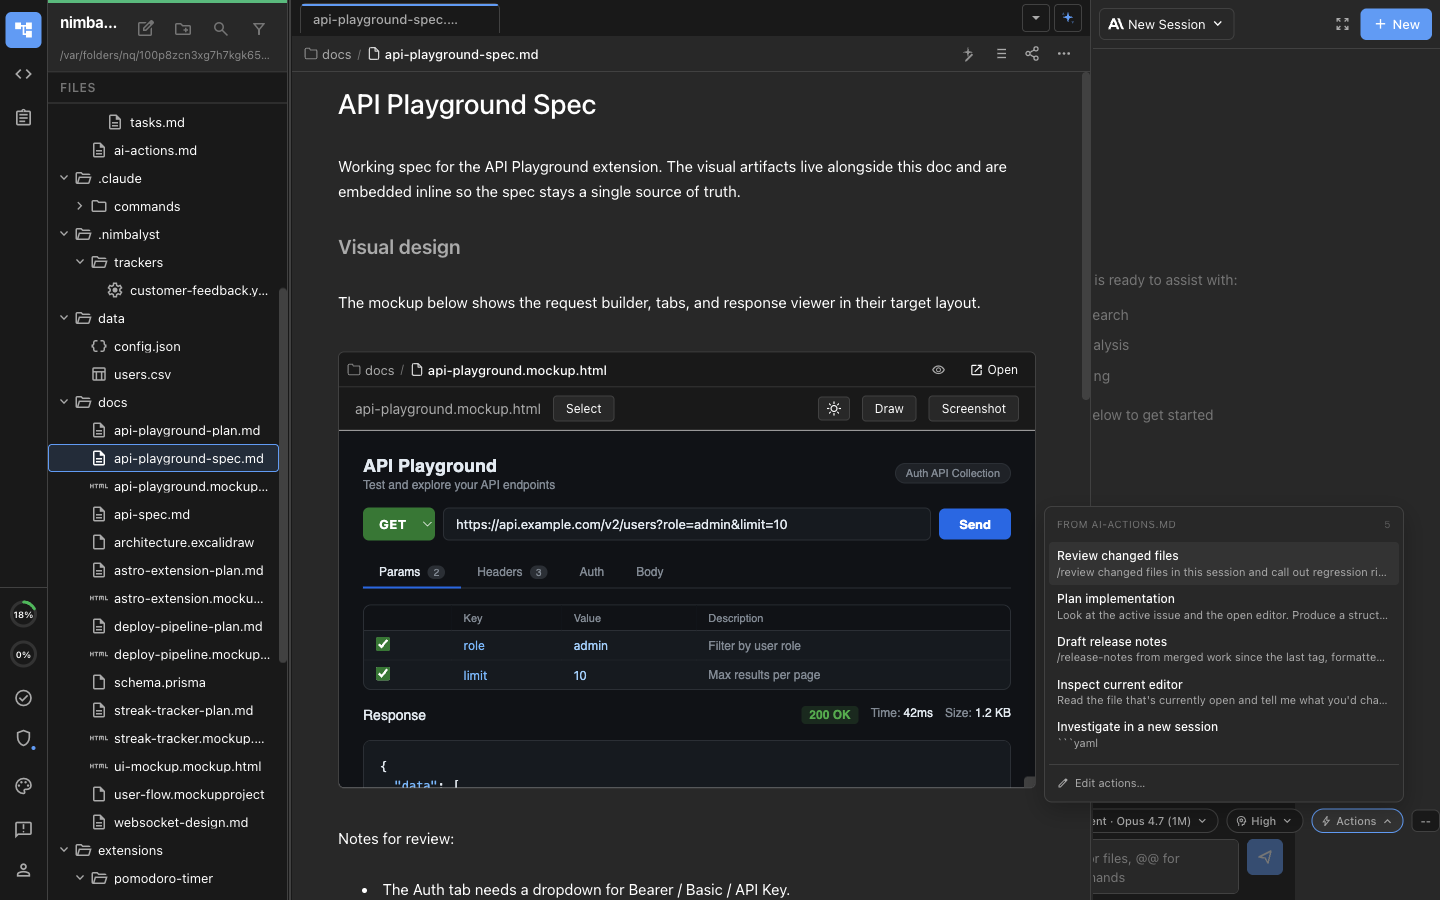
* Use the **Actions** dropdown to insert reusable prompts like reviewing changed files, planning an implementation, drafting release notes, or inspecting the current editor
* AI Edits show up as Red/Green Diffs for your approval
* Each AI conversation is a session which can be saved and resumed

#### **Edit Mockups**

<figure><img src="/files/59r1dWmCxyRbMKg0b2TX" alt=""><figcaption></figcaption></figure>

* Create a mockup by typing /mockup in the agent panel . Click to open it in the editor.
* Edit via modifying the html source or by annotating it (draw on it) or by selecting a div and then ask the agent to make changes
* Embed the mockup into your document by typing /

### **Agent Mode**

* *Session Management:* organize, find, and continue your AI conversations. Track the files changed by a session and coordinate your stepping through and approving each one.
* *Coding support:* All the power of Claude Code and Codex plus file tracking, diff visualization, code editing, and / command support with Github status tracking.

<figure><img src="/files/5xdeO3v76b5uzMBgk6T6" alt=""><figcaption></figcaption></figure>

* You conversation with the agent is in the central panel. Focus on this interaction
* The left panel contains the list of your sessions. Group sessions together into workstreams
* The right panel contains the files that the agent touched in that session or group of sessions. Click on a file to open it in the center. Right click to open it in files mode.

If you already have a history of sessions in the Claude Code CLI, bring them into Nimbalyst with **File → Import Claude Code Sessions...**. See [Import Claude Code Sessions](/session-management/import-claude-code-sessions).

### Team and Collaboration Setup

To collaborate with other people in this project:

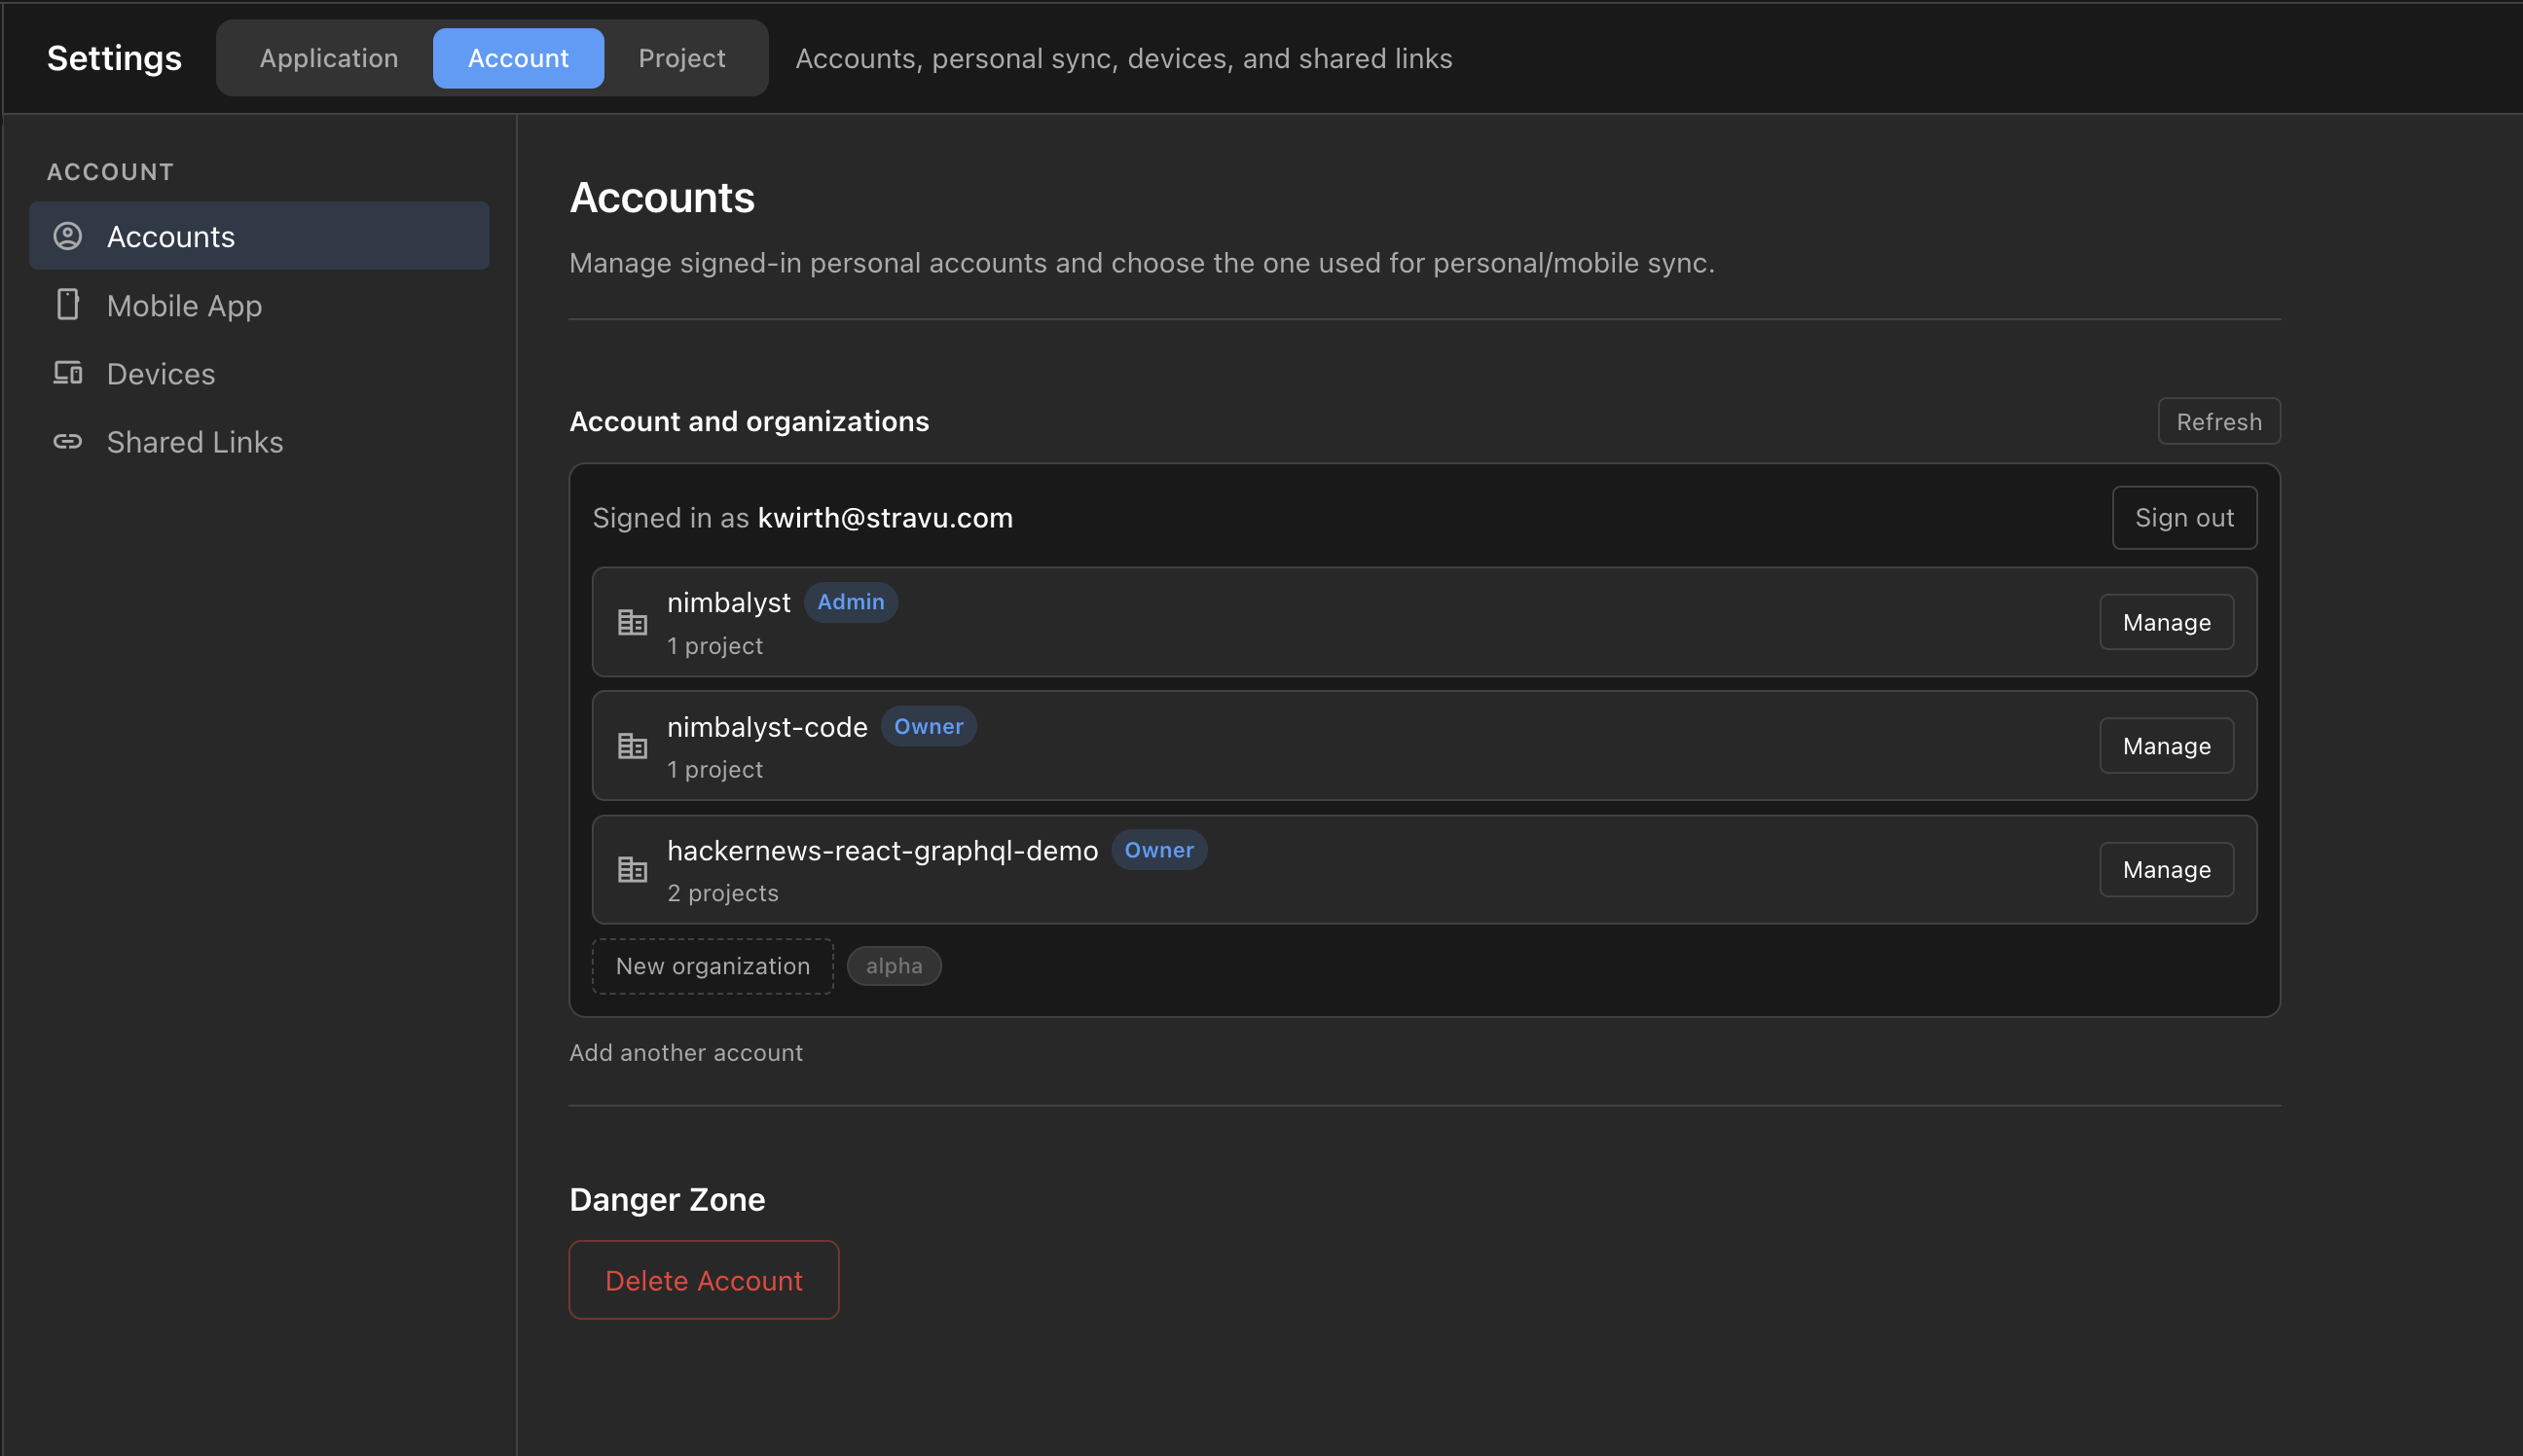
1. Sign in under **Settings > Account > Accounts**.
2. Make sure the project has a git remote named `origin`.
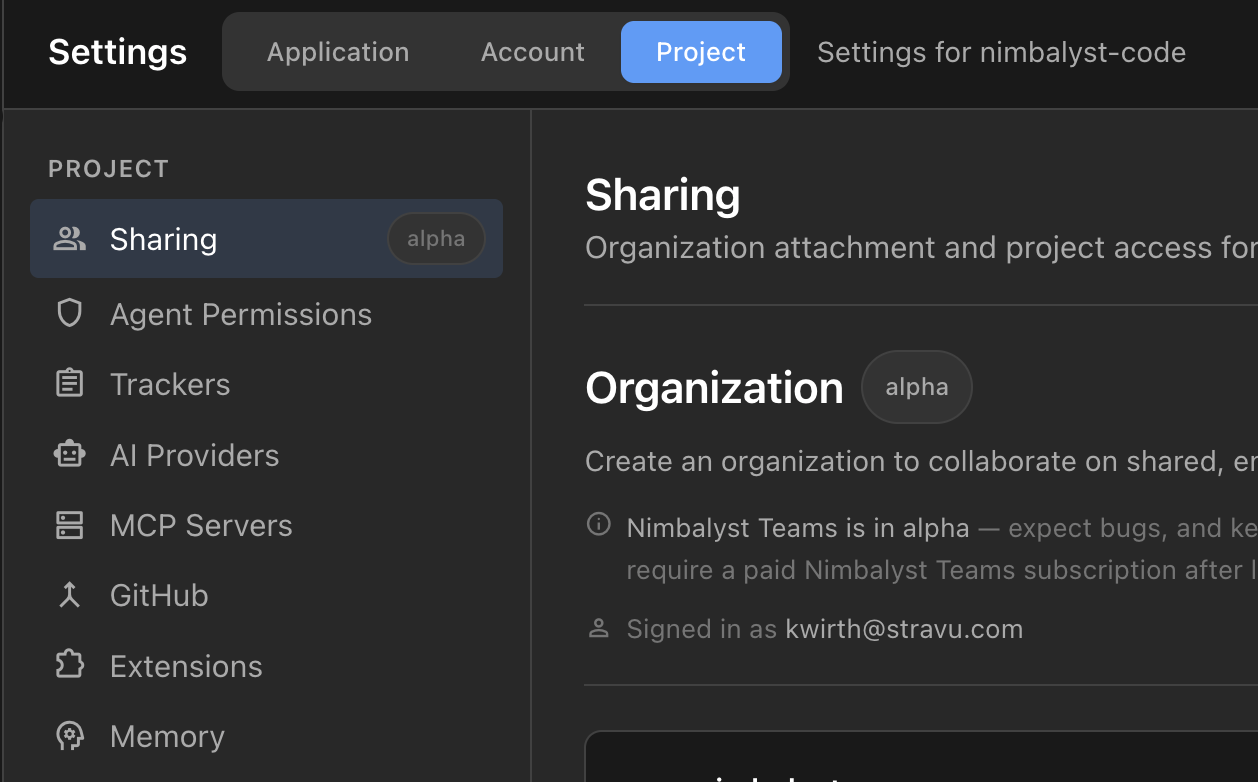
3. Open **Settings > Project > Sharing** and create a team, join an invitation, or add the repository to an organization you already administer.
4. Invite teammates from the organization's member settings.
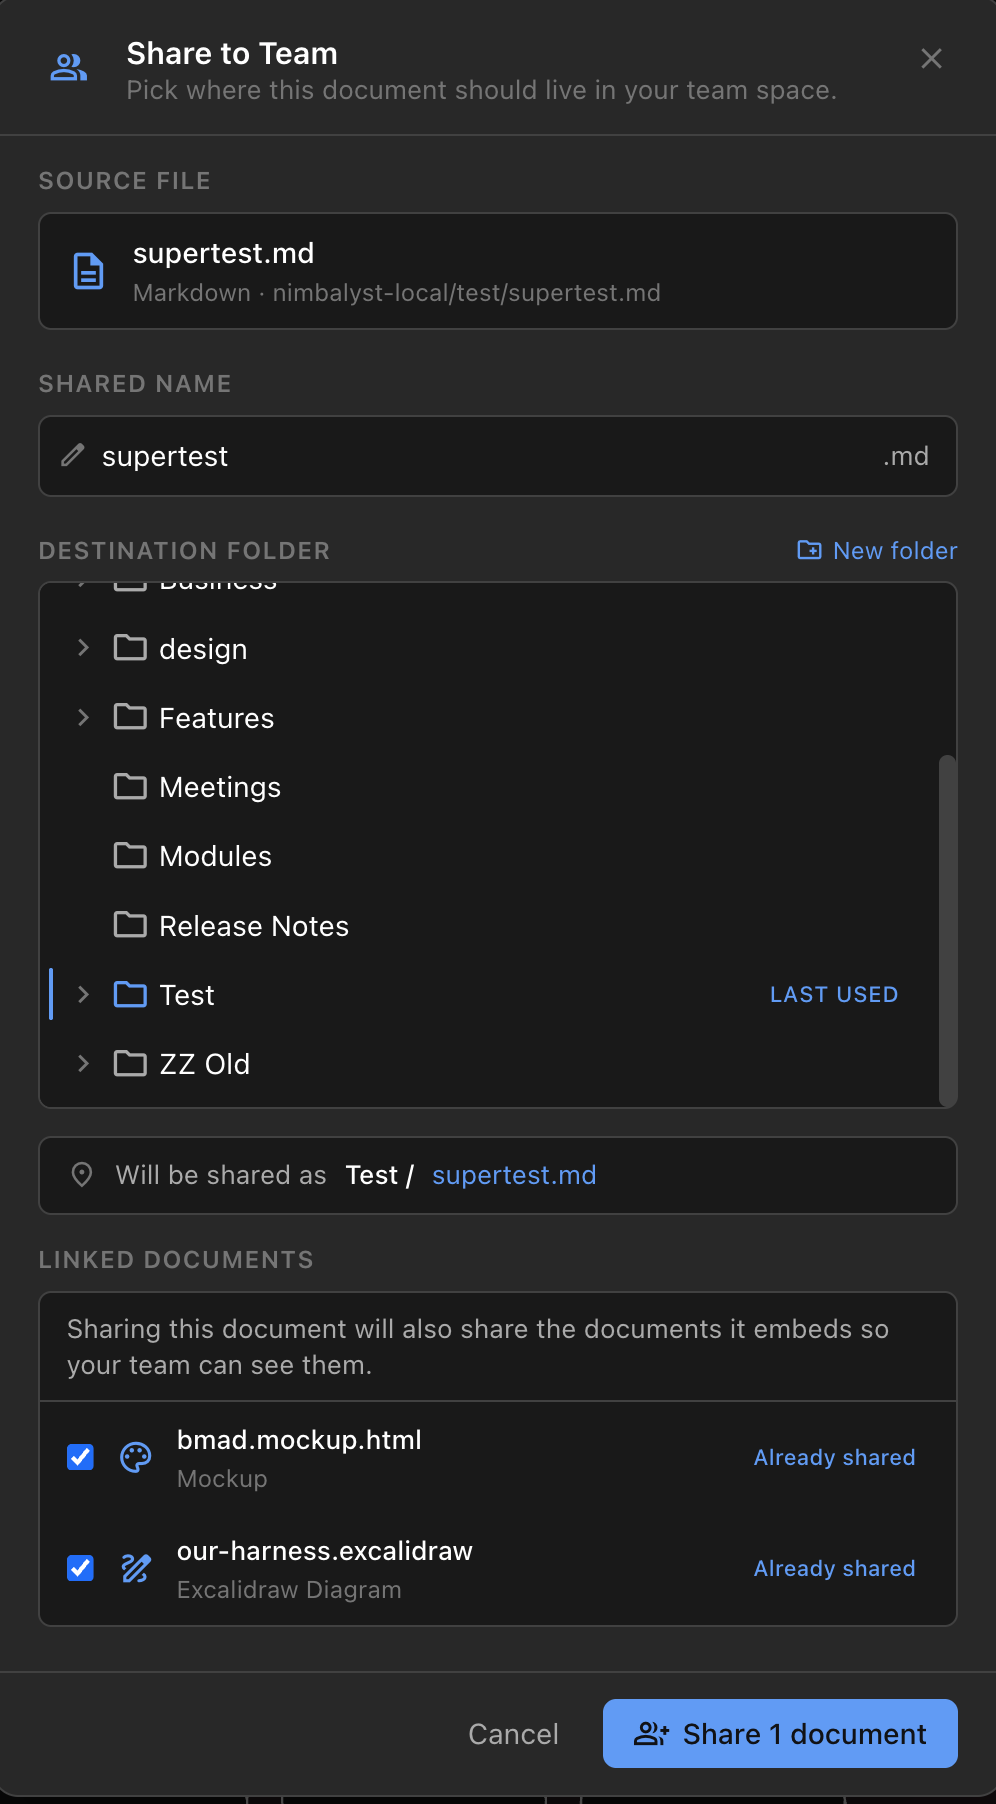
5. Open **Collaboration** mode to create shared documents, or right-click a supported local file and choose **Share to Team**.
6. Open **Trackers** to work on shared tracker types or promote hybrid items into the team tracker.

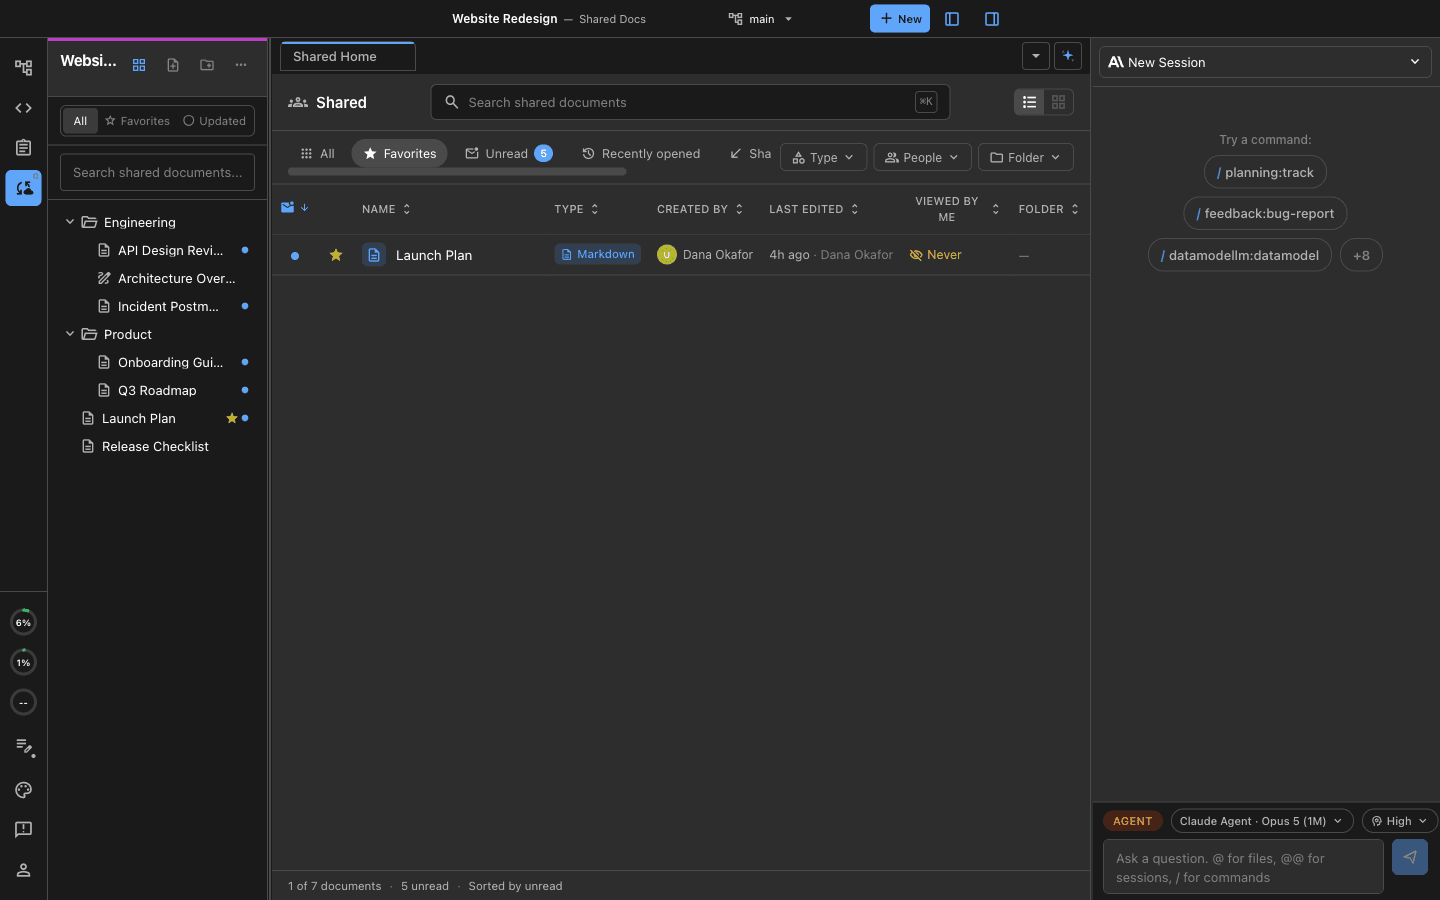
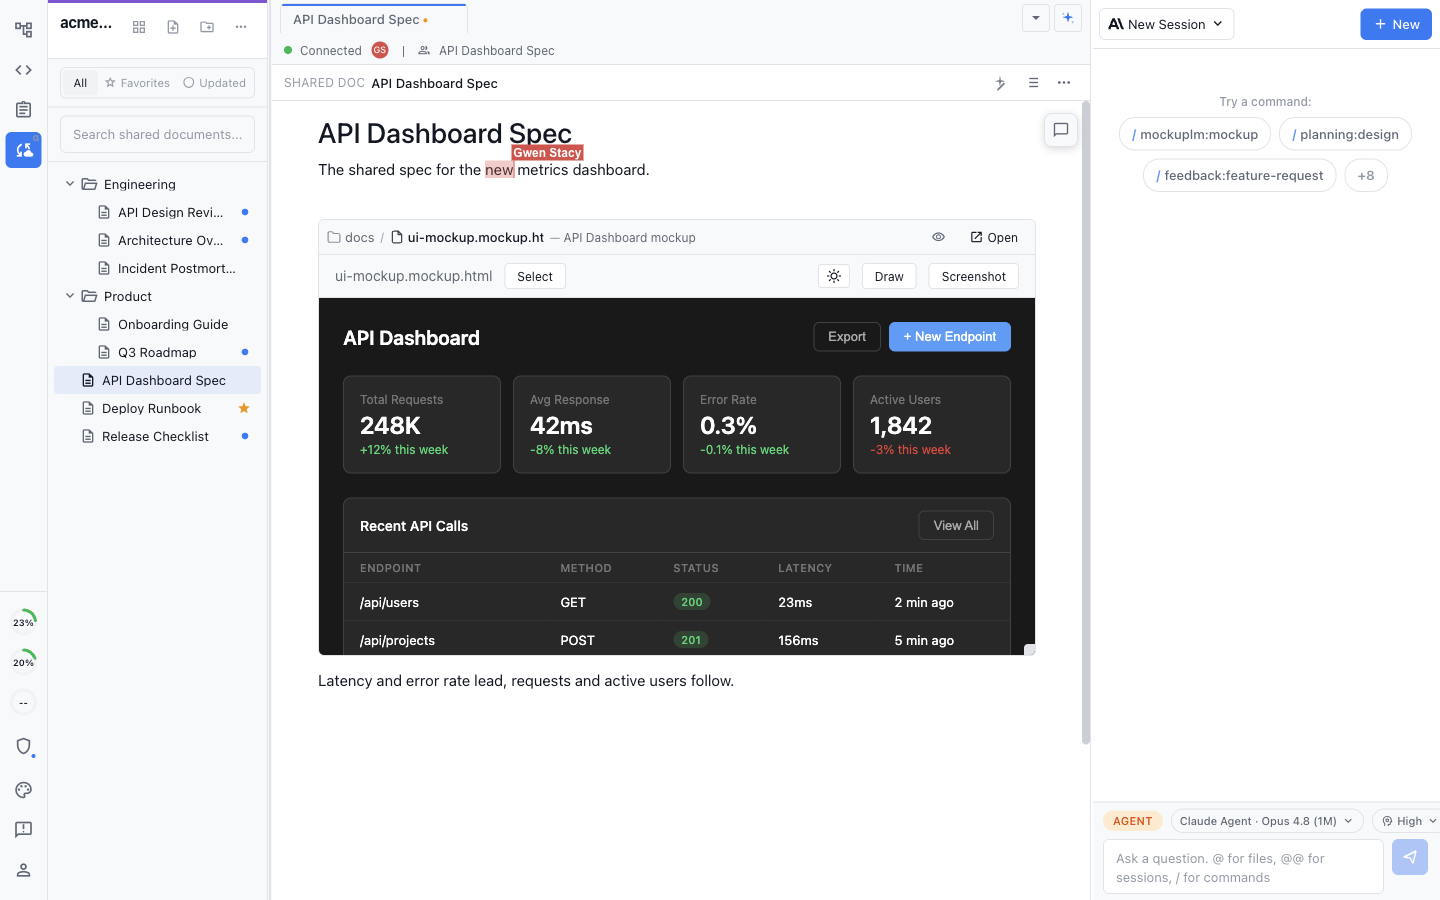
<figure><img src="/files/NzxPYJEjihBizU3unfJM" alt="A shared planning document with teammate presence avatars and a live labeled cursor"><figcaption><p>Once the team is connected, people and their agents can work together in the same shared documents and trackers.</p></figcaption></figure>

See [Set Up Nimbalyst Teams and Organizations](/team-collaboration/setup-teams-and-orgs) for the complete settings flow and [Team Collaboration Overview](/team-collaboration/overview) for how local and shared work fit together.

### Mobile App

Manage your AI coding agents on the go with the Nimbalyst Mobile App.

* **Session Dashboard** — see all active, completed, and paused sessions at a glance
* **Diff Review** — swipe through file changes with red/green diffs optimized for mobile
* **Resume & Reassign** — resume stalled sessions with a voice note or typed instruction from your phone
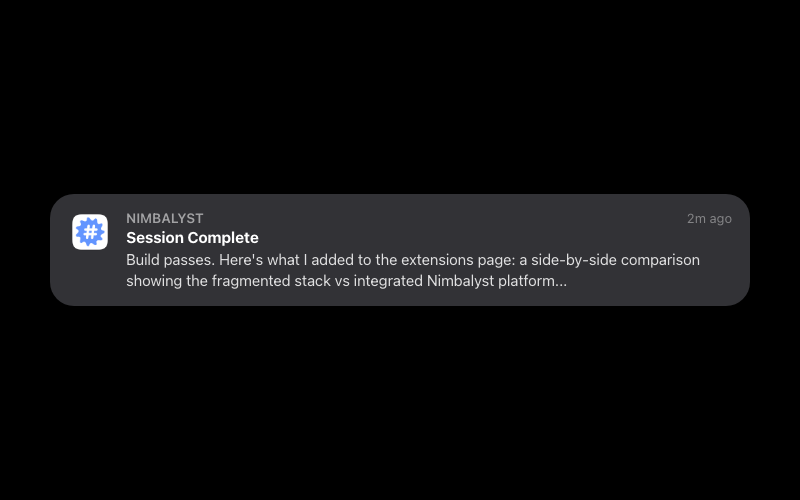
* **Push Notifications** — get notified when sessions complete, hit errors, or need approval
* **Desktop Sync** — changes approved on mobile appear instantly on desktop
* **All Agents** — manage Claude Code and Codex sessions from one app

See the full [mobile-app.md](/mobile/mobile-app) docs for details.

### Shortcuts

* Click Help -> Shortcuts or enter Command / to see a list of shortcuts for Nimbalyst
* **Cmd+O** — Open Unified Quick Open in the Files tab, then switch tabs for content search, sessions, prompts, projects, and trackers
* **Cmd+K** — Agent Mode
* **Cmd+E** — Files Mode
* **Cmd+N** — New File/Session
* **Cmd+Shift+N** — New AI session from any mode
* **Cmd+Shift+K** — Session Kanban board
* **Cmd+\[** / **Cmd+]** — Jump between tabs
* **Cmd+Shift+V** — Force-paste as plain text

### 15-minute guided quickstart

Learn Nimbalyst by doing real work in about 15 minutes. Product managers, founders, and designers finish with a working brief and an embedded mockup. Developers finish with a run-and-test guide, an embedded architecture diagram, and two agents running in parallel.

Open a workspace in Nimbalyst, start a new chat, and paste this prompt:

```
Fetch https://raw.githubusercontent.com/nimbalyst/skills/main/skills/getting-started/quickstart.md, save it to nimbalyst-quickstart/quickstart.md in this workspace, then run it as the Nimbalyst quickstart. Wait for me at every exercise.
```

The agent will save the quickstart in your workspace, help you choose the product or engineering track, and wait for you at each exercise. Everything it creates stays under `nimbalyst-quickstart/`, so you can remove the folder afterward if you do not want to keep the results.

The [Nimbalyst quickstart on GitHub](https://github.com/nimbalyst/skills/blob/main/skills/getting-started/quickstart.md) is the source of truth.

### Nimbalyst Teams, step by step

To go further than the setup checklist above, [Nimbalyst Teams: Step by Step](/team-collaboration/teams-tutorial) walks the whole thing in seven steps, with a screenshot for each: signing in, creating an organization and inviting people, what your teammate receives, shared trackers, shared documents, and working alongside teammates who are in the browser rather than the desktop app.


# Major Bugs, Outages, Feedback, Discord, Support, Releases

Where to report Nimbalyst bugs, check current outage status, join the Discord community, reach the support team, and follow new releases.

### Major Bugs and Outages:

* All Clear

### Discord

* Join our [Discord Server ](https://discord.gg/FgD9S2MCYB)to find community, hear updates, discuss use cases,

### Support

* Email <support@nimbalyst.com>

### In App Feedback

* Click the feedback icon
*

```
<figure><img src="../.gitbook/assets/image (19).png" alt=""><figcaption></figcaption></figure>
```

* Use the embedded skills to report a bug or request a feature

  <figure><img src="/files/9uulcc3o4xBnINzf2yA5" alt=""><figcaption></figcaption></figure>

### GitHub

Nimbalyst is open source. Browse the code, star the repos, or contribute at <https://github.com/nimbalyst>.

* Submit your feature requests and bug reports here: <https://github.com/Nimbalyst/nimbalyst/issues>
* Pull requests welcome — see the contributing guide in the main repo

### X and LinkedIn

* If you are loving Nimbalyst, please tweet about it and mention @nimbalyst. Follow us there too.
* X: <https://x.com/nimbalyst>
* LinkedIn: <https://www.linkedin.com/company/nimbalyst>
* YouTube: <https://www.youtube.com/@nimbalyst>

### Release Notes?

Please find our Release Notes [here](https://github.com/Nimbalyst/nimbalyst/releases)

Every shipped release is listed on the [Nimbalyst changelog](https://nimbalyst.com/changelog/).


# Markdown (WYSIWYG)

Nimbalyst is a WYSIWYG AI markdown editor. Write visually while plain .md files stay on disk, with agent editing built into the same document.

<figure><img src="/files/3AcX6sq9rIZlUGneEgL3" alt=""><figcaption></figcaption></figure>

### Why Nimbalyst as a Markdown Editor?

* **Fast** - Blazing performance for distraction-free writing
* **Clean UI** - Minimal interface focused on your content
* **Focused** - Dedicated to markdown writing and editing
* **Native Markdown** - True markdown support without compromises
* **WYSIWYG** - See formatted output as you type
* **Delightful** - Smooth, intuitive user experience
* **Unified Content** - Work seamlessly with text, tables, code, lists, and images.
* **AI-Integrated -** Leverage AI and Agents that see your documents to research, write, edit, code

The [markdown editor feature page](https://nimbalyst.com/features/markdown-editor/) has a fuller walkthrough of WYSIWYG editing with agents.

### Important Commands

* **Reference a file in another document or in chat:** @ — supported custom-editor files (mockups, Excalidraw, data models, CSV, etc.) embed as live frames when the link is on its own line. See "Embedding Custom-Editor Files" below.
* **Open the mega-menu of insertion options:** /
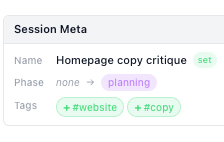
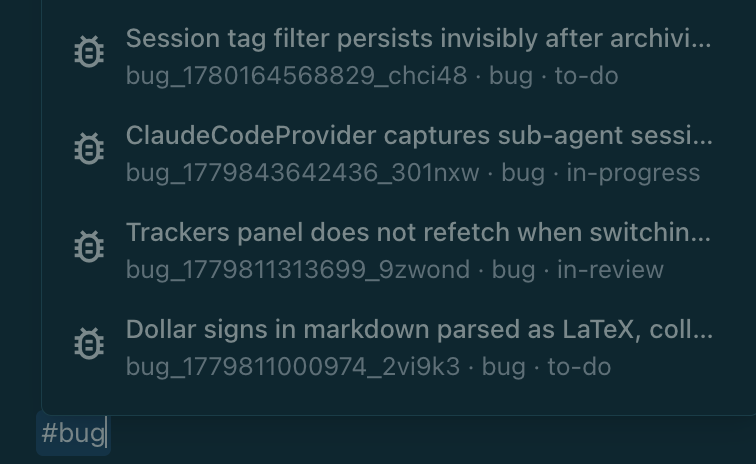
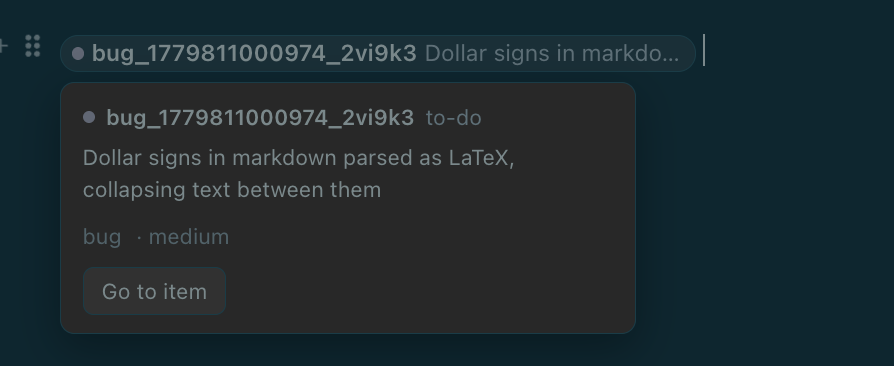
* **Create a tagged bug, idea, plan:** #
* **Text selection toolbar** appears when you select text, providing quick formatting options.
* **Markdown formatting and commands are supported**

<figure><img src="/files/0PzRCHU1Zdqo1ZwmaC0w" alt=""><figcaption></figcaption></figure>

### File and Editor View

Work with your markdown files, edit the documents in WYSIWIG

<figure><img src="/files/HKc2LYDUY6t1Zti7MlBQ" alt=""><figcaption></figcaption></figure>

### WYSIWIG Markdown

Toggle between Markdown and WYSIWIG using the 3 dots at the upper right of the document

<div align="left"><figure><img src="/files/FI3CtFJrh6g2QgYAWmmr" alt="" width="227"><figcaption></figcaption></figure></div>

### Text

Some basic markdown commands

* **Headings:** # followed by space for H1, ## followed by space for H2
* **Lists:** - or \* followed by space, Tab to indent
* **Numbered Lists:** 1 followed by space
* **Links:** Select text and select link icon in toolbar
* **Quotes:** Type > followed by space. Nest by typing >>
* **Code Blocks:** Type / and insert
* **Horizontal Rule:** Type ---
* **Markdown Text Formatting:** Supported

### Tables

![](/files/j3UPp2QcjiArxVozXV9B)

**Create a table by typing /**

<div align="left"><figure><img src="/files/tTheQcCOGyLU03G7In7z" alt="" width="286"><figcaption></figcaption></figure></div>

Format Table by clicking on down arrow

<div align="left"><figure><img src="/files/zczxMSQ6wdhssXdoVZkI" alt="" width="259"><figcaption></figcaption></figure></div>

### Embedding Custom-Editor Files

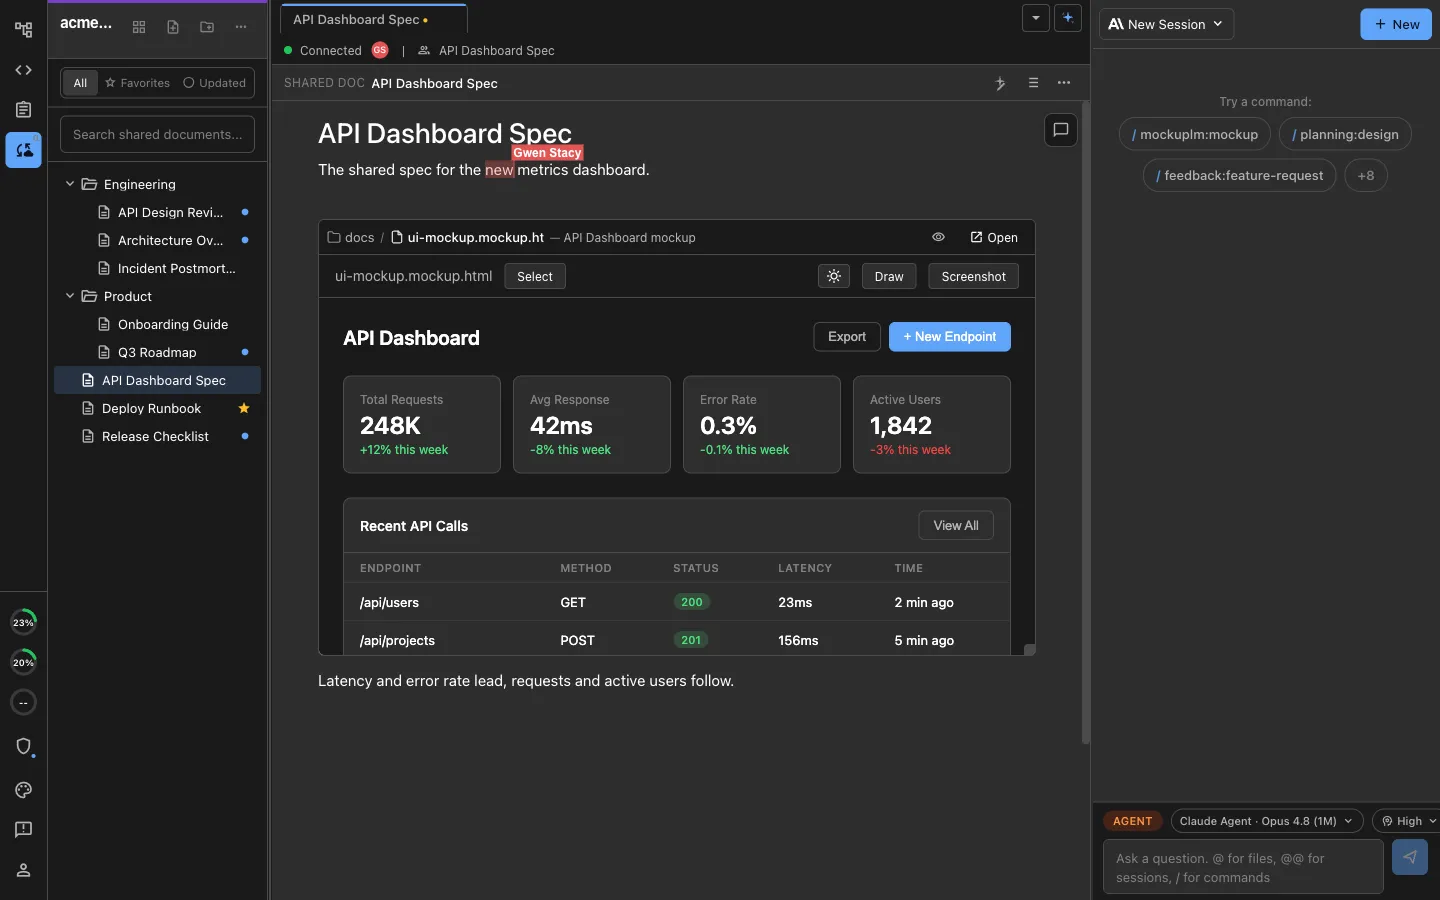
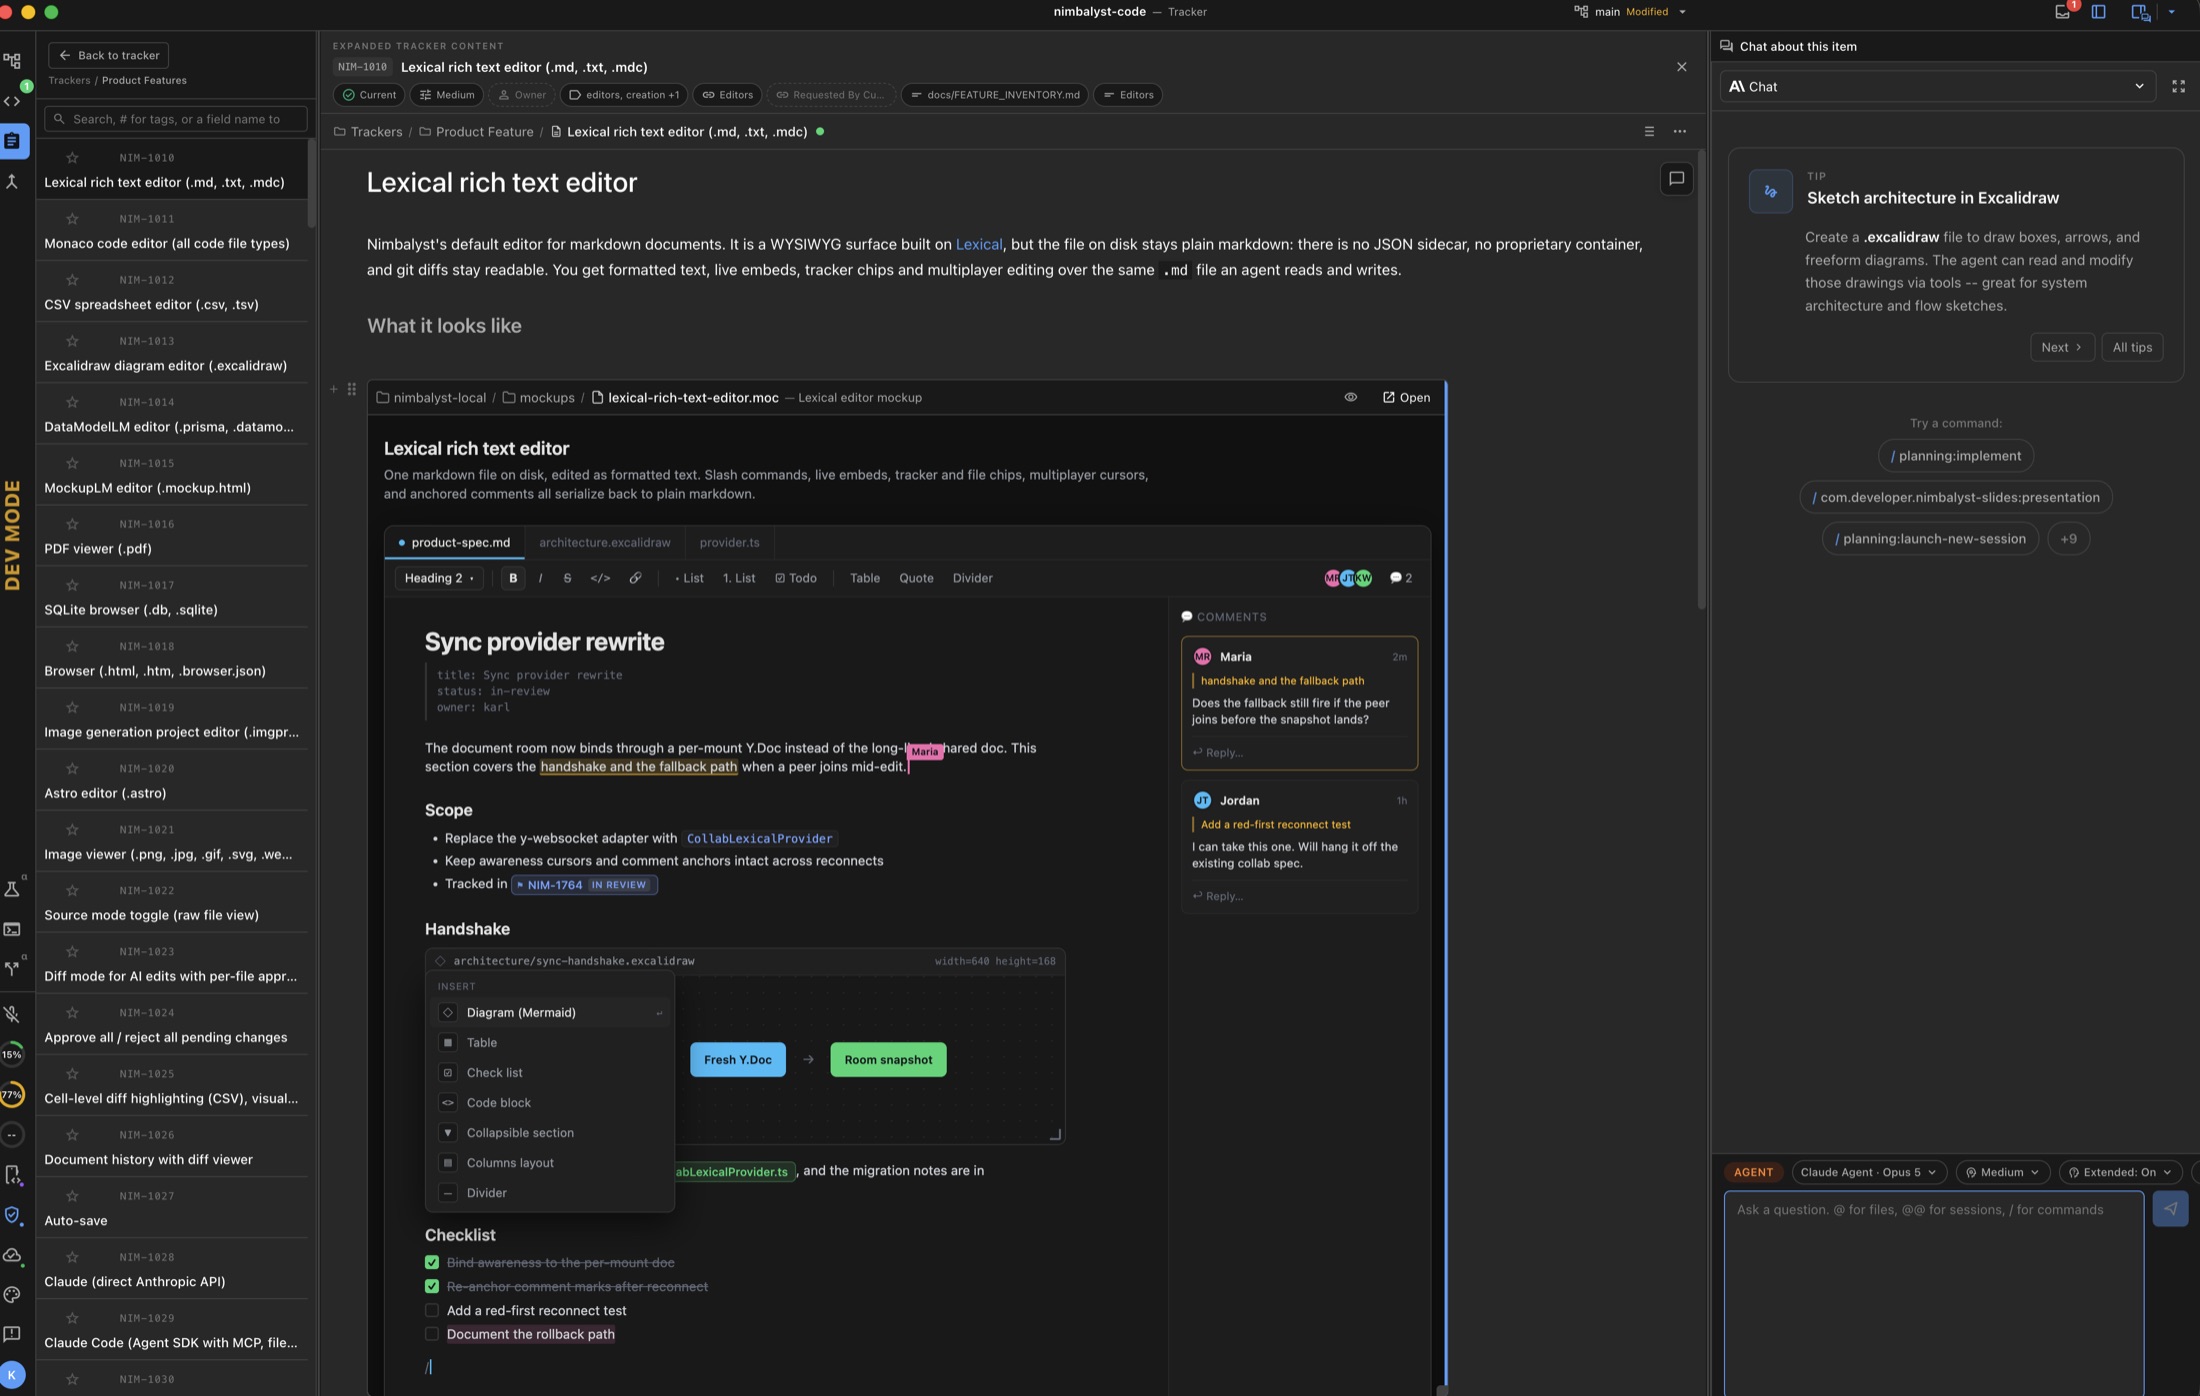
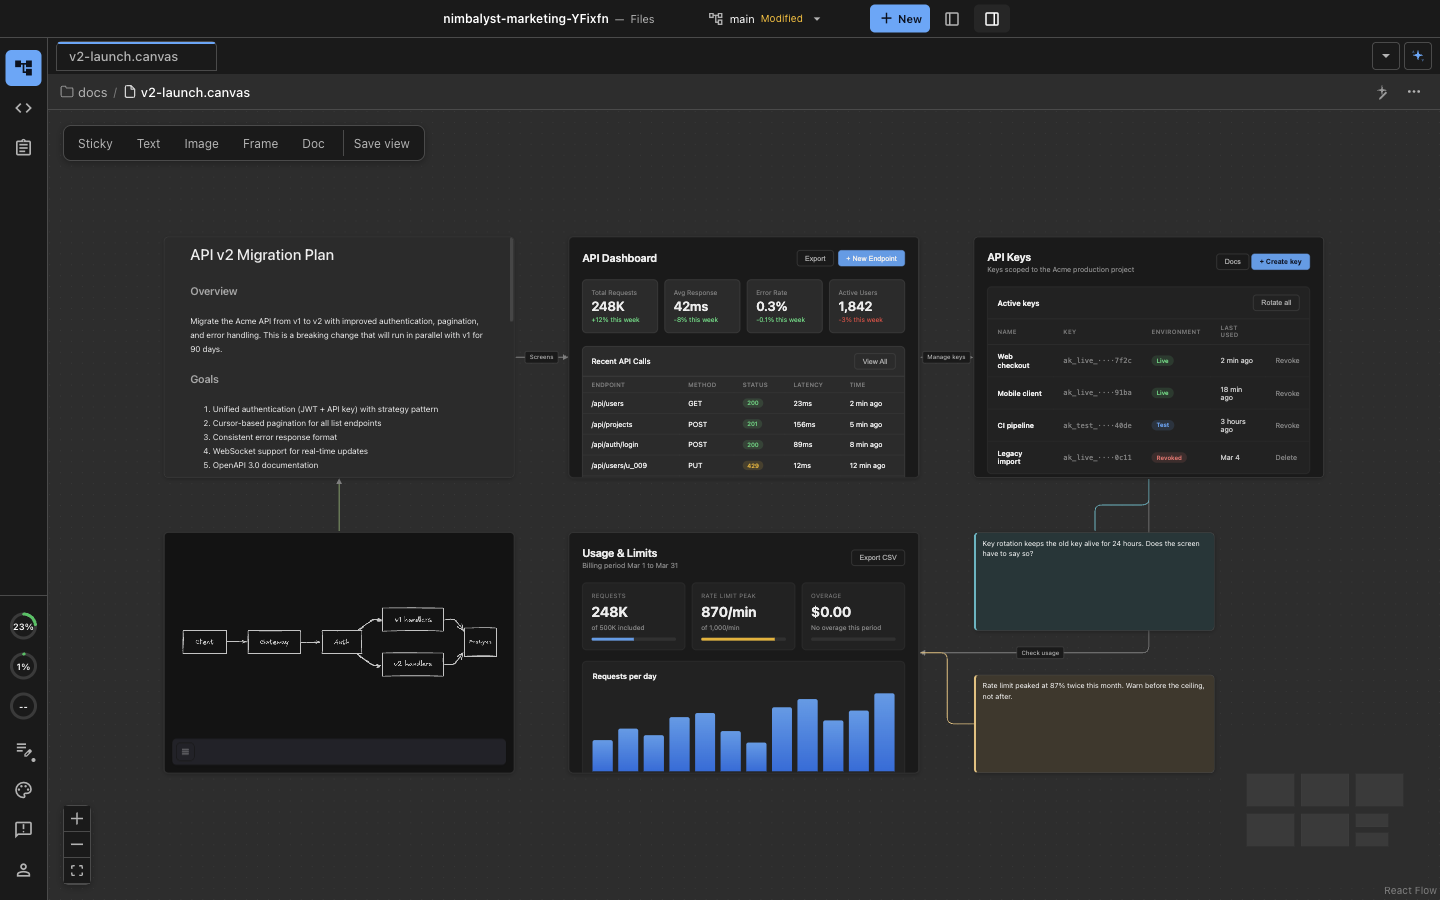
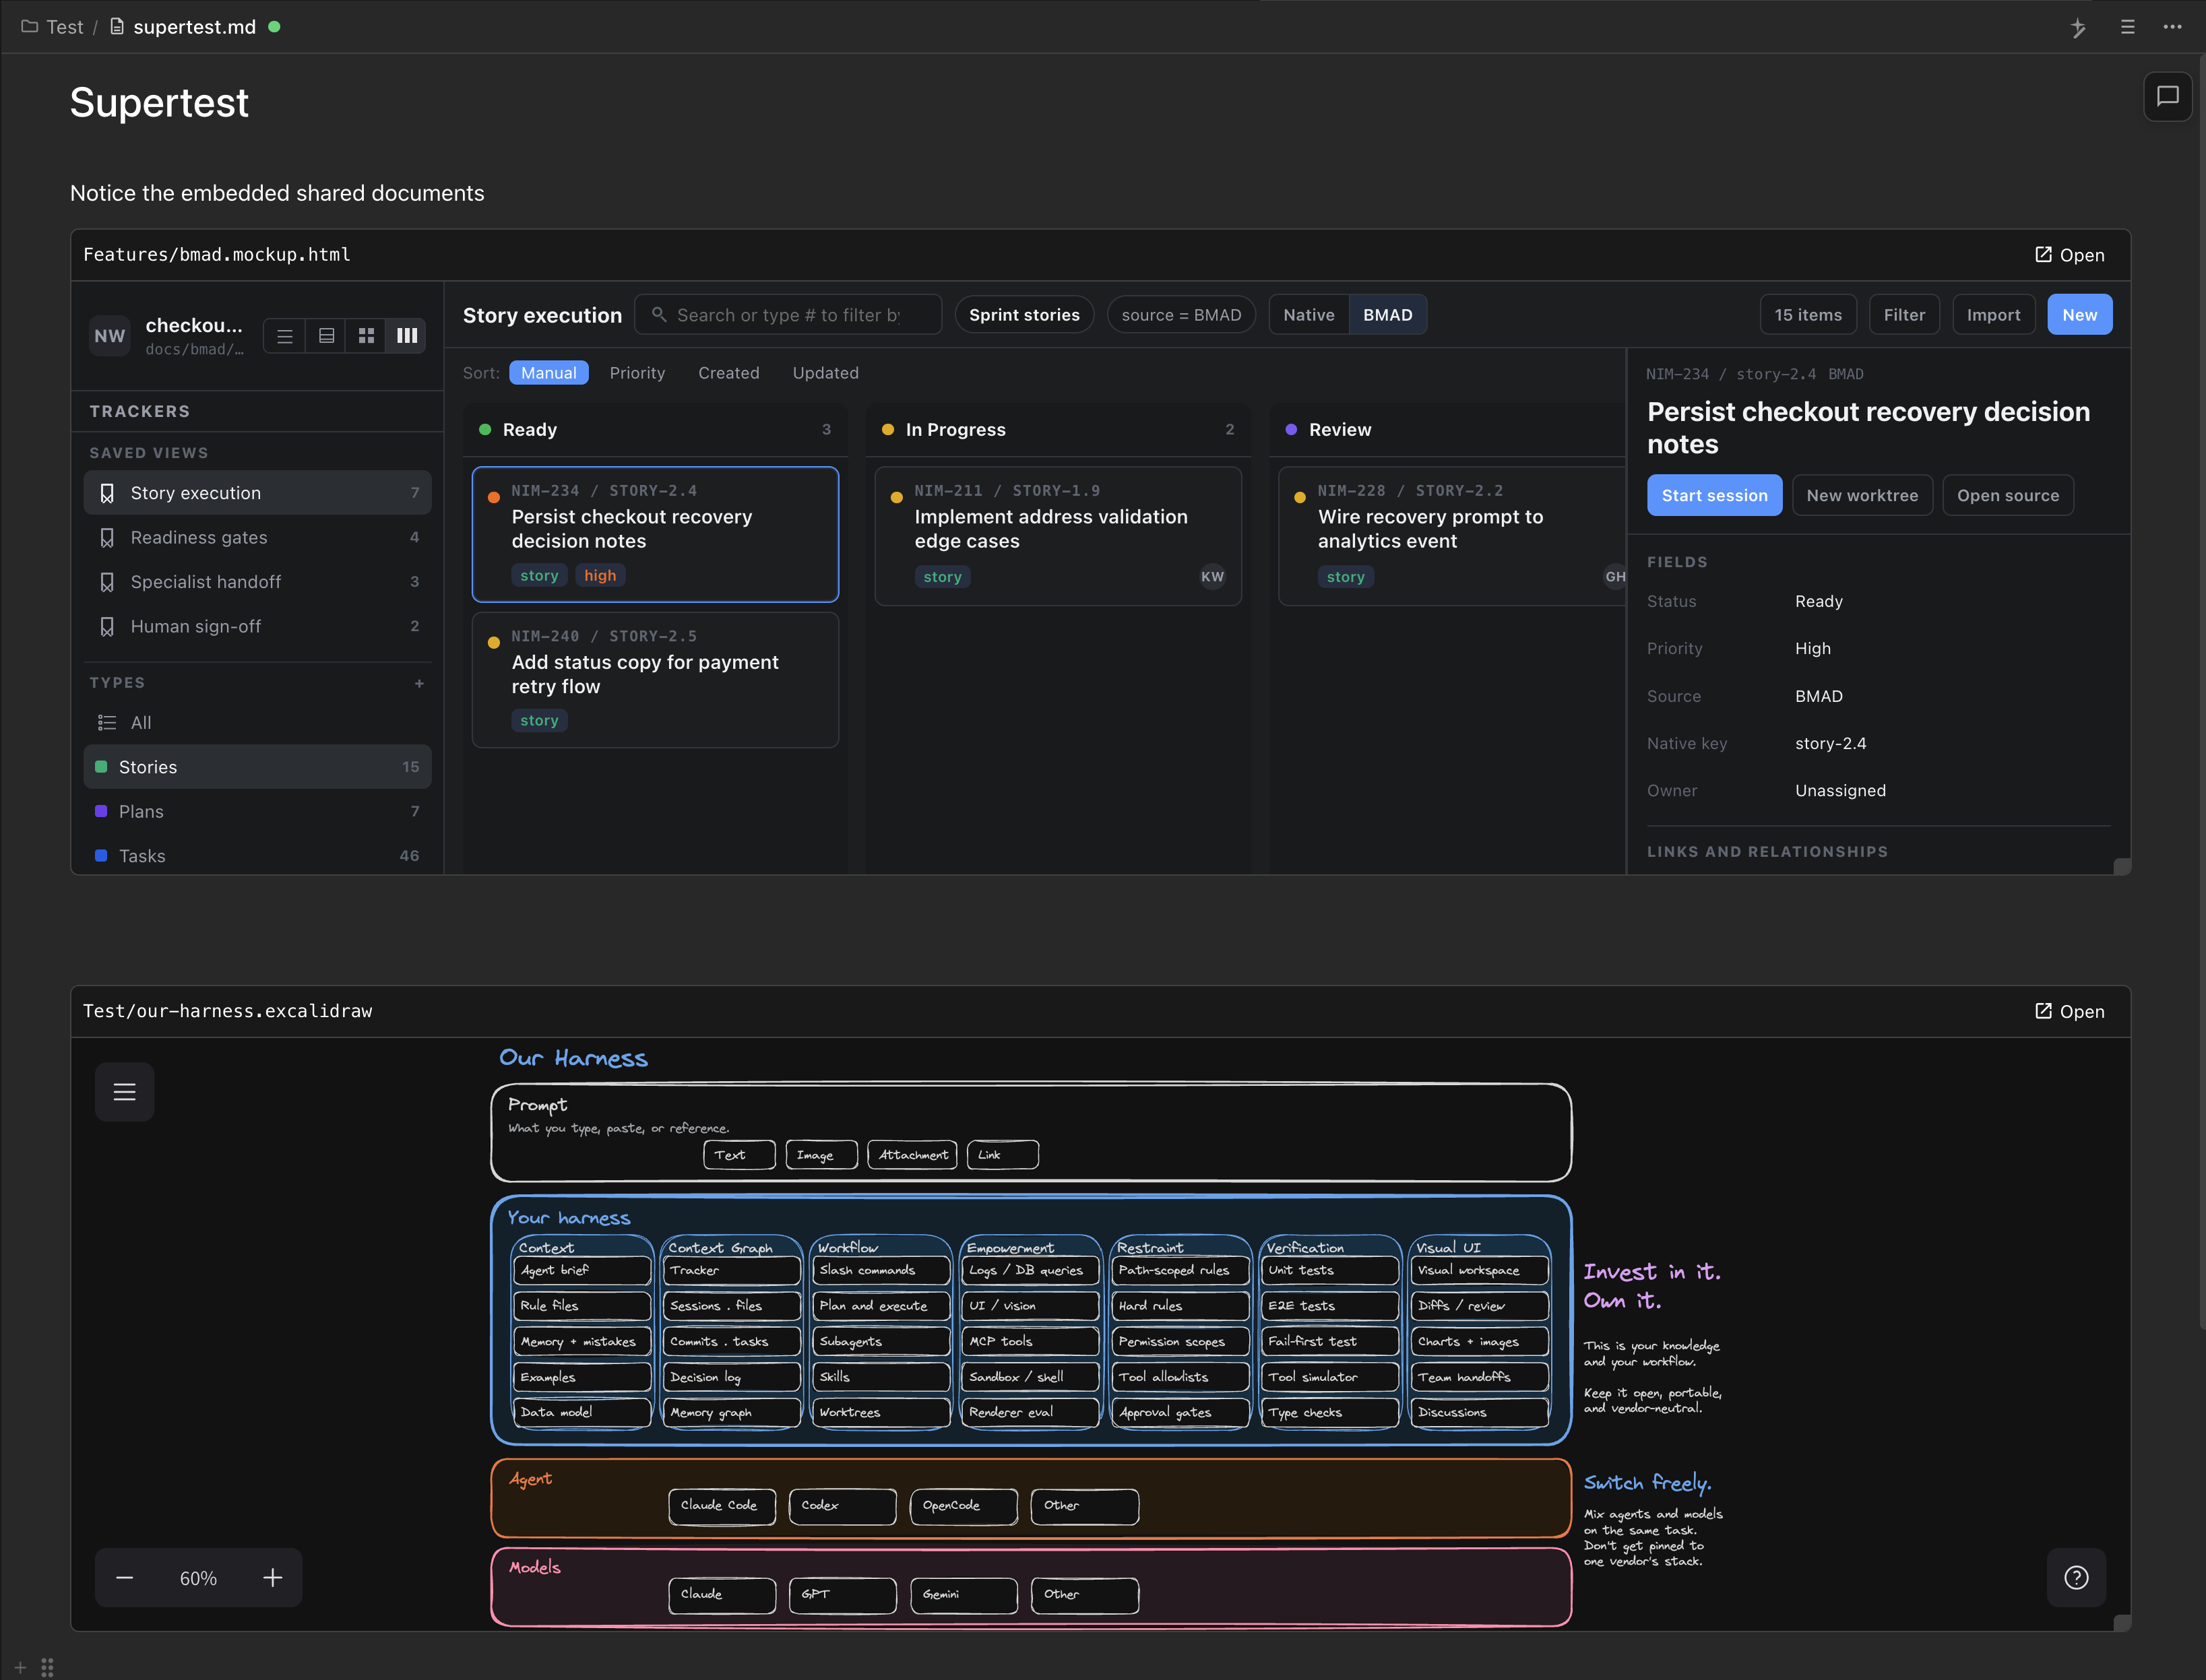
A markdown document can render other workspace files inline as live frames. Drop a link to a file like `.mockup.html`, `.excalidraw`, `.datamodel`, `.csv`, or any other custom-editor file on its own line and Nimbalyst upgrades it into an embedded editor in WYSIWYG view.

<figure><img src="/files/MCi0dxFgWGTBJaV9WNAs" alt="A markdown spec with a mockup and an Excalidraw diagram embedded inline below their @-references"><figcaption><p>A markdown spec with a mockup and an Excalidraw diagram embedded inline.</p></figcaption></figure>

How it works:

* Type `@` to pick a file. If the file is a supported custom-editor type and the link ends up alone in its own paragraph, it auto-upgrades to an inline embed.
* You can also paste a normal markdown link like `[my mockup](./docs/api.mockup.html)` on its own line.
* The embedded frame is the real editor for that file. Edit it in place and the change saves back to the file on disk.
* Multiple users see embedded edits stream in live when the document is shared.

Switch to raw Markdown view (the three dots at the top right) to see the underlying link. The link round-trips: write a link in raw view, switch to WYSIWYG, and it becomes a live frame.

### AI Editing in Shared Collaborative Documents

When you are editing a shared document in collaboration mode, the right-pane chat sees and edits the active document the same way it does in Files mode. Edits route through Yjs, so other connected users see them stream in live. The familiar accept/reject bar appears for pending AI edits, just like in single-user editing.

You don't need to do anything special to turn this on — open a shared document, ask the agent to edit it, and the changes flow into the document for everyone in the session.

### Anchor Links to Headings

Clicking a Markdown anchor link like `[Section](#section)` in a Lexical document scrolls the document to the matching heading.

### Export to PDF

Markdown documents export to PDF with the document title and an outline generated from your headings. Exported files are bookmarked at each heading and the title shows up in PDF readers.

### Undo/Redo Stack

Nimbalyst enables you to undo and redo your edits

* Cmd+Z to Undo
* Cmd+Option+Z to Redo


# Find & Replace and ToC

Use Cmd+F find and replace plus the auto-generated table of contents to move around long markdown documents in Nimbalyst without scrolling.

### Find & Replace

Type Cmd-F to Find or Find and Replace

![](/files/JBtcWkBZSqfLkvTCgUqZ)

### Table of Contents

Auto-Generated TOC based on document headings

Click a heading to jump to that section.

<div align="left"><figure><img src="/files/TGldjgASVTk3h1krDoxL" alt="" width="287"><figcaption></figcaption></figure></div>

More editor features are on the [markdown editor page](https://nimbalyst.com/features/markdown-editor/).


# AI Editing, Red/Green Diff, Approval

How AI editing works in Nimbalyst documents. The agent proposes changes as a red and green diff, and nothing is written until you approve it.

<figure><img src="/files/szVDnFas4avzmTZn68KC" alt=""><figcaption></figcaption></figure>

### AI-Powered Editing

Reviewing agent changes visually rather than in a terminal is covered on the [agent integration page](https://nimbalyst.com/features/agent-integration/).

#### Agent Panel

Runs on the right rail in your document/file view

<div align="left"><figure><img src="/files/8DYTzPmJIAXKqo2HHo6K" alt="" width="375"><figcaption></figcaption></figure></div>

* Open the AI panel by clicking the AI icon or Cmd+Shift+A toggles panel
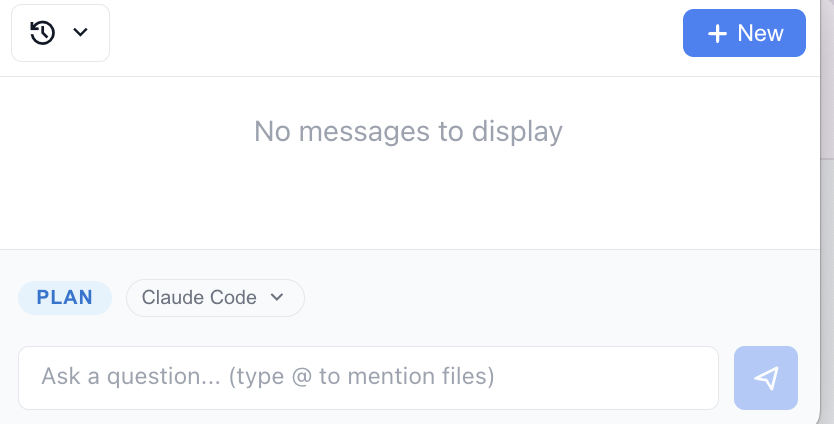
* Select an AI provider from the dropdown and type your message
* Click on New message to change context. This starts a new Session.
* Paste attachments or images into the chat

#### **Chat**

* You can Chat in the Agent panel without editing your document
* Use this to research, explore, learn

#### **Requesting Edits**

* You can ask AI to modify your document
* "Add a section about X"
* "Rewrite this paragraph"

#### **Streaming Edits:**

* Changes appear as they are ready
* Visual diff shows additions/deletions
* Toolbar appears for review

#### Plan Mode and Agent Mode

* Plan mode limits the Agent to editing markdown and create markdown files
* Agent mode gives the full power of the agent
* Click on the Plan or Agent icon to toggle modes<br>

### Red/Green Diff

<figure><img src="/files/dhSCGciKmXP76O3xMuir" alt=""><figcaption></figcaption></figure>

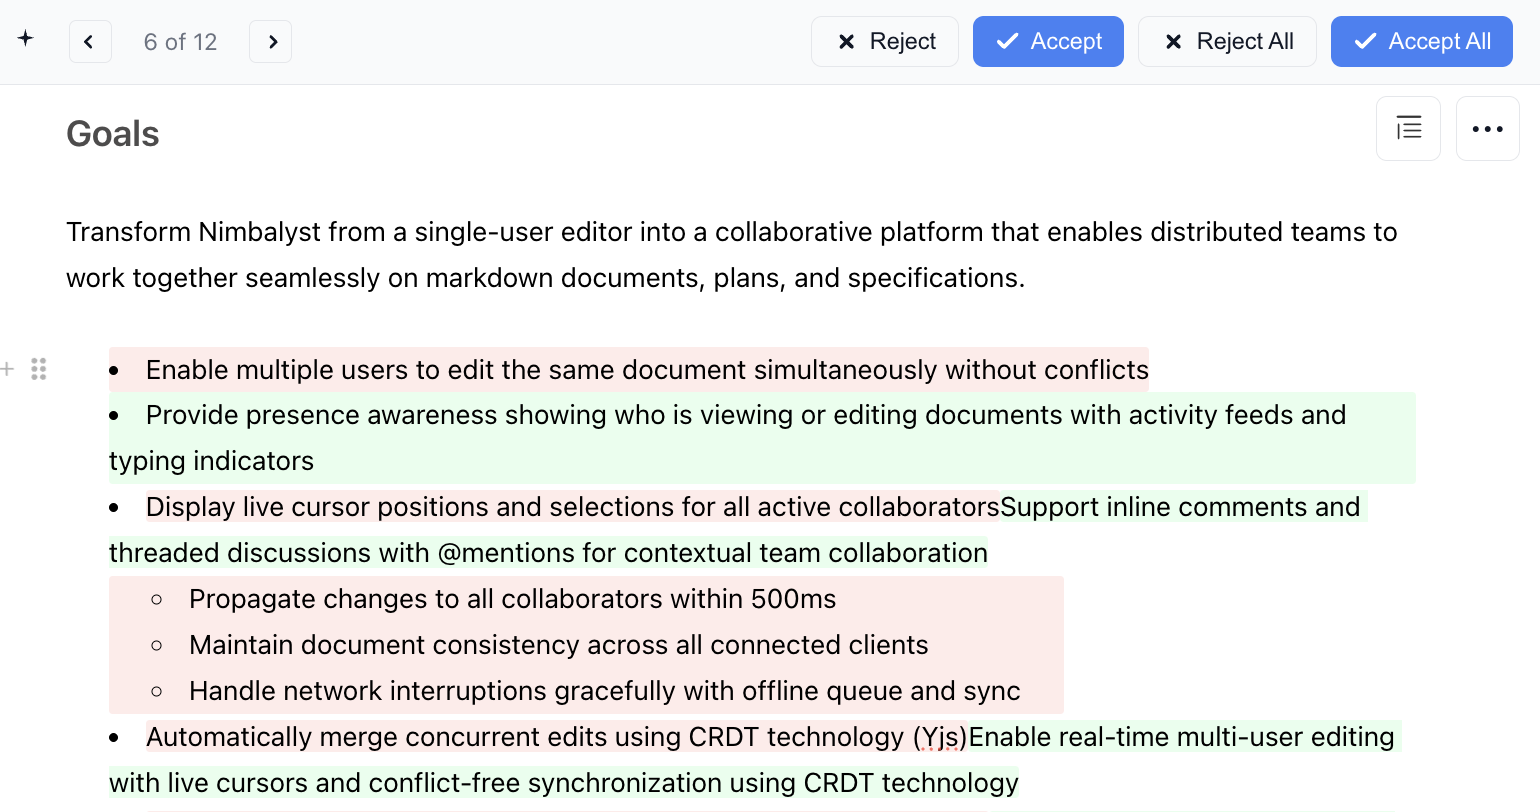
* Shows changes made by the AI to the document
* Enables Keep/Undo of all changes or one by one
* Clicking on change or arrow selects that change and takes you to it

### Agent Context & Conversations

#### **The Agent is passed and understands the following context:**

* Document context: Current file content
* Workspace context: File tree, related files
* Session context: Conversation history

#### When conversing with the Agent

* AI automatically includes the open document
* You can reference other files by name by typing @
* You can include images and code snippets in messages

#### **Best Practices:**

* Be specific about context needs
* "Looking at the function in file.ts..."
* Include relevant code/text in message

#### Context Window

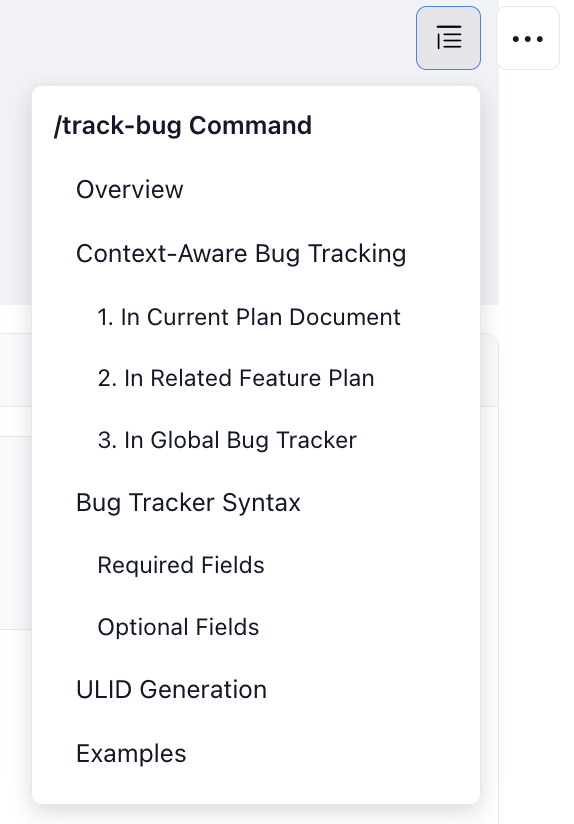
The 18k/200K Tokens indicats how many words/tokens can fit in this chat session. When you get close to 100%, make sure to hit +New and create a new session.

<div align="left"><figure><img src="/files/GOvagULZIZjdSwsU7wLH" alt=""><figcaption></figcaption></figure></div>

### AI Tool Calls

AI can invoke tools to perform actions beyond text generation.

#### **Available Tools:**

* File operations (read, write, search)
* Code analysis and execution
* Web search and research
* Data processing

\
Tool results shown in chat with special formatting.

#### Show Tool Calls in Chat

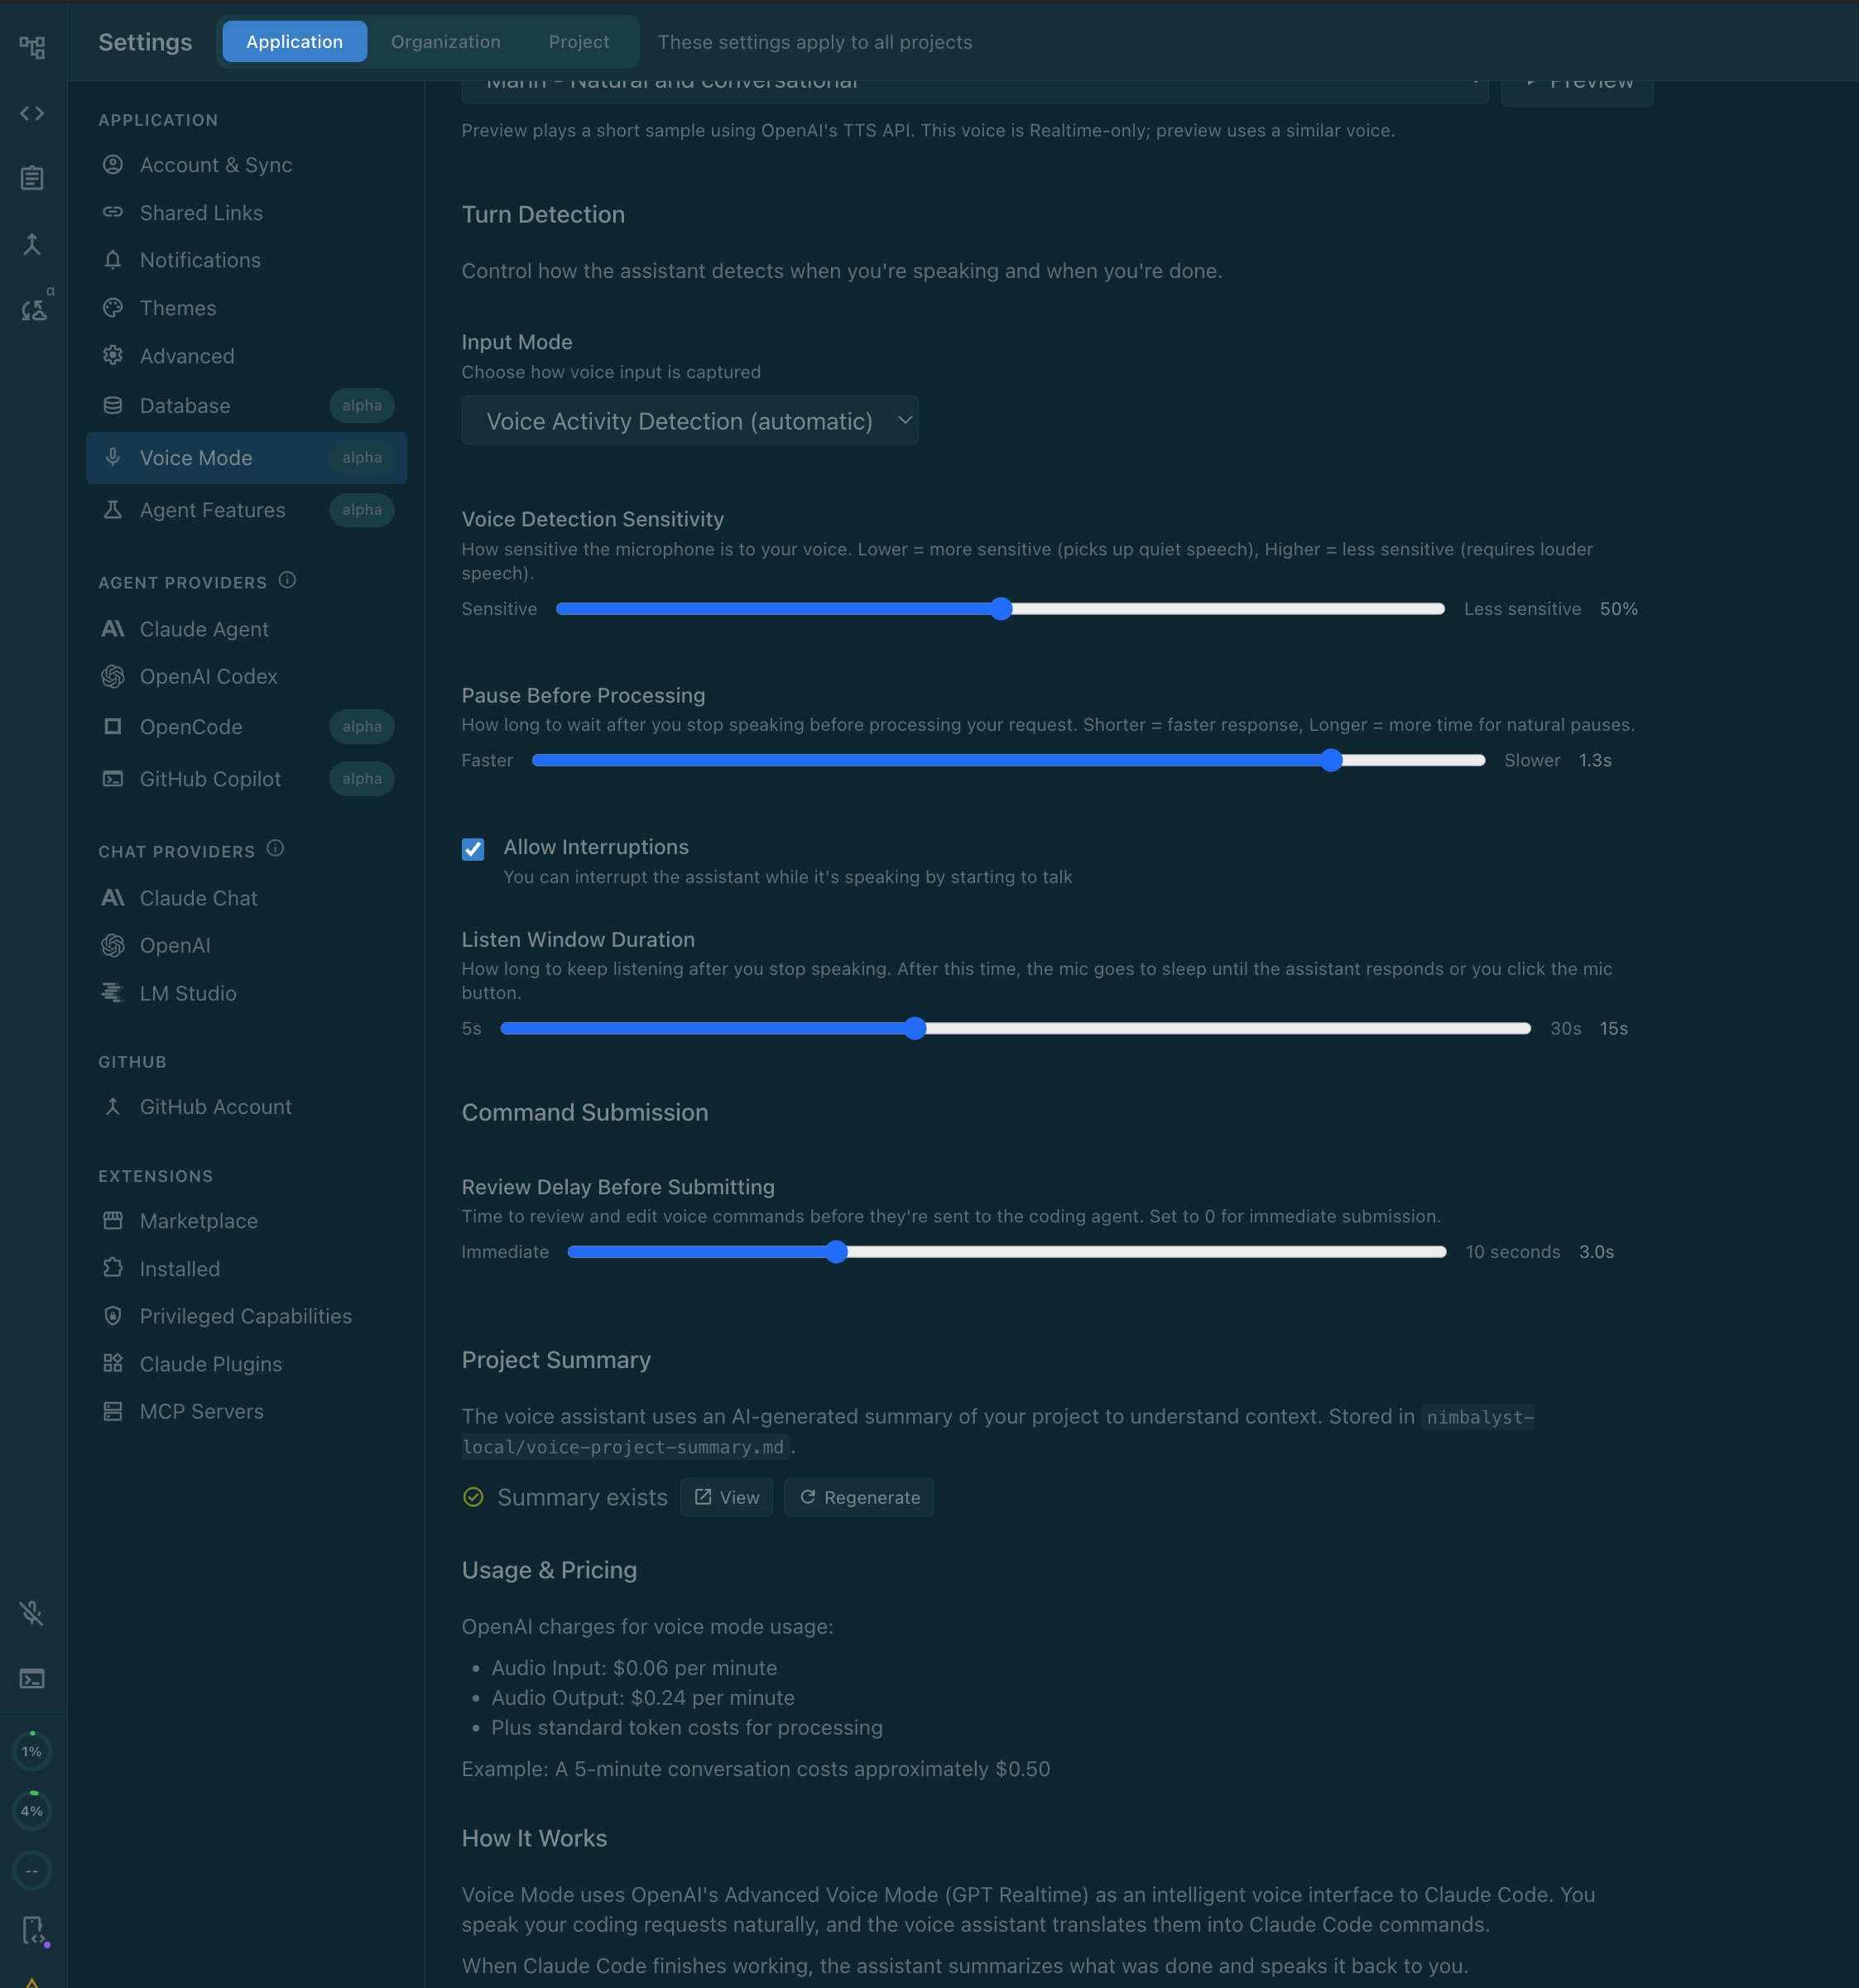
By default, every tool call the agent makes appears as a row in the transcript. To hide them entirely (not just collapse them), turn off **Show Tool Calls in Chat** under **Settings > Application > Agent Features**. Interactive prompts — permission requests, plan-mode exits, commit proposals, AskUserQuestion, PromptForUserInput — still appear so you can always respond.

<br>


# Mermaid Diagrams and Images

Insert and edit Mermaid diagrams and images inside Nimbalyst markdown documents, by hand or by asking your AI agent to generate the syntax.

### Mermaid Diagrams

<figure><img src="/files/CHKeidOALSft5QzbhYIw" alt=""><figcaption></figcaption></figure>

Manually: Insert the Mermaid Diagram in WYSIWIG mode and click edit to manually edit the mermaid syntax

With AI: Ask AI to create a Mermaid Diagram. Then Edit it manually or iterate on it with AI.

See the [diagrams feature page](https://nimbalyst.com/features/diagrams/) for how teams use Mermaid and Excalidraw together, and [architecture diagrams](https://nimbalyst.com/use-cases/architecture-diagrams/) for a worked example.

**Diagram Types Include**

* Flowchart
* Sequence diagram
* Gantt chart
* Class diagram
* State diagram
* Entity relationship

### Images

<div align="left"><figure><img src="/files/v2AeO8zQDB9Iw5fltPxF" alt="" width="375"><figcaption></figcaption></figure></div>

Nimbalyst enable support for images by storing the image in an assets folder in the same directory as the markdown file with a link to the image's location in the markdown file.

You can paste or insert an image and resize it\ <br>


# Mockups

Build HTML mockups in Nimbalyst using your docs, code, and sessions as context, then hand the same mockups to your agent to implement.

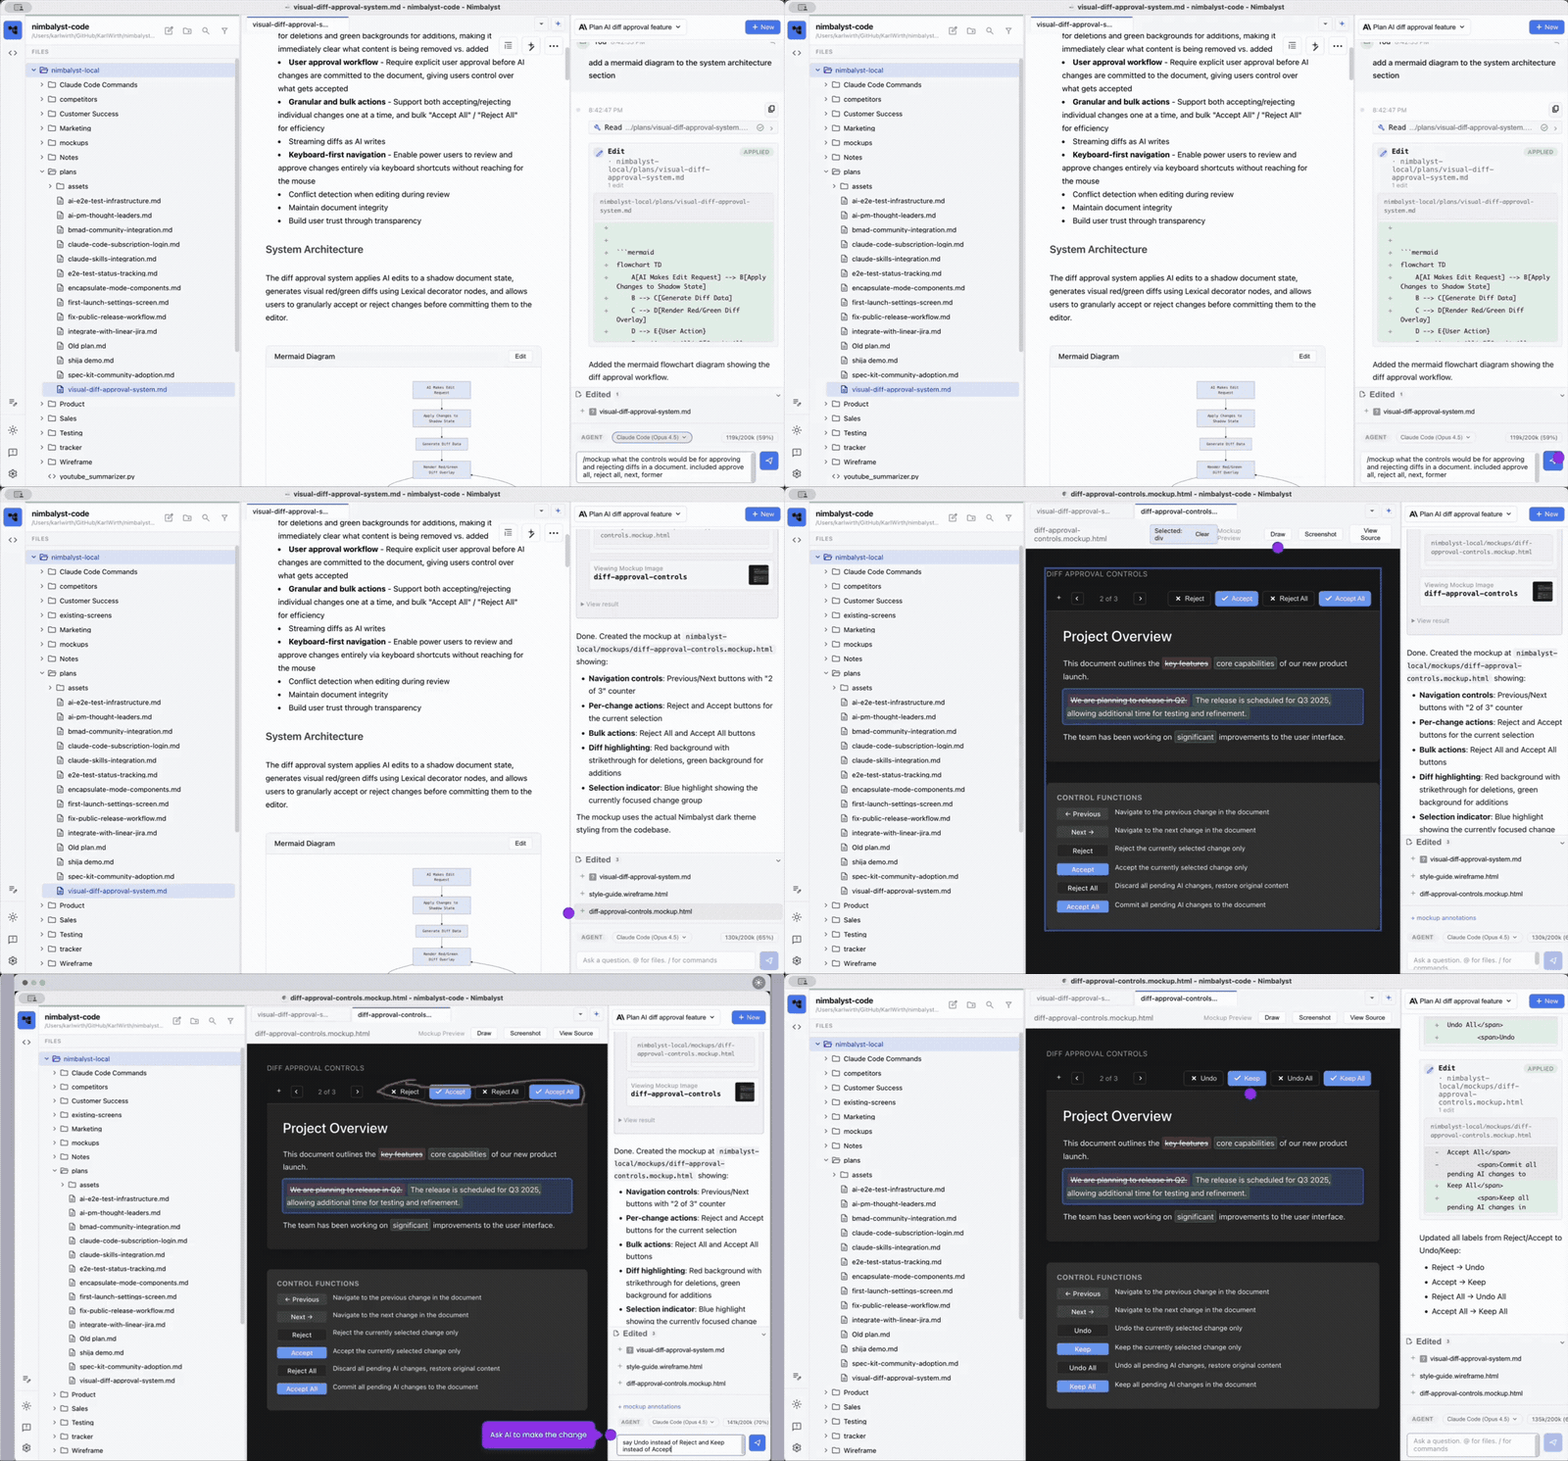
Use all your context (docs, sessions, code) to build your mockups with your coding agent.

Use your mockups and docs to build your code. No copy/paste needed.

See the [mockups feature page](https://nimbalyst.com/features/mockups/) for how mockups feed back into implementation, and [UI mockups](https://nimbalyst.com/use-cases/ui-mockups/) for a full example.

<figure><img src="/files/cM5WGjvJ5EDMbfZVFkXJ" alt=""><figcaption></figcaption></figure>

### Create a Mockup

Create the Mockup

* Select New -> New Mockup
* or type /mockup in the chat

Describe the Mockup you want created

* In the Agent chat, describe the mockup you want created
* Reference documents with the @ command
* Include images or screenshots into the agent chat

### Edit the Mockup

Open the mockup in the mockup editor (by clicking on it)

<figure><img src="/files/59r1dWmCxyRbMKg0b2TX" alt=""><figcaption></figcaption></figure>

**Edit it in 3 ways**

* Directly in the html
* By selecting a div and asking the AI to modify it
* By annotating the mockup by drawing on it and then asking AI to modify it

### Multi-Screen Projects

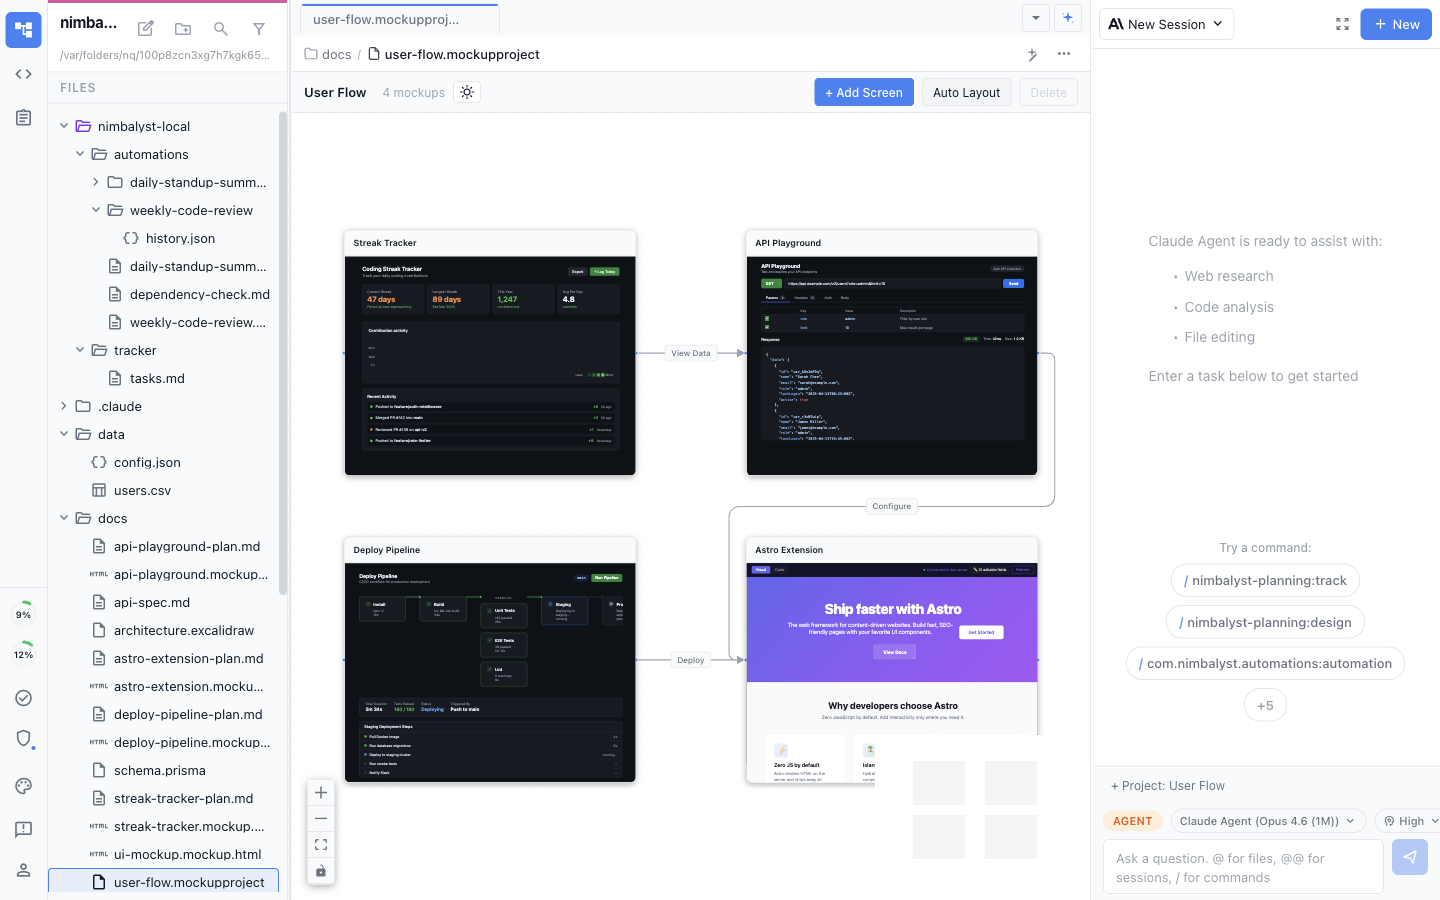
Group multiple mockup screens together to design full flows — checkout, onboarding, settings, whatever spans more than one screen.

<figure><img src="/files/ObYpYVxzB8Yzi4AnxTgd" alt=""><figcaption></figcaption></figure>

**Create a project**

* Select New -> New Mockup Project
* or type /mockup in the chat and describe a multi-screen flow

**On the canvas**

* Drag screens around to arrange them spatially
* Draw connections between screens to show navigation flow, and label the connections (click, hover, navigate)
* Click Add Screen to create a new mockup, or drag an existing .mockup.html in from the file tree
* Click Auto Layout to snap screens into a grid
* Double-click a screen to open it in the mockup editor

**File type and storage**

Projects are stored as .mockupproject files (JSON that references individual .mockup.html files). By default they live in Nimbalyst-Local/Mockups alongside your mockups.

### Insert a Mockup into a Markdown Document

<figure><img src="/files/LAg9u6goS8IXr7AQrvpP" alt=""><figcaption></figcaption></figure>

Select / and then insert a mockup

Click on the mockup to edit it

### Mockup File Type and Storage

Mockups are of file type .mockup.html

By default, they are stored in a Mockups Folder in Nimbalyst-Local, but you can change this.

## Working with the AI

### Tips for Better Results

* **Be specific about layout** -- "Two-column layout with 30% sidebar" is better than "add a sidebar"
* **Reference real products** -- "Style it like the Stripe dashboard" gives the AI a clear design reference
* **Describe interactions** -- "When hovering over a row, show a blue highlight and a delete icon on the right"
* **Iterate in small steps** -- Make one change at a time so you can evaluate each iteration

### What the AI Sees

When you ask the AI to edit a mockup, it:

1. Captures a screenshot of the current rendered mockup
2. Reads the HTML source code
3. Sees any annotations you've drawn
4. Understands which element you've selected (if any)

This multi-modal context means you can give instructions like "make the thing I circled bigger" and the AI understands what you're referring to.

### Design-to-Code Workflow

Mockups are real HTML and CSS, which makes them a useful bridge between design and implementation:

1. **Design in mockups** -- Iterate on the visual design with AI assistance
2. **Review with stakeholders** -- Share the rendered mockup for feedback
3. **Extract patterns** -- Use the mockup's HTML/CSS as a reference when implementing the real UI
4. **Maintain alongside code** -- Keep mockups updated as the product evolves for documentation

## File Format

Mockups use standard HTML with inline CSS. No special build tools or frameworks required.

```html
<div style="font-family: system-ui, sans-serif; max-width: 800px; margin: 0 auto;">
  <header style="padding: 16px; border-bottom: 1px solid var(--nim-border);">
    <h1 style="color: var(--nim-text);">Settings</h1>
  </header>
  <main style="display: flex; gap: 24px; padding: 24px;">
    <nav style="width: 200px;">
      <!-- Sidebar content -->
    </nav>
    <section style="flex: 1;">
      <!-- Main content -->
    </section>
  </main>
</div>
```

Using `var(--nim-*)` CSS variables ensures your mockup adapts to light and dark themes automatically.


# Data Models

Design database schemas visually in Nimbalyst. Build a Prisma-based data model with AI from your existing code and markdown documentation.

<figure><img src="/files/FV1oHQGLUgZTnCjfgDqi" alt=""><figcaption></figcaption></figure>

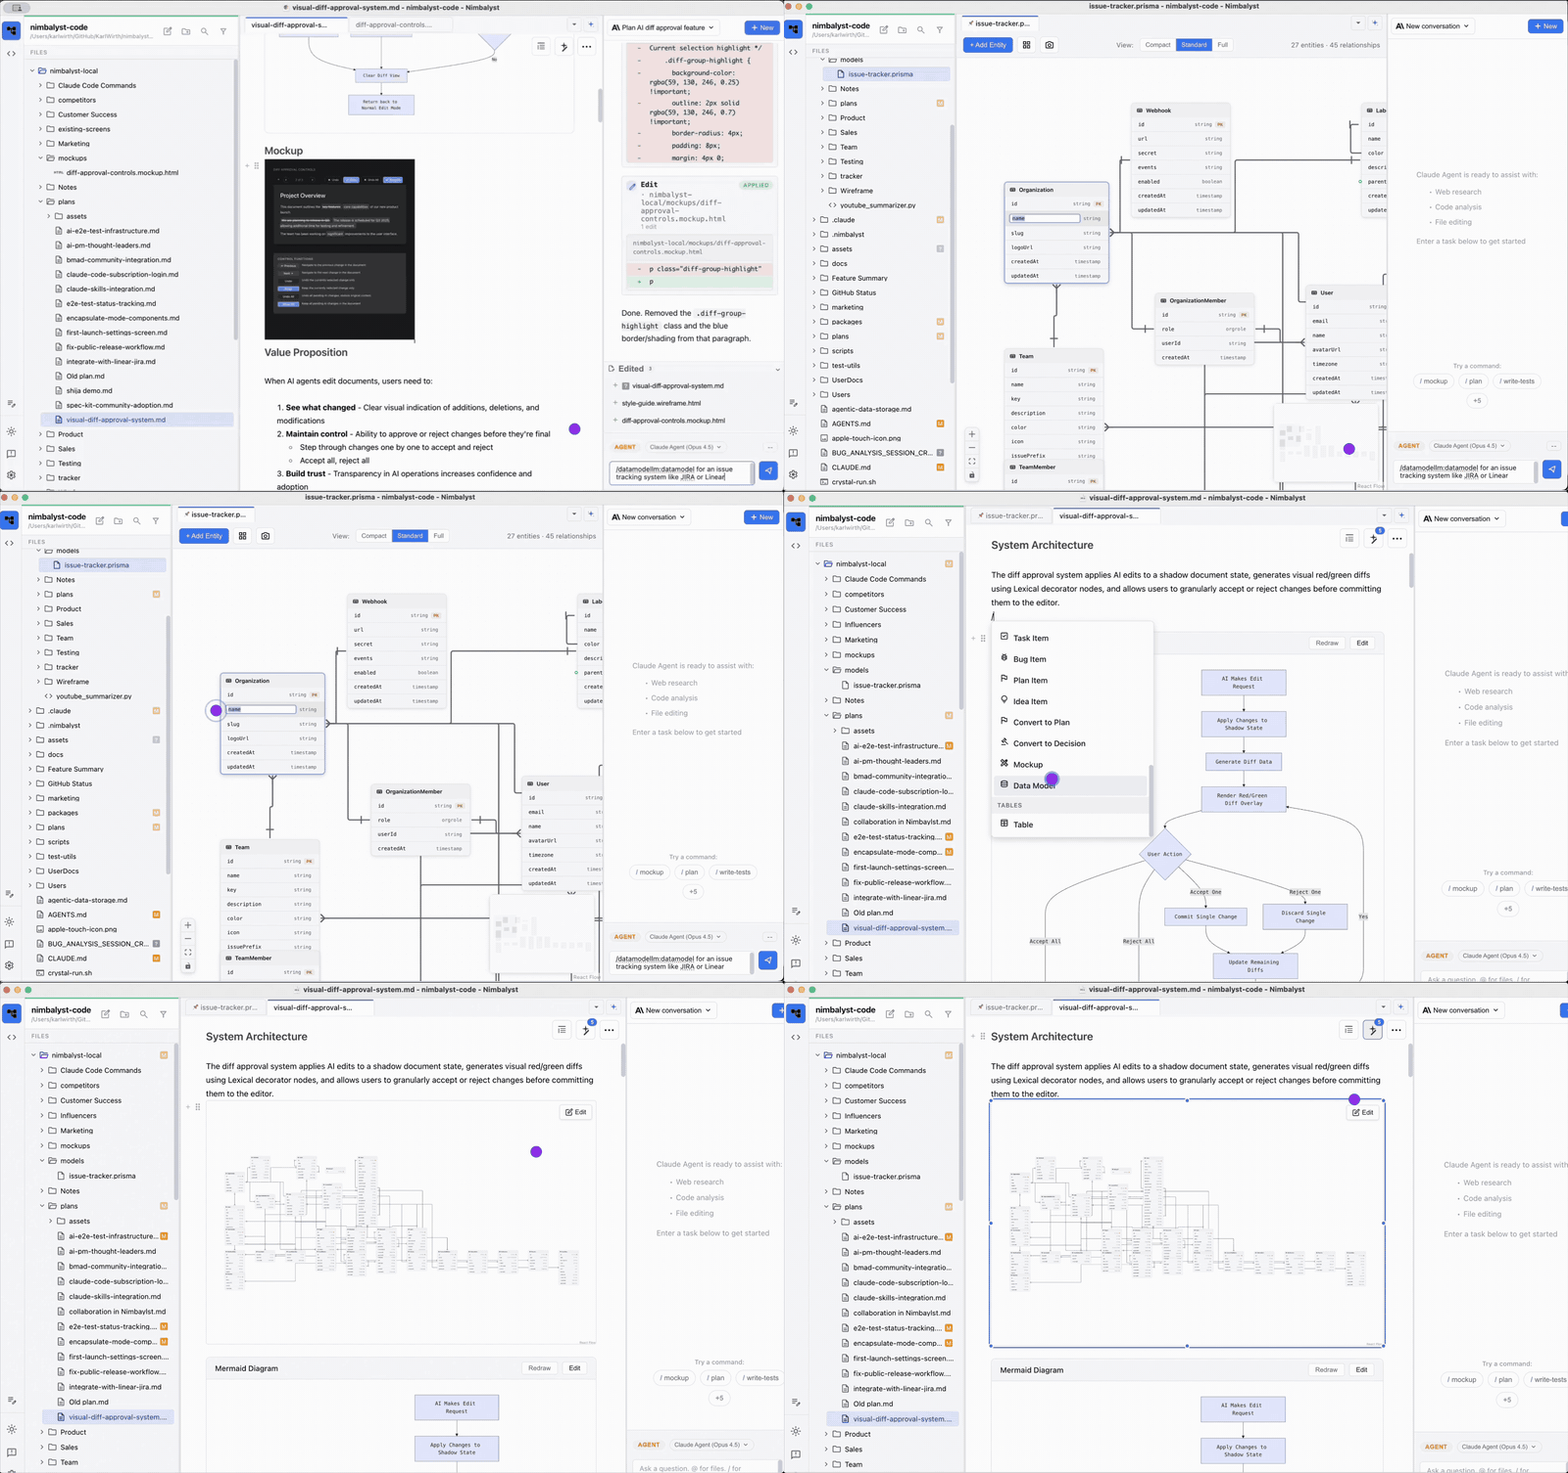
Humans and AI work better with all the context united, integrated. Now in Nimbalyst, build your data model with AI based on your code and markdown docs. Then, use that data model and your docs to write better code.

More on the visual schema editor is on the [data modeling feature page](https://nimbalyst.com/features/data-modeling/) and the [DataModelLM extension page](https://nimbalyst.com/extensions/datamodellm/).

* **Ask AI to create a Data Model:** Use the /datamodel command and specify what you want
* **Edit the Data Model:** We've built a visual editor where you can edit the data model yourself or ask for edits from Claude in the chat panel. Click on the data model file to auto-open the editor.
* **Embed the Data Model:** Use / in the doc to embed a live screenshot of the data model in your markdown
* **Store and Export the Data Model:** We stored the data model as a .prisma file in your filesystem /git. Export the data model as a SQL DDL, JSON Schema, DBML, or JSON (DataModelLM) format

<figure><img src="/files/qEMzDgRrgGxC95ifPQdt" alt=""><figcaption></figcaption></figure>


# CSV

Open CSV and TSV files in the built-in Nimbalyst spreadsheet editor, edit rows and columns visually, and let your AI agent work the same data.

Nimbalyst includes a built-in spreadsheet editor for CSV and TSV files. Open any `.csv` or `.tsv` file and it automatically displays in a familiar spreadsheet interface.

See the [spreadsheets feature page](https://nimbalyst.com/features/spreadsheets/) for how agents work with tabular data in a project.

If you want a calculation-first document instead of a row-and-column data grid, use a [Calc Sheet](/visual-editors-powered-by-ai/calc-sheets) with the `.calc.md` extension.

<figure><img src="/files/nn2bskasQ7rf3Y6R9O6u" alt=""><figcaption></figcaption></figure>

### CSV Spreadsheet Editor

The editor works like Excel or Google Sheets. You can:<br>

* Edit cells, rows, and columns manually
* Cut, copy, and paste

Click **View Source** in the toolbar to toggle between the spreadsheet view and raw CSV text.

### Using Coding Agents with CSV Files

Your coding agent can read and modify your CSV files directly. This is powerful for data tasks that would be tedious to do manually.

**Data Cleaning**

* "Remove all duplicate rows from data.csv"
* "Fix the date format in the 'created\_at' column to YYYY-MM-DD"
* "Trim whitespace from all cells in customers.csv"

**Data Transformation**

* "Add a new column that calculates the total from price and quantity"
* "Split the 'full\_name' column into 'first\_name' and 'last\_name'"
* "Convert all country codes to full country names"

**Analysis & Filtering**

* "Remove all rows where status is 'cancelled'"
* "Sort by revenue descending and keep only the top 100"
* "Find and flag any rows with missing email addresses"

**Bulk Operations**

* "Add 'USD' prefix to all values in the currency column"
* "Replace all instances of 'N/A' with empty cells"
* "Normalize phone numbers to +1-XXX-XXX-XXXX format"

**Generating Data**

* "Create a CSV with 50 sample customer records for testing"
* "Add a header row with appropriate column names"

#### How It Works

When you ask your coding agent to modify a CSV file, it reads the file, makes the changes programmatically, and writes the updated content back. The spreadsheet editor will automatically refresh to show your changes.

#### AI Changes as Red / Green Diff

* Additions will be shown in green
* Deletions will be shown in red


# Browser

Preview HTML files and live URLs in the built-in Chromium browser, right next to your project files and your AI coding agent conversation.

Nimbalyst includes an in-app Browser editor for previewing HTML files and live URLs without leaving your workspace. It opens pages in a real Chromium view, next to your files and agent conversation.

Use it when you want to see a generated page, review an HTML mockup, or check a live URL while Claude Code, Codex, or another agent keeps working in the same project.

The [browser extension page](https://nimbalyst.com/extensions/browser/) covers what an agent can do inside the in-app browser.

<figure><img src="/files/n1f9T3ILnJahsvIewEjR" alt="In-app Browser editor showing a rendered page with URL controls, file tree, and agent sidebar"><figcaption></figcaption></figure>

## What the Browser Is Good For

* Previewing `.html` and `.htm` files directly from the file tree
* Opening a live URL beside the code, notes, and agent transcript
* Reviewing frontend changes without switching to a separate browser window
* Checking generated mockups and landing pages as rendered pages
* Letting an agent inspect, click, type, scroll, evaluate, and screenshot a page

## Built-In Capabilities

* Real Chromium rendering, not an iframe
* Back, forward, reload, and URL bar controls
* Source toggle when you want to move between rendered preview and file source
* Workspace-scoped local preview URLs for files
* Fileless browser tabs for live pages
* Agent tools for navigation, page inspection, clicks, typing, scrolling, screenshots, and JavaScript evaluation

## Browser vs Code Editor

Use the **Browser** when you need to inspect the rendered result of an HTML file or URL.

Use the **Code Editor** when you need to edit the source of the HTML, CSS, JavaScript, or TypeScript file.

In practice, you often use both: edit source in one tab, open the Browser in another tab, and ask your agent to revise the page while you review the rendered result.

## Working with AI

Your coding agent can use the Browser to verify UI work in place. Good prompts include:

* "Open this HTML file in the Browser and check whether the CTA button is visible."
* "Change the hero copy, then preview the page in the Browser."
* "Click through the form and tell me what breaks."
* "Take a screenshot of the current page state."
* "Inspect the page and summarize the visible headings and links."


# Calc Sheets

Calc Sheets are markdown spreadsheets (.calc.md) that keep assumptions, formulas, and outputs in one versionable file your AI agent can edit.

Calc Sheets are markdown documents that end in `.calc.md`. They combine spreadsheet-style calculated results with plain-text editing, so you can keep assumptions, formulas, notes, and outputs together in one versionable file.

Unlike a CSV grid, a Calc Sheet reads like a working document. You write inputs and formulas as text on the left, and Nimbalyst renders the evaluated results alongside them.

The [Calc Sheets extension page](https://nimbalyst.com/extensions/calc-sheets/) covers the formula syntax and unit handling in more depth.

<figure><img src="/files/pCzNHJAoV5MdTur0rC7e" alt="Calc Sheet editor showing assumptions, formulas, units, and live results beside the source"><figcaption></figcaption></figure>

## What Calc Sheets Are Good For

* Quick estimates, budgets, and pricing models
* Unit-aware calculations inside planning docs
* Financial notes where currency formatting matters
* AI-assisted calculation files that should still stay readable in plain text
* Scenario analysis where the assumptions matter as much as the final result

## Example

```md
# Inputs

price = 100 USD
quantity = 1

# Results

total = price * quantity -> currency(USD, 2)
```

In Nimbalyst, the source stays editable as markdown while the computed values appear beside it in a spreadsheet-like results column.

## Built-In Capabilities

* Text-first calculations in plain `.calc.md` files
* Units and currency-aware formatting
* Live result gutter beside the source
* Assertions so a sheet can catch invalid assumptions early
* Natural fit with Git, diffs, and agent-driven edits
* Source mode that stays readable in any text editor

## Calc Sheets vs CSV

Use **Calc Sheets** when the file is mostly a human-readable calculation document with a few important formulas.

Use **CSV** when the file is primarily tabular data with many rows and columns.

See also [CSV](/visual-editors-powered-by-ai/csv).

## Working with AI

Your coding agent can edit `.calc.md` files the same way it edits markdown or code. Good prompts include:

* "Turn this pricing note into a calc sheet with subtotals and a final total."
* "Add a margin assumption and recompute the quoted price."
* "Convert these hard-coded numbers into named inputs."
* "Add assertions so the total fails if quantity is negative."
* "Adjust the payload assumption and explain which checks changed."


# Mind Map

Mind Map is a spatial editor for .mindmap files. Brainstorm on an infinite canvas while the file stays plain text your AI agent can also edit.

Nimbalyst Mind Map is a spatial editor for `.mindmap` files. It lets you lay out ideas on an infinite canvas while keeping the underlying file readable, versionable, and editable by agents.

Use it for brainstorming, project planning, research organization, decision trees, and any topic where a hierarchy is easier to understand visually than as a long outline.

The [mind map extension page](https://nimbalyst.com/extensions/mindmap/) shows the file format and how agents edit maps.

<figure><img src="/files/SWVfpFeSR97O6QGpskde" alt="Mind Map editor showing a color-coded roadmap on an infinite canvas with file tree and agent sidebar"><figcaption></figcaption></figure>

## What Mind Maps Are Good For

* Breaking a project into themes, branches, and follow-up work
* Organizing research notes by concept or domain
* Capturing meeting ideas spatially while preserving structure
* Mapping product roadmaps, launch plans, and decision trees
* Turning a topic prompt into a structured map your team can revise

## Built-In Capabilities

* Infinite canvas with pan and zoom
* Nodes, branches, notes, tags, status, and color coding
* Keyboard-driven editing for adding children, siblings, and updates quickly
* Auto layout for cleaning up a map
* Outline view when a hierarchy is easier to edit as text
* Search across nodes
* AI-assisted creation and branch expansion

## Plain-Text Files

Mind maps are stored as `.mindmap` files. That means they can live with the rest of your project, sync like other files, and be reviewed in Git.

The visual editor gives you the canvas, but the file remains structured enough for Claude Code, Codex, and other agents to read and update.

## Working with AI

Your coding agent can create, expand, and reorganize mind maps. Good prompts include:

* "Create a mind map for this product launch plan."
* "Expand the Discovery branch with customer research tasks."
* "Reorganize this map into Design, Build, Launch, and Measure."
* "Add notes to each high-risk branch."
* "Turn this outline into a mind map."


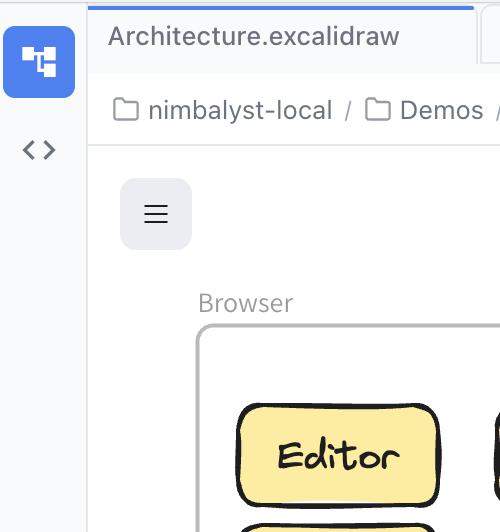
# Excalidraw

Draw diagrams, flowcharts, and whiteboard sketches in the built-in Excalidraw editor, and let your AI agent build them from a description.

### Overview

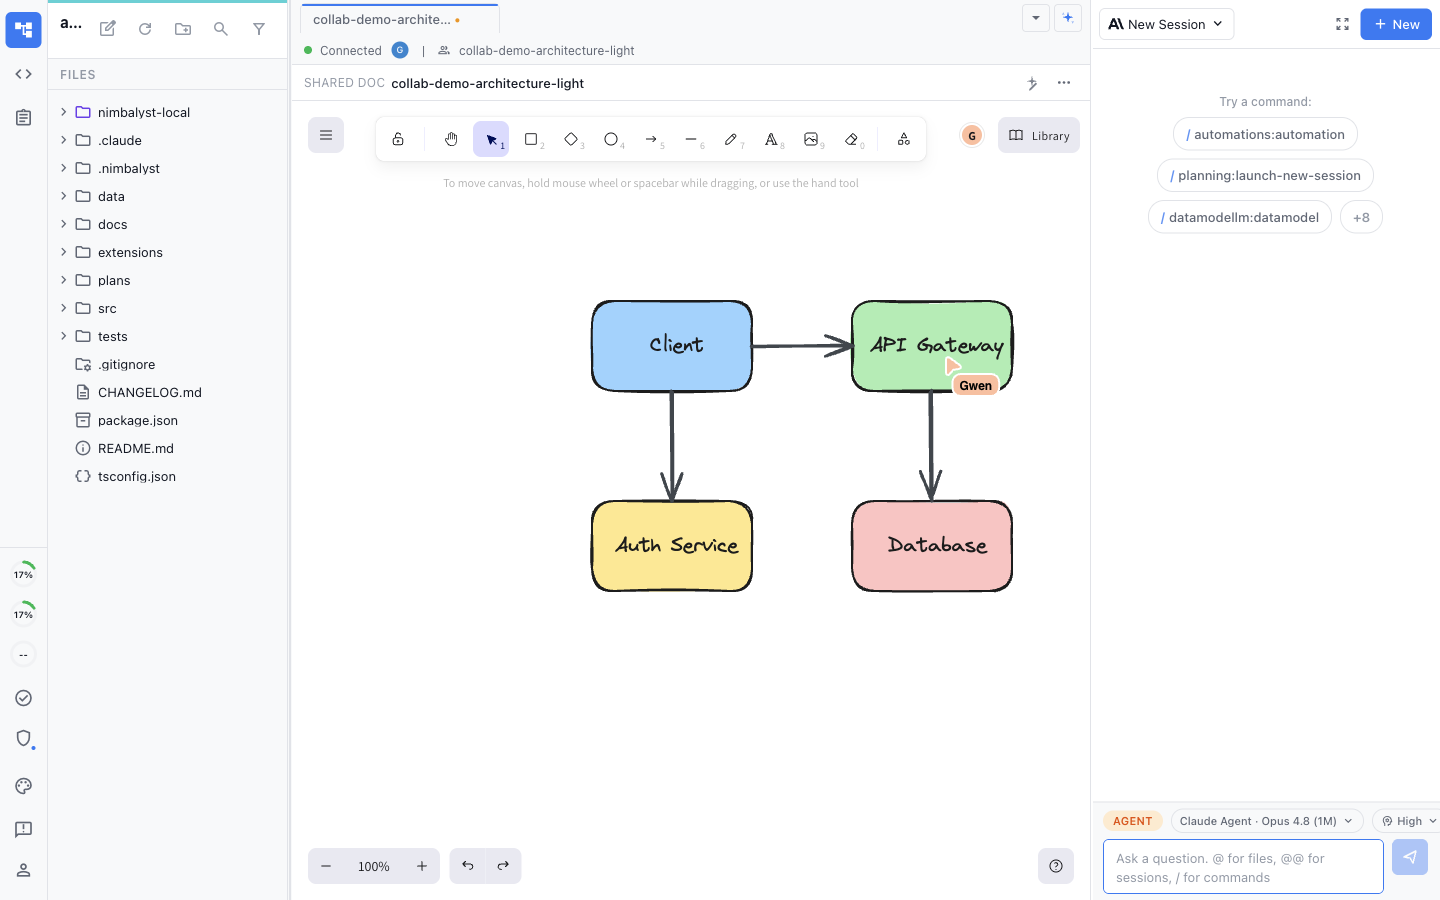
Nimbalyst includes a built-in Excalidraw editor for creating diagrams, flowcharts, and whiteboard sketches. Files open in a visual canvas where you can draw shapes, connect them with arrows, and let AI help build diagrams from descriptions.

The [Excalidraw extension page](https://nimbalyst.com/extensions/excalidraw/) lists what the built-in canvas supports.

<figure><img src="/files/glByr4l1uXtP6OhwWLQD" alt=""><figcaption></figcaption></figure>

### AI-Assisted Diagramming

Ask the AI to create or modify diagrams directly. The AI can:

* Add shapes with labels and colors
* Connect elements with arrows
* Import Mermaid diagrams
* Align and distribute elements
* Group elements together
* Create rows and columns of shapes

### Human Diagramming

Right-click in the file tree and select **New File > Excalidraw Diagram**, or create any file with the `.excalidraw` extension.

The toolbar provides standard Excalidraw tools:

* **Selection**: Click and drag to select elements
* **Rectangle**: Draw boxes (rounded by default)
* **Diamond**: Draw decision shapes
* **Ellipse**: Draw circles and ovals
* **Arrow**: Connect elements with arrows
* **Line**: Draw freeform lines
* **Text**: Add text labels
* **Frame**: Group related elements with a titled container

#### Example AI Prompts

* "Create a flowchart showing user login flow"
* "Add a blue rectangle labeled 'Database'"
* "Connect 'Frontend' to 'API' with an arrow"
* "Import this mermaid diagram: graph TD; A-->B"
* "Align all the boxes on the left"

### Mermaid Import

Convert Mermaid syntax to visual diagrams:

```
graph TD
    A[Start] --> B{Decision}
    B -->|Yes| C[Action]
    B -->|No| D[End]

```

Ask the AI to import Mermaid, or use the `import_mermaid` tool directly.

### Working with Frames

Frames are titled containers that group related elements. Use them to organize architecture diagrams into sections like "Browser", "Services", or "Database".

Create frames manually or ask the AI: "Add a frame called 'Frontend' around the React components"

### Theme Support

The editor adapts to your Nimbalyst theme. Light themes show a white canvas; dark themes show a dark canvas with adjusted colors.

### Tips

* **Pan canvas**: Hold space and drag, or use two-finger scroll
* **Zoom**: Cmd/Ctrl + scroll, or use the zoom controls
* **Duplicate**: Alt + drag to duplicate elements
* **Snap to grid**: Hold Cmd/Ctrl while dragging for alignment
* **Lock elements**: Prevent accidental edits by locking shapes


# PDF Viewer

Open and read PDF documents in Nimbalyst tabs alongside your other project files, with smooth scrolling, zoom controls, and text selection.

Nimbalyst includes a built-in PDF viewer that lets you open and view PDF documents directly in the editor. PDFs open in their own tabs alongside your other files, with support for smooth scrolling, zoom controls, and text selection.

See the [PDF viewer extension page](https://nimbalyst.com/extensions/pdf-viewer/).

### Opening PDFs

Click any `.pdf` file in your file tree to open it. The PDF loads in a dedicated viewer tab with a toolbar at the top.

PDFs are read-only in Nimbalyst. To edit a PDF, use a dedicated PDF editor.

### Viewing Controls

#### Toolbar

The toolbar appears at the top of the PDF viewer and shows:

* **Page count**: Total number of pages (e.g., "10 pages")
* **Zoom controls**: Plus/minus buttons and current zoom percentage
* **Fit button**: Toggle fit-to-width mode

#### Scrolling

Scroll through the PDF using:

* Mouse wheel or trackpad
* Scroll bars
* Page Up / Page Down keys

Pages flow continuously like a modern PDF reader. Large documents (100+ pages) remain smooth thanks to efficient rendering.

### Text Selection

You can select and copy text from PDFs:

1. Click and drag to select text on any page
2. Selected text is highlighted
3. Press **Cmd/Ctrl + C** to copy

Text selection works like any standard PDF reader.

### Theme Support

The PDF viewer adapts to your Nimbalyst theme:

* **Light theme**: Standard white pages with subtle shadows
* **Dark theme**: White pages with enhanced shadows for contrast
* Toolbar and controls match your theme colors


# Code Editor

Nimbalyst includes a Monaco code editor, the same engine VS Code uses, with syntax highlighting and AI edits next to your docs and diagrams.

Nimbalyst includes a full-featured code editor powered by Monaco (the same editor used in VS Code). When you open a code file, it automatically opens in Monaco with syntax highlighting and standard editing features.

Code editing sits next to the rest of the workspace rather than in a separate app. See the [developer tools page](https://nimbalyst.com/features/developer-tools/).

<figure><img src="/files/zyaZPcoRNkm6v7PhQ400" alt=""><figcaption></figcaption></figure>

### Reviewing AI Changes

When the AI edits a code file, you'll see an inline diff view:

When the AI edits code or a a document, changes appear inline:

* Green background: Added content
* Red background: Removed content (with strikethrough)

Navigation

* Previous/Next buttons: Jump between changes in the file
* Change counter: Shows how many changes are in the diff (e.g., "Change 2 of 5")

Accept/Reject:

* Accept All: Keeps all changes
* Reject All: Reverts to original content

Changes remain visible until you accept or reject them.<br>

### Supported File Types

The code editor supports a wide range of programming languages:

#### Web Development

* JavaScript: `.js`, `.jsx`, `.mjs`, `.cjs`
* TypeScript: `.ts`, `.tsx`, `.d.ts`
* HTML: `.html`, `.htm`
* CSS: `.css`, `.scss`, `.sass`, `.less`

#### Data Formats

* JSON: `.json`, `.jsonc`
* YAML: `.yaml`, `.yml`
* XML: `.xml`
* TOML: `.toml`

#### Programming Languages

* Python: `.py`, `.pyw`, `.pyi`
* Go: `.go`
* Rust: `.rs`
* C/C++: `.c`, `.h`, `.cpp`, `.cc`, `.hpp`
* Java: `.java`
* C#: `.cs`
* Swift: `.swift`
* Kotlin: `.kt`
* Ruby: `.rb`
* PHP: `.php`
* Dart: `.dart`

#### Shell & Config

* Shell scripts: `.sh`, `.bash`, `.zsh`, `.fish`
* SQL: `.sql`
* GraphQL: `.graphql`
* Dockerfile

#### Other

* Markdown: `.md` (raw view mode)
* Plain text: `.txt`, `.log`

### Editor Features

#### Syntax Highlighting

Each language gets appropriate color highlighting, making code easy to read and understand.

#### Line Numbers

Line numbers appear on the left side for easy navigation and referenc

#### Minimap

A code overview appears on the right side, letting you see the structure of longer files and quickly jump to different sections.

#### Code Folding

Click the arrows next to code blocks to collapse or expand them. Works with:

* Functions and methods
* Classes
* Conditional blocks
* Loops
* JSON objects and arrays

#### Bracket Matching

Matching brackets, braces, and parentheses are highlighted in color, making it easy to see paired delimiters.

### Editing Code

#### Autosave

Changes save automatically after 2 seconds of inactivity. A dot in the tab title indicates unsaved changes.

#### Manual Save

Press **Cmd+S** (Mac) or **Ctrl+S** (Windows/Linux) to save immediately.

All common editing shortcuts work:

* **Cmd/Ctrl+C**: Copy
* **Cmd/Ctrl+V**: Paste
* **Cmd/Ctrl+Z**: Undo
* **Cmd/Ctrl+Shift+Z**: Redo
* **Cmd/Ctrl+F**: Find
* **Cmd/Ctrl+H**: Find and replace

#### Indentation

The editor uses 2-space indentation by default and automatically detects the indentation style of existing files.

### File Watching

The editor detects when files are changed by other programs:

* If you have no unsaved changes, the file reloads automatically
* If you have unsaved changes, you'll be prompted to keep your version or reload the external changes

### File History

Code file edits are tracked in your file history:

* Press **Cmd+Y** (Mac) or **Ctrl+Y** (Windows/Linux) to open file history
* Restore any previous version of the file
* See when changes were made

### Tips

* **Hover for full path**: Hover over a tab to see the complete file path
* **Multiple files**: Open code and markdown files side by side in tabs
* **Theme support**: The editor automatically matches your Nimbalyst theme (light/dark)
* **Focus indicator**: When you click elsewhere and return, your cursor position is preserved


# File History and Restore

Nimbalyst saves file snapshots automatically. Open history with Cmd+Y to compare versions and restore a document after an AI edit goes wrong.

### Files with Unsaved Changes

Tabs show a dot (•) next to filenames with unsaved changes. The dot disappears after:

* Manual save (Cmd+S)
* Autosave (configurable interval)

### File History (Cmd+Y)

Nimbalyst automatically saves snapshots of your documents, providing version control built into the editor.

Snapshots saved periodically

* Manual snapshot on Cmd+S
* Compressed storage in database
* No external tools needed

<div align="left"><figure><img src="/files/fO0sJGHOkPyM5BDykSsU" alt="" width="218"><figcaption></figcaption></figure></div>

#### Viewing History

<figure><img src="/files/bv0t0VbvdHN66e3x0tko" alt=""><figcaption></figcaption></figure>

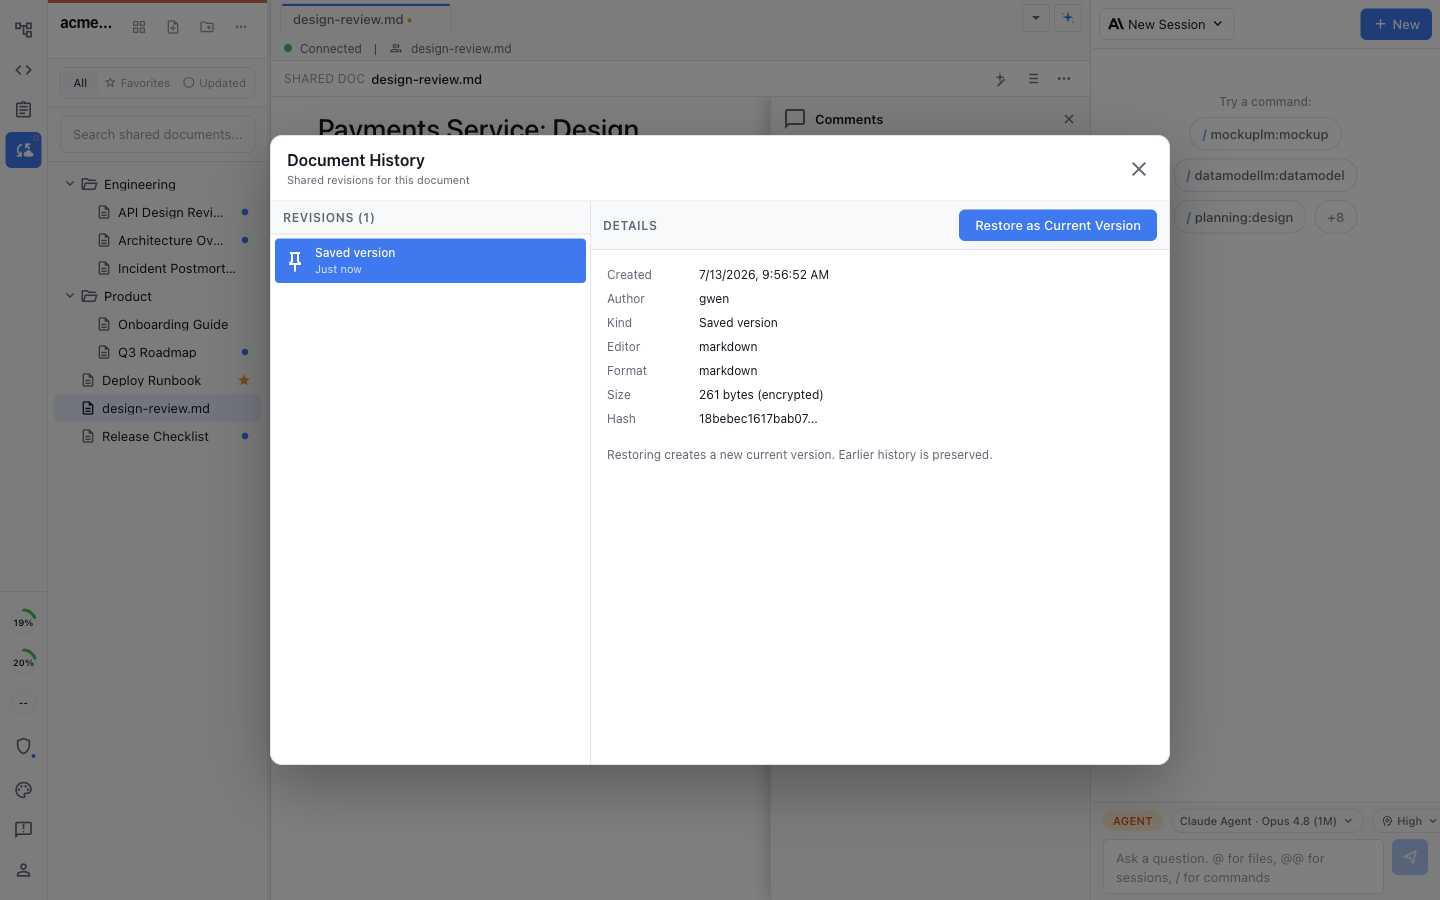
* Cmd+Y opens history panel
* View > Document History
* List of all snapshots
* Timestamps for each version
* Preview snapshot content
* Restore history
* Current version becomes new snapshot. History preserved. Can undo restoration if needed.

#### Comparing snapshots

Just clicking on a snapshot will compare it to the previous checkpoint

Click on one snapshot and then command-click on the other to compare it to a different snapshot

<figure><img src="/files/Hb4hR8iuVpdJw1N1VeLC" alt=""><figcaption></figcaption></figure>

* Study the differences then choose the snapshot you desire.

#### **Deleting Snapshots:**

* Select snapshot and then Click delete icon

### Restoring History

* Select a snapshot and you can restore that version

### Where snapshots are stored

Snapshots live in the `document_history` table of Nimbalyst's local database, inside the application data folder:

| Platform | Application data folder                   |
| -------- | ----------------------------------------- |
| macOS    | `~/Library/Application Support/Nimbalyst` |
| Windows  | `%APPDATA%\Nimbalyst`                     |
| Linux    | `~/.config/Nimbalyst`                     |

Newer installs use SQLite (`sqlite-db/nimbalyst.sqlite`). Installs that predate the SQLite migration use PGLite (the `pglite-db/` folder) until they migrate. Development builds use a `@nimbalyst/electron` folder in the same location.

That database is backed up automatically every 4 hours and on quit, so document history survives a corrupted database. See [Database Backups and Restore](/troubleshooting/database-backups-and-restore).<br>


# File Search, File Tree, and Tabs

Find files fast in Nimbalyst with Quick Open (Cmd+O), the project file tree, and tabs for working across several documents at the same time.

### Quick Open and Search

<figure><img src="/files/gx9hFVRI7tYRxsQ6PNwd" alt=""><figcaption></figcaption></figure>

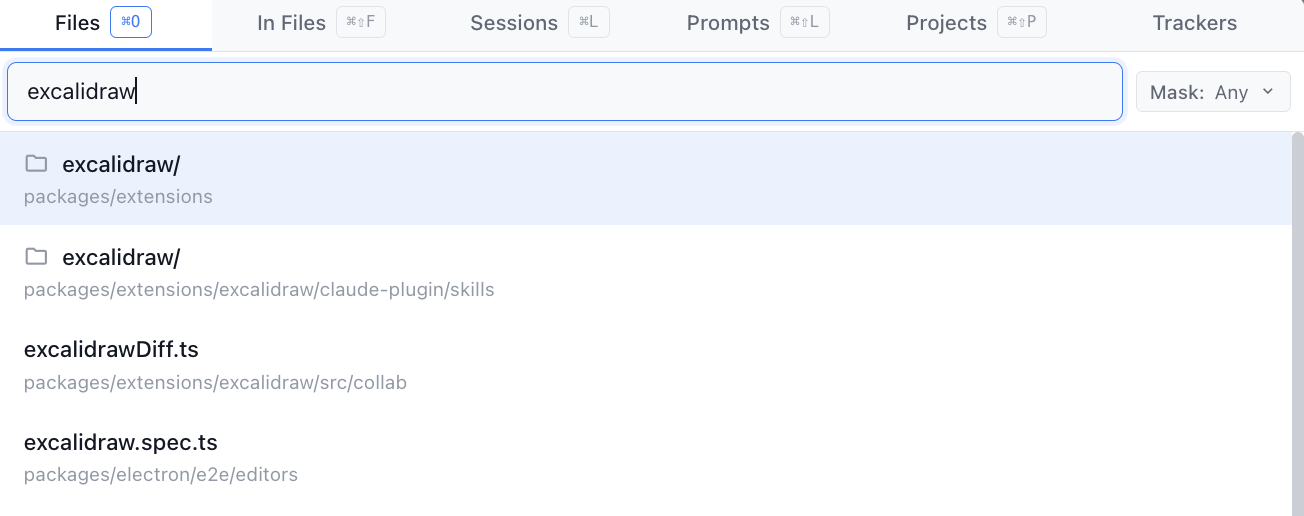
Click the magnifying glass or press **Cmd+O** to open the unified Quick Open launcher.

<div align="left"><figure><img src="/files/wjgQODIRCZJBIW7DAosz" alt="" width="375"><figcaption></figcaption></figure></div>

Quick Open now brings several pickers together in one tabbed surface:

* **Files** - find files and folders by name, including dotfiles and images
* **In Files** - search within file contents across the project
* **Sessions** - jump to AI sessions and workstreams
* **Prompts** - find prompts
* **Projects** - switch between open projects
* **Trackers** - jump directly to tracker items
* **Memory** - search project knowledge across Docs, Trackers, and optionally Sessions when the Nimbalyst Memory extension is enabled

The Files results can also include team shared documents. Opening one takes you to its collaborative editor.

Use the tab bar to switch modes, and use the inline filters for narrower results. In the **Files** tab, selecting a folder reveals it in the file tree. Direct shortcuts for some tabs are shown inside the launcher itself.

#### Search Shortcuts

* **Cmd+O** — Quick Open for files, folders, shared documents, projects, and Tracker items
* **Cmd+L** — Session Quick Open
* **Cmd+Shift+L** — Prompt Quick Open
* **Cmd+Shift+F** — file-content search
* **Cmd+Shift+O** — Memory search
* **Cmd+Shift+D** — team shared-document search

Filename search, file-content search, and Memory search answer different questions:

* Use **Files** when you know all or part of a file name.
* Use **In Files** when you know the exact text inside a local file.
* Use **Trackers** for exact issue-key lookup or structured Tracker search.
* Use **Memory** for a concept or question that may be described differently across documents, Trackers, and sessions. Memory combines semantic and keyword matching.

<div align="left"><figure><img src="/files/lwzAq6FuFAAlZAogomKe" alt="" width="375"><figcaption></figcaption></figure></div>

### File Tree

<div align="left"><figure><img src="/files/kkxBRnrUK3kWUit5X8Hb" alt="" width="375"><figcaption></figcaption></figure></div>

The file tree shows all files in your project. Navigate them by:

* Click folders to expand/collapse
* Click files to open
* Recent files appear at top of sidebar
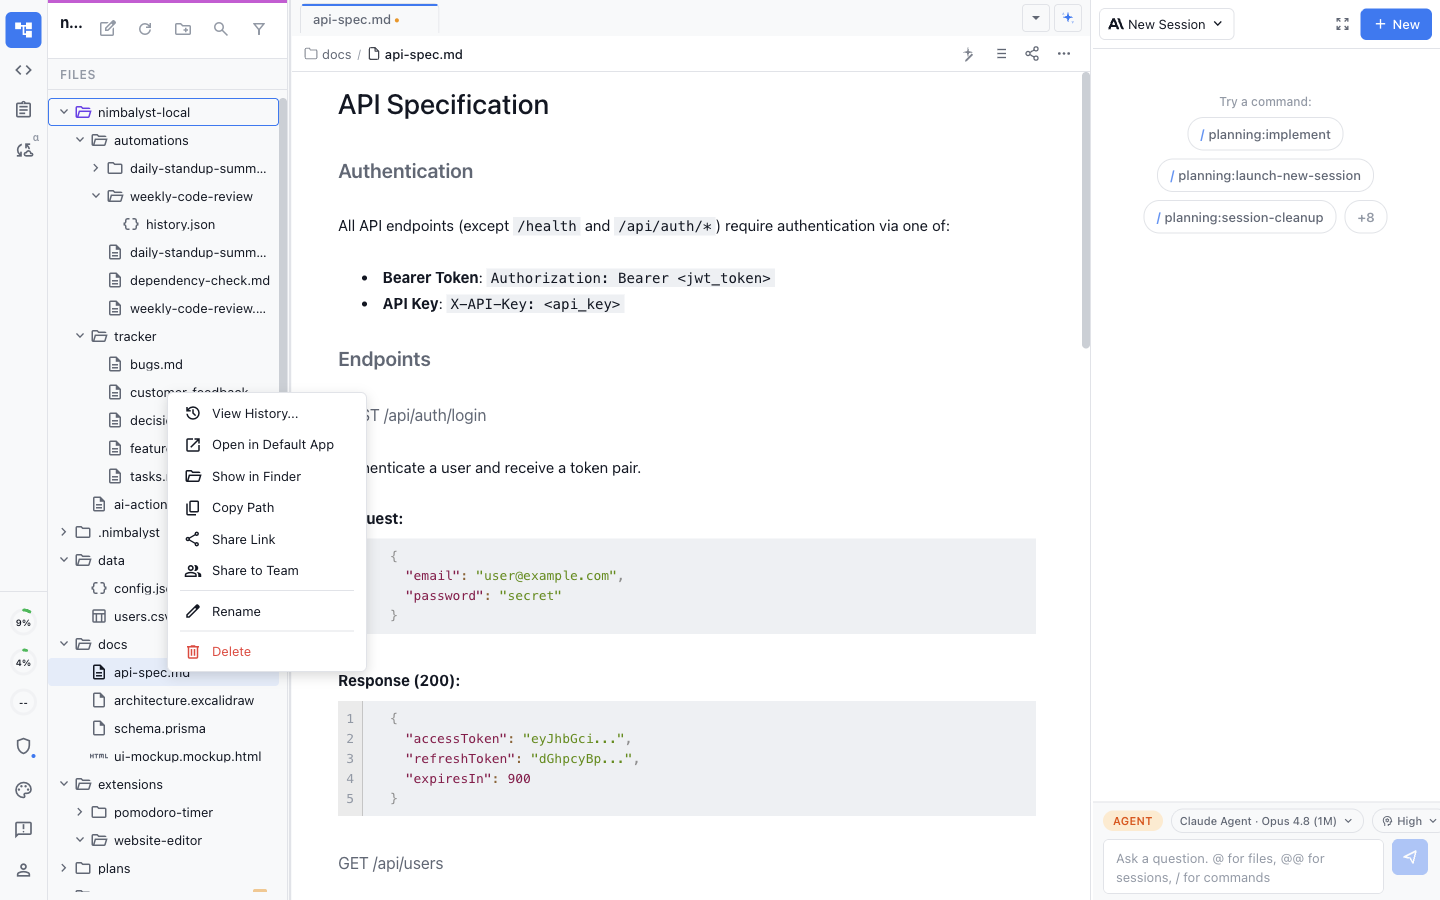
* Right Click on a file to rename, delete, open, copy path, open in new window
* Move files by dragging (Hold Option/Alt to copy)
* Deleted files, attachments, assets, and themes move to system trash instead of permanent deletion
* Show dotfiles in the file tree by selecting the "All Files" filter
* In a team project, right-click a collaboration-supported file and choose **Share to Team** to promote it into the shared document space. See [Collaborative Documents](/team-collaboration/documents).

### Tab Management

<figure><img src="/files/VIT3LBLdoGbkHcaFWviy" alt=""><figcaption></figcaption></figure>

Tabs let you work with multiple documents (or sessions) in one window.

* Dirty indicator (•) shows unsaved changes
* Open tabs are saved when workspace closes and restored when workspace reopens
* Pin a tab to the far left by right clicking and selecting Pin Tab
* Shortcuts are available to move amongst tabs
* Move amongst your tabs with the Tab dropdown

### Paste Options

* **Cmd+Shift+V** — force-paste as plain text without attachment conversion

### Navigation Gutter

* Right-click the navigation gutter and choose **Customize Gutter** to hide or show mode, extension-panel, and status icons.
* Drag icons into a manual order inside their group.
* Right-click an individual gutter icon to hide it directly.
* Changes apply immediately to every open Nimbalyst window and persist across projects.
* The account and Settings control remains available and cannot be hidden.


# Share Link to a File

Create a public share link for any markdown or AI file in Nimbalyst so people outside your workspace can read the document in a browser.

Share any AI or markdown file with a public link.

<figure><img src="/files/aPH7XJetnsYhVaIRv5k4" alt=""><figcaption></figcaption></figure>

**How to use:**

1. Right-click on a markdown file in the file tree
2. Select **Share Link**
3. A link is copied to your clipboard
4. Paste it anywhere -- Slack, email, X, a doc<br>

**Important! Security and Safety.**

* Anyone with the link can view the session or file. Do not share sessions containing sensitive information.
* Shared content is hosted on Cloudflare R2. There is no password protection.
* The content is encrypted on Cloudflare so Nimbalyst, Inc has no ability to read the content


# File Edits Sidebar

The File Edits Sidebar tracks every file your AI agent read or changed during a session, so you can review each modification before accepting.

The File Edits Sidebar tracks every file that the AI interacts with during a session. It provides visibility into which files have been modified, referenced, or read and those that need review.

<figure><img src="/files/JhWni8qOoBZQIyXqiIl3" alt=""><figcaption></figcaption></figure>

* Every file the AI edited appears in the sidebar list
* Click a file to jump directly to the AI session that made the edit
* See how many changes are in each file and navigate between them
* **All Uncommitted Files** mode shows files with pending changes across your project

### Diff Peek

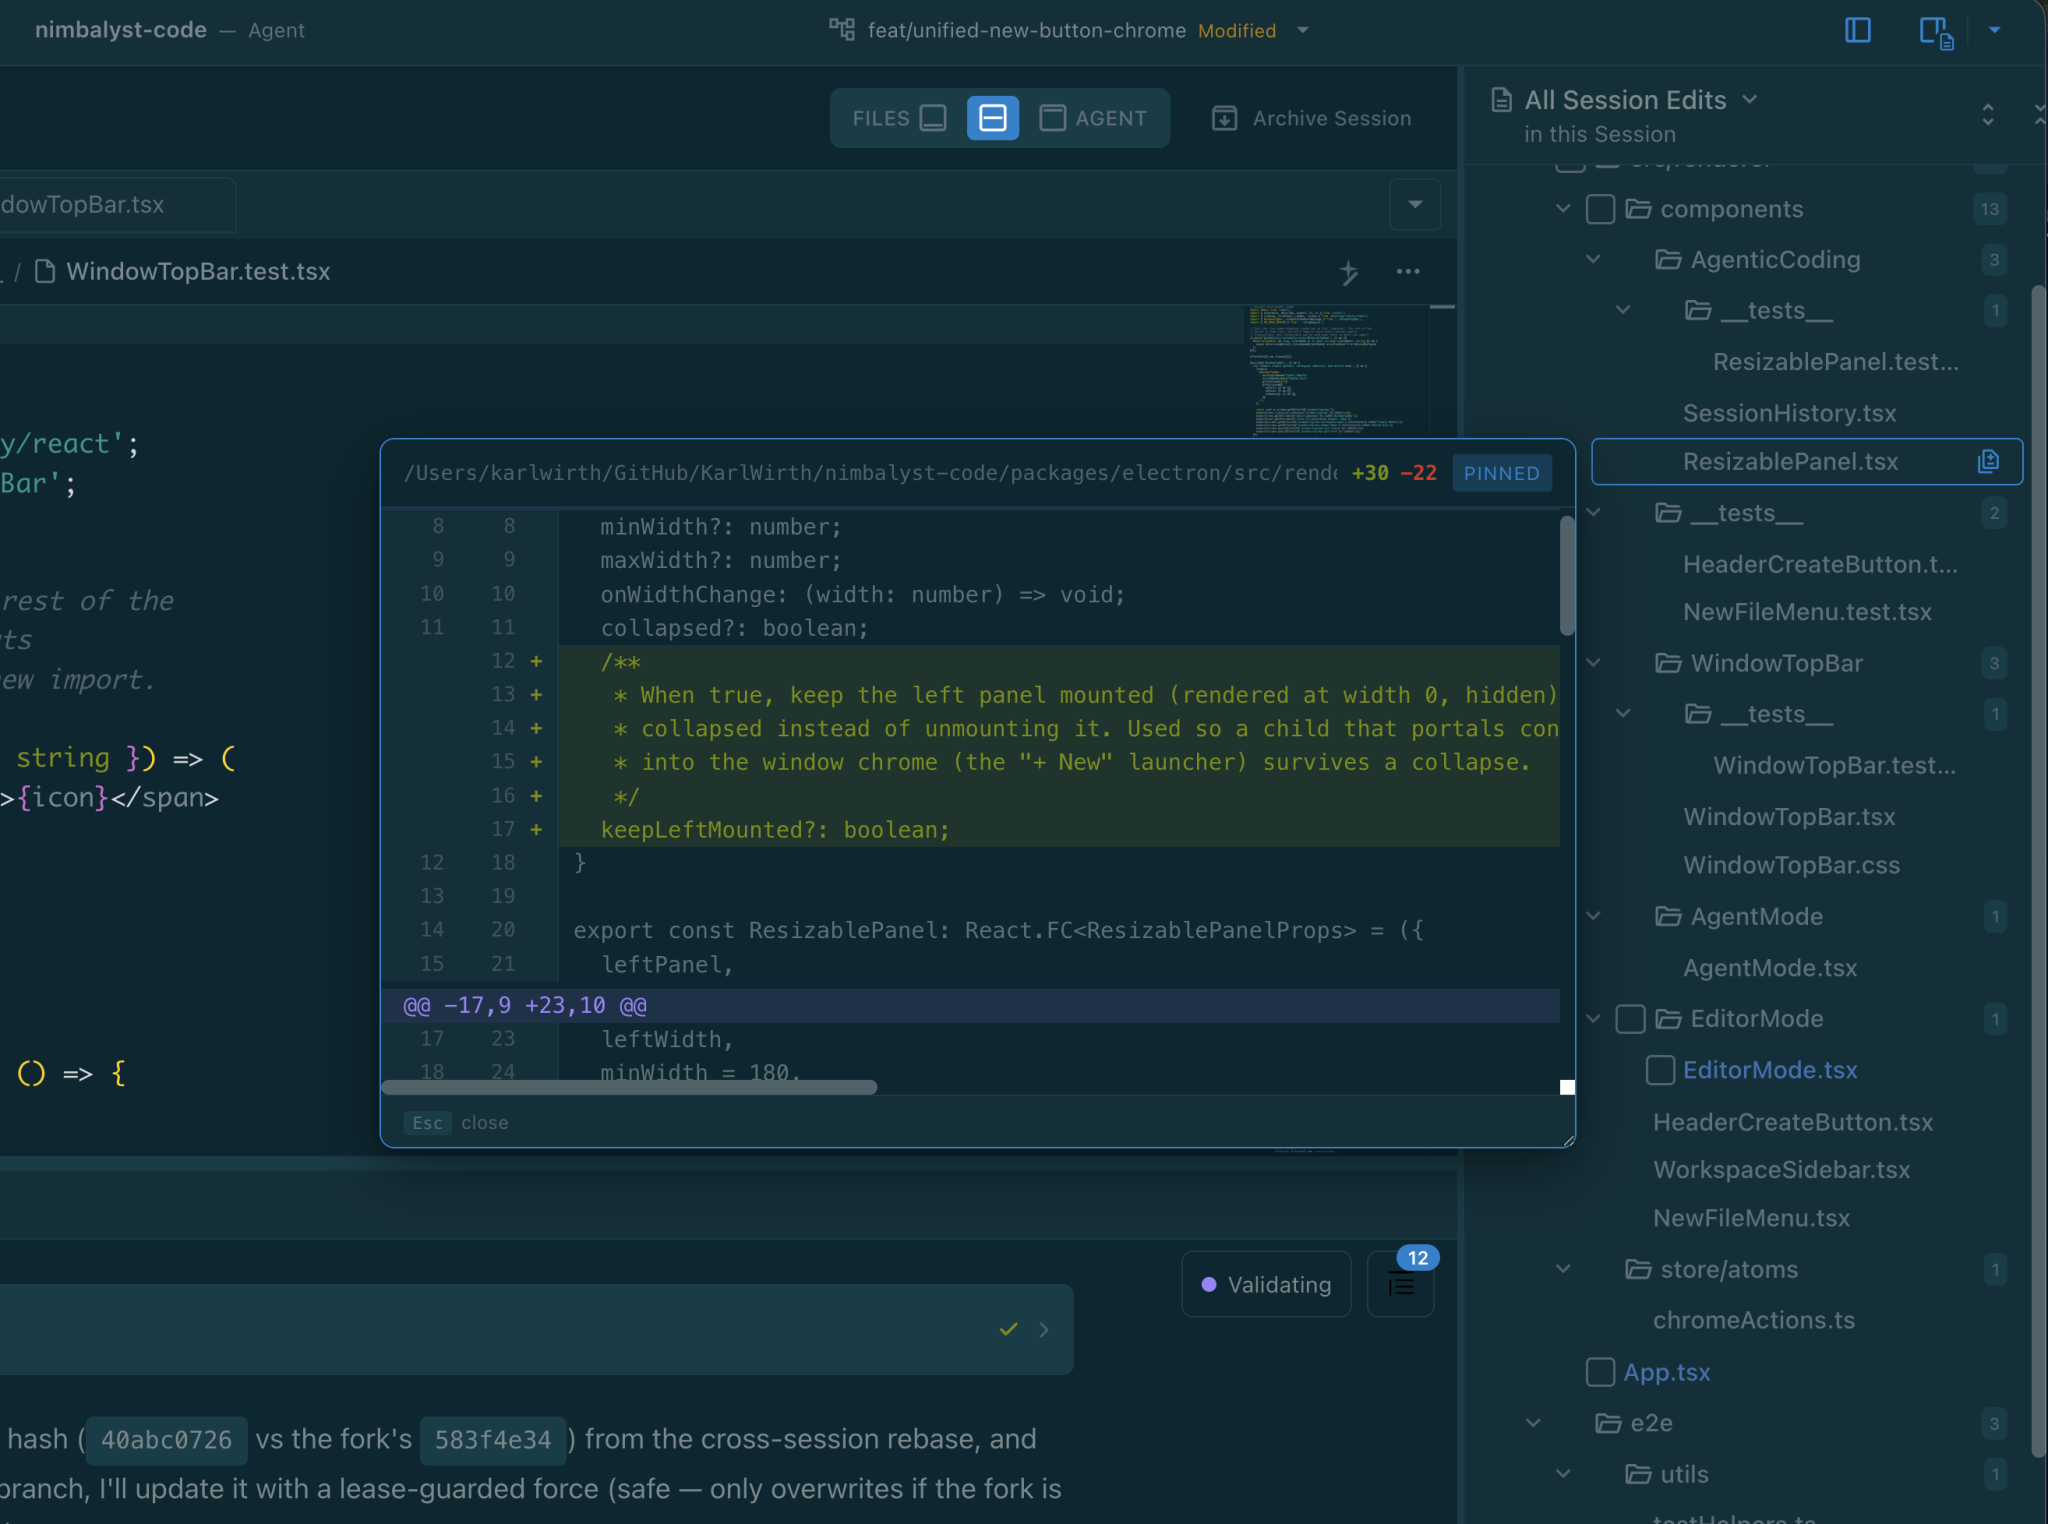
Hover any row in the Files Edited list and a peek icon appears on the right. Click it to open a unified diff popover anchored to the row, so you can see exactly what the agent changed without leaving the session view or opening the file.

<figure><img src="/files/FdA2V9axdDuKo86KoqOa" alt="A pinned diff peek showing changes for a file in the All Session Edits sidebar"><figcaption><p>Review a file's changes from All Session Edits without leaving the agent session.</p></figcaption></figure>

* Hover the row to reveal the peek icon
* Click the icon to pin the diff popover
* The popover is resizable, and the size you pick is remembered (it stays in sync with the diff peek in the Git extension and the commit proposal widget)
* Click outside or press Esc to close


# Agent Window & Session Management

Manage AI coding sessions in the Nimbalyst Agent Window. Start, resume, group, rename, and search long-running Claude Code and Codex sessions.

### Agent Window

In the File Window, you focus on editing your markdown files.

In the Agent Window, you focus on your sessions with your Agent. These sessions could include long chat discussions, research sessions, complex multi-file tasks, and AI-assisted development.

<figure><img src="/files/5xdeO3v76b5uzMBgk6T6" alt=""><figcaption></figcaption></figure>

The Agent Window consists of three main areas:

* Left Sidebar showing your Sessions. You can Search sessions here and select them
* Central transcript area to converse with agent with full conversation history, tool call visualization, streaming content display
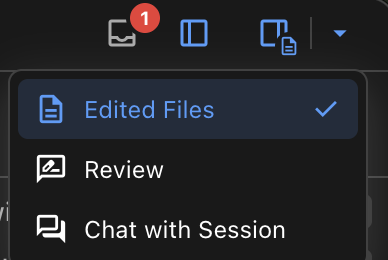
* Right panel, which you can switch between edited files, review, and a chat about the session

The [session management feature page](https://nimbalyst.com/features/session-management/) shows how sessions, workstreams, and the kanban view fit together.

#### Choose What the Right Panel Shows

The right panel is a switcher. Use the dropdown in its header to change what it displays.

<figure><img src="/files/aoOOCsL8WDOS6jUi7sCG" alt="The agent window right panel dropdown, open on three options: Edited Files with a checkmark, Review, and Chat with Session"><figcaption><p>Switch the right panel between edited files, review, and a chat about the session.</p></figcaption></figure>

* **Edited Files** -- The files the agent created and changed in this session, with uncommitted changes and commit controls.
* **Review** -- The review queue for changes waiting on your approval.
* **Chat with Session** -- A conversation about the session itself, kept separate from the main transcript.

You can also open a tracker item as a tab in this window and work the item and the session together. See [Item Detail](/task-management/item-detail).

### Session Management

Run multiple parallel sessions.

Manage Sessions by:

* Searching
* Filtering
* Resuming

Relate Sessions to Documents and Documents to Sessions.

<figure><img src="/files/zr3b1uNOgQbAoUCWcd44" alt=""><figcaption></figcaption></figure>

### Session Features

<figure><img src="/files/hD0djeCLWxZ03Nm7krTA" alt=""><figcaption></figcaption></figure>

* **Turn summary stats** — each agent turn shows file count and line changes (e.g., "Finished in 6m 57s — 3 files +45 -12")
* **Click-to-copy code blocks** — click or tap inline code blocks in transcripts to copy with visual feedback
* **Maximize button** — in the chat sidebar, click the maximize button to open the current session in full agent mode
* **Drag-drop to create Workstreams** — drag a session onto a standalone session to create a Workstream
* **Start session from a document** — "Start a new agent session" from a document pre-populates with an @file reference to that document
* **Rename a session** — right-click an existing session in the list and choose Rename. Sub-session renames live-update; workstream parent rows also support inline rename
* **Preferred Agent Language** — under **Settings > Application > Agent Features**, set the language used to auto-generate session names (applies to Claude Code, Codex, and other providers)

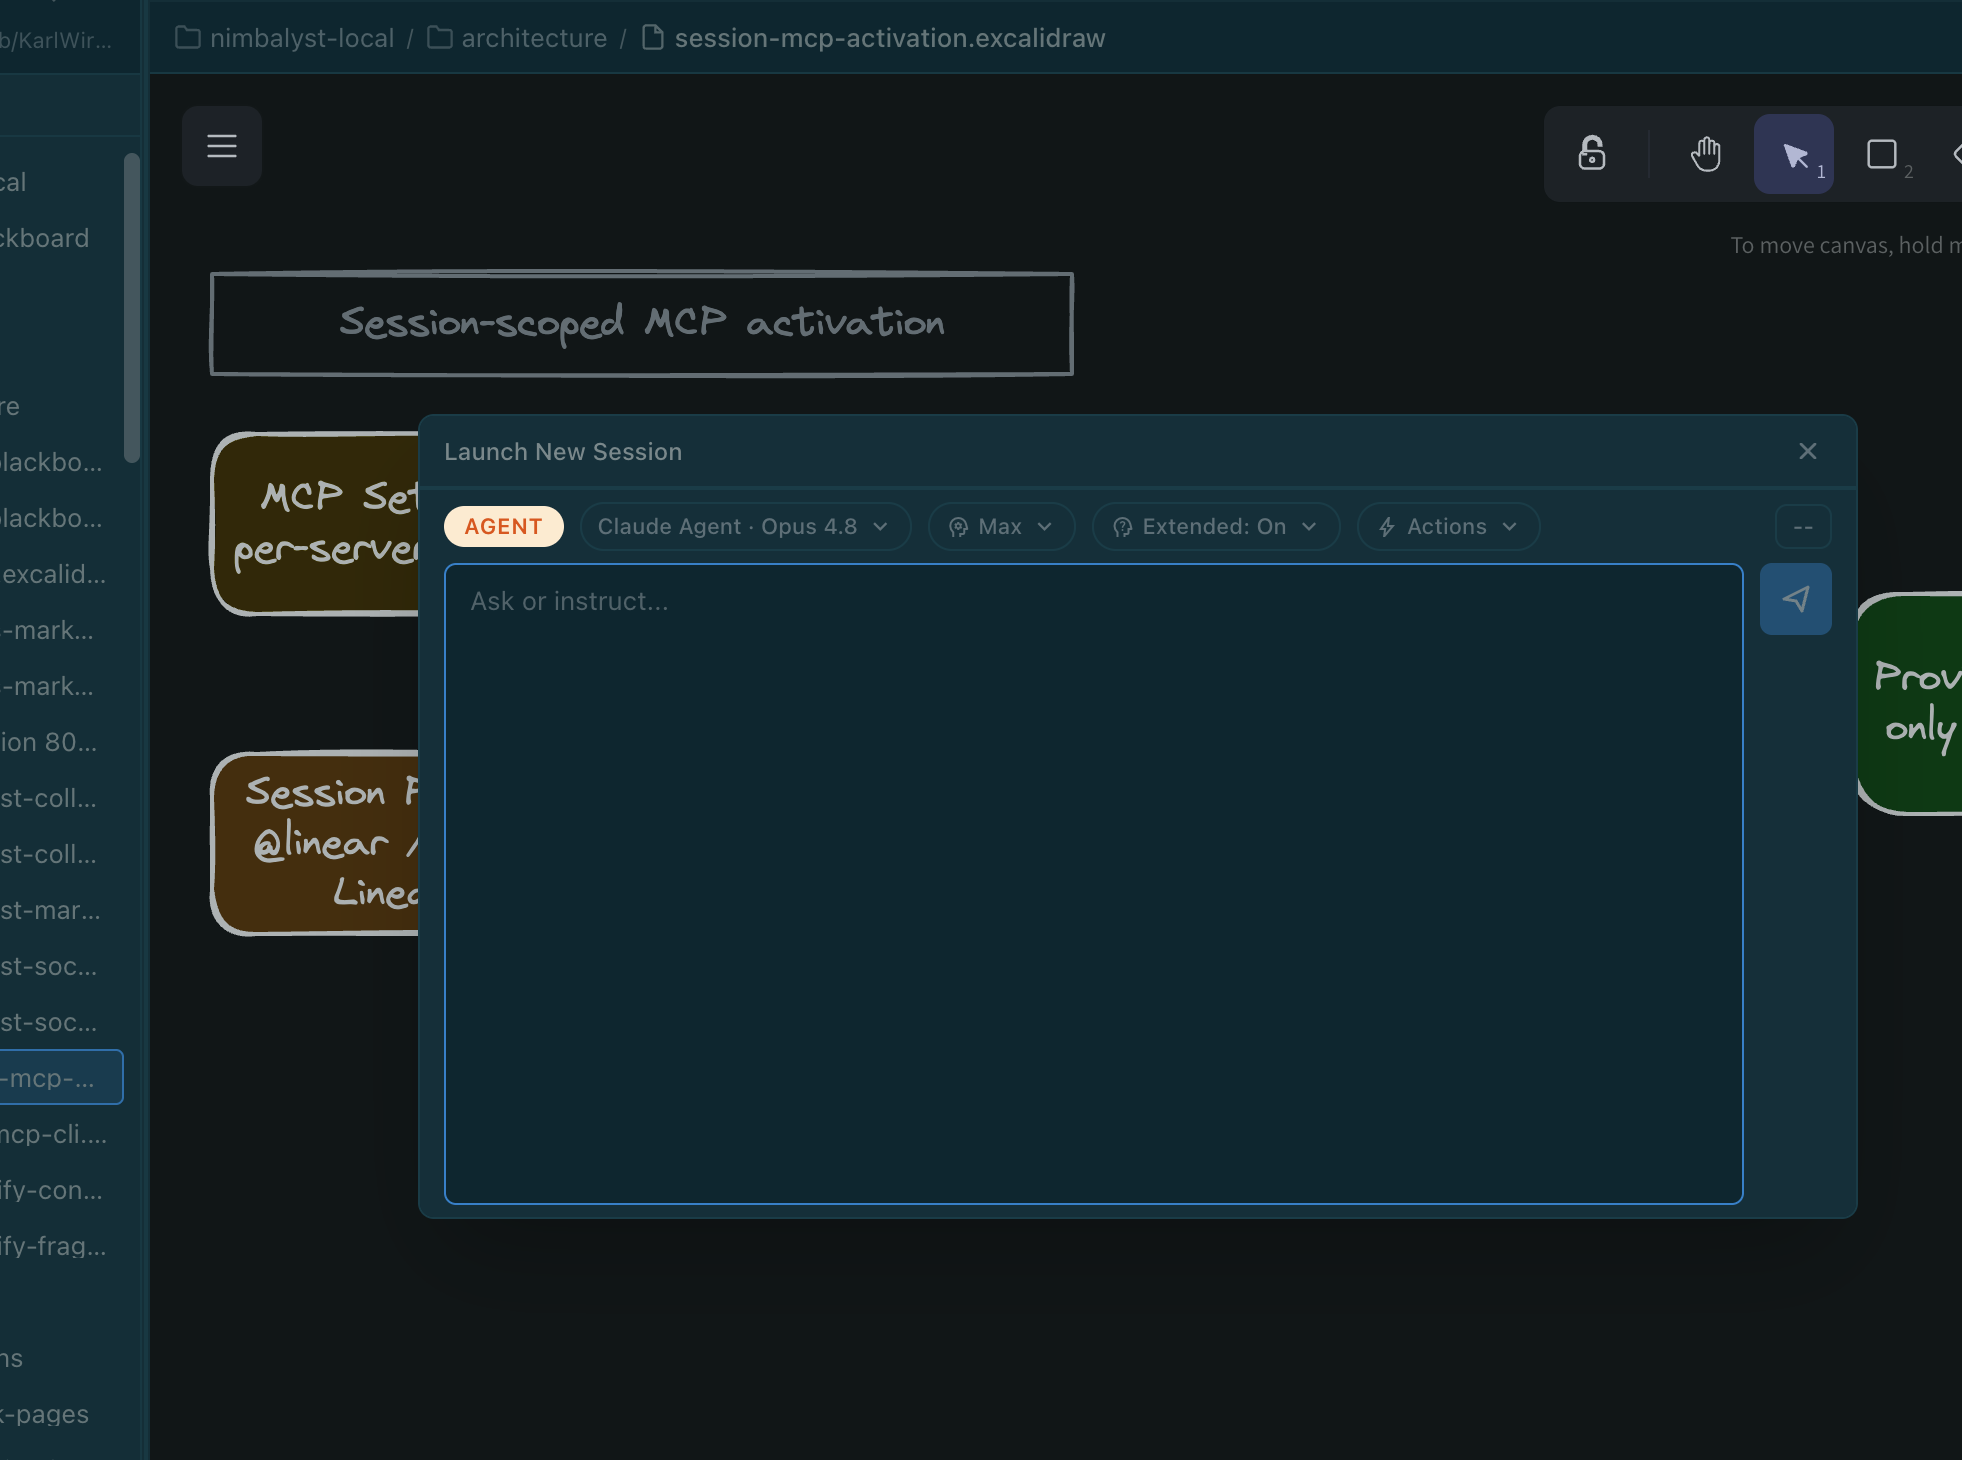
### Start a Background Session from Anywhere

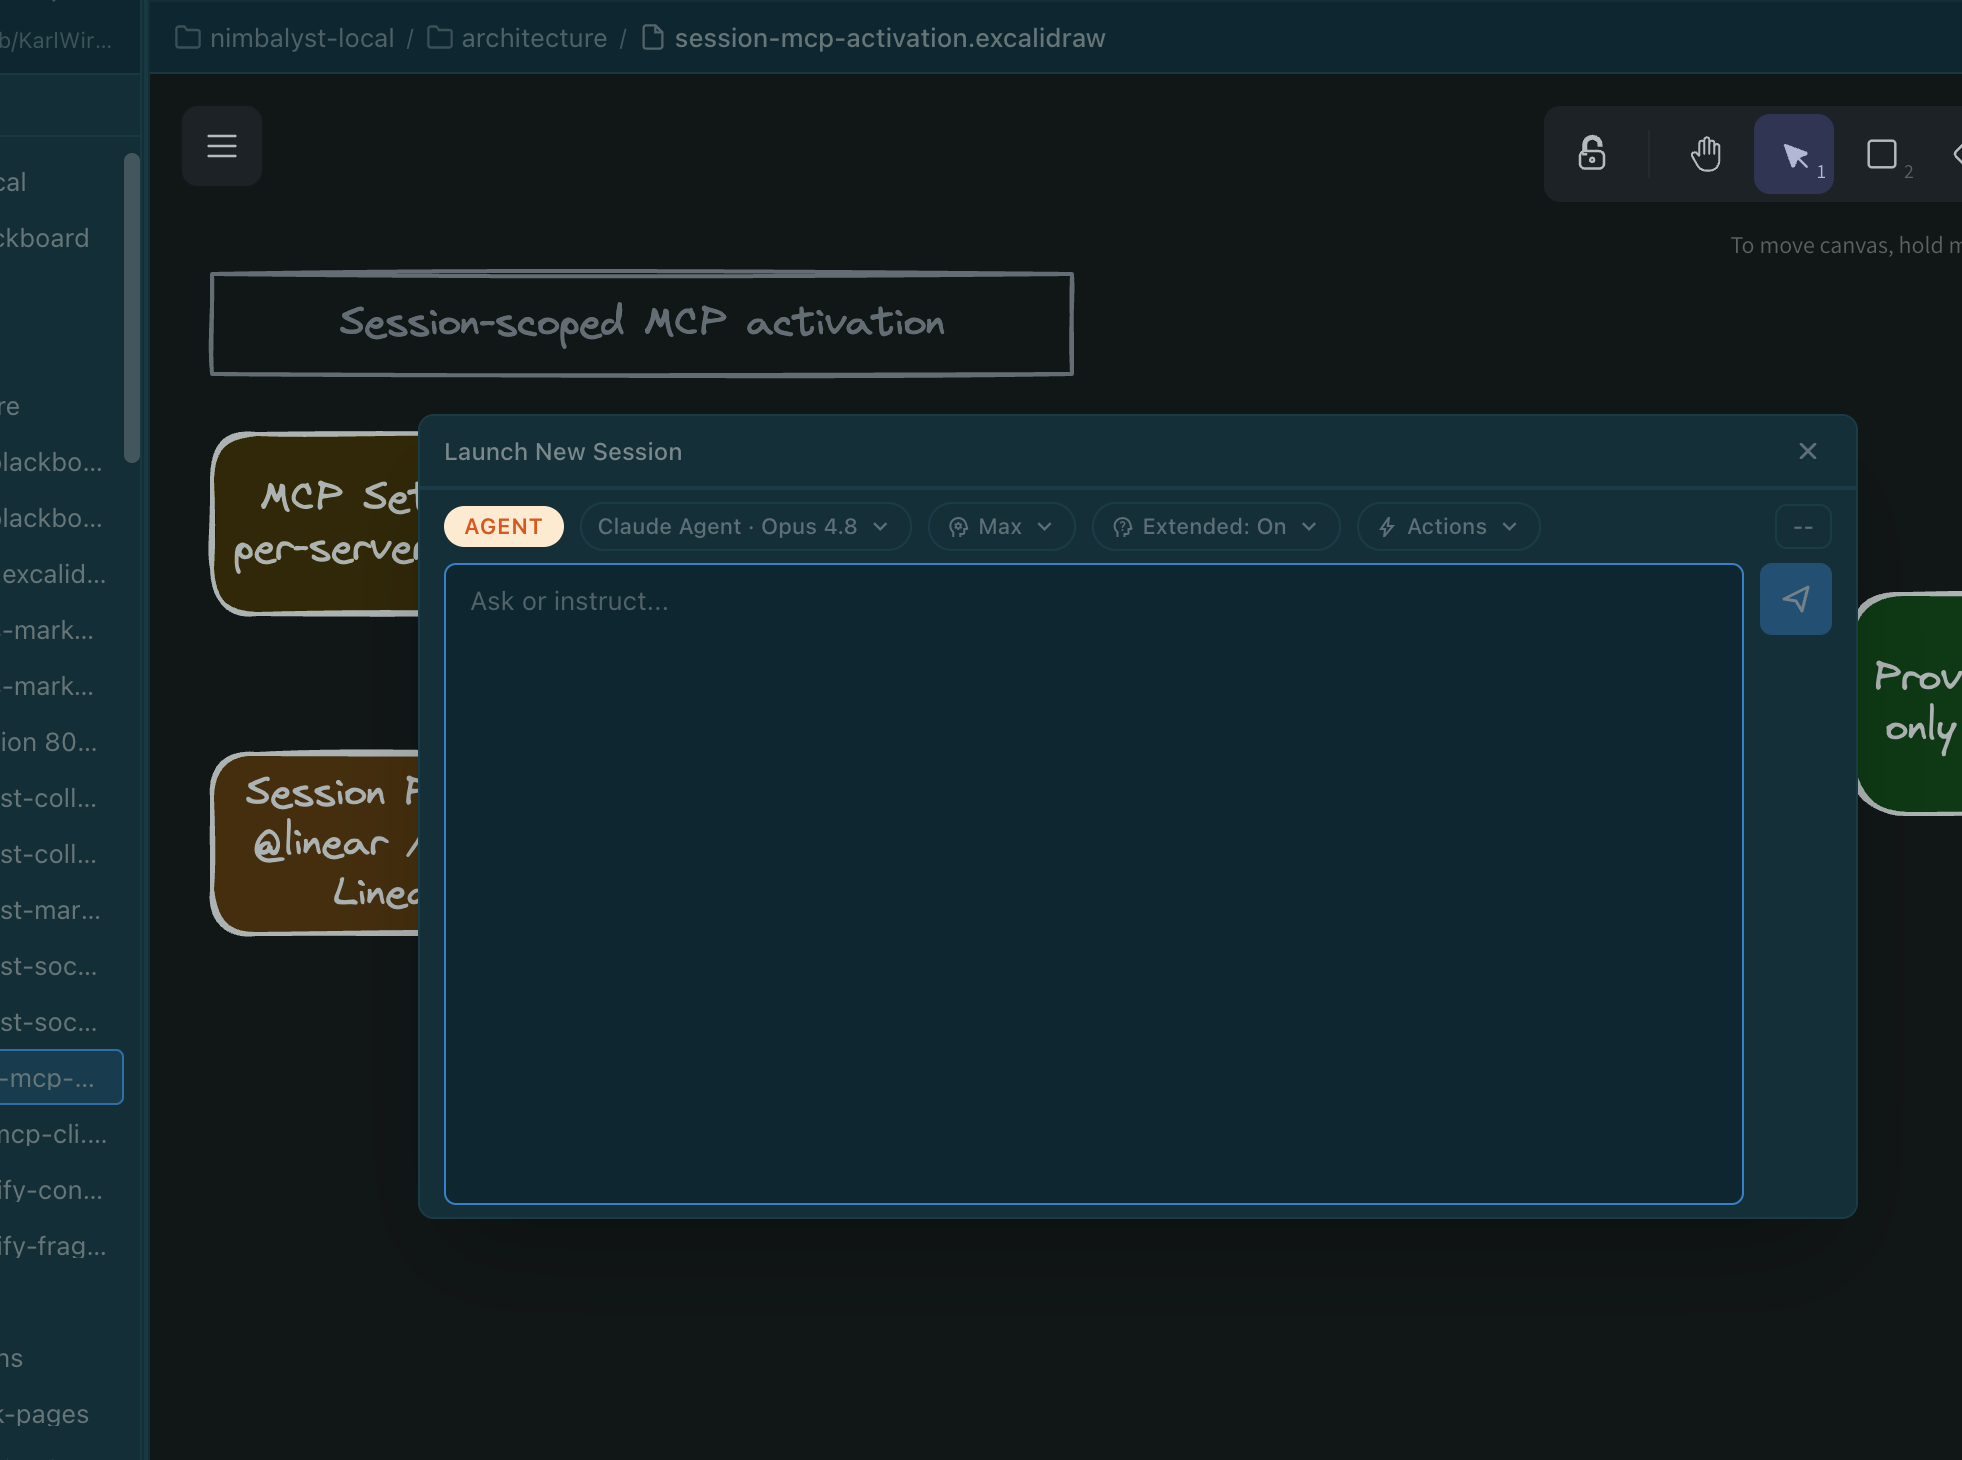
Press **Cmd+Shift+N** from any Nimbalyst mode to open the session launcher over your current work.

<figure><img src="/files/mwXGeDlkudsX5M55Wvkq" alt="The Launch New Session composer floating over an open Excalidraw document"><figcaption><p>Start a session without leaving the document, Tracker, pull request, or shared file you are viewing.</p></figcaption></figure>

The launcher includes the same controls as the normal chat composer:

* Choose the agent and model.
* Set effort and supported thinking controls.
* Insert an Action or slash command.
* Mention files and Tracker items.
* Attach images and other supported context.

Drag the launcher by its title bar when it covers something you need to read. Sending the prompt starts the session in the background, closes and resets the launcher, and keeps you in the current mode. Open Agent mode or the attention list whenever you want to follow the new session.

Starting a session from a document or Tracker item can prefill the relevant reference so the agent receives the context you launched from.

### Change Models and Thinking from Chat

Press **Cmd/Ctrl+Shift+M** while the chat input is focused to open the model picker without reaching for the mouse. Type to search by the model's display name or model ID, then use the arrow keys and Enter to select it.

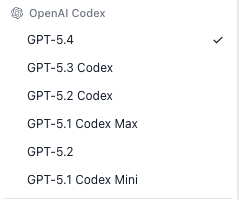
The model selection belongs to the session. Changing it affects later turns without changing the model used by other sessions.

Supported Claude Agent models also show **Extended: On** or **Extended: Off**:

* **Extended: On** keeps the model's extended thinking behavior.
* **Extended: Off** can reduce latency and token use when the task does not need as much reasoning.

The control appears only for models and providers that support it. Extended thinking stays on by default.

### Review the Context Sent with a Prompt

When you select content in an editor, the chat composer shows that selection as a removable chip before you send the prompt.

Selection chips can represent:

* Selected text in documents and code files
* Spreadsheet cells
* A selected mockup screen
* One or more Excalidraw shapes
* Selection types contributed by other editors

Remove a chip when you do not want that selection sent to the model. Removing it changes only the pending prompt; it does not change or deselect the content in the editor.

### Contextual Tips

Empty sessions and other core surfaces can show contextual tips instead of a blank state. These cards point you toward features that fit what you are doing right now.

Common examples include:

* Opening **Tracker Mode** when your work is spreading across many sessions
* Discovering worktree-specific flows and search shortcuts
* Learning keyboard shortcuts and launchers without leaving the current screen
* Finding shared docs, theme controls, feedback entry points, and mobile pairing

Tips often include a direct action like **Open Tracker**, plus **Next** and **All tips** controls so you can browse more guidance without interrupting your current work.

### Session Kanban Board

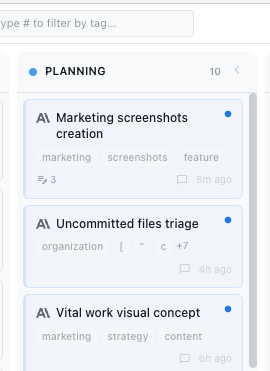
Open the Session Kanban with **Cmd+Shift+K** to see all sessions in the workspace grouped by phase (Backlog, Planning, Implementing, Validating, Complete).

#### Live peek transcripts

Hover any session card and the transcript opens in a peek popover. If the session is running, the transcript streams in live as the agent works, so you can keep an eye on what it is doing without opening the session itself. The peek shows the recent context of long turns, not just the trailing tokens.

* Hover to open, move away to dismiss
* Streaming sessions update token by token in the peek
* Works for sessions, workstreams, and child sessions inside a workstream

### Self-Pacing Session Wakeups

Agents can schedule themselves to wake up later and continue working — useful for long-running tasks where the agent needs to check back on something after a delay rather than running continuously.

* The agent picks the wakeup time itself (anywhere from 60 seconds to 7 days out)
* Wakeups persist across app restarts, but only fire while Nimbalyst is running
* When a wakeup fires, you get an OS notification — clicking it focuses the workspace and opens the session
* A wakeup banner appears in the session header with **Cancel** and **Fire now** controls; sessions with a pending wakeup show a clock icon in the session list

If the workspace window is closed when the wakeup is due, the wakeup waits and re-fires the next time you open that workspace.

### Agent Attention List

The Agent navigation icon shows a badge when sessions are running, unread, or waiting for you.

<figure><img src="/files/XwdV8okDn8OkUEyy3A0o" alt="Agent navigation badge and attention list showing sessions awaiting input"><figcaption><p>The attention list groups sessions by what they need, so a blocked agent does not disappear into session history.</p></figcaption></figure>

Open the icon to see sessions grouped as:

* **Awaiting input** — the agent is blocked on a question, approval, or permission.
* **Running** — the agent is actively working.
* **Unread** — the session has new activity you have not opened.

Select a session to open it. **Mark all read** clears unread state, but it does not approve requests or answer sessions that are awaiting input.

Agents can also send a local system notification when a workflow needs your attention and you have stepped away. Clicking the notification returns you to the relevant workspace and session. Notification availability follows your operating-system and Nimbalyst notification settings.

### System Tray Icon

The system tray menu shows session status at a glance:

* See which sessions are running, completed, or need attention
* Click any session to navigate directly to it
* The dock and Agent navigation badges show a count for sessions that need your attention

### Window State Persistence

The Agentic Coding Window remembers:

* Window size and position
* Active tab in sidebar
* Session ID
* Developer tools state (if open)
* Transcript scroll position

State is saved per workspace.


# AI Usage Report

See which models and tools your AI sessions use, compare activity across projects over time, and find Nimbalyst tools you have not tried yet.

The AI Usage Report shows how you use models and tools across Nimbalyst. Use it to understand activity over time, compare projects, and discover tools that are available but not yet part of your workflow.

Open it from **Window > AI Usage Report**.

If you are deciding between API keys and a Claude or Codex subscription, see [Claude Code and Codex subscriptions](https://nimbalyst.com/claude-code-codex-subscriptions/).

## Overview

The **Overview** tab combines:

* Session and token totals
* An activity heatmap
* Historical usage over time
* Per-project activity

Use the project filter when you want to separate one workspace from your all-project totals.

## Tool Usage

Open the **Tools** tab to see calls made to:

* Built-in agent tools, such as reading files, searching, editing, and running commands
* MCP tools
* Tools contributed by Nimbalyst extensions

The report includes:

* Your most-used tools
* Successful and failed call counts
* Built-in versus MCP and extension usage
* Calls over time
* Usage by provider
* Usage by project

Tool counts describe calls, not time spent or tokens consumed by a tool.

## Backfill Earlier Sessions

New tool calls are recorded automatically. Click **Backfill history** to populate the report from compatible Claude Agent and Codex sessions created before tool tracking was enabled.

Backfill reads your stored Nimbalyst session history. It does not rerun the sessions or call the tools again.

## Where the Data Lives

The report is generated from usage data stored locally by Nimbalyst. Tool tracking records the tool identity, project, provider, count, and error count; it does not turn tool inputs or outputs into a public activity feed.

The AI Usage Report is separate from provider billing dashboards. For authoritative subscription limits, API charges, or provider-specific usage windows, use the dashboard provided by the model provider.


# View Files in Agent Mode

View and edit project files directly inside an AI session in Nimbalyst, without switching back to Files mode to check what the agent did.

### Interacting with Files in Agents Mode

View and edit files directly within your AI session without switching to Files mode.

<figure><img src="/files/rwS5KEoqc7SdU6UMNsFf" alt=""><figcaption></figcaption></figure>

**How to use:**

* When a session, workstream, or worktree edits a file, it appears on the right panel
* Open multiple files in tabs, resize or hide the files panel as needed.
* Edit files directly while collaborating with your coding agent.
* Right-click any file to open it in Files mode if you prefer the full editor experience<br>

Seeing agent output as rendered files rather than terminal text is the core idea behind the [visual editor for Claude Code](https://nimbalyst.com/visual-editor-for-claude-code/).

**Benefits:**

* Stay focused in your AI workflow without context switching
* Make quick edits alongside AI suggestions
* Full editing capabilities without leaving Agent Mode

### Collapsing Sections

Click any section header (Edited, Referenced, Read) to collapse or expand it. This helps focus on what matters when there are many files.

### Tips

* **Long filenames** are truncated. Hover to see the full relative path from your workspace.
* **Multiple edits** to the same file are aggregated - you'll see the total lines added/removed across all changes.
* **Git status updates** automatically when you switch back to Nimbalyst from another app.
* **Empty state**: If no files have been touched yet, you'll see "No file interactions yet."


# Workstreams

Workstreams group related AI sessions that touch the same files or topic, so you can branch an approach without losing the earlier thread.

Workstreams help you organize related AI sessions that work on the same set of files and/or are about the same topic.

### **How to use:**

Start any AI session as usual. When you need to branch your work or try a different approach, click the **+** button to add a new session tab.

<figure><img src="/files/PAVbq3TYUKI9KcNeqg0e" alt=""><figcaption></figcaption></figure>

Your single session automatically converts into a workstream containing multiple sessions.

<figure><img src="/files/UKwIZkuu81Y341zwA3NI" alt=""><figcaption></figcaption></figure>

The right panel shows all files modified across all sessions in your workstream, giving you a unified view of changes.

Running several agents against the same project at once is covered on the [agent orchestration page](https://nimbalyst.com/features/agent-orchestration/) and in [parallel Claude Code sessions](https://nimbalyst.com/parallel-claude-code-sessions/).

<figure><img src="/files/b8R6bL1iRj7nhAidmofD" alt=""><figcaption></figcaption></figure>

Clicking on that file, you can open the files editor in the Agents mode

<figure><img src="/files/2130W1MWrgrIa5c6oCMT" alt=""><figcaption></figcaption></figure>

Right clicking on the file, you can still open it in Files mode

<figure><img src="/files/hBFQtvUzGxVkm2ixGuPs" alt=""><figcaption></figcaption></figure>

### **Benefits:**

* Keep related work organized without losing context
* Easily compare different approaches to the same problem
* Track all file changes across multiple sessions in one place

### Spawning sibling sessions with `/launch-new-session`

You can ask the agent to spin off another session for a side task without leaving the current one. Run `/launch-new-session` in any session and describe the side task. The agent calls the `spawn_session` MCP tool and a new session is created.

By default the new session is a **sibling**: it joins the caller's workstream, so files-edited, open tabs, and the workstream overview are shared. The original session stays focused on its own thread while the sibling runs in parallel.

If you want the side task fully separated, ask for an isolated session ("isolated bug fix", "fix and commit separately"). The agent passes `isolated: true` to `spawn_session` and the new session is top-level instead of joining the workstream.

* **Sibling (default)**: shares workstream context with the caller. Good for parallel exploration of related work.
* **Isolated**: independent top-level session with no parent. Good for unrelated fixes the agent should commit on its own.
* **Worktree**: combine either mode with a worktree to put the new session on its own git branch. Sibling and worktree are independent options.

You can also launch sibling sessions from the composer's Actions dropdown by configuring an Action with `launch: new-session`. See [AI Actions](/session-management/ai-actions) for the config keys.


# Import Claude Code Sessions

Import sessions from the Claude Code CLI into Nimbalyst so you can browse, search, resume, and continue past terminal conversations visually.

Bring sessions you ran in the Claude Code CLI into Nimbalyst so you can browse, search, resume, and continue them in the Agent Window.

Nimbalyst runs on top of the Claude Code you already have installed, so imported CLI sessions keep working the same way. See the [Claude Code GUI page](https://nimbalyst.com/claude-code-gui/).

### How to use

1. Open **File → Import Claude Code Sessions...**

<figure><img src="/files/yKSl5UcY0VYOe7aTrHLJ" alt=""><figcaption></figcaption></figure>

2. The Import dialog scans your Claude Code session storage for sessions tied to the current workspace and shows totals at the top:

* **Total** sessions found
* **New** sessions not yet imported
* **Updates** to sessions you've already imported (Claude Code added more turns since last import)
* **In Sync** sessions that already match what's in Nimbalyst

<figure><img src="/files/6Dx0nsTzFVyYFmFyjUCk" alt=""><figcaption></figcaption></figure>

3. Search by title, expand the project group, and check the sessions you want to import.
4. Click **Import n Sessions**.

Imported sessions show up in the Agent Window session list and the kanban board. You can resume them, link them to tracker items, or open them in a worktree just like any other Nimbalyst session.

### What gets imported

* Full conversation history including subagent turns
* Extended-thinking blocks
* Long tool results (inlined so they show up in the transcript)
* Follow-up prompts within a turn

### Workspace matching

Nimbalyst matches Claude Code's on-disk session directories to your current workspace. Workspaces with spaces, apostrophes, or accented characters in their path are handled correctly.

If the workspace-filtered scan finds nothing, the dialog falls back to showing all available Claude Code sessions and tells you the scope was broadened, so you can still import sessions that Claude Code stored under a different resolved path or sibling worktree.

### Tips

* Import is idempotent. Running it again on a session that already matches Nimbalyst's copy is a no-op (it shows up under **In Sync**).
* "Has Updates" means Claude Code added more turns to a session since you last imported it. Re-checking and re-importing brings the new turns over.
* Import works with sessions from Claude Code 2.1.x and later.


# / Commands and Skills

Use Claude Code and Codex slash commands, custom commands, and skills in Nimbalyst, and learn how actions, commands, and skills differ.

Nimbalyst supports Claude Code and Codex out-of-the-box slash commands, custom commands, and skills.

### Actions vs Commands vs Skills

**Actions** are reusable prompt presets defined in a single `nimbalyst-local/ai-actions.md` file and surfaced as a dropdown in the composer. Pick one and the prompt drops into your draft. Best for "I copy-paste this prompt all the time." Typical examples include reviewing changed files, planning an implementation, drafting release notes, and inspecting the current editor. See [AI Actions](/session-management/ai-actions).

**Commands** are simple markdown files that provide a prompt template. They live in `.claude/commands/` as markdown files. When you type `/command-name`, the contents of that file are sent as a prompt to the agent.

**Skills** are richer integrations that can include instructions, workflows, and tool usage patterns. Nimbalyst ships with built-in skills (like `/commit`), plugins can provide skills, and you can create your own. Skills can define how the agent should behave for specific workflows — for example, a skill that tells the agent how to manage your tracker state when working on blog posts.

### Using Slash Commands and Skills

Type `/` in the AI chat to see all available commands and skills. The typeahead shows all skills — user-created, plugin, and extension skills — so you can quickly find what you need.

Plugin skills are namespaced consistently with commands so the inserted command matches what the agent SDK routes. For example:

* `/excalidraw:excalidraw`
* `/planning:design`
* `/feedback:bug-report`

Skills and commands written for one agent run in the other — workflow discovery is unified across Claude Code and Codex.

Ready-made skills you can drop into a project are listed on the [Nimbalyst skills page](https://nimbalyst.com/skills/), and the [commands and skills feature page](https://nimbalyst.com/features/commands-and-skills/) covers how they surface in the composer.

### @ Mentions

Type `@` in the AI chat to reference files and folders. The picker opens immediately, with suggestions sorted by **recency** so the files you've most recently opened or edited are at the top. Keep typing to filter, or scroll to find older files. You can mention individual files or entire directories (shown with a folder icon).

Mentioning a file gives the agent direct context about which files you want it to work with, instead of relying on the agent to search for them.

In markdown documents, `@` is also the fastest way to embed supported custom-editor files. If the inserted file link sits by itself on its own line, Nimbalyst upgrades it into a live inline embed in WYSIWYG view. This is useful for mockups, Excalidraw files, data models, CSV files, and other custom-editor content you want to keep inside a spec or plan.

### @@ Session Mentions

Type `@@` in the AI chat to reference another session. The picker shows your sessions in recency order so the conversation you were just in is one keystroke away.

Mentioning a session pulls its context into your current conversation. It's useful when you want the agent to build on prior work, reuse research from an earlier session, or understand decisions made elsewhere — without having to re-explain everything.

### Built-in Example

**`/commit`** - Creates a git commit:

1. Runs `git status` and `git diff`
2. Reviews recent commits for style
3. Drafts a commit message with type prefix (`feat:`, `fix:`, etc.)
4. Stages and commits

**`/session-cleanup`** - Tidies your Sessions board:

1. Audits your sessions by phase and tags
2. Suggests phase corrections (for example, moving committed work out of planning)
3. Flags old completed sessions as archive candidates
4. Asks for your approval before changing anything

### Create Your Own Commands

Custom commands live in `.claude/commands/` as markdown files. Go to the `.claude` directory in your project, then the `commands` folder. Edit or add your own commands there.
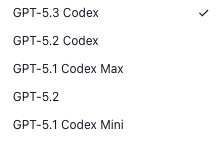
You can also go to Settings (click the Gear on the bottom left), then Project Settings to add commands.

### Create Your Own Skills

Skills are a powerful way to teach the agent how to handle recurring workflows. For example, you can create a skill that integrates with the tracker system — telling the agent to update tracker state whenever you're working on certain types of tasks. See [project-wide-plan-task-management.md](broken://pages/SR3dgfjEnZdIBTuLRmdE) for an example.


# AI Actions

AI Actions are reusable prompt presets that show up in the Nimbalyst composer. Define them in one workspace file so they version and share.

AI Actions are reusable prompt presets that show up as a dropdown in the AI composer. Pick one and the prompt drops into your draft, ready to send or edit. They live in a single file in your workspace, so they're easy to version, share, and edit.

<figure><img src="/files/GV9Em9r4EUHFdDVxgZ46" alt="The Actions dropdown open in the AI composer, listing seed entries like Review changed files, Plan implementation, and Draft release notes"><figcaption><p>The Actions dropdown open in the composer.</p></figcaption></figure>

### When to use Actions

Actions are the lightest-weight way to reuse a prompt:

* **Action**: a prompt you reuse often, defined in one file, picked from a dropdown.
* **Command** (`/`): a slash command in `.claude/commands/<name>.md`. Runs in either Claude Code or Codex.
* **Skill**: a richer integration with workflow logic and tool usage patterns.

If you're copy-pasting the same prompt more than twice, turn it into an Action.

See the [commands and skills feature page](https://nimbalyst.com/features/commands-and-skills/) for how Actions, Commands, and Skills differ in practice.

Starter Actions often include patterns like:

* **Review Changed Files**
* **Plan Implementation**
* **Draft Release Notes**
* **Inspect Current Editor**

### Where Actions live

Actions are defined in `nimbalyst-local/ai-actions.md` in your workspace. The first time you open the Actions dropdown in a workspace without that file, you'll see a "Create ai-actions.md with examples" button that seeds it with a few starter entries.

### File format

Each `## Heading` is one action. Everything between that heading and the next `##` is the prompt body that gets inserted into the composer.

```markdown
# AI Action Prompts

## Review changed files
/review changed files in this session and call out regression risk
in the affected modules.

## Plan implementation
Look at the active issue and the open editor. Produce a structured plan that:
- breaks the work into 3-5 phases
- identifies the files I'll need to touch
- flags any cross-cutting concerns

When you're done, ask me which phase to start with.

## Inspect current editor
Read the file that's currently open and tell me what you'd change. Be specific:
- 3 concrete improvements
- 1 thing that's already good and shouldn't change
```

### Launching a new sibling session from an Action

By default an Action drops its prompt into the current composer. You can also configure an Action to spin up a brand-new sibling session and submit the prompt there, so the current session stays focused on what it was already doing. See [Workstreams](/session-management/workstreams) for how sibling sessions appear in the sidebar.

Add a fenced YAML config block right under the heading:

````markdown
## Investigate in a new session
```yaml
launch: new-session
model: opus
foreground: false
autoSubmit: true
```

Spin up a sibling investigation. Read the open file and the linked tracker item.
Produce a one-page summary of what the change should do, what it must not break,
and three risks to watch for. Reply in the sibling session when done.
````

Supported config keys:

| Key          | Values                                                                 | What it does                                                                                                                      |
| ------------ | ---------------------------------------------------------------------- | --------------------------------------------------------------------------------------------------------------------------------- |
| `launch`     | `same-session` (default), `new-session`                                | Whether the Action drops its prompt into the current composer or starts a sibling session.                                        |
| `model`      | a model id (e.g. `opus`, `sonnet`, `haiku`, a specific provider model) | Model to use when `launch: new-session`. Defaults to the current session's model.                                                 |
| `foreground` | `true` (default), `false`                                              | When `false`, the sibling session opens in the background so you stay focused on the current one.                                 |
| `autoSubmit` | `true` (default), `false`                                              | When `false`, the prompt is dropped into the sibling's composer but not sent. Useful when you want to tweak it before submitting. |

Actions with `launch: new-session` show a small "open in new" icon in the dropdown so you can tell at a glance which ones will spin up a sibling.

### Editing your Actions

Click **Edit actions…** at the bottom of the Actions dropdown to jump straight to `nimbalyst-local/ai-actions.md`. Save the file and the dropdown updates the next time you open it. No restart needed.

### Sharing Actions with a team

`nimbalyst-local/` is part of your workspace, so committing `ai-actions.md` to git ships the whole team's Action set with the repo. Pair this with `.claude/commands/` and your skills/CLAUDE.md to make a one-clone-and-go agent environment.


# Interactive Prompts (PromptForUserInput)

PromptForUserInput is a built-in Nimbalyst MCP tool that lets your agent collect several answers at once through one structured widget.

`PromptForUserInput` is a built-in Nimbalyst MCP tool that lets your agent collect several inputs from you at once through a single structured widget in the transcript. Instead of asking three narrow questions back-to-back, the agent surfaces one prompt with multiple fields and waits for you to submit.

Use it any time you want to drive a decision visually: ranking, picking from a list, confirming, or editing a draft.

### When to use it

Ask for an interactive prompt when you want to:

* Prioritize a list by dragging items into order (e.g. "help me prioritize my blogs")
* Approve or reject recommended changes in bulk (e.g. "review these recommended changes to my tracker, keep some, drop others")
* Edit a short draft inline before the agent acts on it (e.g. tweak a tweet, commit message, or summary)
* Confirm a destructive or important action
* Collect a few related answers in one shot instead of a chat back-and-forth

More on how Nimbalyst passes structured input back to your agent is on the [agent integration page](https://nimbalyst.com/features/agent-integration/).

### How to trigger it from chat

You usually do not need to name the tool. Just describe the interaction you want:

* "Show me a prioritization widget for these blog posts so I can drag them into the order I want to publish."
* "Give me a checklist of the changes you recommend to my tracker so I can approve the ones I like."
* "Draft a tweet thread for this release and let me edit it before posting."
* "Ask me to confirm before you run the migration."

If your agent ignores the hint or falls back to plain chat, you can be explicit: "Use the `PromptForUserInput` tool."

### Field types

A single prompt can mix any of these five fields:

* **multiSelect** — pick any subset from a list of options. Good for "approve these, skip these".
* **singleSelect** — pick exactly one option. Good for choosing a branch, mode, or template.
* **reorder** — drag items into the order you want. Supports per-item removal with a configurable `minItems` floor. Good for prioritization.
* **editText** — inline rich-text editor for short drafts. Reuses the same Lexical editor Nimbalyst uses elsewhere in the transcript and on iOS.
* **confirm** — yes/no confirmation with custom labels.

### Examples

#### Prioritize blog posts (reorder)

> **You:** I have five blog drafts in `/blog/drafts/`. Show me a prioritization widget so I can drag them into the order I want to publish, and let me drop any I want to kill.

The agent returns a single prompt with a `reorder` field listing the five drafts. You drag them into order, click the trash icon on the ones you want to drop, and submit. The agent then continues with the ordered, filtered list.

#### Approve tracker changes (multiSelect)

> **You:** Look at my open tracker items and recommend changes. Ask me which ones to apply.

The agent surveys your tracker, then surfaces a `multiSelect` prompt with each recommended change as an option ("Close issue #142 as duplicate", "Re-label #156 as bug", and so on). You check the ones you want, leave the others, and submit. The agent applies only the approved changes.

#### Draft and edit a tweet (editText + confirm)

> **You:** Draft a tweet announcing the 0.60.1 release and let me edit it before you post anything.

The agent surfaces one prompt with two fields: an `editText` field pre-filled with the draft, and a `confirm` field asking whether to post it. You polish the wording in place, flip confirm to yes, and submit.

### Voice mode behavior

In Voice Mode, the agent decides per-prompt whether voice can handle the interaction or whether to defer to the on-screen widget. Long drafts and reorders with more than six items default to the screen, since reading them aloud is not useful. Short single-select and confirm prompts stay in voice.

### For extension and agent developers

`PromptForUserInput` is exposed as a standard MCP tool. Any agent that speaks MCP (Claude Code, Codex, OpenCode, GitHub Copilot, your own extension) can call it.

The schema is a flat type-discriminator object, not `oneOf`. Each field carries a `type` ("multiSelect", "singleSelect", "reorder", "editText", or "confirm") plus the options or initial value for that type. The response comes back as a JSON object keyed by field id.

A minimal call looks like this:

```json
{
  "title": "Prioritize blog drafts",
  "fields": [
    {
      "id": "order",
      "type": "reorder",
      "label": "Drag into publish order",
      "items": [
        { "id": "a", "label": "Why we built Workstreams" },
        { "id": "b", "label": "Voice Mode tour" },
        { "id": "c", "label": "0.60.1 release notes" }
      ],
      "minItems": 1
    },
    {
      "id": "confirm",
      "type": "confirm",
      "label": "Lock in this order?"
    }
  ]
}
```

Notes worth knowing if you are integrating:

* The wire name is `PromptForUserInput`, not `RequestUserInput`. This avoids collision with the Codex CLI's built-in `request_user_input` tool, which is gated to Plan mode.
* Responses persist as a synthetic `nimbalyst_tool_result` on settle, so the canonical `tool_call` event still picks up the answer even if the SDK subprocess exits before flushing its own `tool_result` block.
* iOS round-trips the response through the existing transcript bridge, so the same prompt works on desktop and mobile without separate code paths.
* iOS reorder uses a 200ms long-press to start a drag, with the selection callout suppressed, so the gesture does not get hijacked into text selection.

### Related

* [MCP](/setup-nimbalyst/mcp) — overview of Nimbalyst's built-in MCP tools, including `AskUserQuestion` for simpler multiple-choice prompts.
* [Agent Window & Session Management](/session-management/agent-window-and-session-management) — where these prompts appear in the transcript.


# Automations

Schedule recurring AI tasks in Nimbalyst. Automations run on a timer from a markdown file to produce standups, weekly reports, and reviews.

Automations let you schedule recurring AI-powered tasks that run on a timer inside Nimbalyst. Use them to generate daily standups, weekly reports, periodic code reviews, or any repeating task you'd otherwise do manually.

Each automation is a markdown file in `nimbalyst-local/automations/`. The frontmatter defines the schedule and output settings, and the markdown body is the prompt that runs on each execution.

The [automations feature page](https://nimbalyst.com/features/automations/) covers scheduling patterns teams use, such as standups and recurring reviews.

<figure><img src="/files/5y3AsCH5oIdA1hWTIMiJ" alt=""><figcaption></figcaption></figure>

## Creating an Automation

### Quick: Use `/automation`

Type `/automation` followed by a description:

```
/automation summarize my git commits every weekday morning
```

Nimbalyst creates the automation file with the right schedule and prompt, sets it to disabled so you can review it first, then tells you to open the file and enable it.

### Manual: Create the File

Create a `.md` file in `nimbalyst-local/automations/` with this format:

```markdown
---
automationStatus:
  id: standup-summary
  title: Daily Standup Summary
  enabled: false
  schedule:
    type: weekly
    days: [mon, tue, wed, thu, fri]
    time: "09:25"
  output:
    mode: new-file
    location: nimbalyst-local/automations/standup-summary/
    fileNameTemplate: "{{date}}-standup.md"
  runCount: 0
---

# Daily Standup Summary

Review the git log and recent file changes in this workspace since the previous business day. Summarize:

1. **What was accomplished** - List completed work based on commits and file changes
2. **What's in progress** - Identify files with uncommitted changes or recent branches
3. **Any blockers** - Note any error logs, failing tests, or stale branches

Format as a concise standup update suitable for sharing with the team.
```

## Document Header Controls

When you open an automation file, a header bar appears at the top of the editor with:

* **Enable/Disable toggle** -- turn the automation on or off
* **Schedule display** -- shows the schedule in plain language (e.g., "Weekdays at 9:25 AM")
* **Last run info** -- when it last ran and whether it succeeded
* **Run Now button** -- trigger the automation immediately without waiting for the next scheduled time

## Schedule Types

### Daily

Runs once per day at the specified time.

```yaml
schedule:
  type: daily
  time: "09:00"
```

### Weekly

Runs on specific days of the week at the specified time. Valid days: `mon`, `tue`, `wed`, `thu`, `fri`, `sat`, `sun`.

```yaml
schedule:
  type: weekly
  days: [mon, wed, fri]
  time: "14:00"
```

### Interval

Runs every N minutes while Nimbalyst is open.

```yaml
schedule:
  type: interval
  intervalMinutes: 60
```

## Output Modes

Each run's output is written to files. You control how with the `output` block:

| Mode         | Behavior                                                                                        |
| ------------ | ----------------------------------------------------------------------------------------------- |
| **new-file** | Creates a new file per run. Use `fileNameTemplate` with `{{date}}` and `{{time}}` placeholders. |
| **append**   | Appends each run's output to a single `output.md` file with date headers.                       |
| **replace**  | Overwrites a single `output.md` file each run -- only the latest result is kept.                |

**Example output config:**

```yaml
output:
  mode: new-file
  location: nimbalyst-local/automations/standup-summary/
  fileNameTemplate: "{{date}}-output.md"
```

## AI Provider

By default, automations run using Claude Code. You can optionally specify a different provider or model:

```yaml
provider: claude-code    # "claude-code", "claude", or "openai"
model: claude-code:sonnet # optional: specific model ID
```

## Execution History

Each automation tracks its run history in a `history.json` file inside the output directory. This includes timestamps, duration, success/error status, and links to the AI session that produced the output.

You can also ask the agent to check history:

```
What's the run history for my standup-summary automation?
```

The agent uses the `automations.history` tool to retrieve this.

## Frontmatter Fields Reference

| Field                      | Required         | Description                                          |
| -------------------------- | ---------------- | ---------------------------------------------------- |
| `id`                       | Yes              | Unique kebab-case identifier                         |
| `title`                    | Yes              | Human-readable name                                  |
| `enabled`                  | Yes              | `true` or `false`                                    |
| `schedule.type`            | Yes              | `daily`, `weekly`, or `interval`                     |
| `schedule.time`            | For daily/weekly | Time in 24h format (`"HH:MM"`)                       |
| `schedule.days`            | For weekly       | Array of day abbreviations                           |
| `schedule.intervalMinutes` | For interval     | Number of minutes between runs                       |
| `output.mode`              | Yes              | `new-file`, `append`, or `replace`                   |
| `output.location`          | Yes              | Path for output files (relative to workspace)        |
| `output.fileNameTemplate`  | For new-file     | Filename with `{{date}}` and `{{time}}` placeholders |
| `provider`                 | No               | AI provider to use                                   |
| `model`                    | No               | Specific model ID                                    |
| `runCount`                 | Auto             | Incremented on each run                              |
| `lastRun`                  | Auto             | ISO timestamp of last execution                      |
| `lastRunStatus`            | Auto             | `success` or `error`                                 |
| `nextRun`                  | Auto             | ISO timestamp of next scheduled run                  |

## Example: Weekly Project Status Report

```markdown
---
automationStatus:
  id: weekly-status
  title: Weekly Project Status
  enabled: true
  schedule:
    type: weekly
    days: [fri]
    time: "16:00"
  output:
    mode: new-file
    location: nimbalyst-local/automations/weekly-status/
    fileNameTemplate: "{{date}}-status.md"
  runCount: 0
---

# Weekly Project Status

Generate a weekly status report for this project:

1. **Summary** - One paragraph overview of the week's progress
2. **Completed** - List all merged PRs and completed features this week (check git log)
3. **In Progress** - List open branches and their status
4. **Metrics** - Count commits, files changed, and lines added/removed
5. **Next Week** - Based on open branches and TODOs, suggest priorities

Format as a clean markdown report.
```

##

<figure><img src="/files/LnBsNDz6qiiamXNHSuRa" alt=""><figcaption></figcaption></figure>

<figure><img src="/files/5y3AsCH5oIdA1hWTIMiJ" alt=""><figcaption></figcaption></figure>

## Tips

* **Start disabled**: New automations default to `enabled: false`. Review the prompt and schedule before enabling.
* **Edit anytime**: Just edit the markdown file. The extension picks up changes within 30 seconds.
* **Run Now to test**: Use the "Run Now" button in the document header to test your automation before relying on the schedule.
* **Check output**: Outputs appear in the `location` directory. Open them from the file tree.
* **Automations only run while Nimbalyst is open**: If Nimbalyst is closed at the scheduled time, the automation won't fire retroactively.


# Share Link to a Session

Create a public share link for any AI session so teammates can read the whole transcript in a browser without installing Nimbalyst first.

Share any AI or markdown file with a public link.

<figure><img src="/files/VUvCu0GYzrhRNA0eKZYO" alt=""><figcaption></figcaption></figure>

**How to use:**

1. Right-click on a session in the session list
2. Select **Share Link**
3. A link is copied to your clipboard
4. Paste it anywhere -- Slack, email, X, a doc<br>

**Important! Security and Safety.**

* Anyone with the link can view the session or file. Do not share sessions containing sensitive information.
* Shared content is hosted on Cloudflare R2. There is no password protection.
* The content is encrypted on Cloudflare so Nimbalyst, Inc has no ability to read the content

Shared links are read-only. For real collaboration on the same session context, see [Nimbalyst for Teams](https://nimbalyst.com/teams/).


# Tracker Overview

Nimbalyst has a built-in issue tracker that keeps bugs, features, tasks, and plans in your project files, next to your docs and AI sessions.

Nimbalyst's tracker is a schema-driven system for managing work items directly alongside your AI sessions and project files. It supports multiple item types out of the box, each with its own status workflow, fields, and icon -- and you can define custom types to fit your project's needs.

The [task management feature page](https://nimbalyst.com/features/task-management/) shows the tracker in context alongside docs and sessions, and [kanban for Claude Code](https://nimbalyst.com/kanban-for-claude-code/) covers the board view for agent work.

Tracker types can be local, hybrid, or shared with a team. Shared items support real-time field and rich-body editing, team comments and activity, and the same kanban, list, tag, relationship, agent, and session-linking workflows. See [Collaborative Trackers](/team-collaboration/trackers).

<figure><img src="/files/HQCuarKTb1srEJPlI3uh" alt=""><figcaption></figcaption></figure>

## Why work in trackers instead of folders

Task trackers and document tools are usually separate, which forces a choice. Either a task is a one-line ticket and the actual thinking lives in a document somewhere else, or you write the document and nothing tracks its state. Nimbalyst removes the split. **Every tracker item contains a full document**, so the work and the record of the work are the same object.

<figure><img src="/files/A3tWnGtozirpBXO0zfvJ" alt="A tracker item open beside the item list, its Content section holding a full document with headings, prose, an embedded mockup, and a comment thread"><figcaption><p>The item's Content section is a complete document, not a description field. Headings, embeds, and comments all live inside the item.</p></figcaption></figure>

That Content section is the same editor you get in any markdown file. Write the spec, the repro steps, the rollout plan. Embed a mockup, an Excalidraw diagram, a data model, a spreadsheet. Add checklists, tables, and code blocks. Reference other tracker items as live chips and other files as live embeds. Leave anchored comments on a specific passage.

### Your file tree stays clean

This is the practical payoff. Without it, every piece of work sheds files: a spec, a scratch note, a diagram, a follow-up list, each needing a folder and a name and a decision about where it belongs. Six months later nobody remembers whether the auth rework notes are under `docs/`, `planning/`, or `archive/2026/`.

When the writing lives inside the item, none of that reaches your file tree. The project keeps the files that are genuinely project artifacts, and the thinking around each piece of work stays attached to that piece of work.

### Let the flow carry the work, then archive it

The intended rhythm is to work through the tracker rather than to file things:

1. Create the item when the work appears, from a chat, a `/track` command, or the **+New** button.
2. Write and think inside it as the work develops, embedding whatever the work needs.
3. Move it across statuses as it progresses, and link the sessions, files, and pull requests it touches.
4. When it is done, mark it done. When it is no longer live, archive it.

Archiving is not deleting. An archived item keeps its body, its comments, its activity log, and every link it had to sessions, files, and other items.

It does get out of your way. Archived items are hidden from the board, from lists, from quick-open search, and from the tracker reference picker. To see them, add an **Archived** filter in the tracker filter box, or use a saved view that includes them. `nim tracker unarchive NIM-123` brings one back to active.

So finished work leaves your board without leaving your project. It is out of sight by default and retrievable on purpose, which is the thing folder-based organizing never quite manages.

### Folders still work, and trackers point at them

None of this replaces your file tree. Code, real documentation, and anything that belongs in the repository should stay a file under version control.

The two systems connect in both directions. A tracker item can link files for reference and can embed them live in its body. A markdown file can carry `trackerStatus` frontmatter and become an item itself, or contain inline `#type[...]` tags and tracker reference chips that show live status beside the prose. So a tracker item can point at the spec in `docs/`, and that spec can point back.

The rule of thumb: if it is a durable artifact of the project, make it a file. If it is the work itself, and it has a beginning, a middle, and an end, make it a tracker item and write inside it.

### Expand an item to full width

When the body grows past a comfortable size for the side panel, open **Expanded tracker content** for a full-width editing surface, with the item list still on the left and a chat about the item on the right.

<figure><img src="/files/Y1JS8cByVPFqt0OXRFWQ" alt="Expanded tracker content view, showing a full-width item body with a checklist, a slash-command insert menu, and an embedded Excalidraw diagram, with the item list on the left and a Chat about this item panel on the right"><figcaption><p>Expanded view gives the item body the full window, with the item list on the left and a chat scoped to this item on the right.</p></figcaption></figure>

Everything behaves as it does in the panel, with more room: slash commands for diagrams, tables, checklists, code blocks, collapsible sections, and column layouts. **Back to tracker** returns you to the board.

### What You Can Track

Nimbalyst includes six built-in item types:

* **Bug** -- Defects and issues to fix
* **Task** -- General work items and to-dos
* **Feature** -- New capabilities and enhancements
* **Idea** -- Early-stage ideas before they become work
* **Decision** -- Architectural and product decisions with context
* **Plan** -- Larger initiatives with progress tracking

Each type has its own statuses, fields, and color-coded icon. You can also define custom tracker types using YAML configuration files.

### How Items Get Created

Items can come from multiple sources:

* Ask the AI agent during a chat session
* Use the `/track` command for quick creation
* Write inline `#type[...]` tags in any markdown file
* Add `trackerStatus` YAML frontmatter to a markdown document
* Click the **+New** button in the tracker panel

### Where are Items Stored

Items are stored in one of three places:

* In the Database as a tracked item
* In a markdown file if you created the tracked item using # inline
* As a markdown file if that trackerstatus is added to a markdown file

Items in hybrid or shared tracker types can also sync through the team's tracker space. Sharing is explicit for hybrid items; a shared tracker type shares all of its items by design.

### Learn More

* [Item Types and Fields](/task-management/item-types-and-fields) -- Built-in types, statuses, and field definitions
* [Kanban and List Views](/task-management/kanban-and-list) -- Board mechanics, filtering, and drag-and-drop
* [Item Detail](/task-management/item-detail) -- Editing fields, comments, and activity logs
* [Creating Items](/task-management/creating-items) -- All four creation paths with examples
* [AI Integration](/task-management/ai-integration) -- How agents create, update, and query items
* [Commits and Sessions](/task-management/commits-and-sessions) -- Linking items to git history and conversations
* [Custom Tracker Types](/task-management/custom-tracker-types) -- Define your own types with YAML
* [Local Config](/task-management/local-config) -- Project-level settings and file organization


# Item Types and Fields

Nimbalyst ships six built-in tracker item types, each with its own status workflow, fields, and icon. Learn what each type is meant to track.

Nimbalyst includes six built-in tracker types. Each has its own status workflow, fields, and color-coded icon. The type determines which columns appear on the kanban board and which fields are available in the detail view.

### Bug

For tracking defects and issues.

* **Icon:** Bug report (red)
* **Statuses:** To Do, In Progress, In Review, Done
* **Fields:** Title, Status, Priority, Owner, Description

### Task

For general work items and to-dos.

* **Icon:** Task (blue)
* **Statuses:** To Do, In Progress, In Review, Done
* **Fields:** Title, Status, Priority, Owner, Description

### Feature

For new capabilities and enhancements.

* **Icon:** Rocket (green)
* **Statuses:** To Do, In Progress, In Review, Done
* **Fields:** Title, Status, Priority, Owner, Description, Release Version, Release Notes

### Idea

For capturing ideas before they become work items.

* **Icon:** Lightbulb (yellow)
* **Statuses:** New, Considering, Accepted, Rejected
* **Fields:** Title, Status

### Decision

For recording architectural and product decisions with context.

* **Icon:** Gavel (purple)
* **Statuses:** To Do, In Progress, Decided, Implemented
* **Fields:** Title, Status, Chosen (the decision made), Priority, Owner, Stakeholders, Tags

### Plan

Nimbalyst supports two approaches to planning:

* **Quick plans (via /plan for Claude Code):** Uses Claude Code's default planning model — a temporary plan is created, given a name, used for implementation, and then discarded. These plans are not integrated with the tracker system.
* **Long-lived plans:** Write a thoughtful plan in markdown that outlines goals, strategy, and features. Update it with your architecture and implementation overview. Keep this as a long-lived document. To work this way, create a custom `/` command or skill (e.g., `/spec`) and have it integrate with the tracker system. This approach keeps your plans visible, versioned, and connected to your task tracking.

For larger initiatives with progress tracking.

* **Icon:** Flag (blue)
* **Statuses:** Draft, Ready for Development, In Development, In Review, Completed, Rejected, Blocked
* **Fields:** Title, Status, Plan Type, Priority, Progress (0-100%), Owner, Stakeholders, Tags, Start Date
* **Plan Types:** System Design, Feature, Bug Fix, Refactor, Documentation, Research

### Priority Levels

All item types that support priority use the same four-level scale:

| Priority | Use For                                       |
| -------- | --------------------------------------------- |
| Critical | Blocking issues that need immediate attention |
| High     | Important work that should be done soon       |
| Medium   | Standard priority (default)                   |
| Low      | Nice-to-have or can wait                      |


# Views: Kanban, List, and Tag Board

Switch between kanban board, list, and tag board views in the Nimbalyst tracker, then save any filter and grouping as a named view to reuse.

The tracker gives you several ways to look at your items: a kanban board for visual status management, a list view for dense sortable data, and a tag board for organizing by tag. Save any arrangement of filters and grouping as a named view to return to later.

See [kanban for Claude Code](https://nimbalyst.com/kanban-for-claude-code/) for how teams run agent work off a board.

### Kanban Board

The kanban board organizes items into columns by status. Each item type has its own status workflow, so the columns change depending on which type you are viewing. For custom types, the columns follow the order of the status options you defined in the type's schema.

<figure><img src="/files/HQCuarKTb1srEJPlI3uh" alt=""><figcaption></figcaption></figure>

### Moving Items

* **Drag between columns** to change an item's status. Dragging a task from "To Do" to "In Progress" updates the item immediately.
* **Drag within a column** to reorder items. Manual ordering lets you prioritize work visually without changing status.

### Card Display

Each card on the board shows:

* Type icon (color-coded by item type)
* Item title
* Priority badge (if set)
* Owner avatar (if assigned)
* Type tag label

<figure><img src="/files/QgODlwnuHpjPjN22SCsj" alt=""><figcaption></figcaption></figure>

### Detailed View

* Click any card to open its detail view.

<figure><img src="/files/ynEPB3Qh2GEHDXUqy3gb" alt=""><figcaption></figcaption></figure>

### Selection

* **Click** a card to select it and open the detail panel.
* **Shift-click** to select a range of cards.
* **Click a column header** to select all cards in that column.
* **Right-click a column header** to open a context menu with bulk actions.

### Filtering

Filter chips and controls sit in the Tracker sidebar:

* **"Mine"** -- Show only items assigned to you.
* **"Unassigned"** -- Show only items with no owner.
* **High Priority** -- Show items with High or Critical priority.
* **Favorites** -- Show items you have starred.
* **Recently Viewed** -- Return to items you opened recently, ordered by your most recent view.
* **Edited by Others** -- Show the latest items whose most recent known editor is someone other than you.
* **Recent** -- Show the 50 most recently updated items.
* **Archived** -- Switch from active items to archived items.
* **Type filter** -- Select which item type to display (Bug, Task, Feature, etc.).
* **Text search** -- Search across titles, descriptions, and item IDs.

<figure><img src="/files/ZxpmnX4PBDWPB3jg9F6P" alt="Tracker sidebar showing Favorites, Recently Viewed, Edited by Others, Recent, and Archived filters"><figcaption><p>Combine personal filters, type folders, saved views, search, and board controls to focus on the work that matters now.</p></figcaption></figure>

Click the star on a Tracker row or card to add or remove it from Favorites. Favorites and recently viewed state belong to you; starring an item does not change it for teammates.

The three recency filters are mutually exclusive because each uses a different ordering. Other filters can be combined and saved as a named view.

### List View

Switch to the list view for a table-based layout. The list view shows one row per item with sortable columns.

<figure><img src="/files/X8mzTF9d1UL6fn0Z8Czc" alt=""><figcaption></figcaption></figure>

* **Click a column header** to sort by that field (title, status, priority, owner, etc.).
* **Resize columns** by dragging the column border.
* **Configure visible columns** to show or hide fields that matter to you.
* Turn on the optional **Shared** column to see which items are shared with your team (off by default). See [Sharing Plans and Trackers](/task-management/sharing-plans-and-trackers).
* The same filtering and search controls from the kanban view apply here.
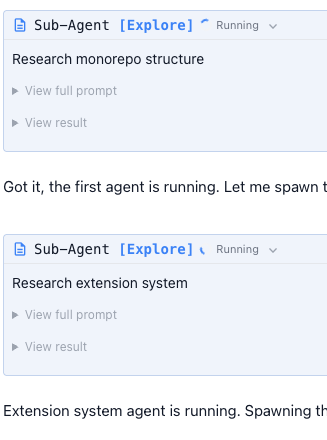
The list view works well when you have many items and need to scan or sort quickly, while the kanban view is better for visualizing workflow stages.

### Tag Board

The tag board (alpha) arranges items into one column per tag, with an "Untagged" column for the rest. An item with several tags appears in each matching column, so you can see everything touching a given area at once. Switch to it from the view buttons at the top of the tracker. The tag board is for organizing and scanning; open an item to make changes.

<figure><img src="/files/RdGvte2vDCvmlIemJbIA" alt="Tracker tag board showing plans grouped into #playwright and #search columns"><figcaption><p>The tag board groups items into a column per tag. Use the search bar to filter by tag with #.</p></figcaption></figure>

### Saved Views

Any combination of type filter, filter chips, grouping, and view mode can be saved as a named view. Set the tracker up the way you want it, then in the **Saved Views** section of the sidebar click **+**, name the view, and press Enter. Saved views appear in the sidebar; click one to reapply all of its settings at once. Remove a view by hovering it and clicking the **×**.


# Item Detail, Comments, Activity

Open a tracker item to edit fields in place, write the body, add comments, and follow the full activity history of a piece of work.

Click any item in the kanban board or list view to open the detail panel. The detail view shows all fields for an item and lets you edit them in place.

<figure><img src="/files/tAfeD87bVRVV1tFj83VP" alt=""><figcaption></figcaption></figure>

### Editable Fields

* **Title** -- Click the title text to edit it inline.
* **Status** -- Dropdown with all valid statuses for the item's type.
* **Priority** -- Dropdown (Critical, High, Medium, Low).
* **Owner** -- User picker to assign responsibility.
* **Description** -- Text area for detailed notes and context.
* **Tags** -- Add or remove categorization tags.
* **Due Date** -- Date picker for deadlines.
* **Progress** -- Percentage slider, available on Plan items only.

Fields vary by item type. For example, Feature items include Release Version and Release Notes, while Idea items have only Title and Status.

### Comments

Add comments to discuss an item without changing its fields. Each comment shows the author and timestamp.

<figure><img src="/files/tAfeD87bVRVV1tFj83VP" alt=""><figcaption></figcaption></figure>

Comments are useful for team discussions, leaving notes for your future self, or recording context that doesn't fit in the description. AI agents can also add comments to items during sessions.

You can edit or delete your own comments. Hover a comment you wrote and use the pencil to edit it inline (press Enter to save, Escape to cancel), or the trash icon to delete it. Edited comments are marked as edited.

### Activity Log

Every change to an item is recorded in the activity log:

* **Who** made the change (you or an AI agent)
* **When** it happened
* **What** changed (field name, before value, after value)

<figure><img src="/files/tAfeD87bVRVV1tFj83VP" alt=""><figcaption></figcaption></figure>

The activity log provides a complete audit trail. When an AI agent updates an item during a session -- marking a bug as done or changing a plan's progress -- that change is recorded with the same detail as manual edits.

### Linked Sessions

Linked sessions appear at the top of the detail panel, above the item's fields, with a count. Each one shows the provider, the session title, and when it was last active. Click one to jump back to that conversation. Use **Launch Session** to start a fresh session for the item, or **Link Existing** to connect a session you already have.

<figure><img src="/files/GQgwR62sHRzPm0Vw9mW5" alt="Tracker item detail with the Sessions section at the top, above Status and Priority"><figcaption><p>The Sessions section sits at the top of the item detail, with Link Existing and Launch Session controls.</p></figcaption></figure>

Linking is deliberate: creating or updating an item does not attach your current session unless you ask for it. See [AI Integration](/task-management/ai-integration) for how agents link sessions.

### Open an Item in Agent Mode

A tracker item opens as a tab in Agent mode, exactly like a file. You get the item's full body above and the agent session below, so you can write in the item and direct the agent against it without switching modes or losing your place.

<figure><img src="/files/0gOBbiiXCA2lDHxLo8hD" alt="Agent mode with a tracker item open as a tab above the session, showing the item body with its fields and content on top, the agent conversation underneath, and the session edits panel on the right"><figcaption><p>The item opens as a tab above the session. Edit its body on top, work with the agent underneath.</p></figcaption></figure>

This is the natural place to work an item end to end. The agent reads and updates the same item you are editing, its file changes appear in the right panel as it goes, and the item stays linked to the session so the connection survives after you move on.

Use the **Files**, split, and **Agent** controls at the top right to change how much room the item and the conversation each get.

### Choose What the Right Panel Shows

The panel on the right of the agent window is a switcher, not a fixed sidebar. Use the dropdown in its header to change what it displays.

<figure><img src="/files/aoOOCsL8WDOS6jUi7sCG" alt="The agent window right panel dropdown, open on three options: Edited Files with a checkmark, Review, and Chat with Session"><figcaption><p>Switch the right panel between edited files, review, and a chat about the session.</p></figcaption></figure>

* **Edited Files** -- The files the agent created and changed in this session, with uncommitted changes and commit controls.
* **Review** -- The review queue for changes waiting on your approval.
* **Chat with Session** -- A conversation about the session itself, separate from the main transcript.

When you have a tracker item open, the same panel can also scope a chat to that item. See [Agent Window & Session Management](/session-management/agent-window-and-session-management).

### Launch an Isolated Worktree

When Git worktrees are available, choose **Launch Worktree** in the Sessions section to start an isolated worktree and AI session for the item.

Nimbalyst proposes a branch and worktree name from the Tracker key and title, inserts a live Tracker reference into the session draft, and links the resulting session back to the item. Review the worktree details before creating it.

Use **Launch Session** for work that can happen in the current project checkout. Use **Launch Worktree** when the task needs its own branch and filesystem state. See [Worktrees](/developer-features/worktrees).

### Linked Files

Items backed by markdown files show their source file path. You can also explicitly link additional files to an item for reference -- design docs, specs, or related source code.


# Creating Items

Four ways to create tracker items in Nimbalyst, from asking your AI agent during a session to writing a structured YAML definition by hand.

There are four ways to create tracker items in Nimbalyst, from conversational AI to structured YAML.

### From Chat

Ask the AI agent to create items during any session:

> "Create a bug for the login page crash on Safari" "Track this as a feature request: dark mode for the dashboard" "Log a decision: we're using PostgreSQL instead of MongoDB"

The AI determines the appropriate type, sets the status and fields based on your description, and creates the item. Ask the agent to link the item to the current session when that relationship should be recorded.

Turning a conversation into tracked work is one of the workflows in [project planning](https://nimbalyst.com/use-cases/project-planning/).

<figure><img src="/files/NUHv0pGDdP5U3NhozcuY" alt=""><figcaption></figcaption></figure>

### From the /track Command

Use `/track` in the chat input for quick inline creation:

```
/track Login page crashes on Safari when clicking forgot password
```

The AI analyzes your description, determines the item type (bug, task, feature, etc.), and creates it in your project's tracker files. This is the fastest path when you know what you want to track.

### Inline in Markdown

Track items directly within any markdown document using `#type[...]` syntax:

```markdown
## Sprint Items

- Fix Safari crash #bug[status:to-do priority:critical]
- Add dark mode toggle #feature[status:in-progress priority:high owner:karl]
- Consider Redis for caching #idea[status:new]
- Use WebSockets over polling #decision[status:decided]
- Migrate to PostgreSQL #task[status:to-do priority:medium]
```

<figure><img src="/files/QdsAlmUpxfU3sYbu4Xtc" alt=""><figcaption></figcaption></figure>

Inline items appear in the tracker alongside full-document items. Edit their properties in the markdown text or through the tracker UI -- changes sync both ways.

### From YAML Frontmatter

Add `trackerStatus` frontmatter to any markdown file to make it a tracked item:

```yaml
---
trackerStatus:
  type: plan
title: Database Migration Strategy
status: draft
priority: high
owner: karl@example.com
tags: [backend, database]
---

## Overview

This plan covers migrating from SQLite to PostgreSQL...
```

The tracker system automatically picks up files with `trackerStatus` frontmatter and displays them in the kanban board. Changes to the file update the tracker item, and changes made through the tracker UI update the file.

This approach works well for plans, decisions, and features that deserve their own dedicated document.

### From the Tracker Panel

You can also click the **+New** button in the tracker panel to create an item directly. Select the type, fill in the fields, and the item is created as a markdown file in your tracker directory.


# Referencing Tracker Items

Drop a live reference to any tracker item into a document or AI chat. The chip shows the current status and title and stays up to date.

You can drop a live reference to any tracker item into a document or an AI chat. The reference renders as a chip that shows the item's current status and title, and it stays current as the item changes.

### Insert a reference with

In a document, type `#` and start typing to search your items by key, title, or description. Pick one from the list to insert it as a chip. Typing `##` or `###` still creates a heading, so your markdown headings are unaffected.

* Narrow the search to one type by including its name, for example type `#bug` to list only bugs, then keep typing to filter.
* Archived items are left out of the picker.

<figure><img src="/files/4Yd4NrlBc0fdSVRQM255" alt="The tracker reference picker filtered to bug items after typing #bug"><figcaption><p>Type # to search your items. Add a type name, like #bug, to narrow the list.</p></figcaption></figure>

The same reference works in the AI chat, so you can point the agent at a specific item as you talk to it.

### What the chip shows

A reference chip can show the item's type, issue key, live title, workflow state, and owner. Because it resolves the item live, those values update on their own as the item changes. Completed items keep their reference but cross out the title, making finished work visible without making the link disappear.

Click a chip to open a preview with the item's status, type, priority, and owner, plus a **Go to item** button that takes you straight to it. If the underlying item can't be found (it was deleted, or has not synced to this machine yet), the chip shows the identifier in muted text and marks it as not resolved.

<figure><img src="/files/TRFTzKcA7a4P1op8xi5x" alt="An inserted tracker reference chip and its preview card with a Go to item button"><figcaption><p>A reference chip, and the preview that opens when you click it, with status, type, priority, and a Go to item button.</p></figcaption></figure>

In raw markdown, a reference is stored as a link using the `nimbalyst://` scheme, so it survives round-tripping through plain text.

### References from the AI

When an agent mentions a Tracker item in chat, it links the item as the same clickable chip instead of plain text. You get the live workflow state at a glance and can click through to the item without hunting for it.

References to other AI sessions in the transcript are clickable too, so you can move directly to the related conversation.


# Linking Tracker Items

Link tracker items to each other with parent, blocks, and duplicate relationships. Links are two-way, so setting one side updates the other.

Tracker items can link to one another, not just to sessions and commits. A module can be the parent of its features, a plan can block another plan, a bug can duplicate another. Links are two-way: set one side and the reverse shows up on the other item on its own.

### Relationship fields live on the tracker type

Item-to-item links are not switched on for every type by default, which is why they can be hard to find at first. A type gets them when its schema includes one or more **relationship fields**. Each relationship field sets:

* the **relationship** it represents (parent of, child of, depends on, blocks, relates to, duplicates, or supersedes),
* the **target types** it is allowed to link to, and
* whether it holds a **single** item or **many**.

The example below is a custom "Feature Module" type whose schema defines three relationship fields: **Parent Module** (child of), **Submodules** (parent of), and **Features** (parent of, pointing at feature items).

<figure><img src="/files/4P6Bi97Qw5YlYrLbPTtb" alt="A Feature Module item showing Parent Module, Submodules, and Features relationship fields"><figcaption><p>Relationship fields defined on a type: Parent Module (child of), Submodules (parent of), and Features (parent of).</p></figcaption></figure>

### Set up the fields (ask your agent)

The quickest way to add relationship fields is to ask the AI agent in Nimbalyst to edit the type's schema. For a parent/child hierarchy, tell it something like:

> "For this tracker type, update the schema to support linked trackers. Make this tracker the parent of this tracker, and that one the child (a parent can have multiple children)."

Once it updates the schema, tell it which items to link to which, or let it work the links out from context. You can also edit the schema by hand under **Settings > Project > Trackers** (relationship is one of the field types). See [Custom Tracker Types](/task-management/custom-tracker-types).

### Link items

With relationship fields on the type, open an item's detail panel. Each relationship field lists the items already linked as pills. Click the **+** on the field, type in the box to find an item by key or title, and choose it. Remove a link with the **×** on its pill. A field can be restricted to certain target types, so if an item you expect is missing, it may not be an allowed type for that field.

### Two-way "Linked from" backlinks

When a relationship field is paired with an inverse field on the other type, the link stays in sync on both ends. In the Feature Module example, adding an item to **Submodules** automatically fills that item's **Parent Module** field, and removing either side clears the other. This is the automatic "Linked from" backlink from the release notes. A field backlinks only when its schema names an inverse field; a one-way field records just the side you set.

### Relationship types

These are the relationship keys a field can use, with their natural inverse:

| Relationship | Inverse                                |
| ------------ | -------------------------------------- |
| Parent of    | Child of                               |
| Depends on   | Blocks                                 |
| Relates to   | Relates to (symmetric)                 |
| Duplicates   | reference (set an inverse to backlink) |
| Supersedes   | reference (set an inverse to backlink) |


# Sharing Plans and Trackers

How to share Nimbalyst plans and tracker boards with teammates, and how local, hybrid, and shared tracker types differ in practice.

For the complete team workflow, including shared boards, collaborative item bodies, comments, history, agent access, links, and local/hybrid/shared tracker types, see [Collaborative Trackers](/team-collaboration/trackers).

Shared boards and the rest of the team layer are described on the [Teams trackers page](https://nimbalyst.com/teams/trackers/).

Plans and other full-document tracker items start out local to your machine. You can share an individual item with your team so everyone works from the same copy, and edits sync both ways, including changes made offline.

### Share an item

Open the item's detail panel and click **Share**. The button switches to **Shared** and the item becomes visible to your team. Click **Shared** again to make it local-only.

Sharing is available when:

* Your workspace has a team configured, and
* The item is a native tracker item or one backed by a markdown file (frontmatter or imported).

Inline tracker items, the ones written as markers inside a document, are always local. Promote one to a full item first if you want to share it. Some tracker types are shared with the whole team by design; those are always shared and have no per-item toggle.

### What stays in sync

Once an item is shared, its status, lifecycle, and body stay in sync across the team. Edits from teammates flow back to you, and edits you make offline sync the next time you reconnect. Session links are personal, so they are cleared when an item becomes shared.

### Seeing what is shared

Each item carries a small sync indicator: local, pending (waiting to sync), or synced. To scan sharing across many items at once, turn on the optional **Shared** column in the table view (see [Views: Kanban, List, and Tag Board](/task-management/kanban-and-list)). It is off by default.


# AI Integration

AI agents in Nimbalyst can create, update, and query tracker items during a session. Link the ones that matter, or turn agent access off.

By default, AI agents in Nimbalyst can use the tracker system. They can create, update, and query items during a session, and you can link the ones that matter back to the session for traceability. You can turn this access off per project.

Letting agents keep the board current is one of the workflows on the [task management feature page](https://nimbalyst.com/features/task-management/).

### Creating Items

During a coding or planning session, the AI can create tracker items on the fly when it identifies work to track:

> "I found a potential memory leak in the WebSocket handler. I've created a bug item to track it."

You can also ask the agent directly:

> "Create a task for updating the API documentation" "Log an idea: real-time collaboration for the editor" "Track a decision: we chose Tailwind over styled-components"

The agent selects the appropriate type, sets fields based on your description, and creates the item.

### Updating Items

Ask the agent to modify existing items:

> "Mark the login bug as done" "Set the database migration plan to in-progress and assign it to me" "Add a comment to bug #123 saying the fix is in PR #456" "Change the priority of the caching task to critical"

The agent can update any field: status, priority, owner, description, tags, and progress.

The agent can also **reclassify an item to a different type** — for example, turning a task into a bug — without losing its comments, attachments, or session links. Just ask:

> "Convert task #42 to a bug" "This idea is actually a feature, reclassify it"

### Querying Items

Ask about your project's current state:

> "What bugs are currently open?" "Show me all high-priority tasks assigned to me" "List decisions made this month" "How many items are in the In Review column?" "Find all items tagged with 'backend'"

The agent can filter by type, status, priority, owner, tags, and perform full-text search across titles and descriptions.

### Session Linking

When an agent creates or updates a tracker item with an explicit link (via `linkSession: true` on `tracker_create`, or by calling `tracker_link_session`), the item is connected to that session. This means:

* From any item, you can see which sessions touched it
* From any session, you can see which items were created or modified
* You can trace the full history of an item back to the conversations that shaped it

Neither creating nor updating an item auto-links the current session. The agent has to opt in (for example with `linkSession: true`), which keeps sessions from accumulating unrelated items when the agent is just logging work in passing.

### AI Agent Access

You control whether AI agents can use your trackers, per project. In **Settings > Project > Trackers**, the **AI Agent Access** toggle turns the tracker tools on or off for that project. It is on by default. Turn it off and the tracker tools are removed from the agent entirely, so it can neither read nor change your items. The change takes effect for new agent sessions.

### Transcript Widgets

Tracker operations performed by the agent appear as structured widgets in the chat transcript, not just plain text. Each widget shows the item type, title, status, and other key fields. Click the widget to navigate directly to the item in the tracker.

This makes it easy to review what the agent created or changed without scrolling through conversation text.


# Commits and Session Linking

Reference a tracker item ID in a git commit message and Nimbalyst links that commit to the item, giving traceability from idea to shipped code.

Tracker items connect to both your git history and your AI sessions, giving you traceability from idea to implementation.

### Commit Linking

When a git commit message references a tracker item ID, the commit is linked to that item in the detail view. This lets you see exactly which commits relate to a bug fix, feature, or task.

For example, a commit message like:

```
Fix Safari login crash (NIM-42)
```

automatically associates the commit with tracker item NIM-42. The item's detail view shows the linked commit with its hash, message, and timestamp.

Tracing a change from item to commit to pull request is covered in [coding progress](https://nimbalyst.com/use-cases/coding-progress/).

### Opt-in Automation

Commit-tracker linking can be configured in your project settings. When enabled, Nimbalyst scans commit messages for item ID references and creates the links automatically. This is opt-in -- you control whether the automation is active for each project.


# Linking Sessions and Tracked Items

Link AI sessions to tracker items so the conversation behind a bug fix or a design decision stays attached to the work item it produced.

### Session Linking

Session linking is deliberate. Creating or updating an item does not automatically attach every active session. Link the session when the conversation is part of the item's implementation or decision history:

* Ask the agent to create an item and link it to the current session
* Tell the agent to link an existing item while it updates the item's status or fields
* Open the item and choose **Link Existing** to select a session yourself
* Choose **Launch Session** to start a new session from the item

### Navigating Between Items and Sessions

The connection is bidirectional:

* **From an item:** The detail view shows all linked sessions. Click any session to jump back to that conversation.
* **From a session:** The agent sidebar panel shows tracker items linked to the current session. Click any item to open its detail view.

### Linked Tracker Items Sidebar

<figure><img src="/files/acNdmgZyGp7QS6OjDK5r" alt=""><figcaption></figcaption></figure>

In agent mode, a dedicated sidebar panel shows all tracker items linked to the current session. This panel updates when the agent or a person adds a link, giving you a live view of the work associated with the conversation.

### Why This Matters

Session and commit linking close the loop between planning and execution. You can start with an idea, track it through a decision, assign it as a task, link it to the AI session that implemented it, and see the commits that shipped it -- all from the item's detail view.


# Custom Tracker Types

Define your own tracker types in Nimbalyst with YAML config files. Custom types get the same kanban board, detail view, and AI integration.

Beyond the six built-in types, you can define custom tracker types using YAML configuration files. Custom types get the same kanban board, detail view, and AI integration as built-in types.

### Where to Define Custom Types

Create YAML files in your project's `.nimbalyst/trackers/` directory. Each file defines one custom tracker type. Nimbalyst loads these definitions when the workspace opens.

<figure><img src="/files/Imv7Dwd7jLVf1XRtfABL" alt=""><figcaption></figcaption></figure>

### Example: Customer Feedback

```yaml
# .nimbalyst/trackers/customer-feedback.yaml
type: customer-feedback
displayName: Customer Feedback
displayNamePlural: Customer Feedback
icon: feedback
color: "#f59e0b"

modes:
  inline: true
  fullDocument: false

idPrefix: fb
idFormat: ulid

fields:
  - name: title
    type: string
    required: true
  - name: status
    type: select
    default: new
    options:
      - value: new
        label: New
        icon: fiber_new
      - value: reviewing
        label: Reviewing
        icon: psychology
      - value: planned
        label: Planned
        icon: event
      - value: shipped
        label: Shipped
        icon: rocket_launch
      - value: wont-fix
        label: Won't Fix
        icon: block
  - name: source
    type: select
    options:
      - value: support
        label: Support Ticket
      - value: interview
        label: User Interview
      - value: survey
        label: Survey
      - value: social
        label: Social Media
  - name: customerName
    type: string
  - name: priority
    type: select
    options:
      - value: low
        label: Low
      - value: medium
        label: Medium
      - value: high
        label: High
      - value: critical
        label: Critical

roles:
  title: title
  workflowStatus: status
  priority: priority
```

### Field Types Reference

| Type           | Description                 | Options                                                                     |
| -------------- | --------------------------- | --------------------------------------------------------------------------- |
| `string`       | Single-line text            | `minLength`, `maxLength`                                                    |
| `text`         | Multi-line text             | --                                                                          |
| `number`       | Numeric value               | `min`, `max`                                                                |
| `select`       | Single choice from options  | `options` array with `value`, `label`, `icon`, `color`                      |
| `multiselect`  | Multiple choices            | Same as `select`                                                            |
| `date`         | Calendar date               | --                                                                          |
| `datetime`     | Date and time               | --                                                                          |
| `boolean`      | True/false toggle           | --                                                                          |
| `user`         | Person reference            | --                                                                          |
| `array`        | List of values              | `itemType`                                                                  |
| `relationship` | Link to other tracker items | `relationshipTypeKey`, `targetTrackerTypes`, `multiValue`, `inverseFieldId` |

### Field Properties

| Property        | Description                                 |
| --------------- | ------------------------------------------- |
| `name`          | Field identifier (used in code and YAML)    |
| `type`          | One of the types listed above               |
| `required`      | Must have a value when creating             |
| `default`       | Initial value for new items                 |
| `displayInline` | Show in compact inline view (default: true) |
| `readOnly`      | Cannot be edited by users                   |

### Roles

Roles map your custom fields to standard tracker behaviors:

| Role             | Purpose                                  |
| ---------------- | ---------------------------------------- |
| `title`          | Which field is the item's display title  |
| `workflowStatus` | Which field drives kanban columns        |
| `priority`       | Which field is the priority level        |
| `assignee`       | Which field is the item owner            |
| `tags`           | Which field contains categorization tags |
| `progress`       | Which field tracks completion percentage |
| `dueDate`        | Which field is the deadline              |
| `startDate`      | Which field is the start date            |

### Schema Properties

| Property             | Description                                    | Default  |
| -------------------- | ---------------------------------------------- | -------- |
| `type`               | Unique identifier for this type                | Required |
| `displayName`        | Singular display name                          | Required |
| `displayNamePlural`  | Plural display name                            | Required |
| `icon`               | Material Design icon name                      | Required |
| `color`              | Hex color for the icon                         | Required |
| `modes.inline`       | Show as inline markers in markdown             | `true`   |
| `modes.fullDocument` | Can be a full markdown document                | `false`  |
| `idPrefix`           | 2-3 character prefix for IDs                   | Required |
| `idFormat`           | ID generation: `ulid`, `uuid`, or `sequential` | `ulid`   |
| `creatable`          | Can users create items of this type            | `true`   |

### Editing a Type from Settings

You do not have to hand-write YAML. Open **Settings > Project > Trackers**, select a type, and choose **Customize**.

For a built-in or custom type, you can:

* Change the singular and plural labels, icon, and color.
* Add, rename, reorder, or remove workflow statuses.
* Give each status its own label, icon, and color.
* Add fields and configure their type, default value, and other properties.
* Assign field roles such as title, workflow status, priority, owner, tags, progress, and dates.

The preview shows how the type and its workflow will appear before you save. Changing a built-in type creates a project-level override; it does not modify Nimbalyst's built-in default for other projects.

Built-in types you have changed show **Reset to default**. Resetting removes the project's override and restores the current Nimbalyst definition, including its original fields and statuses.

### When Files and Settings Drift

Nimbalyst keeps a local copy of each type's schema in step with the YAML files in `.nimbalyst/trackers`. If the two diverge, for example after pulling a teammate's changes in git, a **Schema files are out of sync** warning appears and names the types that differ. Click **Resync from files** to bring the app back in line with the YAML on disk.

### Organize Tracker Types into Folders

Tracker type folders keep a long list of workflows manageable without changing the type itself.

<figure><img src="/files/RQjkCLsC9DrQ33LIawrx" alt="Tracker type navigation organized into PM and Engineering, Marketing, and Customers folders"><figcaption><p>Group related Tracker types into folders and keep the most important workflows in a deliberate order.</p></figcaption></figure>

Create folders from the Tracker type navigation, move types into or out of a folder, and drag folders or types into a manual order. Choose **All** to view items across every folder.

Folders organize the navigation only. Moving a type does not change its fields, workflow, issue keys, or existing items.

In a Nimbalyst Team project, the folder structure and manual order synchronize so teammates see the same organization.


# The nim CLI

nim is a command-line tool for Nimbalyst trackers. List, create, update, comment, archive, and import items from your shell, and pipe JSON out.

`nim` is a companion command-line tool for working with your trackers from the terminal. List, create, update, comment on, archive, and import items without leaving your shell, and pipe results as JSON into other tools.

### Install and run

`nim` ships as an npm package. Install it globally:

```bash
npm install -g @nimbalyst/cli
```

Then run commands as `nim <noun> <verb>`, for example `nim tracker list`. You can also run it without installing, with `npx nim tracker list`.

The tracker the CLI talks to is described on the [task management feature page](https://nimbalyst.com/features/task-management/).

### How it connects

`nim` finds your workspace and tracker data on its own:

* When Nimbalyst is running, `nim` talks to the app (live mode), so writes go through the same path as the UI.
* When the app is closed, `nim` reads your local tracker database directly. Reads work either way.

A few commands depend on the running app: importing from external sources, linking a live session, and defining or deleting a type. Open Nimbalyst before using those. If you work with more than one project, point `nim` at one with `--workspace <path>`.

### Reading items

```bash
nim tracker list --type bug --status open --priority high
nim tracker list --where severity=critical --since 1d --json
nim tracker get NIM-123
nim tracker show NIM-123        # renders the body
nim tracker types              # list types; add "show <type>" for one schema
```

Common list filters: `--type`, `--status` (or the shortcuts `open` and `closed`), `--priority`, `--owner me`, `--search`, `--since` and `--until`, `--tag`, and `--where field=value` for anything else. Add `--json` for machine output, `--csv --columns key,status,title` for a table, or `--quiet` for just the IDs.

### Creating, updating, and commenting

```bash
nim tracker create bug "Login times out" --priority high --tag auth --body-file repro.md
nim tracker update NIM-123 --status in-review --owner me
nim tracker update NIM-123 --unset owner
nim tracker comment NIM-123 "Repro confirmed on main"
nim tracker archive NIM-123
nim tracker unarchive NIM-123
```

`create` takes the type and a title, plus optional `--status`, `--priority`, `--owner`, `--tag` (repeatable), `--label`, `--field key=value`, `--due`, `--progress`, and `--body` or `--body-file`. `update` takes the same flags to change fields, plus `--unset <field>` to clear one.

### Importing from external sources

With the app open, `nim` can pull items in from installed importers, such as GitHub issues:

```bash
nim tracker importers                                       # what is installed
nim tracker import search github-issues --repo owner/repo --state open
nim tracker import github-issues "owner/repo#42" --type bug
```

### Output and scripting

Every read command supports `--json`, so you can pipe `nim` into other tools. `nim status` reports how it is connecting and which workspace it resolved. Set `NIM_OWNER` so `--owner me` resolves to you, or `NIM_WORKSPACE` to fix a default project. Run any command with `--help` for its full set of flags.


# Local Config

Where Nimbalyst keeps tracker configuration: type definitions, project settings, and issue key prefixes, all as plain version-controlled files.

Tracker behavior is configured through project-level directories and settings. Everything is stored as plain files, version-controlled, and portable between machines.

### Tracker Type Definitions

Custom tracker types live in the `.nimbalyst/trackers/` directory at your project root. Each YAML file in this directory defines one tracker type. Nimbalyst loads all type definitions when the workspace opens.

```
your-project/
  .nimbalyst/
    trackers/
      customer-feedback.yaml
      release-note.yaml
      interview-question.yaml
```

See [Custom Tracker Types](/task-management/custom-tracker-types) for the full YAML schema.

### Tracker Files

Inline tracker markdown files are stored in the `nimbalyst-local/tracker/` directory within your project. You can organize files by type, topic, sprint, or any structure that works for you:

```
your-project/
  nimbalyst-local/
    tracker/
      bugs.md
      sprint-12-tasks.md
      api-decisions.md
      q2-features.md
```

These are standard markdown files with inline `#type[...]` tags or `trackerStatus` YAML frontmatter. The tracker system scans this directory and surfaces all items in the kanban board and list view.

### Issue Key Prefix

Each project can have a configurable issue key prefix (e.g., `NIM-`) that appears on all item IDs. This makes it easy to reference items in commit messages, comments, and conversations. Configure the prefix in your project settings.

### Commit-Tracker Linking

Automatic commit-tracker linking is an opt-in toggle in project settings. When enabled, Nimbalyst scans git commit messages for item ID references (e.g., `NIM-42`) and links the commit to the corresponding tracker item.

### What Gets Version-Controlled

Tracker files are plain markdown, so they work with any version control system:

* `.nimbalyst/trackers/*.yaml` -- Type definitions travel with the repo. Anyone who clones the project gets the same custom types.
* `nimbalyst-local/tracker/*.md` -- Item files are local by default. Add them to `.gitignore` if you want project-specific items that don't sync, or commit them if you want shared visibility.
* Changes to tracker items via the UI or AI update the underlying markdown files, which show up in your normal git diff and commit workflow.


# Coding with Coding Agents & Nimbalyst

How to code with Claude Code and Codex inside Nimbalyst, a visual interface for coding agents with your files, diffs, and sessions side by side.

***

Nimbalyst integrates a UI for coding agents like Claude Code and Codex directly into your markdown workspace.

Nimbalyst runs on top of Claude Code and Codex rather than replacing them. See the [Claude Code GUI page](https://nimbalyst.com/claude-code-gui/) and the [Codex GUI page](https://nimbalyst.com/codex-gui/) for what the desktop workspace adds on top.

<figure><img src="/files/4nw9W1Szg81cV3Ek8ISC" alt=""><figcaption></figcaption></figure>

### Nimbalyst's Two Modes

**Chat Mode**: AI sidebar for quick questions and targeted edits. Good for:

* Explaining code
* Small edits to the current document
* Quick lookups

**Agent Mode**: Full-screen autonomous coding. Good for:

* Multi-file refactors
* Implementing features from a plan
* Running tests and fixing failures iteratively
* Running multiple sessions in parallel

### Code Editor with Diff Visualization

<figure><img src="/files/nAh8fOXUd3vlB0rouIeV" alt=""><figcaption></figcaption></figure>

When the AI edits code or a a document, changes appear inline:

* **Green background**: Added content
* **Red background**: Removed content (with strikethrough)

**Accept/Reject**:

* Accept All: Keeps all changes
* Reject All: Reverts to original content

Changes remain visible until you accept or reject them.

### Inline edit cards in the transcript

Both Claude Code's `Edit` tool and Codex's `file_change` tool render as red/green edit cards directly in the session transcript, so you can see exactly what the agent did to each file as the turn unfolds.

Edit cards work for:

* New files (rendered as a single-color "added" card)
* Existing files (red lines for removals, green for additions)
* Gitignored or never-snapshotted files
* Renamed and deleted files

***


# Basics on Code/Git for Non-Devs

A plain-language introduction to code and git for product managers and designers who want to use a coding agent without a dev background.

### Working with Code

* Coding agents like Claude Code and Codex can read your code and write code if you have it locally, say in GitHub client, on your machine.
* If you are a Product Manager who wants to use a coding agent to better understand your code, its status, etc, download GitHub Client and ask your dev team for read-only access to your codebase

If you are a PM working alongside engineers, [Claude Code for product managers](https://nimbalyst.com/claude-code-for-product-managers/) covers the same ground without a terminal.

### Moving plans or other documents into Git

If you want a a plan or other document to be synched with Git, simply move the document into another folder that is not git-ignored.

* For example, your organization might have a folder for Specification or Shared Plans. When a plan you are working on is at the right state to be in this folder for all to see and reference, move it.


# Turn on/off Developer Mode

Turn Developer Mode on or off in Nimbalyst to show or hide the terminal, git worktrees, and the other git features you may not need.

Nimbalyst has two modes: Standard Mode and Developer Mode.

### Developer Mode

The following features are only available in Developer Mode

* Terminal
* Worktrees
* Many Git features

NOTE: The Git related features will only be available if your Project is Git-integrated.

Everything gated behind Developer Mode is described on the [developer tools page](https://nimbalyst.com/features/developer-tools/).

### Turning on Developer Mode

You can select your mode under Settings, Advanced

<figure><img src="/files/nKGmHh0brDxh7PBcbqng" alt=""><figcaption></figcaption></figure>


# Terminal Window

Run a Ghostty-powered terminal inside Nimbalyst. Create multiple terminal sessions in your workspace directory that survive app restarts.

### Terminal in Nimbalyst

Nimbalyst enables you to run a Ghostty-powered terminal directly within Nimbalyst. You can create multiple terminal sessions, each running independently in your workspace directory. Terminal sessions persist across app restarts, so your command output is preserved.<br>

The terminal sits alongside the visual editors rather than replacing them. See the [developer tools page](https://nimbalyst.com/features/developer-tools/).

<figure><img src="/files/CagY2lPTvKlfaUe1tNDp" alt=""><figcaption></figcaption></figure>

### Opening and Closing the Terminal

Open and close the terminal from the terminal icon on the left nav or with the command key

You can have multiple terminals by clicking the + and making a new terminal tab

<figure><img src="/files/81CYbdX5WS4Ct0cY6FdT" alt=""><figcaption></figcaption></figure>

### Using the Terminal

Type commands and press Enter to run them. The terminal works like any standard shell:

* Run commands: `ls`, `git status`, `npm install`, etc.
* Navigate directories: `cd folder`
* Use tab completion (depends on your shell)
* Access command history with up/down arrow keys

#### Shell Detection

Nimbalyst automatically detects and uses your system shell:

| Platform | Default Shell       |
| -------- | ------------------- |
| macOS    | zsh (or bash)       |
| Linux    | bash (or zsh, fish) |
| Windows  | PowerShell (or cmd) |

#### Scrollback Buffer

Your terminal output is preserved (up to 500KB). When you reopen a terminal session:

* Previous output is restored
* You can scroll back through command history
* A new shell process starts in the same directory

#### Command History

* Each terminal maintains its own command history file. Your shell's history (accessed via up/down arrows) persists across sessions.
* **Note**: Fish shell and Windows cmd have limited history persistence.

#### Process Management

* **Running process**: Commands run until complete or until you stop them with Ctrl+C
* **Process exit**: If the shell exits, press Enter to restart it
* **App quit**: When you close Nimbalyst, all terminal processes are stopped and scrollback is saved

### Worktrees

* Each worktree has a dedicated terminal button for quick access and separated work
* Each terminal session persists with its own storage

### Tips

* **Working directory**: Each terminal starts in your workspace folder
* **Copy/paste**: Use your normal system shortcuts (Cmd+C/Cmd+V on Mac, Ctrl+C/Ctrl+V on Windows/Linux)
* **Clear screen**: Use `clear` or Ctrl+L to clear the terminal
* Environment variables set during a session don't persist to new sessions


# Worktrees

Use git worktrees in Nimbalyst to run AI coding agents on several branches at once, each with its own directory, session, and diff to review.

Git worktrees let you work on multiple branches simultaneously, each with its own working directory.

For background on why worktrees matter when several agents are running at once, see the [git worktrees guide](https://nimbalyst.com/blog/git-worktrees-for-ai-coding-agents-complete-guide/).

<figure><img src="/files/lqcHWfW1VCkqo7ORUs4W" alt=""><figcaption></figcaption></figure>

**How to use:**

* Create a worktree from the Agent Mode UI to start an isolated AI session on a new branch.
* From a Tracker item, choose the worktree action to launch an isolated session with that item linked as its context.
* From Pull Request mode, choose **Open in Worktree** to check out the pull request branch and start a session inside it.
* Each worktree has its own file system state, so changes don't interfere with your main branch.
* Rebase worktrees even with uncommitted changes - auto-stashing handles it for you.
* Use the worktree terminal button to access a terminal scoped to that specific worktree.

<figure><img src="/files/Ieo47HQbdVzjSd0WqIT7" alt=""><figcaption></figcaption></figure>

**Benefits:**

* Work on multiple features in parallel without stashing or switching branches
* AI sessions stay isolated - experiments don't affect your main codebase
* Safe rebasing with automatic stash management

For the full pull request workflow, see [Pull Request Reviews](/developer-features/pull-request-reviews).


# Working with Git

Commit, check status, and manage branches in Nimbalyst with AI-generated commit proposals and git file status colors in the file tree.

Streamlined git workflow with visual commit proposals and real-time status updates.

Git Integration

* **Interactive Claude-generated git commit proposals**
* **Manual git commits** - Commit files edited in an AI Session
* **Git file status colors for AI Sessions** - Visual indicators for added/modified/deleted files
* **Detect more Claude changes** - Including rm, mv, echo >>, etc
* **Uncommitted files count on sessions** - See at a glance which sessions have pending changes

The [git feature page](https://nimbalyst.com/features/git/) covers commit proposals, status colors, and branch handling.

<figure><img src="/files/lqcHWfW1VCkqo7ORUs4W" alt=""><figcaption></figcaption></figure>

**How to use:**

* When committing, use the interactive file picker to select exactly which files to include.
* View full commit details in the expanded git widget.
* File status colors (green for added, yellow for modified, red for deleted) help you understand changes at a glance.
* Pending file reviews are auto-approved when you commit, streamlining your workflow.

**Benefits:**

* No more polling for git status - updates appear instantly
* Visual clarity on what's changed
* Faster commit workflow with fewer clicks

### Files Sidebar in Agents Mode

* A compact file list at the top showing referenced files
* A pending review banner at the bottom when files need review

<figure><img src="/files/bcADWjGONYPlpytorJAu" alt=""><figcaption></figcaption></figure>

### File Categories

Files are organized into three collapsible sections:

#### Edited

Files the AI has modified. These show:

* **Operation icon**: What the AI did to the file
  * Green `+` = Created new file
  * Blue pencil = Edited existing file
  * Red trash = Deleted file
  * Orange rename = Renamed file
* **Git status badge**: Current version control state
* **Line counts**: `+5` (lines added) `-3` (lines removed)
* **Pending review indicator**: Yellow highlight with review icon if awaiting your approval

#### Referenced

Files you mentioned in your prompts using `@filename` syntax. These are files you brought to the AI's attention but weren't necessarily modified.

#### Read

Files the AI read to understand your codebase. These provide context for the AI but weren't modified.

### Git Status Badges

For edited files, small colored badges show the git status:

| Badge          | Meaning                          |
| -------------- | -------------------------------- |
| **M** (yellow) | Modified - Changes not staged    |
| **S** (green)  | Staged - Changes ready to commit |
| **?** (gray)   | Untracked - New file not in git  |
| **D** (red)    | Deleted                          |

Hover over a badge to see "Git status: modified" (or staged, etc.)

### Pending Review Files

When the AI makes changes, those files may show as "pending review":

* **Yellow background**: The file has AI changes you haven't reviewed yet
* **Review icon**: A small review icon appears next to the filename
* **Banner**: Shows count like "3 files pending review" with a "Keep All" button

#### Accepting Changes

* Click **Keep All** to accept all pending AI changes at once
* Or review files individually by clicking on them

### File Activity Tracking and Git Status in Files Mode

<figure><img src="/files/DI08kf3k1i0SSPtrHBMQ" alt=""><figcaption></figcaption></figure>

The sidebar tracks all files the AI interacts with during a session:

**Git Status** - Shown with a Git label (M for modified, ? for untracked file)

**Uncommitted Changes** - Shows only files/folders with uncommitted changes

**Files Read** - Files the AI examined to understand context in the session

**Files Written** - Files written to by AI during the session

### Diff Peek in the Commit Proposal

Each file in a commit proposal has a diff peek popover so you can see exactly what changed without leaving the widget. It uses the same diff view as the Git extension's changes panel, and the popover is resizable — the size you pick is remembered globally, so the proposal widget and the Git extension stay in sync.

The peek shows a combined HEAD-vs-working diff that includes staged, unstaged, and untracked changes uniformly.

### Diff Peek in the Git Log

In the Git extension, when you select a commit in the log, the commit detail panel lists every file touched by that commit. Click any file in that list to pin its unified diff in the same peek popover.

* Click a file to open the diff for that file at that commit
* **Up/Down** arrow keys step through files in the commit while the popover is pinned
* **Esc** closes the popover
* The popover reuses the size persisted by the changes panel and the commit proposal widget, so all three diff peeks stay in sync

### Git Command History

Open the Git extension's **Output** tab to follow commands run through Nimbalyst. Push, pull, fetch, commit, and other Git operations appear as they run and remain available after the panel closes or the renderer reloads.

Each entry shows:

* The command and start time
* Live standard output and error output
* Running, completed, failed, or interrupted state
* Duration and exit code
* A suggested recovery step for common Git failures

Long errors show a short preview. Choose **View full error** for the complete message or **Copy** to put the error on the clipboard. Use **Clear Log** when you no longer need the completed history; a command that is still running remains attached until it finishes.

This is separate from the shell history in the Terminal. Terminal history remembers commands typed into a shell, while Git command history records operations launched by Nimbalyst and their output.

### Auto-Approve Commits

Skip the manual approval step for git commit proposals.<br>

**How to use:**

1. Go to **Settings** and enable **Auto-approve commits**, or toggle it directly on any git commit proposal widget
2. When enabled, Claude's commit proposals are committed automatically without waiting for your approval


# Pull Request Reviews

Review GitHub pull requests inside Nimbalyst. Read the diff, run an AI review, open the branch in a worktree, then comment, approve, or merge.

Review GitHub pull requests without leaving Nimbalyst. Pull Request mode brings the conversation, changed files, commits, checks, tracker-based triage, and AI review workflow into one place.

See [code review](https://nimbalyst.com/use-cases/code-review/) for how teams run AI-assisted reviews end to end.

## Before You Begin

Pull Request mode is available when:

* Developer Mode is enabled. See [Turn on/off Developer Mode](/developer-features/turn-on-off-developer-mode); the setting is under Settings, Advanced, Application Mode.
* The project is a Git repository whose `origin` remote points at GitHub (GitHub Enterprise hosts work too).
* The [GitHub CLI](https://cli.github.com/) is installed and signed in with `gh auth login`.

All GitHub access goes through your `gh` CLI. Nimbalyst stores no GitHub tokens of its own. If `gh` is missing or signed out, Pull Request mode shows setup instructions and a recheck button.

Open Pull Request mode from the **Pull Requests** button in the navigation gutter or press **Cmd+U**. The button appears once Developer Mode is on and the workspace has a GitHub remote.

## Find the Pull Request That Needs You

Use the filters above the pull request list to focus on:

* **Open** or **Closed** pull requests
* **Awaiting my review**
* **Created by me**
* **With conflicts** or **Draft**
* **Review Status** chips, which appear when pull requests are linked to tracker items (see triage below)

Search by title or pull request number, then sort by recent activity.

## Review a Pull Request

Select a pull request to open its detail view:

* **Conversation** shows the description, inline review threads (open, resolved, and outdated), and the discussion. Add your own pull-request-level comment from the box at the bottom.
* **Files Changed** shows the diffs with a file tree. Switch between a full-file compare view and a GitHub-style collapsed diff with unified or split layout. Very large diffs load on demand.
* **Commits** shows the commits included in the branch, with per-commit stats and copyable SHAs.
* **Checks** shows CI and other GitHub checks grouped by failing, in progress, and passing, with links to the details on GitHub. Results refresh on a polling interval rather than streaming live.

The header also shows the source and destination branches, linked Tracker items, review state, and merge readiness.

<figure><img src="/files/wESwnPDuJVnUMofjSWQo" alt="Pull Request mode with a pull request open on the Conversation tab and the Approve, Review with AI, GitHub, and Open in Worktree actions visible"><figcaption><p>Review the pull request directly, start an AI review, or open the branch in an isolated worktree.</p></figcaption></figure>

## Review with AI

Click **Review with AI** to start an agent session prefilled with a review command for the pull request. The session opens in the chat pane right next to the pull request, and each prompt carries a compact PR context card so the agent knows exactly which pull request it is reviewing. If tracker items reference the pull request, the session is linked to them automatically.

The agent can inspect the pull request, explain the changes, identify risks, and suggest review feedback using the same project context and tools as your other Nimbalyst sessions.

## Open the Pull Request in a Worktree

Click **Open in Worktree** to create (or reuse) an isolated worktree on the pull request branch and open an agent session inside it. Edits and Git operations stay separate from your main working directory, and Nimbalyst switches to Agent mode with the session ready.

Use a worktree when you want the agent to run tests, make follow-up edits, or investigate the branch without disturbing other work. See [Worktrees](/developer-features/worktrees).

## Triage with Review Statuses

Pull request triage runs on Nimbalyst Trackers. Link a pull request to any Tracker item with **Link tracker item** in the pull request header. Once linked:

* The item's workflow status appears as a status pill in the header. Click the pill to change the review status.
* Rows in the pull request list show a compact status badge, and the sidebar gains matching **Review Status** filter chips.
* You can move between the pull request, the Tracker item, and any linked AI session without searching for each one.

A common setup is a dedicated tracker type for pull requests with statuses such as Backlog, Needs Review, Inspecting, and Safe, with one item per pull request. Nimbalyst never creates these items automatically; create them yourself or ask your agent to create and link them for the open pull requests.

Merging inside Nimbalyst can also advance linked items automatically when their tracker type defines a post-merge workflow status, and a one-click hint offers the update after a pull request merges.

## Comment, Approve, or Merge

Add pull-request-level comments from the Conversation tab. Inline review threads from other reviewers are shown for context but cannot be authored inline yet, and there is no request-changes action; use a comment or an approval.

Use the actions in the pull request header to approve or merge when the repository and your GitHub account allow it. Nimbalyst supports GitHub's squash, merge-commit, and rebase strategies, limited to the methods the repository allows, and always asks for confirmation before merging. For squash and merge-commit merges you can edit the commit message first.

### GitHub CLI Workflow Permission

Some pull requests modify GitHub Actions workflow files. GitHub requires the CLI token to include the `workflow` scope before those changes can be merged.

If Nimbalyst reports that the scope is missing, run:

```bash
gh auth refresh -h github.com -s workflow
```

Complete the GitHub authorization flow, then return to the pull request and retry the merge.


# Agent Teams

Agent Teams let one coding agent session spawn teammate agents that work in parallel. How to turn it on and when parallel agents help.

### Agent Teams

Agent Teams let a single coding agent session spawn teammate agents that work in parallel.<br>

Running fan-out work across several agents is covered on the [agent orchestration page](https://nimbalyst.com/features/agent-orchestration/).

**How to use:**

1. Go to **Settings > Application > Claude Agent**
2. Enable **Agent Teams**
3. Start a session. When the agent decides subtasks can run in parallel, it spawns teammates automatically
4. Each teammate shows a distinct progress indicator in the transcript

**Good to know:**

* Teammate output stays contained -- it does not leak into the main transcript
* The main session waits for all teammates to finish before completing


# Nimbalyst Teams: Step by Step

A step-by-step walkthrough of Nimbalyst Teams: sign in, invite your team, and work together in shared trackers and documents with your coding agents.

Seven steps from a solo workspace to a team working in the same trackers, the same documents, and the same files as their coding agents. Every screen below is the product as it ships.

Watch the whole walkthrough in under three minutes, or read the steps below.

{% embed url="<https://www.youtube.com/watch?v=UM_6pmmSbSc>" %}

## Step 1. Sign in to Nimbalyst

Open the user menu at the bottom of the left rail and choose **Sign in**.

<figure><img src="/files/FZLKEqGcyy7JGGrNTQJ9" alt="The Nimbalyst user menu open, showing Application Settings, Project Settings, No organization, and Sign in"><figcaption><p>The user menu at the bottom of the left rail.</p></figcaption></figure>

Sign in with Google or with a magic link sent to your email address. Signing in is what connects this copy of Nimbalyst to a team.

<figure><img src="/files/y1U8bjoB9krC0PsR6XGf" alt="The Account tab in Nimbalyst Settings, showing Continue with Google and an email field for a magic link"><figcaption><p>Sign in from Settings, under Account.</p></figcaption></figure>

## Step 2. Create your organization

From that same menu, choose **Set up** next to **No organization**.

<figure><img src="/files/fmAfUPju12AksoEnVgCt" alt="The user menu with the No organization row highlighted and a Set up action beside it"><figcaption><p>Set up an organization from the user menu.</p></figcaption></figure>

Name your organization. Everyone you invite sees this name, and you can change it later.

<figure><img src="/files/zMN34FEc7GNZVB5NjgMY" alt="The New organization dialog on its Name step, with an organization name typed in and the owner&#x27;s address below the field"><figcaption><p>Step one of three: name the organization.</p></figcaption></figure>

Then invite your teammates by email. They join as members, and you can change roles afterwards.

<figure><img src="/files/kkuo6Ebo3PZB17EBbgGn" alt="The New organization dialog on its Invite step, with a teammate&#x27;s email address entered"><figcaption><p>Step two of three: invite the team.</p></figcaption></figure>

Everyone you add appears in the organization's member list, where you can change a role or invite more people at any time.

<figure><img src="/files/RegsTKNPf5TzU44qPyqQ" alt="The organization management dialog listing team members with their email addresses and roles, and an invite field at the bottom"><figcaption><p>The member list for your organization.</p></figcaption></figure>

## Step 3. Your teammate receives an invite email

They receive an email with one button. There is no account to create first.

<figure><img src="/files/6UE21m5L58MNRhT3fpOh" alt="The invitation email, with an explanation of Nimbalyst and a Join button"><figcaption><p>The invitation email your teammate receives.</p></figcaption></figure>

## Step 4. They accept and land in the team

Clicking through accepts the invitation and puts them in the organization. From there they can open the team in the desktop app, or keep working in the browser.

<figure><img src="/files/flXkrEoeIR4WMK5hlrUA" alt="The confirmation screen after accepting an invitation, offering to open the desktop app or continue in the browser"><figcaption><p>Accepted, and in the team.</p></figcaption></figure>

## Step 5. Working collaboratively in trackers

Switch to **Tracker** mode. With a team, the left navigation splits into two groups. The top group belongs to the organization and everyone in it sees the same items. The bottom group stays on your machine.

<figure><img src="/files/0lMSh3H8L146l2XmKLoJ" alt="The tracker sidebar split into a Northwind section marked Shared with 5 people and a Personal section marked Local only"><figcaption><p>The team's trackers lead. Yours stay local.</p></figcaption></figure>

Every tracker opens as a grid you can edit in place. Press **Cmd+Shift+N** anywhere in Nimbalyst to launch an agent session against whatever you are looking at, without leaving the board.

<figure><img src="/files/k0bYgng53lcLMlCFkb3z" alt="A shared bug tracker in grid view with the Launch New Session popup open over it, carrying a prompt about a checkout timeout"><figcaption><p>Cmd+Shift+N puts an agent on the item in front of you.</p></figcaption></figure>

Open an item and it expands into a full document the team writes together, with its own agent chat alongside.

<figure><img src="/files/96Nq23JL03FJUsbJaw50" alt="A tracker item expanded to full width with a written body and a Chat about this item panel on the right"><figcaption><p>An item's body is a document, not a text field.</p></figcaption></figure>

Put a file reference on its own line in that body and it becomes a live embed. Anyone with access can edit it in place, or open it in its own editor.

<figure><img src="/files/HMgo77m75ZveDQkcDRZq" alt="A tracker item body containing two live embeds, an Excalidraw diagram and a UI mockup, each with its path and an Open action"><figcaption><p>Embedded files render live inside the item.</p></figcaption></figure>

Link your own agent sessions and the files they touched to an item, so the work and the record of it stay together.

<figure><img src="/files/hhVDnH0JR6FgwCGTJHlY" alt="A tracker item detail panel showing a Sessions section with Link Existing and Launch Session actions"><figcaption><p>Link an existing session, or launch a new one from the item.</p></figcaption></figure>

## Step 6. Working collaboratively in documents

Right click any file in your project and choose **Share to Team**. Nimbalyst scans the file for embedded files and offers to share those alongside it, so your teammates do not open the document and find empty placeholders.

<figure><img src="/files/f3KGohwRIC878GOpQruC" alt="The file tree context menu open on a markdown file, showing the Share to Team action"><figcaption><p>Any project file can become a shared document.</p></figcaption></figure>

**Shared Docs** holds every shared document and folder in one place. A blue dot marks anything changed since you last opened it.

<figure><img src="/files/Sz9iYoKYjqKcPyep8ZSF" alt="The shared documents space with a folder tree on the left and a table of shared documents with authors, last edited times, and unread dots"><figcaption><p>One space for everything the organization shares.</p></figcaption></figure>

Star the documents you work in every day and the **Favorites** filter brings them straight back.

<figure><img src="/files/OcDk2SAF3ZkVZFd4e8xY" alt="The shared documents space filtered to Favorites, showing a single starred document"><figcaption><p>Favorites, one click away.</p></figcaption></figure>

Open a shared document and you are editing the same copy as everyone else, with a labelled cursor for each person. Each teammate's locally running coding agent works in that same document.

<figure><img src="/files/Ou0plwT5RA1b9fu99vLY" alt="A shared launch plan open in Nimbalyst with a teammate&#x27;s labelled cursor in the text and an agent prompt staged in the chat"><figcaption><p>People and their agents, in one shared copy.</p></figcaption></figure>

Select a passage to leave a comment, mention someone with `@`, and reply in the thread. Comments live with the document, so they follow it everywhere it is opened.

<figure><img src="/files/oToLCvBD4ANEUEEPNtqy" alt="A comment thread on a highlighted passage of a shared document, with a reply below the first comment"><figcaption><p>Comments and replies attach to the passage they are about.</p></figcaption></figure>

Anything addressed to you shows a badge in the top right corner of the window.

<figure><img src="/files/Tjdad3DIwDwGvBU7LEAx" alt="The top-right toolbar cluster in Nimbalyst with an unread count badge on the inbox button"><figcaption><p>The unread badge, top right.</p></figcaption></figure>

Open it for a single list of every mention, comment, and message waiting on you, each linked to the document it came from.

<figure><img src="/files/rKCVyOm1CYGrPlBRtMPq" alt="The team inbox listing mentions, comments, and messages with the document each one came from"><figcaption><p>Every mention, comment, and message in one list.</p></figcaption></figure>

## Step 7. Teammates can work in the browser

Someone without the desktop app opens [console.nimbalyst.com](https://console.nimbalyst.com) and reads, writes, and comments on the same shared documents. People on the desktop app and people in the browser work side by side on the same files.

<figure><img src="/files/7APmYrSPwyxHLnXISkhV" alt="The Nimbalyst web console showing the same shared document tree and table in a browser"><figcaption><p>The same shared space, in a browser.</p></figcaption></figure>

See [Web Console](/team-collaboration/web-console) for what the browser supports.

## Where to go next

* [Team Collaboration Overview](/team-collaboration/overview)
* [Collaborative Documents](/team-collaboration/documents)
* [Collaborative Trackers](/team-collaboration/trackers)
* [Set Up Nimbalyst Teams](/team-collaboration/setup-teams-and-orgs)


# Team Collaboration Overview

How Nimbalyst Teams adds shared documents and trackers on top of each teammate’s local workspace and their own locally running coding agents.

Each teammate runs the open-source Nimbalyst app on their own machine with their own Claude Code, Codex, or other local agents. Nimbalyst Teams adds a shared layer for files and Trackers without replacing anyone's local workspace, environment, or agents.

See [Nimbalyst for Teams](https://nimbalyst.com/teams/) for what the shared workspace covers, or go straight to [Nimbalyst Teams: Step by Step](/team-collaboration/teams-tutorial).

{% hint style="info" %}
Nimbalyst Teams is in **beta**. Expect bugs. Organizations are free during beta and will require a paid Nimbalyst Teams subscription after launch.
{% endhint %}

<figure><img src="/files/tPpDWg6Ysi3rX6qCkw5K" alt="Two teammates editing the same architecture diagram in real time on a shared canvas, with a live labeled cursor"><figcaption><p>People and their agents work together on the same shared documents, mockups, diagrams, and trackers.</p></figcaption></figure>

### One integrated workflow for the whole team

Give the whole team higher bandwidth with less context switching. Manage agents, edit the work visually, and track tasks in a shared workspace where each teammate keeps using their own local Nimbalyst and agents, live or asynchronously.

Team collaboration is faster when people and agents share the whole workflow. Nimbalyst keeps plans, visual files, Trackers, sessions, reviews, and delivery links together so context survives every handoff.

* **One workflow from plan to ship:** Move from a spec to a mockup, implementation session, Tracker update, review, commit, and pull request without rebuilding the story in each tool.
* **Every file type in the same context:** Work across markdown, code, mockups, diagrams, spreadsheets, data models, and other supported editors while teammates and their agents stay connected to the same project context.
* **Less context switching:** Stop moving between a document app, task tracker, diagram tool, editor, and terminal or copying context from one into another.
* **Higher-bandwidth collaboration:** Rich visual editors, live presence, linked work, and immediate status let the team understand and direct more work at once than a collection of text-only tools.

### Multiplayer on the work

#### Edit the same docs, mockups, and diagrams together

<figure><img src="/files/vPtTE7Era3Qoy8Drfnpv" alt="Two teammates editing the same document, with a UI mockup embedded inline and a live labeled cursor"><figcaption><p>A shared document can contain an editable mockup, diagram, image, or tracker inline.</p></figcaption></figure>

* **True multiplayer:** Edit shared markdown, mockups, and diagrams together in real time, with a live cursor for everyone in the document.
* **Your agents in the same room:** Each teammate's local Claude Code and Codex agents edit the same shared documents, not separate copies.
* **Promote and review:** Promote any local file to a shared one in a click, and review its full change history.

### Plan and track together

#### Plan and track the work on one shared board

<figure><img src="/files/1HsF6gb1fQdemNp2CmoS" alt="A shared task list with an item open, showing its linked session, status, priority, owner, and written content"><figcaption><p>The team and its agents keep the same tracker items, fields, and linked sessions current.</p></figcaption></figure>

* **Shared boards and trackers:** Plans, decisions, bugs, tasks, and ideas live on shared boards and trackers in the same workspace as your docs.
* **Everyone updates the same items:** Teammates and their local agents read and update the same tracker items, so the board reflects what is actually happening.
* **One place for status:** See what is in progress, done, or blocked instead of pinging people for updates.

### One connected workspace

Shared docs, local files, trackers, and agent sessions live together and link to each other. A tracker can link to the session working it, the source document it came from, and the pull request that closes it. Documents can contain live tracker references and embedded visual files.

For a look at how the shared layer works across a whole team, see [how Nimbalyst Teams works](https://nimbalyst.com/teams/how-it-works/).

### How collaboration works

1. **Everyone works locally.** Each teammate runs Nimbalyst on their own machine with their own Claude Code, Codex, or other agents.
2. **Authenticate to Nimbalyst Teams.** Signing in gives each person access to the organizations, projects, shared files, and shared Trackers they are authorized to use.
3. **Promote what should be shared.** Move a local file or Tracker item into the shared team workspace when the team should work on it. Only explicitly shared content enters the team collaboration flow.
4. **Work live, asynchronously, or offline.** Shared files and Trackers sync across everyone's workspace. Previously opened documents remain available from an encrypted local copy, and offline changes upload when the device reconnects.
5. **Keep the work connected.** Shared docs, local files, Trackers, and sessions link to one another so the team and its agents work from one picture instead of scattered tools.

### Set up Nimbalyst Teams

Getting a team running takes three steps:

1. Sign in under **Settings > Account > Accounts** and create an organization.
2. Attach the current project to that organization under **Settings > Project > Sharing**.
3. Invite teammates by email from the organization management dialog.

Full instructions, including roles, projects, messaging, and encryption, are in [Set Up Nimbalyst Teams and Organizations](/team-collaboration/setup-teams-and-orgs).

Continue with [Collaborative Documents](/team-collaboration/documents) or [Collaborative Trackers](/team-collaboration/trackers).

### Teammates without the app

Anyone you invite can open your team's shared documents in a browser at [console.nimbalyst.com](https://console.nimbalyst.com), edit them live, and leave comments without installing anything. See [Web Console](/team-collaboration/web-console).

### Enterprise-grade security, local-first by default

Your code stays on your machine. Only what you choose to share gets synced, and only the people you invite can read it.

* **Encrypted through Cloudflare:** Shared documents, Trackers, and tasks flow through Nimbalyst's Cloudflare sync service and are encrypted in transit and at rest.
* **Isolated and authorized per team:** Team data is isolated per team and requires an authenticated, authorized membership.
* **SOC 2 Type 2 certified:** Nimbalyst has completed SOC 2 Type 2 certification with audited controls, processes, and documented compliance.
* **Local-first by default:** Local files remain on your machine until you promote one for the team and its agents to work on together.

Nimbalyst-hosted Teams uses server-managed encryption keys so authorized web, CLI, and agent experiences can access shared team work. Hosted team data is encrypted but is not zero-knowledge. Personal device sync uses a separate end-to-end encrypted model.


# Collaborative Documents

Share markdown docs, mockups, and diagrams with your team. Teammates and their local coding agents edit the same files in real time.

## Every document, shared with your team and their agents

Markdown, mockups, diagrams, and more, edited together in real time or asynchronously. Each teammate's locally running Nimbalyst and configured agents work in the same shared files, not separate copies.

See [collaborative documents in Nimbalyst Teams](https://nimbalyst.com/teams/documents/) for how shared editing works.

<figure><img src="/files/IefrgYjbADy387FEJeZ4" alt="Two teammates editing the same markdown document in real time, with presence and a live labeled cursor"><figcaption><p>True multiplayer editing keeps everyone on one shared copy.</p></figcaption></figure>

### Everyone in the same document at once

<figure><img src="/files/NzxPYJEjihBizU3unfJM" alt="Two teammates editing the same document with presence avatars and a live labeled cursor"><figcaption><p>Presence avatars and labeled cursors show who is in the document and where they are working.</p></figcaption></figure>

* **True multiplayer:** Type in the same markdown, mockup, or diagram at the same time, with a live cursor for every person in the document.
* **See who is here:** Presence avatars show who is in the document and where they are working right now.
* **Your agents, in the same file:** Each teammate's local Claude Code and Codex agents edit the same shared document, so people and agents stay on one copy.

### One document, every kind of content inside it

Shared documents are not limited to text. Embed a mockup, diagram, image, or inline tracker in the page and edit it in place.

<figure><img src="/files/vPtTE7Era3Qoy8Drfnpv" alt="A shared document with a UI mockup embedded inline and a live cursor"><figcaption><p>The embedded mockup remains editable inside the shared document.</p></figcaption></figure>

* **Markdown, mockups, and diagrams:** Work in shared markdown, UI mockups, Excalidraw, Mermaid, mind maps, data models, and spreadsheets in one workspace.
* **Embed anything inline:** Drop an Excalidraw canvas, mockup, image, or other supported extension file into a document and edit it inline.
* **Inline trackers:** Add an editable tracker reference inside a document so the plan and the task remain connected.

Type `@` to choose a project file. Put the file reference by itself in a paragraph and Nimbalyst upgrades compatible editor types into a live inline embed.

<figure><img src="/files/wXKomnsHtV8PIIY6OAQg" alt="A shared markdown document containing two live embeds, a mockup showing a tracker board and an Excalidraw diagram, each with a header naming its shared path and an Open action"><figcaption><p>Embedded files render live inside the shared document. Each embed names its shared path and opens in its own editor.</p></figcaption></figure>

An embed inside a shared document is a live view of another shared file, not a flattened image. The mockup and the diagram above are still their own documents. Anyone with access can edit them in place, or click **Open** to work on them in the full editor, and the change appears everywhere the file is embedded.

### Sharing a document that contains embeds

When you share a markdown file that embeds other files, those embedded files have to be shared too. Otherwise your teammates would open the document and find empty placeholders where the mockup and diagram should be.

Nimbalyst handles this in the **Share to Team** dialog. It scans the document for embedded files and lists each one under **Linked documents**, pre-checked.

<figure><img src="/files/0z3BLQCROJtsuqc4dncS" alt="The Share to Team dialog showing the source file, shared name, destination folder tree, and a Linked documents section listing an embedded mockup and an Excalidraw diagram, both checked and marked Already shared"><figcaption><p>Share to Team finds the files a document embeds and shares them alongside it.</p></figcaption></figure>

* **Everything the document needs, in one action:** Leave the linked documents checked and Nimbalyst shares them with the parent document, so the embeds render for everyone.
* **Already-shared files are recognized:** An embedded file that is already in the team space is marked **Already shared** and is reused rather than duplicated.
* **You stay in control:** Uncheck any linked document you do not want in the team space. Its embed will show as unavailable for teammates until you share it.
* **The count reflects your choices:** The confirm button tells you how many documents are about to be shared.

Embedding works the same way in a tracker item body. See [Collaborative Trackers](/team-collaboration/trackers).

### Supported Shared File Types

Nimbalyst can share and co-edit:

* Markdown, plain-text, and code files such as TypeScript, HTML, Swift, and Python
* Excalidraw diagrams and supported visual diagrams
* Mockups
* CSV, TSV, and calc spreadsheets
* Data models
* Other extension file types that declare collaboration support

The editor determines how collaboration appears. Text and code show live cursors and selections, spreadsheets show the selected cell and active editor, and visual editors can show canvas selections and presence.

### Promote any local file to shared in a click

<figure><img src="/files/iMvhzBhUTD81kBfdjdjf" alt="The file context menu open on a document, with a Share to Team action"><figcaption><p>Start locally, then choose Share to Team when the file is ready for collaboration.</p></figcaption></figure>

1. In Files mode, right-click the local file.
2. Choose **Share to Team**.
3. Choose its shared name and destination folder.
4. Confirm **Share to Team**.

Only what you choose is shared. Your code and other local files remain on your machine. Nimbalyst keeps a link to the originating local file so you can open, relink, or re-upload it when needed.

The shared copy flows through Nimbalyst's Cloudflare sync service and is encrypted in transit and at rest. Teammates who return later receive the changes made while they were away and can continue with their own local agents.

### Work Offline

Previously opened shared documents open immediately from an encrypted local copy when the network is unavailable. You can continue editing text, supported visual content, and attachments while offline.

Nimbalyst keeps document changes and attachment uploads in a durable queue. When the device reconnects, it uploads the queued work and merges it with changes received from teammates. The queue survives a window or application restart.

Documents you have never opened still require a connection for their first download. An attachment that is not yet cached shows an unavailable placeholder until Nimbalyst can retrieve it.

### Discuss the work right where it lives

<figure><img src="/files/VrLFCPn2VxWxyEjEhwaU" alt="A shared document with a highlighted passage and a comment thread with a reply"><figcaption><p>Comments keep review feedback beside the exact passage being discussed.</p></figcaption></figure>

* **Comment in context:** Leave a comment on a passage or section so feedback sits next to the thing it is about.
* **Threads that resolve:** Reply, resolve, and reopen threads so review happens in the document instead of a separate chat.
* **Everyone stays in sync:** Comments sync in real time so the whole team sees the discussion as it happens.

### Never lose a version

<figure><img src="/files/aqkr5VcvZj4l7D7pXu7H" alt="Document History for a shared document, showing a saved revision, its author and metadata, and a Restore as Current Version action"><figcaption><p>Review saved revisions and restore the one you need without leaving the shared document.</p></figcaption></figure>

* **Full change history:** Every shared document keeps its history so you can see how it changed and who changed it.
* **Restore in one click:** Roll a document back to an earlier version without leaving the editor.
* **Review before you trust:** Scan what changed since you last looked so nothing slips by unnoticed.

Right-click a document in the Collaboration sidebar and choose **View History**. Press **Cmd/Ctrl+S** in a shared document to save a revision.

### Find shared work in the Shared home

**Shared home** lists every document in the team space in one sortable table, with the folder tree beside it.

<figure><img src="/files/RAu1wC5BOK7sO8X91x8n" alt="The Shared home view listing shared documents in a table with Name, Type, Created by, Last edited, Viewed by me, and Folder columns, filter tabs for All, Favorites, Unread, Recently opened, Shared with me, and Shared by me, and unread dots beside several rows"><figcaption><p>Shared home lists every shared document with its type, folder, author, and when you last looked at it.</p></figcaption></figure>

* **Sort by any column:** Name, type, who created it, when it was last edited, when you last viewed it, and which folder it lives in.
* **Filter to what matters:** **All**, **Favorites**, **Unread**, **Recently opened**, **Shared with me**, and **Shared by me**, with a count on the unread filter.
* **Narrow further:** Filter by type, by person, or by folder, and search across every shared document.
* **List or tiles:** Switch between the table above and a tile view from the toggle at the top right.

### Favorites, and what changed since you were last here

<figure><img src="/files/pyff0qbCVFTpc6dmwOW5" alt="A shared folder in the Collaboration sidebar, with gold stars marking three favorited files and blue dots marking two files that changed since they were last opened"><figcaption><p>A gold star marks a favorite. A blue dot marks a document that changed since you last opened it.</p></figcaption></figure>

* **Favorites:** Star the documents you keep coming back to and reach them from the **Favorites** filter. Starred files show a gold star wherever they appear.
* **Changed since you were away:** A blue dot marks each shared document that changed since you last opened it. Opening the document clears the dot.
* **New and recently updated:** Use the **Unread** and **Recently opened** filters to catch up on what moved while you were away, sorted by the last change.

The Collaboration sidebar also provides shared folders, search, drag-and-drop organization, and **All**, **Favorites**, and **Updated** filters.

### Open shared documents in a browser

Shared markdown documents also open at [console.nimbalyst.com](https://console.nimbalyst.com), where teammates can edit them live and comment without installing the desktop app. See [Web Console](/team-collaboration/web-console).


# Collaborative Trackers

Share one tracker board across your team. Teammates and their locally running AI agents keep the same bugs, features, and plans current.

## One shared board your team and its agents keep current

Bugs, features, tasks, plans, and decisions live on shared Trackers in the same workspace as your docs. Teammates and their local agents update the same items in real time or asynchronously, so the board reflects what is actually happening.

See [shared trackers in Nimbalyst Teams](https://nimbalyst.com/teams/trackers/) for how the shared board works.

<figure><img src="/files/blGXYPkVuBAiiHSsbHLJ" alt="A shared tracker board grouped into tag columns such as API, mobile, reliability, and authentication"><figcaption><p>Group shared work by tag to see plans across areas and milestones.</p></figcaption></figure>

### One board, everyone on it

<figure><img src="/files/16VGhpe2jfEJzDrKHfiM" alt="A shared task board with To Do, In Progress, In Review, and Done columns"><figcaption><p>Use kanban stages, lists, filters, and saved views to organize shared work.</p></figcaption></figure>

* **Real-time and multiplayer:** The board updates live as people and agents change items, with no refresh or manual synchronization.
* **Kanban with your stages:** Move work across the stages you define, from backlog to done, on a shared kanban board.
* **Recently changed:** See what moved recently, with a marker on items that changed since you last looked.

The tracker also includes a sortable list, filters, saved views, and a tag board.

### Your agents and your team keep it up to date

<figure><img src="/files/1HsF6gb1fQdemNp2CmoS" alt="A tracker item detail kept up to date with a linked session, status, priority, owner, and written content"><figcaption><p>Open an item to see its current fields, content, owner, and the session working on it.</p></figcaption></figure>

* **Agents update the board:** Claude Code and Codex agents can create items, change status, and update many trackers as they work.
* **People edit too:** Teammates edit the same items by hand, so the board stays accurate whether a person or agent made the change.
* **Comments and full history:** Every item keeps a threaded discussion and a record of what changed and who changed it.

Enable or disable agent Tracker tools per project under **Settings > Project > Trackers > AI Agent Access**.

### Track any kind of work

<figure><img src="/files/B7KHzYJ5bIWMfDxahlon" alt="The tracker sidebar with configurable types including Modules and Initiatives, and an Authentication module open with child features and fields"><figcaption><p>Create tracker types and relationships that match how your team organizes work.</p></figcaption></figure>

* **Bugs, features, and your own types:** Use built-in trackers or define custom types with the fields you need.
* **Hierarchy and links:** Break work into parent and child items and link related items across trackers.
* **Fields that fit:** Give each type its own fields, statuses, owners, tags, dates, priorities, and progress.

See [Custom Tracker Types](/task-management/custom-tracker-types) and [Linking Tracker Items](/task-management/linking-tracker-items).

### A collaborative document inside every item

Each full tracker item has a rich body the team edits together, so the plan and discussion live with the task.

<figure><img src="/files/Ww89coXz4wR8GVTVA7x9" alt="A tracker item with a collaborative rich-text body, including an Excalidraw diagram and mockup embedded inline"><figcaption><p>Write the plan in the item and embed diagrams, mockups, images, and other project files.</p></figcaption></figure>

* **Write the plan in place:** Draft the spec, repro steps, decision, or rollout plan inside the item.
* **Diagrams and mockups too:** Add diagrams, mockups, images, data models, and spreadsheets so the full picture sits with the work.
* **Edited together:** The item body is collaborative, so teammates and agents work on it in the same place.

### Every item is wired into the work

An item connects to the sessions working it, the parent and child items around it, and the documents that reference it.

<figure><img src="/files/UjmjEQoHCV9pmS9iYPMs" alt="An initiative showing its parent, child item, tags, content, and linked session"><figcaption><p>Build a hierarchy around the work and link the session, source file, and pull request that belong to it.</p></figcaption></figure>

* **Hierarchy and linked sessions:** Break work into parent and child items, and connect each one to the session working it, the file it came from, and the pull request that closes it.

<figure><img src="/files/HdFETKpAqMzdsmOWAWYj" alt="An agent session reporting updates to linked tracker items, with those items visible in the Trackers panel"><figcaption><p>The agent updates linked items while it works and reports the changes in the session.</p></figcaption></figure>

* **Updated from the session:** Claude Code and Codex agents change linked items as they work, so a session and its tracker items stay in step.

<figure><img src="/files/Cc5gaCeEEPEt4391jaVg" alt="A launch-readiness document containing live tracker reference pills with item keys, titles, and statuses"><figcaption><p>Reference live tracker items in a document so their current status stays beside the plan.</p></figcaption></figure>

* **Tracker pills in your docs:** Reference an item in any document with a live pill that shows its status and links back to the board.

Use **Link Existing**, **Launch Session**, or ask the agent to link the current session when that relationship belongs in the item's history.

### Keep trackers private or share them, and organize by tag

<figure><img src="/files/blGXYPkVuBAiiHSsbHLJ" alt="A tracker board grouped by tag, with columns for areas such as API, mobile, reliability, and authentication"><figcaption><p>Keep personal trackers local, promote team trackers to shared, and group the shared board by tag.</p></figcaption></figure>

* **Local trackers:** Track your own work in local trackers that stay on your machine.
* **Shared trackers:** Promote a tracker to shared so the whole team and its agents work on the same board.
* **Board by tag:** Group the board by tag to slice work by area, milestone, or any other label.

#### Choose a sync policy per tracker type

Sharing is decided per tracker type, not all-or-nothing, under **Settings > Project > Trackers > Team Sync Policy**. Changes apply to every member of the team.

<figure><img src="/files/Rv1OZUPV8zLYgiwGOJHI" alt="The Team Sync Policy panel listing tracker types such as Plans, Decisions, Bugs, Tasks, Ideas, Milestones, and Releases, each with an item count and a Local, Shared, Hybrid selector, with Override badges on several rows"><figcaption><p>Each tracker type is Local, Shared, or Hybrid, with its current item count beside it.</p></figcaption></figure>

* **Shared:** Items sync to all team members in real time. The row reads *Visible to all team members*.
* **Local:** Items stay on your machine only. The row reads *Only visible to you*.
* **Hybrid:** Each item carries its own sharing choice, so one tracker type can hold both team and private work.

An **Override** badge marks a type whose settings differ from the default. Use the pencil to edit it and the revert arrow to return it to the default. Custom types you defined yourself can be deleted from this panel.

Inline `#type[...]` items stay local until they are promoted to full items. Shared items show their synchronization state, and list view can display the optional **Shared** column.

Shared Tracker data flows through Nimbalyst's Cloudflare sync service and is encrypted in transit and at rest. Local and unshared items remain outside the team workspace.


# Web Console (console.nimbalyst.com)

Open your team's shared documents in a browser at console.nimbalyst.com, edit them live with teammates, leave comments, and manage your organization.

The Nimbalyst Web Console at [console.nimbalyst.com](https://console.nimbalyst.com) opens your team's shared documents in a browser. No install, no local setup, and the same collaboration service and permissions as the desktop app.

It exists so the people who need to read and respond to your work do not need to become Nimbalyst users first. Write a plan in the desktop app, share it with your team, and a teammate can open the link, follow your live edits, and leave comments from any browser.

{% hint style="info" %}
The console is part of Nimbalyst Teams, which is in **beta**. Expect bugs. Organizations are free during beta and will require a paid Nimbalyst Teams subscription after launch.
{% endhint %}

They can edit it too. Editing runs in both directions: a teammate with edit access types straight into the same document you are in, and their changes land in your desktop app as they make them. You each see the other's cursor while you work.

<figure><img src="/files/5OgFUMBL1C3l89q2OkRf" alt="A shared markdown plan open in the browser editor, with a teammate&#x27;s labeled cursor in the document, a comments button showing four threads, and an Open in desktop link"><figcaption><p>A shared plan open in a browser, with a teammate editing alongside you.</p></figcaption></figure>

### What you can do in a browser

* **Open shared documents.** Browse your organization's shared document tree, folders, and projects.
* **Edit live.** Shared markdown documents are fully editable, with everyone's changes syncing in real time.
* **See who else is here.** Live labeled cursors show each teammate editing alongside you, colored per person.
* **Comment on the text.** Select a passage, add a comment, reply, resolve, and mention teammates with `@`.
* **Manage your organization.** Billing, roles, invitations, security posture, and organization lifecycle.

The browser is a companion to the desktop app rather than a replacement for it. See [What the browser cannot do](#what-the-browser-cannot-do) for the specifics.

### Signing in

The console uses the same account as the desktop app. Two ways in:

1. **Continue with email** sends a magic link to your work address.
2. **Continue with Google** uses your connected Google identity.

<figure><img src="/files/UyfwZjxiQYhSeIkrnVyD" alt="The Nimbalyst Web Console sign-in screen, with a work email field and a Continue with Google button"><figcaption><p>Sign in with the account connected to your organization.</p></figcaption></figure>

If your account belongs to more than one organization, you choose which one to open after signing in. You can switch organizations later from the profile menu at the bottom of the left navigation, without signing in again.

Browser sessions last seven days and are scoped to one signed-in account.

If you follow a link to a document while signed out, the console remembers where you were headed and returns you there after you sign in.

<figure><img src="/files/KXmrTqriVvQTF5UnBRyp" alt="The console sign-in screen showing an alert reading: Your session is not active. Sign in to continue to this organization link."><figcaption><p>Following a shared link while signed out preserves your destination.</p></figcaption></figure>

### Accepting an invitation

When an organization admin invites you by email, the invitation link brings you to the console and accepts your membership. Because the full Nimbalyst experience lives in the desktop app, the console then offers to open Nimbalyst for you, with a download link if you do not have it yet. **Continue in the browser instead** takes you to the shared documents.

### Working in shared documents

The left navigation has two modes: **Shared Docs** and **Organization**.

<figure><img src="/files/FyfwlA9g5dR7UzCYT90Q" alt="The web console listing an organization&#x27;s shared documents in a table with Name, Type, Created by, Last edited, and Folder columns, beside a folder tree"><figcaption><p>Every shared document in the project, with its type, folder, author, and last edit.</p></figcaption></figure>

In Shared Docs you get a document tree on the left, a tab strip across the top for the documents you have open, and a breadcrumb showing organization, project, folder, and document. The tree and the comments panel are both resizable by dragging their edges, or with the arrow keys once a handle is focused. Double-click a handle to reset it.

If your organization has several projects, the project switcher sits at the top of the tree and shows how many shared documents each one holds.

Your open tabs, panel widths, and last-used project are remembered in the browser, so returning to the console puts you back where you were.
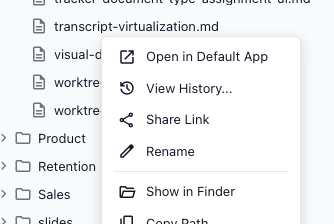
#### Editing together

Shared markdown documents are live. Above the document, a status pill reports the connection (**Live**, **Connecting**, **Reconnecting**, **Offline**, or **Read-only**) and a save chip reports whether your changes are saved.

The document stays hidden until the first sync completes, so you never type into what looks like an empty document while the server copy is still loading.

Each teammate editing with you appears as a colored cursor labeled with their name. Screen readers announce people joining, leaving, and editing.

Edits go both ways. Anyone whose organization role allows it can type into the document from the browser, and those changes reach the desktop app and every other open browser as they happen. Viewers and guests are held to reading.

#### Commenting

Select any text in the document and choose **Add comment**. Comments dock in a panel on the right, which you can toggle from the floating comments button. The button carries a count when the panel is closed.

* Reply to a thread, then **Resolve** it once it is handled.
* Type `@` in the composer to mention a teammate.
* Mentioned teammates are notified.

<figure><img src="/files/WgRFhHzWowNH2IOFZPzB" alt="A shared plan open in the browser with the comments panel docked on the right, showing four threads anchored to passages, each with an author, a timestamp, a reply box, and Resolve and Delete actions"><figcaption><p>Comments anchor to the passage they are about, with replies and resolve in the docked panel.</p></figcaption></figure>

Commenting depends on your organization role. Owners, admins, and members can write comments. Viewers and guests can read but not comment. Comments are also withdrawn on any document the server has made read-only for you.

#### Opening in the desktop app

Every document has an **Open in desktop** link in its status bar that hands the document off to Nimbalyst on your machine. Documents the browser cannot handle offer the same handoff more prominently.

### Organization administration

Switch the left navigation to **Organization** for five sections:

| Section               | What it covers                                                                                                                                                  |
| --------------------- | --------------------------------------------------------------------------------------------------------------------------------------------------------------- |
| **Overview**          | Your role, membership type, and every project in the organization                                                                                               |
| **Billing**           | Current plan, status, seat count, and period end; seat changes and payment management run through the billing provider, and the console never sees card details |
| **Roles and members** | The member list, each person's role, role changes, member removal, and email invitations                                                                        |
| **Security**          | Data custody mode, encryption key epoch and fingerprint, and the twenty most recent organization audit events                                                   |
| **Danger zone**       | Merge this organization into another, or delete it permanently                                                                                                  |

Deleting an organization requires typing its exact name. Role changes and every other privileged write are checked again by the collaboration service, so the console never grants access on its own.

### What the browser cannot do

The console is deliberately narrower than the desktop app. Today:

* **Only markdown documents open.** Mockups, diagrams, data models, mind maps, spreadsheets, and code files show as unsupported and need the desktop app.
* **Trackers are desktop-only.** The shared tracker boards do not open in a browser.
* **Documents above 8 MiB of collaborative state** are too large for a browser tab and offer a desktop handoff instead.
* **No document history or version view.**
* **No export or embedding.**
* **No promoting a local file to the team.** Sharing a local file to your organization happens in the desktop app.
* **No personal (non-team) documents**, and no read receipts.
* **No creating projects or organizations.** The console works with organizations and projects that already exist.

### Troubleshooting

| What you see                                        | What it means                                                                                                                                  |
| --------------------------------------------------- | ---------------------------------------------------------------------------------------------------------------------------------------------- |
| **No access to this organization**                  | The link points at an organization your account cannot open. Check you signed in with the right address.                                       |
| **Organization access was removed**                 | Your membership ended while you had the document open. Live access stops immediately.                                                          |
| **Document not found**                              | The document was deleted, or it left the project you have access to.                                                                           |
| **Your session expired**                            | Sign in again. Your destination is preserved.                                                                                                  |
| **Shared documents are unavailable**                | The collaboration service could not be reached. Your route is kept, so a retry returns you to the same place.                                  |
| **This document is too large to edit in a browser** | Nothing is lost. Open it in the desktop app, which has no such limit.                                                                          |
| **This document is now read-only**                  | The server rejected an edit. The rejected change was not saved.                                                                                |
| **This document could not be opened**               | The first sync did not complete. Nothing you type would be saved, so editing stays off until the connection returns. **Try again** retries it. |

If a sign-in link fails, it has usually been used already or expired. Request a fresh one.

### Related

* [Team Collaboration Overview](/team-collaboration/overview)
* [Collaborative Documents](/team-collaboration/documents)
* [Set Up Nimbalyst Teams and Organizations](/team-collaboration/setup-teams-and-orgs)


# Set Up Nimbalyst Teams

Create a Nimbalyst organization, attach a project to it, invite teammates, and manage members, projects, messaging, and encryption from the organization management dialog.

Nimbalyst Teams has two layers. An **organization** holds the member roster, billing, messaging settings, and encryption. A **project** is one git repository attached to that organization, with its own shared documents and trackers. Nimbalyst uses the project's git remote as its identity, so teammates who open clones of the same repository connect to the same team project.

Setup lives in two places: **Settings** for your account and the current project, and the **organization management dialog** for everything organization-wide.

{% hint style="info" %}
Nimbalyst Teams is in **beta**. Expect bugs. Organizations are free during beta and will require a paid Nimbalyst Teams subscription after launch.
{% endhint %}

### Before you begin

Make sure that:

* You have opened the correct project in Nimbalyst.
* The project has a git remote named `origin` if you want automatic project matching.
* You are signed in to Nimbalyst under **Settings > Account > Accounts**.
* Teammates will sign in with the email addresses you invite.

### Create an organization

Your signed-in accounts and the organizations each one belongs to are listed under **Settings > Account > Accounts**. Use **New organization** here to start one, or **Manage** to open the management dialog for an existing one.

<figure><img src="/files/vm755pFgYzTpaaBPpwNB" alt="Settings, Account, Accounts, showing the signed-in email with its organizations, each with an Admin or Owner role badge, a Manage button, and a New organization button"><figcaption><p>Every organization your signed-in account belongs to, with your role in each.</p></figcaption></figure>

Each row shows your role, **Owner** or **Admin**, and how many projects the organization holds. The person who creates an organization becomes its owner. You can also **Add another account** and belong to organizations under more than one identity.

### Attach this project to an organization

Project-level sharing lives under **Settings > Project > Sharing**. This panel is where a repository becomes a team project.

<figure><img src="/files/SYAhnZ6xHi5eU4JEcfU6" alt="Settings, Project, Sharing, showing the Organization section with the signed-in account and the organization attachment controls"><figcaption><p>Settings > Project > Sharing attaches the current repository to an organization.</p></figcaption></figure>

To create a team from this project:

1. Open **Settings**.
2. Select **Project** at the top.
3. In the sidebar, select **Sharing**.
4. Click **Create Team**.
5. Confirm the team name and detected git remote. If you have more than one Nimbalyst account, choose the account that should own the team.
6. Click **Create Team**.

Nimbalyst creates the organization, registers this repository as its first project, and prepares the team's encryption.

If you already administer an organization, use **Add to an existing organization** instead of creating another one:

1. Select the organization.
2. Click **Add Project**.
3. Confirm that this workspace appears as a project under the organization.

Each project has its own tracker and document space. Projects in the same organization share the member roster, messaging settings, and encryption.

### Manage the organization

Organization administration is a dialog that opens in whatever window you are already in, rather than a fourth Settings scope. Open it any of these ways:

* **Organization switcher** in the navigation gutter, then **Manage organization…**.
* **Settings > Account > Accounts**, then **Manage** on the organization's row.
* The organization row in the **account menu** at the bottom of the navigation gutter.
* **Settings > Project > Sharing**, then **Open organization**, which lands on the **Projects** page.
* The pending-invitations row in the organization switcher, which lands on **Members**.

The dialog's sidebar holds **Members**, **Projects**, and **Settings**, plus **Billing** and **Danger zone** for owners and admins. Plain members do not see the last two.

**Window > Organization Messages** (**Cmd/Ctrl+Alt+O**) is a different surface. It opens the messaging window for rooms and direct messages, not the administration dialog.

#### Members and roles

**Members & Roles** carries a `beta` chip while roles and verification settle. Under **Members**, enter a teammate's email address and click **Invite**. The invite stays pending until that person joins. An owner or admin can revoke a pending invite, remove a member, or move a member between **Admin** and **Member**.

This page also shows identity fingerprints so teammates can verify one another. Compare fingerprints through a separate trusted channel before marking someone verified. A changed fingerprint means the member's device identity changed, so verify it again before trusting the new key. Owners and admins can re-share a team key when a verified member changes devices.

#### Projects

**Projects** lists every project in the organization, including ones you have not cloned locally.

<figure><img src="/files/3Ly2tNc2FZ6lSNNCIiuz" alt="The organization management dialog Projects page, listing a git-linked project with a Manage access button and a reserved Organization Space entry"><figcaption><p>Every project in the organization, whether or not you have a local clone.</p></figcaption></figure>

Use **Manage access** to control who can reach a project's shared documents and trackers. To add a project, open it in Nimbalyst and go to **Project Settings > Sharing > Add to an existing organization**. **Organization Space**, a shared area for documents and trackers that belong to the organization rather than to a single repository, is reserved for a later release.

#### Settings: messaging, security, and encryption

**Settings** covers organization-wide configuration. Members can view this page; only owners and admins can change it.

<figure><img src="/files/haFavr4lkYlhBpAkZoy8" alt="The organization management dialog Settings page, showing the organization name with a Rename action, Messaging toggles for Rooms and Direct messages, a who-can-create-rooms selector, and a Security panel reading Encrypted by Nimbalyst with encryption active"><figcaption><p>Rename the organization, control built-in messaging, and check encryption status.</p></figcaption></figure>

* **Organization:** Rename the organization. The owner's email address is shown beneath it.
* **Messaging:** Turn **Rooms** and **Direct messages** off for organizations that chat elsewhere. The Inbox, document comments, and tracker comments are unaffected. **Who can create rooms** offers **Any member** or **Organization admins only**, and is unavailable while Rooms is off.
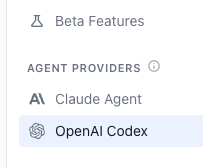
* **Security:** Team data is encrypted in transit and at rest with keys managed by Nimbalyst. This is separate from personal sync encryption, whose keys remain only on your devices.

**Billing** and **Danger zone** round out the dialog. Details on encryption, data isolation, and SOC 2 are on the [security page](https://nimbalyst.com/features/security/).

### Join an invited team

The invited person should:

1. Sign in to Nimbalyst with the invited email address.
2. Open a clone of the team's repository in Nimbalyst.
3. Open **Settings > Project > Sharing**.
4. Click **Join Team** on the invitation card.

Because the repository remote matches the team project, the shared documents and trackers become available once the invitation is accepted and the encryption key is ready.

If the invite does not appear, confirm the signed-in email address and the repository's `origin` remote first.

### Use multiple accounts

Add or reconnect accounts under **Settings > Account > Accounts**, then switch between them from the account menu in the navigation footer.

When you create an organization, add a project to one, or create a shared link, Nimbalyst lets you choose which signed-in account owns that action. Organization membership and project access continue to use that account even when another account is selected for personal mobile sync.

If an invitation or team project is missing, first switch to the account whose email address received the invitation.

### Which scope does what

| You want to…                                              | Go to                              |
| --------------------------------------------------------- | ---------------------------------- |
| Sign in, add an account, or start an organization         | **Settings > Account > Accounts**  |
| Attach this repository to an organization, or join a team | **Settings > Project > Sharing**   |
| Choose which tracker types sync to the team               | **Settings > Project > Trackers**  |
| Invite people, set roles, verify fingerprints             | **Organization dialog > Members**  |
| Manage project access across the organization             | **Organization dialog > Projects** |
| Rename the org, control messaging, check encryption       | **Organization dialog > Settings** |
| Chat in rooms and direct messages                         | **Window > Organization Messages** |

Team content is authorized with the active team membership. Personal session and mobile sync use a separate personal identity and do not grant access to team documents or trackers. See [Application, Account, and Project Settings](/setup-nimbalyst/settings-scopes) for the complete settings model.

### Start collaborating

After the team is connected:

* Open **Collaboration** mode to create and organize shared documents.
* Right-click a supported local file and choose **Share to Team**.
* Open **Trackers** to share hybrid items or work in tracker types configured as shared.

Continue with [Collaborative Documents](/team-collaboration/documents) and [Collaborative Trackers](/team-collaboration/trackers).


# Extension System & Marketplace

Install Nimbalyst extensions from the marketplace registry to add editors, AI tools, and panels, or publish an extension you built yourself.

Install Nimbalyst extensions from a live marketplace registry, build your own extensions to Nimbalyst with a hardened extension SDK. See all the extensions below and make your own.

The full list of published extensions, with screenshots, is at [nimbalyst.com/extensions](https://nimbalyst.com/extensions/).

## What Are Extensions?

Extensions are add-ons that give Nimbalyst new capabilities. Each extension can add custom editors for new file types, AI tools that let your agent interact with your content, sidebar panels, settings pages, themes, keyboard shortcuts, and more.
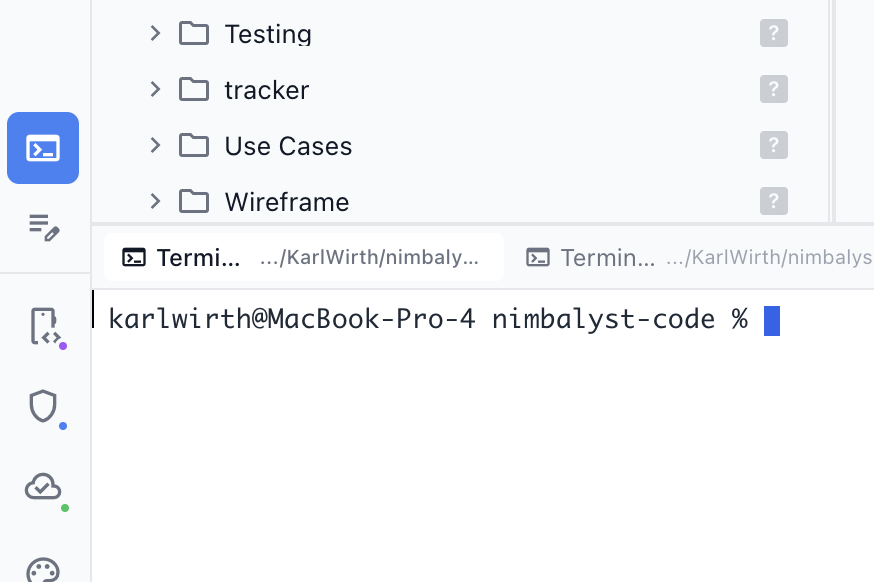
Extensions work seamlessly alongside Nimbalyst's built-in editors. When you open a file, Nimbalyst checks if any extension handles that file type and loads the right editor automatically. Extensions have full access to Nimbalyst's theming system, so they always match your current look and feel.
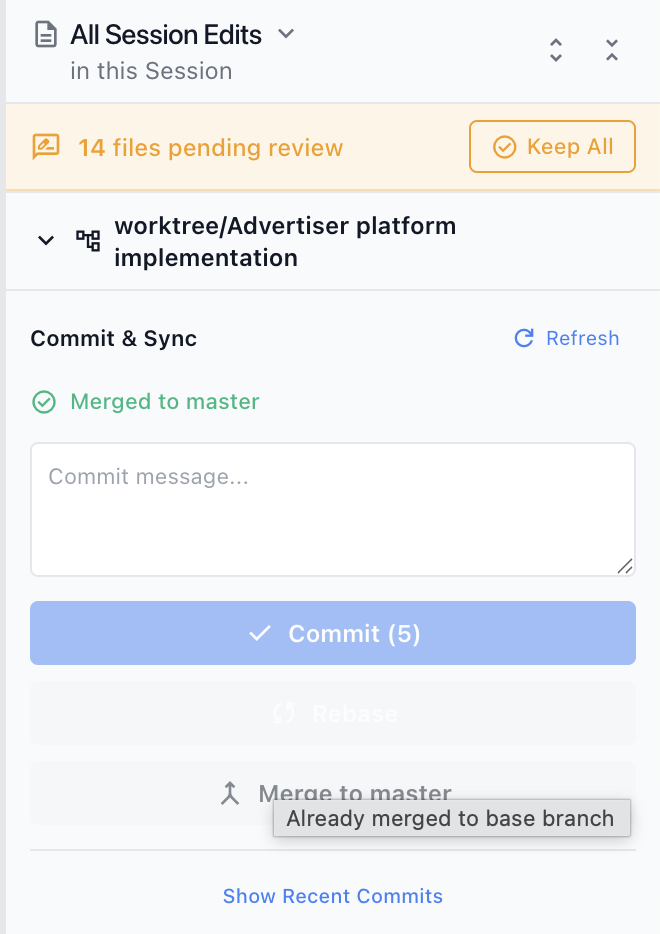
## Extensions in the Marketplace

Go to **Settings > Application > Marketplace** to browse and install extensions.

<figure><img src="/files/AZxQKLxo2KfFFWJhJlFp" alt="Extension Marketplace showing featured extensions and category filters"><figcaption><p>The Extension Marketplace in Settings, showing featured extensions, search, and category filters</p></figcaption></figure>

Click any extension card to see its full details, screenshots, permissions, and install button.

<figure><img src="/files/32vwhQ1dXNmWCrRVJ0zy" alt="Extension detail modal showing description, screenshots, and install button"><figcaption><p>Extension detail view with description, highlights, screenshots, and install controls</p></figcaption></figure>

### What's in the catalog

The bundled catalog is updated as extensions are released, so use the Marketplace for the current list, versions, screenshots, and permissions. Recent additions include:

* **Electronics Studio** — work with tscircuit and Circuit JSON in schematic, PCB, assembly, and 3D views; run simulations; and export manufacturing and review artifacts.
* **Replicad CAD** — build parametric 3D models in TypeScript with a live B-rep preview, STEP import and export, geometry inspection, and printability tools.

Marketplace cards show whether an extension is installed and whether an update is available.

### Managing Installed Extensions

View all installed extensions under **Settings > Application > Installed**. This is the single panel for everything you have installed — marketplace, GitHub, local dev, and built-in extensions all show up here, each with a colored source pill so you can tell them apart at a glance.

<figure><img src="/files/5zf0nztGAfSrYotGVxgs" alt="Installed Extensions panel showing all active extensions with details"><figcaption><p>The Installed Extensions panel shows every active extension, its permissions, and contributed AI tools</p></figcaption></figure>

Each row has an enable toggle and an indicator if an update is available. Click an extension to open the detail pane, which includes its AI tools, permissions, file path, and **Update**, **Repository**, **Reveal**, and **Uninstall** actions.

The Marketplace itself is now Discover-only. When updates are available, an "Installed (N) — M updates" link at the top of Marketplace takes you to the Extensions panel.

### Themes from Extensions

Extensions can ship themes. Any theme contributed by an installed extension shows up under **Settings > Application > Themes** in an **Extension Themes** group, and in the gutter theme popup, alongside the built-in themes. Pick one and Nimbalyst applies it just like a first-party theme.

If you later disable or uninstall the extension that provided the active theme, Nimbalyst falls back gracefully so your workspace stays usable.

### Installing from GitHub

At the bottom of the Marketplace discover page, you can paste a GitHub repository URL to install any extension directly from source. The repository must contain a valid `manifest.json` file.

## Build Your Own Extensions

Extensions are self-contained packages that declare their file types, editors, and UI contributions via a manifest. You can build extensions that do everything the built-in ones do.

**What you can build:**

* **Custom editors** for any file type (spreadsheets, diagrams, visual tools)
* **AI tools** that Claude can use to read and modify your editor's content
* **Panels** for sidebar views, fullscreen modes, or floating windows
* **Application or Project settings pages** with project-aware context
* **Project filesystem access** for editors that manage related files
* **Typed tracker item pickers and live references**
* **Themes, slash commands, file icons, and new file templates**

**How development works:**

* The **Extension Dev Kit** (bundled with Nimbalyst) scaffolds a new extension project with a starter template, hot reload, and MCP tools for build/install/reload from inside Nimbalyst
* Editors integrate through the **EditorHost contract** (load/save, dirty state, theme, external change handling) so custom editors behave exactly like first-party ones
* Use the full **Extension SDK** -- clipboard, screenshot export, AI and network permissions, and access to the same MCP tooling that first-party extensions use

For full technical documentation on building extensions, see [Building Your Own Extensions](/extensions/building-extensions).


# Building Your Own Extensions

Build your own Nimbalyst extension with custom editors, AI tools, panels, and themes, packaged with a manifest that declares what it adds.

Build extensions that add new capabilities to Nimbalyst -- custom editors, AI tools, panels, themes, and more. Extensions are self-contained packages with a manifest that declares their contributions.

Nimbalyst is open source, and the built-in extensions live alongside the app source in [github.com/nimbalyst](https://github.com/nimbalyst). The fastest way to learn the extension API is to read those built-in extensions.

The [extensions feature page](https://nimbalyst.com/features/extensions/) covers what extensions can contribute to the app.

## What Can Extensions Do?

* **Custom Editors** -- New ways to view and edit file types (spreadsheets, diagrams, 3D models)
* **AI Tools** -- Tools that Claude can use to interact with your extension
* **AI Completions** -- Call chat models (Claude, OpenAI, LM Studio) directly from your extension
* **Panels** -- Sidebar panels, fullscreen views, or floating windows
* **Settings Pages** -- Application- or Project-scoped settings with repository context
* **Project Filesystem Access** -- Read and update related project files from a custom editor
* **Tracker References** -- Add typed item pickers and live tracker reference chips
* **Themes** -- Custom color themes
* **Slash Commands** -- Commands users can invoke from the chat
* **File Icons** -- Custom icons for file types in the sidebar
* **New File Types** -- Add entries to the "New File" menu

## Quick Start

The recommended workflow is to create and iterate on extensions from inside Nimbalyst:

1. Enable **Extension Dev Tools** in **Settings > Application > Advanced**
2. Use `File > New Extension Project` or ask Claude to run `/new-extension`
3. Describe the extension you want Claude to build from the starter scaffold
4. Ask Claude to build and install the extension with `extension_build` and `extension_install`
5. Use `extension_reload` for rebuild + reinstall during iteration

See [Getting Started](/extensions/building-extensions/getting-started) for a step-by-step walkthrough.

## Project Structure

A typical extension project:

```
my-extension/
  manifest.json       # Extension metadata and contributions
  package.json        # npm dependencies
  tsconfig.json       # TypeScript configuration
  vite.config.ts      # Build configuration
  src/
    index.ts          # Extension entry point (activate/deactivate)
    components/       # React components
    styles.css        # Scoped styles
```

## Development Workflow

1. **Create** -- Use `/new-extension` inside Nimbalyst or copy a starter project
2. **Develop** -- Edit files in your extension project
3. **Build** -- Claude uses `extension_build` to compile
4. **Install** -- Claude uses `extension_install` to load it
5. **Test** -- Open a file with your extension's file type
6. **Iterate** -- Claude uses `extension_reload` for hot updates

## Core Concepts

### The Extension Manifest

Every extension needs a `manifest.json` that describes what it provides. At minimum:

```json
{
  "id": "com.example.my-editor",
  "name": "My Editor",
  "version": "1.0.0",
  "main": "dist/index.js"
}
```

See [Manifest Reference](/extensions/building-extensions/manifest-reference) for the complete schema.

### The EditorHost Contract

Custom editors receive a `host` prop that handles all communication with Nimbalyst -- loading and saving files, tracking dirty state, theme changes, and AI diff mode. The `useEditorLifecycle` hook wraps the host into a single, clean API.

See [Custom Editors](/extensions/building-extensions/custom-editors) for the full guide.

### AI Tool Integration

AI tools let Claude interact with your editor programmatically. Define tools with a name, description, input schema, and handler function. Claude reads the description to decide when to call your tool.

See [AI Tools](/extensions/building-extensions/ai-tools) for examples and best practices.

### Permissions

Extensions declare the capabilities they need:

| Permission   | What It Grants                                             |
| ------------ | ---------------------------------------------------------- |
| `filesystem` | Read and write files in the workspace                      |
| `ai`         | Register AI tools and call chat/completion models directly |
| `network`    | Make HTTP requests to external services                    |

## Documentation

| Document                                                                 | Description                               |
| ------------------------------------------------------------------------ | ----------------------------------------- |
| [Getting Started](/extensions/building-extensions/getting-started)       | Create your first extension in 10 minutes |
| [Custom Editors](/extensions/building-extensions/custom-editors)         | Build editors for new file types          |
| [AI Tools](/extensions/building-extensions/ai-tools)                     | Add tools that Claude can use             |
| [Manifest Reference](/extensions/building-extensions/manifest-reference) | Complete manifest.json schema             |
| [API Reference](/extensions/building-extensions/api-reference)           | TypeScript types and interfaces           |

## Prerequisites

* Nimbalyst with Extension Dev Tools enabled (**Settings > Application > Advanced**)
* Node.js 18+
* Basic knowledge of React and TypeScript

## Built-in Extension Examples

Study the built-in extensions for patterns and best practices:

| Extension       | File Types       | Notable Patterns                           |
| --------------- | ---------------- | ------------------------------------------ |
| Excalidraw      | `.excalidraw`    | Imperative API via refs, 19 AI tools       |
| CSV Spreadsheet | `.csv`, `.tsv`   | RevoGrid with custom save, formula support |
| DataModelLM     | `.datamodel`     | Zustand store, screenshot export           |
| MockupLM        | `.mockup.html`   | iframe preview, AI generation              |
| SQLite Browser  | `.db`, `.sqlite` | Panel-based with Jotai, 9 AI tools         |

These are all in `packages/extensions/` in the [Nimbalyst repository on GitHub](https://github.com/nimbalyst).


# Getting Started

Create your first Nimbalyst extension step by step, ending with a working custom editor for a new file type built on the extension SDK.

This guide walks you through creating your first Nimbalyst extension. By the end, you'll have a working extension that registers a custom editor for `.hello` files.

## Recommended: Create It From Inside Nimbalyst

The intended workflow is to scaffold and iterate on extensions from inside Nimbalyst:

1. Enable Extension Dev Tools in **Settings > Application > Advanced**
2. Use `File > New Extension Project` or `Developer > New Extension Project`
3. Or ask Claude to run `/new-extension minimal ~/my-first-extension "Hello Editor"`
4. Ask Claude to build and install it with `extension_build` and `extension_install`
5. Use `extension_reload` while iterating

The rest of this guide shows the manual scaffold path if you prefer to create the project yourself.

## Prerequisites

1. **Enable Extension Dev Tools** - Go to **Settings > Application > Advanced** and enable "Extension Dev Tools"
2. **Node.js 18+** - Required for building extensions

## Step 1: Create the Project

Create a new directory for your extension:

```bash
mkdir my-first-extension
cd my-first-extension
npm init -y
```

## Step 2: Install Dependencies

```bash
npm install --save-dev typescript vite @nimbalyst/extension-sdk
npm install react
```

## Step 3: Create the Manifest

Create `manifest.json` - this tells Nimbalyst about your extension:

```json
{
  "id": "com.example.hello-editor",
  "name": "Hello Editor",
  "version": "1.0.0",
  "description": "A simple custom editor for .hello files",
  "main": "dist/index.js",
  "apiVersion": "1.0.0",
  "contributions": {
    "customEditors": [
      {
        "filePatterns": ["*.hello"],
        "displayName": "Hello Editor",
        "component": "HelloEditor"
      }
    ],
    "newFileMenu": [
      {
        "extension": ".hello",
        "displayName": "Hello File",
        "icon": "description",
        "defaultContent": "Hello, World!"
      }
    ]
  }
}
```

`apiVersion` is currently optional but recommended.

## Step 4: Create the Vite Config

Create `vite.config.ts`:

```typescript
import { defineConfig } from 'vite';
import { createExtensionConfig } from '@nimbalyst/extension-sdk/vite';

export default defineConfig(
  createExtensionConfig({
    entry: './src/index.ts',
  })
);
```

## Step 5: Create the TypeScript Config

Create `tsconfig.json`:

```json
{
  "compilerOptions": {
    "target": "ES2020",
    "module": "ESNext",
    "moduleResolution": "bundler",
    "jsx": "react-jsx",
    "strict": true,
    "esModuleInterop": true,
    "skipLibCheck": true,
    "declaration": true,
    "outDir": "dist",
    "rootDir": "src"
  },
  "include": ["src/**/*"]
}
```

## Step 6: Create the Extension Entry Point

Create `src/index.ts`:

```typescript
import type { ExtensionContext } from '@nimbalyst/extension-sdk';
import { HelloEditor } from './HelloEditor';

// Export components that the manifest references
export const components = {
  HelloEditor,
};

// Called when the extension is loaded
export function activate(context: ExtensionContext) {
  console.log('Hello Editor extension activated!');
}

// Called when the extension is unloaded
export function deactivate() {
  console.log('Hello Editor extension deactivated');
}
```

## Step 7: Create the Editor Component

Create `src/HelloEditor.tsx`:

```tsx
import React, { useRef, useReducer } from 'react';
import { useEditorLifecycle } from '@nimbalyst/extension-sdk';
import type { EditorHostProps } from '@nimbalyst/extension-sdk';

export function HelloEditor({ host }: EditorHostProps) {
  const textRef = useRef('');
  const textareaRef = useRef<HTMLTextAreaElement>(null);
  const [, forceRender] = useReducer((x) => x + 1, 0);

  const { isLoading, error, markDirty } = useEditorLifecycle(host, {
    applyContent: (content: string) => {
      textRef.current = content;
      if (textareaRef.current) {
        textareaRef.current.value = content;
      }
      forceRender();
    },
    getCurrentContent: () => textRef.current,
  });

  const handleChange = (e: React.ChangeEvent<HTMLTextAreaElement>) => {
    textRef.current = e.target.value;
    markDirty();
  };

  if (error) return <div style={{ padding: '20px' }}>Error: {error.message}</div>;
  if (isLoading) return <div style={{ padding: '20px' }}>Loading...</div>;

  return (
    <div style={{
      padding: '20px',
      height: '100%',
      display: 'flex',
      flexDirection: 'column'
    }}>
      <h2 style={{ marginBottom: '10px' }}>Hello Editor</h2>
      <p style={{ color: 'var(--nim-text-muted)', marginBottom: '10px' }}>
        Editing: {host.filePath}
      </p>
      <textarea
        ref={textareaRef}
        defaultValue={textRef.current}
        onChange={handleChange}
        style={{
          flex: 1,
          padding: '10px',
          fontSize: '16px',
          fontFamily: 'monospace',
          backgroundColor: 'var(--nim-bg-secondary)',
          color: 'var(--nim-text)',
          border: '1px solid var(--nim-border)',
          borderRadius: '4px',
          resize: 'none'
        }}
      />
    </div>
  );
}
```

**Key points:**

* `useEditorLifecycle` handles loading, saving, file watching, echo detection, and dirty state
* `applyContent` pushes content into the editor (on load, external changes)
* `getCurrentContent` pulls content from the editor (on save)
* Call `markDirty()` when the user edits -- the hook manages `host.setDirty()` for you
* Content lives in a ref, not React state -- the textarea uses `defaultValue`

## Step 8: Add Build Script

Update your `package.json` to add a build script:

```json
{
  "scripts": {
    "build": "vite build"
  }
}
```

## Step 9: Build and Install

Now ask Claude to build and install your extension:

> "Build and install my extension from \~/my-first-extension"

Claude will use the `extension_build` and `extension_install` tools to compile and load your extension.

## Step 10: Test It

1. Create a new file with the `.hello` extension
2. Your custom editor should appear instead of the default text editor
3. Make changes and save - they persist to the file

## Next Steps

* Add styling with a `styles.css` file
* Add AI tools so Claude can interact with your editor
* Add a toolbar with actions
* Handle more complex file formats

See the [custom-editors.md](/extensions/building-extensions/custom-editors) guide for more advanced editor development.

## Troubleshooting

### Extension doesn't load

1. Check the console for errors (View > Toggle Developer Tools)
2. Verify your `manifest.json` has a valid `id` field
3. Make sure `dist/index.js` exists after building

### Editor doesn't appear for file type

1. Check that `filePatterns` in the manifest matches your file extension
2. Verify the `component` name matches what you export in `components`

### Changes don't appear after editing

Ask Claude to reload the extension:

> "Reload my hello-editor extension"

This will rebuild and hot-reload without restarting Nimbalyst.


# Custom Editors

Build a custom editor extension for Nimbalyst: the useEditorLifecycle hook, the EditorHost interface, undo and redo, and large file handling.

Custom editors are the most powerful extension type. They let you create entirely new ways to view and edit file types - from spreadsheets to diagrams to 3D models.

## How Custom Editors Work

When a user opens a file, Nimbalyst checks if any extension has registered a custom editor for that file type. If found, your React component is rendered instead of the default editor.

Your component receives a single `host` prop from Nimbalyst. The host handles loading, saving, dirty tracking, file change notifications, and optional features like diff mode.

## The useEditorLifecycle Hook

The recommended way to build custom editors is with the `useEditorLifecycle` hook. It replaces all manual `EditorHost` subscription boilerplate (loading, saving, echo detection, file watching, diff mode, theme) with a single hook call.

```tsx
import { useEditorLifecycle } from '@nimbalyst/extension-sdk';
import type { EditorHostProps } from '@nimbalyst/extension-sdk';

export function MyEditor({ host }: EditorHostProps) {
  const editorRef = useRef<MyEditorAPI>(null);

  const { isLoading, error, theme, markDirty, diffState } = useEditorLifecycle(host, {
    applyContent: (data) => editorRef.current?.load(data),
    getCurrentContent: () => editorRef.current?.getData() ?? defaultValue,
    parse: (raw) => JSON.parse(raw),
    serialize: (data) => JSON.stringify(data),
  });

  if (error) return <div>Failed to load: {error.message}</div>;
  if (isLoading) return <div>Loading...</div>;

  return <MyEditorComponent ref={editorRef} onChange={markDirty} theme={theme} />;
}
```

### How It Works

The hook interacts with your editor through pull/push callbacks -- content never lives in React state:

* **`applyContent(parsed)`**: Called to push content INTO the editor (on initial load, on external file change). Update your editor's internal state here.
* **`getCurrentContent()`**: Called to pull content FROM the editor (on save). Return the current state. Omit for read-only editors.
* **`parse(raw)`**: Convert raw file string into your editor's format. Omit if your editor works with raw strings.
* **`serialize(data)`**: Convert your editor's format back to a string for saving. Omit if already a string.

### What It Returns

| Field              | Type                        | Description                                   |
| ------------------ | --------------------------- | --------------------------------------------- |
| `isLoading`        | `boolean`                   | `true` until initial content is loaded        |
| `error`            | `Error \| null`             | Error from initial load                       |
| `theme`            | `string`                    | Current theme name (reactive)                 |
| `markDirty`        | `() => void`                | Call when the user makes an edit              |
| `isDirty`          | `boolean`                   | Whether unsaved changes exist                 |
| `diffState`        | `DiffState<T> \| null`      | AI edit diff with `accept`/`reject` callbacks |
| `toggleSourceMode` | `(() => void) \| undefined` | Toggle to Monaco source view                  |
| `isSourceMode`     | `boolean`                   | Whether source mode is active                 |

### Editor Architecture Patterns

The hook supports three common architectures:

**Library-managed** (Excalidraw, Three.js) -- callbacks talk to the library's imperative API via refs:

```tsx
const apiRef = useRef<ExcalidrawImperativeAPI>(null);
useEditorLifecycle(host, {
  applyContent: (elements) => apiRef.current?.updateScene({ elements }),
  getCurrentContent: () => apiRef.current?.getSceneElements() ?? [],
  parse: (raw) => JSON.parse(raw).elements,
  serialize: (elements) => JSON.stringify({ elements }),
});
```

**Store-managed** (Zustand, custom stores) -- callbacks talk to a store:

```tsx
const storeRef = useRef(createMyStore());
useEditorLifecycle(host, {
  applyContent: (doc) => storeRef.current.getState().loadDocument(doc),
  getCurrentContent: () => storeRef.current.getState().document,
  parse: parseDocument,
  serialize: serializeDocument,
});
```

**Read-only** (PDF viewer, SQLite browser) -- only `applyContent`, no save:

```tsx
const dataRef = useRef<ArrayBuffer | null>(null);
const [, forceRender] = useReducer((x) => x + 1, 0);
useEditorLifecycle(host, {
  applyContent: (data) => { dataRef.current = data; forceRender(); },
  binary: true,
});
```

### Additional Options

| Option             | Type                           | Description                                                                                   |
| ------------------ | ------------------------------ | --------------------------------------------------------------------------------------------- |
| `binary`           | `boolean`                      | Use `loadBinaryContent()` instead of `loadContent()`. For PDFs, images, SQLite, etc.          |
| `onLoaded`         | `() => void`                   | Called after initial content is loaded and applied                                            |
| `onExternalChange` | `(content: T) => void`         | Called when an external file change is detected (not from our own save)                       |
| `onSave`           | `() => Promise<void>`          | Replace the default save flow. Use for async content extraction (e.g., RevoGrid)              |
| `onDiffRequested`  | `(config: DiffConfig) => void` | Replace default diff handling. Use for specialized diff rendering (e.g., cell-level CSV diff) |
| `onDiffCleared`    | `() => Promise<void>`          | Replace default diff cleanup. Paired with `onDiffRequested`                                   |

### Echo Detection

The hook automatically ignores file change notifications caused by our own saves. This prevents the editor from reloading content immediately after saving -- a common source of bugs in manual implementations.

## EditorHost Interface

The `useEditorLifecycle` hook wraps this interface. You rarely need to use it directly, but it's useful to understand what's available:

```typescript
interface EditorHostProps {
  host: EditorHost;
}

interface EditorHost {
  readonly filePath: string;
  readonly fileName: string;
  readonly theme: string;
  readonly isActive: boolean;
  readonly workspaceId?: string;
  readonly fs?: EditorHostFileSystem;

  loadContent(): Promise<string>;
  loadBinaryContent(): Promise<ArrayBuffer>;
  onFileChanged(callback: (newContent: string) => void): () => void;
  setDirty(isDirty: boolean): void;
  saveContent(content: string | ArrayBuffer): Promise<void>;
  onSaveRequested(callback: () => void): () => void;
  onThemeChanged(callback: (theme: string) => void): () => void;
  openHistory(): void;

  // Diff mode (AI edits)
  onDiffRequested?(callback: (config: DiffConfig) => void): () => void;
  reportDiffResult?(result: DiffResult): void;
  onDiffCleared?(callback: () => void): () => void;

  // Source mode (toggle to Monaco)
  toggleSourceMode?(): void;
  onSourceModeChanged?(callback: (isActive: boolean) => void): () => void;
  isSourceModeActive?(): boolean;
}
```

## Key Concepts

### Content Ownership

Nimbalyst editors use a **host-driven save model** where the editor owns its content state:

1. **Initial load**: The hook calls `host.loadContent()` and passes the result to your `applyContent` callback
2. **Dirty tracking**: Call `markDirty()` when the user makes changes
3. **Saving**: The hook subscribes to save events and calls your `getCurrentContent` to get the data
4. **External changes**: The hook detects external file changes, filters echoes, and calls `applyContent`

### Why Not Pass Content as a Prop?

The `EditorHost` model is more efficient for complex editors:

* Spreadsheets with thousands of cells do not need to serialize on every keystroke
* Diagram editors can maintain rich object graphs internally
* Binary editors can load and save `ArrayBuffer` data without pretending everything is text
* Imperative editor libraries (Excalidraw, RevoGrid, Three.js) cannot be re-rendered anyway

## Accessing Other Project Files

A file-backed custom editor can use the optional `host.fs` service when it needs to read or update project files beyond the document currently open in the editor. This is useful for CAD projects, generated assets, compilers, analyzers, and editors backed by several related files.

```tsx
const snapshots = await host.fs?.read([
  'models/assembly.json',
  'models/materials.json',
]);

const assembly = snapshots?.[0];
if (assembly?.exists && assembly.content && assembly.sha256) {
  await host.fs?.write({
    label: 'Update assembly',
    actor: 'user',
    changes: [
      {
        path: assembly.path,
        expectedSha256: assembly.sha256,
        content: updateAssembly(assembly.content),
      },
    ],
  });
}
```

The service:

* Restricts paths to the active workspace, including protection against symlink escapes.
* Returns a SHA-256 version token with every read.
* Uses the version token for compare-and-swap writes so an editor cannot silently overwrite a newer file.
* Refuses to write a file that has unsaved changes in another open editor.
* Records successful writes in Nimbalyst document history.
* Can observe external project-file changes through `host.fs.onChanged()`.

`host.fs` is optional. It is not present for virtual, embedded, offscreen, or collaborative hosts that cannot provide raw local-disk semantics. Always guard it before use and provide a clear read-only or unavailable state.

Use `loadContent()` and `saveContent()` for the editor's primary file. Use `host.fs` only for additional project files.

## Registering the Editor

In your `manifest.json`:

```json
{
  "contributions": {
    "customEditors": [
      {
        "filePatterns": ["*.mytype", "*.myt"],
        "displayName": "My Type Editor",
        "component": "MyEditor",
        "supportsDiffMode": false,
        "showDocumentHeader": false
      }
    ]
  }
}
```

And export it from your entry point:

```typescript
// src/index.ts
import { MyEditor } from './MyEditor';

export const components = {
  MyEditor,
};
```

## Styling Your Editor

### Using CSS Variables

Nimbalyst provides CSS variables for theming. Always use these instead of hardcoded colors:

```css
.my-editor {
  background: var(--nim-bg);
  color: var(--nim-text);
  border: 1px solid var(--nim-border);
}

.my-editor-toolbar {
  background: var(--nim-bg-secondary);
  border-bottom: 1px solid var(--nim-border);
}

.my-editor-button:hover {
  background: var(--nim-bg-hover);
}
```

### Available CSS Variables

| Variable             | Purpose                   |
| -------------------- | ------------------------- |
| `--nim-bg`           | Main background           |
| `--nim-bg-secondary` | Toolbar/panel background  |
| `--nim-bg-tertiary`  | Nested element background |
| `--nim-bg-hover`     | Hover state background    |
| `--nim-text`         | Main text color           |
| `--nim-text-muted`   | Muted text                |
| `--nim-text-faint`   | Very muted text           |
| `--nim-border`       | Main borders              |
| `--nim-primary`      | Accent/brand color        |

### Including Styles

Create a `styles.css` file and reference it in your manifest:

```json
{
  "styles": "dist/index.css"
}
```

Import it in your entry point:

```typescript
// src/index.ts
import './styles.css';
```

## Handling Large Files

For large files, consider:

### Virtualization

Only render visible rows/items:

```tsx
import { useVirtualizer } from '@tanstack/react-virtual';

function LargeListEditor({ items }) {
  const parentRef = useRef<HTMLDivElement>(null);

  const virtualizer = useVirtualizer({
    count: items.length,
    getScrollElement: () => parentRef.current,
    estimateSize: () => 35,
  });

  return (
    <div ref={parentRef} style={{ height: '100%', overflow: 'auto' }}>
      <div style={{ height: virtualizer.getTotalSize() }}>
        {virtualizer.getVirtualItems().map(virtualRow => (
          <div
            key={virtualRow.key}
            style={{
              position: 'absolute',
              top: virtualRow.start,
              height: virtualRow.size,
            }}
          >
            {items[virtualRow.index]}
          </div>
        ))}
      </div>
    </div>
  );
}
```

### Lazy Parsing

Parse content incrementally:

```typescript
function parseContentLazy(content: string) {
  // Return a lightweight wrapper that parses on demand
  return {
    getRow(index: number) {
      // Parse just this row when needed
    },
    get length() {
      // Count rows without full parse
    }
  };
}
```

## Undo/Redo Support

Nimbalyst doesn't provide built-in undo for custom editors. Implement your own:

```tsx
import { useState, useCallback } from 'react';

function useUndoRedo<T>(initialState: T) {
  const [history, setHistory] = useState<T[]>([initialState]);
  const [index, setIndex] = useState(0);

  const state = history[index];

  const setState = useCallback((newState: T) => {
    const newHistory = history.slice(0, index + 1);
    newHistory.push(newState);
    setHistory(newHistory);
    setIndex(newHistory.length - 1);
  }, [history, index]);

  const undo = useCallback(() => {
    if (index > 0) setIndex(index - 1);
  }, [index]);

  const redo = useCallback(() => {
    if (index < history.length - 1) setIndex(index + 1);
  }, [index, history.length]);

  const canUndo = index > 0;
  const canRedo = index < history.length - 1;

  return { state, setState, undo, redo, canUndo, canRedo };
}
```

## Keyboard Shortcuts

Handle keyboard shortcuts in your editor:

```tsx
function MyEditor({ content, onChange }) {
  useEffect(() => {
    const handleKeyDown = (e: KeyboardEvent) => {
      // Cmd/Ctrl + Z for undo
      if ((e.metaKey || e.ctrlKey) && e.key === 'z' && !e.shiftKey) {
        e.preventDefault();
        undo();
      }
      // Cmd/Ctrl + Shift + Z for redo
      if ((e.metaKey || e.ctrlKey) && e.key === 'z' && e.shiftKey) {
        e.preventDefault();
        redo();
      }
    };

    window.addEventListener('keydown', handleKeyDown);
    return () => window.removeEventListener('keydown', handleKeyDown);
  }, [undo, redo]);

  // ...
}
```

## Example: Simple Table Editor

A complete example using `useEditorLifecycle`:

```tsx
import React, { useRef } from 'react';
import { useEditorLifecycle } from '@nimbalyst/extension-sdk';
import type { EditorHostProps } from '@nimbalyst/extension-sdk';

export function TableEditor({ host }: EditorHostProps) {
  const dataRef = useRef<string[][]>([]);
  const tableRef = useRef<HTMLTableElement>(null);

  const parseCSV = (text: string): string[][] =>
    text.split('\n').map(row => row.split(',').map(cell => cell.trim()));

  const serializeCSV = (data: string[][]): string =>
    data.map(row => row.join(',')).join('\n');

  const { isLoading, error, theme, markDirty } = useEditorLifecycle(host, {
    applyContent: (data: string[][]) => {
      dataRef.current = data;
      renderTable();
    },
    getCurrentContent: () => dataRef.current,
    parse: parseCSV,
    serialize: serializeCSV,
  });

  function renderTable() {
    // Re-render table imperatively or use forceUpdate
  }

  if (error) return <div>Error: {error.message}</div>;
  if (isLoading) return <div>Loading...</div>;

  return (
    <div style={{ padding: '10px', overflow: 'auto', height: '100%' }}>
      <table ref={tableRef} style={{ borderCollapse: 'collapse', width: '100%' }}>
        <tbody>
          {dataRef.current.map((row, rowIndex) => (
            <tr key={rowIndex}>
              {row.map((cell, colIndex) => (
                <td key={colIndex} style={{ border: '1px solid var(--nim-border)' }}>
                  <input
                    defaultValue={cell}
                    onChange={e => {
                      dataRef.current[rowIndex][colIndex] = e.target.value;
                      markDirty();
                    }}
                    style={{
                      width: '100%',
                      padding: '4px',
                      border: 'none',
                      background: 'transparent',
                      color: 'var(--nim-text)'
                    }}
                  />
                </td>
              ))}
            </tr>
          ))}
        </tbody>
      </table>
    </div>
  );
}
```

## Best Practices

1. **Use `useEditorLifecycle`** - Handles loading, saving, echo detection, file watching, diff mode, and theme
2. **Keep content out of React state** - Use refs or external stores for editor data
3. **Use CSS variables** - Your editor should respect the user's theme
4. **Handle empty content** - The file might be new or empty
5. **Call `markDirty()`** - Not `host.setDirty()` directly -- the hook tracks dirty state for you
6. **Test with large files** - Ensure your editor performs well

## Next Steps

* Add [ai-tools.md](/extensions/building-extensions/ai-tools) so Claude can interact with your editor
* See [manifest-reference.md](/extensions/building-extensions/manifest-reference) for all configuration options
* Check the built-in extensions in `packages/extensions/` in the Nimbalyst repository for production examples


# AI Tools

Add AI tools to a Nimbalyst extension so coding agents can read and change your custom file types instead of only seeing raw file content.

AI tools let Claude interact with your extension programmatically. When you add tools, Claude can read data, make changes, and help users work with your custom file types.

## Why Add AI Tools?

Without tools, Claude can only:

* Read the raw file content
* Suggest edits to the raw content

With tools, Claude can:

* Query structured data ("What columns are in this spreadsheet?")
* Make targeted changes ("Add a row with these values")
* Perform complex operations ("Sort by the date column")
* Understand your data model ("What entities are defined?")

## Tool Definition Structure

Tools are defined in your extension's entry point:

```typescript
// src/index.ts
import type { ExtensionAITool } from '@nimbalyst/extension-sdk';

export const aiTools: ExtensionAITool[] = [
  {
    name: 'my_tool_name',
    description: 'What this tool does - Claude reads this to decide when to use it',
    inputSchema: {
      type: 'object',
      properties: {
        param1: {
          type: 'string',
          description: 'Description of param1',
        },
        param2: {
          type: 'number',
          description: 'Description of param2',
        },
      },
      required: ['param1'],
    },
    handler: async (args, context) => {
      // Implement tool logic
      return { result: 'success' };
    },
  },
];
```

## Registering Tools in the Manifest

Add tools to your `manifest.json`:

```json
{
  "permissions": {
    "ai": true
  },
  "contributions": {
    "aiTools": [
      "myext.get_data",
      "myext.update_data"
    ]
  }
}
```

## Tool Handler Context

The handler receives a context object with useful information:

```typescript
interface AIToolContext {
  // Path to the current workspace (if any)
  workspacePath?: string;

  // Path to the active file (if any)
  activeFilePath?: string;

  // Access host services such as filesystem, UI, and AI helpers
  extensionContext: ExtensionContext;
}
```

## Example: Spreadsheet Tools

Here's a complete example for a CSV/spreadsheet editor:

```typescript
import type {
  AIToolContext,
  ExtensionAITool,
  ExtensionToolResult,
} from '@nimbalyst/extension-sdk';

async function loadActiveFile(context: AIToolContext): Promise<{
  filePath: string;
  content: string;
} | ExtensionToolResult> {
  if (!context.activeFilePath) {
    return { success: false, error: 'No active file is open.' };
  }

  try {
    const content = await context.extensionContext.services.filesystem.readFile(context.activeFilePath);
    return {
      filePath: context.activeFilePath,
      content,
    };
  } catch (error) {
    return {
      success: false,
      error: `Failed to read active file: ${error instanceof Error ? error.message : String(error)}`,
    };
  }
}

// Helper to parse CSV
function parseCSV(content: string): string[][] {
  return content.split('\n').map(row => row.split(','));
}

export const aiTools: ExtensionAITool[] = [
  {
    name: 'csv.get_schema',
    description: 'Get the column names and row count of the current CSV file',
    scope: 'global',
    inputSchema: {
      type: 'object',
      properties: {},
    },
    handler: async (_args, context) => {
      const loaded = await loadActiveFile(context);
      if ('success' in loaded) {
        return loaded;
      }

      const rows = parseCSV(loaded.content);
      const headers = rows[0] || [];

      return {
        success: true,
        data: {
          columns: headers,
          rowCount: rows.length - 1,
          filePath: loaded.filePath,
        },
      };
    },
  },

  {
    name: 'csv.get_rows',
    description: 'Get rows from the CSV file. Returns data as objects with column names as keys.',
    inputSchema: {
      type: 'object',
      properties: {
        startRow: {
          type: 'number',
          description: 'Starting row index (0-based, excluding header)',
        },
        count: {
          type: 'number',
          description: 'Number of rows to return (default: 10)',
        },
      },
    },
    handler: async (args, context) => {
      const loaded = await loadActiveFile(context);
      if ('success' in loaded) {
        return loaded;
      }

      const rows = parseCSV(loaded.content);
      const headers = rows[0] || [];
      const dataRows = rows.slice(1);

      const start = typeof args.startRow === 'number' ? args.startRow : 0;
      const count = typeof args.count === 'number' ? args.count : 10;
      const selectedRows = dataRows.slice(start, start + count);

      return {
        success: true,
        data: {
          rows: selectedRows.map(row => {
            const obj: Record<string, string> = {};
            headers.forEach((h, i) => {
              obj[h] = row[i] || '';
            });
            return obj;
          }),
          totalRows: dataRows.length,
        },
      };
    },
  },

  {
    name: 'csv.add_row',
    description: 'Add a new row to the CSV file',
    inputSchema: {
      type: 'object',
      properties: {
        data: {
          type: 'object',
          description: 'Object with column names as keys and cell values',
        },
      },
      required: ['data'],
    },
    handler: async (args, context) => {
      const loaded = await loadActiveFile(context);
      if ('success' in loaded) {
        return loaded;
      }

      const rows = parseCSV(loaded.content);
      const headers = rows[0] || [];

      // Build new row from data object
      const values = (args.data as Record<string, string>) || {};
      const newRow = headers.map(h => values[h] || '');
      rows.push(newRow);

      const nextContent = rows.map(r => r.join(',')).join('\n');
      await context.extensionContext.services.filesystem.writeFile(
        loaded.filePath,
        nextContent
      );

      return {
        success: true,
        message: `Added a row to ${loaded.filePath}.`,
        data: {
          rowIndex: rows.length - 1,
        },
      };
    },
  },
];
```

## Updating File Content

When a tool needs to modify a file, write through the filesystem service:

```typescript
handler: async (args, context) => {
  // ... modify data ...

  if (!context.activeFilePath) {
    return { success: false, error: 'No active file is open.' };
  }

  await context.extensionContext.services.filesystem.writeFile(
    context.activeFilePath,
    serializedData
  );

  return {
    success: true,
    message: 'Row added successfully',
  };
}
```

Nimbalyst will:

1. Persist the updated file content
2. Notify the active editor through file watching
3. Let the editor reload or reconcile its in-memory state

## Tool Naming Conventions

Use a prefix for your tools to avoid conflicts:

```
extensionname.action_name
```

Examples:

* `csv.get_schema`
* `csv.add_row`
* `diagram.add_node`
* `datamodel.get_entities`

## Writing Good Tool Descriptions

Claude uses the description to decide when to use your tool. Be specific:

**Good:**

```typescript
description: 'Get the column names and data types from the current CSV file. Returns an array of column definitions.'
```

**Bad:**

```typescript
description: 'Get schema'  // Too vague
```

## Error Handling

Return errors as objects, not thrown exceptions:

```typescript
handler: async (args, context) => {
  if (!context.activeFilePath) {
    return { success: false, error: 'No active file is open' };
  }

  if (!args.columnName) {
    return { success: false, error: 'columnName parameter is required' };
  }

  try {
    // ... do work ...
    return { success: true, data: result };
  } catch (e) {
    return { error: `Failed to process: ${e.message}` };
  }
}
```

## Input Schema

The `inputSchema` follows JSON Schema format:

```typescript
inputSchema: {
  type: 'object',
  properties: {
    // String parameter
    name: {
      type: 'string',
      description: 'The name to use',
    },

    // Number parameter
    count: {
      type: 'number',
      description: 'How many items',
    },

    // Boolean parameter
    includeHeaders: {
      type: 'boolean',
      description: 'Whether to include header row',
    },

    // Enum parameter
    format: {
      type: 'string',
      enum: ['json', 'csv', 'xml'],
      description: 'Output format',
    },

    // Array parameter
    columns: {
      type: 'array',
      items: { type: 'string' },
      description: 'List of column names',
    },

    // Object parameter
    options: {
      type: 'object',
      properties: {
        sortBy: { type: 'string' },
        ascending: { type: 'boolean' },
      },
    },
  },
  required: ['name'], // Required parameters
}
```

## Best Practices

1. **Keep tools focused** - One tool, one job
2. **Return structured data** - Objects are easier for Claude to work with
3. **Include context in responses** - Return relevant metadata
4. **Handle missing files gracefully** - Check if `activeFilePath` exists and read through the filesystem service
5. **Validate inputs** - Check required parameters
6. **Use descriptive names** - `get_column_stats` not `stats`

## Testing Tools

Test your tools by asking Claude to use them:

> "What columns are in this CSV file?"

Claude should invoke your `csv.get_schema` tool and report the results.

## Example: Data Model Tools

For a more complex example, here are tools for a data modeling extension:

```typescript
export const aiTools: ExtensionAITool[] = [
  {
    name: 'datamodel.get_entities',
    description: 'List all entities (tables/models) defined in the data model',
    inputSchema: { type: 'object', properties: {} },
    handler: async (_args, context) => {
      if (!context.activeFilePath) {
        return { success: false, error: 'No active file is open' };
      }

      const content = await context.extensionContext.services.filesystem.readFile(
        context.activeFilePath
      );
      const model = parseDataModel(content);

      return {
        success: true,
        data: {
          entities: model.entities.map(e => ({
            name: e.name,
            fieldCount: e.fields.length,
          })),
        },
      };
    },
  },

  {
    name: 'datamodel.get_entity',
    description: 'Get detailed information about a specific entity',
    inputSchema: {
      type: 'object',
      properties: {
        name: { type: 'string', description: 'Entity name' },
      },
      required: ['name'],
    },
    handler: async (args, context) => {
      if (!context.activeFilePath) {
        return { success: false, error: 'No active file is open' };
      }

      const content = await context.extensionContext.services.filesystem.readFile(
        context.activeFilePath
      );
      const model = parseDataModel(content);
      const entity = model.entities.find(e => e.name === args.name);

      if (!entity) {
        return { success: false, error: `Entity '${args.name}' not found` };
      }

      return {
        success: true,
        data: {
          name: entity.name,
          fields: entity.fields.map(f => ({
            name: f.name,
            type: f.type,
            required: f.required,
          })),
          relations: entity.relations,
        },
      };
    },
  },

  {
    name: 'datamodel.add_field',
    description: 'Add a new field to an entity',
    inputSchema: {
      type: 'object',
      properties: {
        entityName: { type: 'string' },
        fieldName: { type: 'string' },
        fieldType: { type: 'string' },
        required: { type: 'boolean' },
      },
      required: ['entityName', 'fieldName', 'fieldType'],
    },
    handler: async (args, context) => {
      if (!context.activeFilePath) {
        return { success: false, error: 'No active file is open' };
      }

      const content = await context.extensionContext.services.filesystem.readFile(
        context.activeFilePath
      );
      const model = parseDataModel(content);
      const entity = model.entities.find(e => e.name === args.entityName);

      if (!entity) {
        return { success: false, error: `Entity '${args.entityName}' not found` };
      }

      entity.fields.push({
        name: args.fieldName,
        type: args.fieldType,
        required: args.required ?? false,
      });

      await context.extensionContext.services.filesystem.writeFile(
        context.activeFilePath,
        serializeDataModel(model)
      );

      return {
        success: true,
        message: `Added ${args.fieldName} to ${args.entityName}.`,
      };
    },
  },
];
```

## Calling AI Models Directly

Extensions can also call AI chat/completion models directly, without going through Claude. This is useful for summarization, classification, code generation, or any task where the extension itself needs an AI response.

### Prerequisites

Your manifest must declare `permissions.ai: true`.

### Listing Available Models

```typescript
export async function activate(context: ExtensionContext) {
  const models = await context.services.ai!.listModels();
  // => [
  //   { id: "claude:claude-sonnet-4-6-20250514", name: "Claude Sonnet 4.6", provider: "claude" },
  //   { id: "openai:gpt-4o", name: "GPT-4o", provider: "openai" },
  //   ...
  // ]
}
```

Only models from chat providers the user has enabled and configured are returned (Claude, OpenAI, LM Studio). Agent providers like Claude Code are not included.

### Non-Streaming Completion

```typescript
const result = await context.services.ai!.chatCompletion({
  messages: [
    { role: 'user', content: 'Classify this text as positive or negative: "Great product!"' },
  ],
  model: 'claude:claude-sonnet-4-6-20250514', // optional, uses default if omitted
  systemPrompt: 'Respond with a single word: positive or negative.',
  temperature: 0,
  maxTokens: 10,
});

console.log(result.content);  // "positive"
console.log(result.model);    // "claude-sonnet-4-6-20250514"
console.log(result.usage);    // { inputTokens: 42, outputTokens: 1 }
```

### Streaming Completion

For longer responses where you want to show results incrementally:

```typescript
const handle = await context.services.ai!.chatCompletionStream({
  messages: [
    { role: 'user', content: 'Write a haiku about programming' },
  ],
  onChunk: (chunk) => {
    if (chunk.type === 'text') {
      // Append text to your UI
      appendToOutput(chunk.content!);
    } else if (chunk.type === 'error') {
      showError(chunk.error!);
    }
    // chunk.type === 'done' means the stream is complete
  },
});

// Optionally abort:
// handle.abort();

// Wait for the full result:
const result = await handle.result;
console.log(result.content); // Full response text
```

### Multi-Turn Conversations

Pass multiple messages for conversation context:

```typescript
const result = await context.services.ai!.chatCompletion({
  messages: [
    { role: 'user', content: 'What is the capital of France?' },
    { role: 'assistant', content: 'The capital of France is Paris.' },
    { role: 'user', content: 'What is its population?' },
  ],
});
```

### Structured Output (JSON Mode)

Use `responseFormat` to constrain the model's output to valid JSON:

```typescript
// Simple JSON mode - model returns valid JSON
const result = await context.services.ai!.chatCompletion({
  messages: [{ role: 'user', content: 'List 3 colors with hex codes' }],
  systemPrompt: 'Respond in JSON format.',
  responseFormat: { type: 'json_object' },
});
const data = JSON.parse(result.content);
```

For stricter control, use `json_schema` to enforce a specific shape:

```typescript
const result = await context.services.ai!.chatCompletion({
  messages: [{ role: 'user', content: 'Classify this issue: login page crashes on Safari' }],
  responseFormat: {
    type: 'json_schema',
    schema: {
      type: 'object',
      properties: {
        category: { type: 'string', enum: ['bug', 'feature', 'question'] },
        severity: { type: 'string', enum: ['low', 'medium', 'high', 'critical'] },
        component: { type: 'string' },
      },
      required: ['category', 'severity', 'component'],
    },
  },
});
const classification = JSON.parse(result.content);
// => { category: "bug", severity: "high", component: "auth" }
```

### Key Points

* **Stateless**: These calls do not create sessions in the session history. Each call is independent.
* **Model selection**: Use `listModels()` to discover available models, then pass an `id` to `chatCompletion()` or `chatCompletionStream()`. If you omit the model, the first available provider's default is used.
* **Chat providers only**: Claude, OpenAI, and LM Studio. Agent providers (Claude Code, Codex) are not available through this API.
* **User configuration**: The API respects the user's provider settings and API keys. If a provider is disabled or unconfigured, its models won't appear in `listModels()`.

## Next Steps

* See [custom-editors.md](/extensions/building-extensions/custom-editors) to build the visual component
* Check [manifest-reference.md](/extensions/building-extensions/manifest-reference) for all configuration options
* Check the built-in extensions in `packages/extensions/` in the Nimbalyst repository for production examples
* See [api-reference.md](/extensions/building-extensions/api-reference) for full type definitions


# Manifest Reference

Full reference for the Nimbalyst extension manifest.json: required fields, permissions, contributions, file pattern syntax, and validation.

The `manifest.json` file declares your extension metadata, permissions, and contributions.

## Basic Structure

```json
{
  "id": "com.example.my-extension",
  "name": "My Extension",
  "version": "1.0.0",
  "main": "dist/index.js",
  "styles": "dist/index.css",
  "apiVersion": "1.0.0",
  "permissions": {},
  "contributions": {}
}
```

## Required Fields

### `id`

Unique identifier for your extension.

```json
"id": "com.yourcompany.extension-name"
```

* Use reverse-domain style identifiers.
* Must start with a letter.
* Can contain letters, numbers, dots, underscores, and hyphens.

### `name`

Human-readable name shown in the UI.

```json
"name": "CSV Spreadsheet Editor"
```

### `version`

Extension version in semver format.

```json
"version": "1.0.0"
```

### `main`

Path to the built JavaScript entry point, relative to the manifest.

```json
"main": "dist/index.js"
```

`main` is required for normal extensions. Claude-plugin-only extensions can omit it if they do not ship runtime code.

## Optional Top-Level Fields

### `description`

Short description of what your extension does.

```json
"description": "Edit CSV files with a spreadsheet interface"
```

### `author`

Author or organization name.

```json
"author": "Nimbalyst"
```

### `styles`

Path to a CSS bundle to load with your extension.

```json
"styles": "dist/index.css"
```

### `apiVersion`

Optional extension API version string.

```json
"apiVersion": "1.0.0"
```

This is currently recommended, not required. Use it so future compatibility checks can warn more precisely.

### `requiredReleaseChannel`

Restrict visibility to a release channel.

```json
"requiredReleaseChannel": "alpha"
```

Allowed values:

* `"stable"`
* `"alpha"`

### `defaultEnabled`

Control whether the extension starts enabled the first time it is discovered.

```json
"defaultEnabled": false
```

If omitted, the extension defaults to enabled.

## Permissions

Declare the capabilities your extension needs:

```json
"permissions": {
  "filesystem": true,
  "ai": true,
  "network": false
}
```

Available permissions:

| Permission   | Description                                                                                                                                |
| ------------ | ------------------------------------------------------------------------------------------------------------------------------------------ |
| `filesystem` | Read and write files through extension services                                                                                            |
| `ai`         | Register AI tools, context providers, and call AI chat/completion models directly (`listModels`, `chatCompletion`, `chatCompletionStream`) |
| `network`    | Reserved for network-enabled extensions                                                                                                    |

## Contributions

The `contributions` object declares what your extension adds to Nimbalyst.

### `customEditors`

Register custom editors for matching file types.

```json
"contributions": {
  "customEditors": [
    {
      "filePatterns": ["*.csv", "*.tsv"],
      "displayName": "Spreadsheet Editor",
      "component": "SpreadsheetEditor",
      "supportsSourceMode": true,
      "supportsDiffMode": true,
      "showDocumentHeader": true
    }
  ]
}
```

| Field                | Type       | Description                                                                               |
| -------------------- | ---------- | ----------------------------------------------------------------------------------------- |
| `filePatterns`       | `string[]` | Glob patterns for matching files                                                          |
| `displayName`        | `string`   | Name shown in the editor selector                                                         |
| `component`          | `string`   | Key in your exported `components` object                                                  |
| `supportsSourceMode` | `boolean`  | Enables the host's source-mode toggle                                                     |
| `supportsDiffMode`   | `boolean`  | Enables the host's AI diff review mode. Defaults to `true` when omitted                   |
| `showDocumentHeader` | `boolean`  | Shows the host-provided document header above the editor. Defaults to `true` when omitted |

### `documentHeaders`

Render UI above matching editors without replacing the editor itself.

```json
"documentHeaders": [
  {
    "id": "astro-frontmatter",
    "filePatterns": ["*.astro"],
    "displayName": "Astro Frontmatter",
    "component": "AstroFrontmatterHeader",
    "priority": 100
  }
]
```

### `aiTools`

Declare AI tools your extension provides. This is an array of tool name strings, not full tool definitions.

```json
"aiTools": [
  "csv.get_schema",
  "csv.query"
]
```

The actual tool definitions belong in your TypeScript exports:

```ts
export const aiTools: ExtensionAITool[] = [
  {
    name: 'csv.get_schema',
    description: 'Get the column names from the active CSV file',
    inputSchema: { type: 'object', properties: {} },
    handler: async (_args, context) => {
      return { success: true, data: {} };
    },
  },
];
```

### `newFileMenu`

Add items to the "New File" menu.

```json
"newFileMenu": [
  {
    "extension": ".csv",
    "displayName": "CSV Spreadsheet",
    "icon": "table",
    "defaultContent": "Column A,Column B\n,\n,"
  }
]
```

### `fileIcons`

Override file icons in the sidebar.

```json
"fileIcons": {
  "*.csv": "table",
  "*.tsv": "table",
  "*.json": "data_object"
}
```

Keys are glob patterns. Values are Material icon names.

### `slashCommands`

Register slash commands for the command picker.

```json
"slashCommands": [
  {
    "id": "csv.insert-table",
    "title": "Insert CSV Table",
    "description": "Insert a table from CSV data",
    "icon": "table",
    "keywords": ["csv", "table"],
    "handler": "insertCsvTable"
  }
]
```

| Field         | Type       | Description                           |
| ------------- | ---------- | ------------------------------------- |
| `id`          | `string`   | Stable command identifier             |
| `title`       | `string`   | Label shown in the picker             |
| `description` | `string`   | Optional help text                    |
| `icon`        | `string`   | Optional Material icon name           |
| `keywords`    | `string[]` | Optional search keywords              |
| `handler`     | `string`   | Name of the exported handler function |

### `commands`

Reserved for future command contributions.

```json
"commands": [
  {
    "id": "csv.refresh",
    "title": "Refresh CSV Data",
    "keybinding": "CmdOrCtrl+Shift+R"
  }
]
```

### `configuration`

Declare user/workspace settings for your extension.

```json
"configuration": {
  "title": "CSV Tools",
  "properties": {
    "delimiter": {
      "type": "string",
      "default": ",",
      "description": "Default delimiter for new CSV files",
      "scope": "workspace"
    }
  }
}
```

### `claudePlugin`

Bundle a Claude Code plugin with the extension.

```json
"claudePlugin": {
  "path": "claude-plugin",
  "displayName": "CSV Assistant",
  "description": "Adds Claude Code helpers for CSV workflows",
  "enabledByDefault": true
}
```

### `panels`

Register non-file-based panels.

```json
"panels": [
  {
    "id": "database-browser",
    "title": "Database",
    "icon": "database",
    "placement": "sidebar",
    "aiSupported": true
  }
]
```

`placement` must be one of:

* `"sidebar"`
* `"fullscreen"`
* `"floating"`

### `settingsPanel`

Add a nested settings UI inside the extension's installed-extension detail.

```json
"settingsPanel": {
  "component": "CsvSettingsPanel",
  "title": "CSV Tools",
  "icon": "settings",
  "order": 100
}
```

### `settingsRoutes`

Add a first-class page to the Application or Project Settings sidebar:

```json
"settingsRoutes": [
  {
    "id": "memory",
    "scope": "project",
    "label": "Memory",
    "group": "Project",
    "icon": "psychology",
    "order": 80,
    "component": "MemorySettings"
  }
]
```

| Field       | Type                         | Description                                                                          |
| ----------- | ---------------------------- | ------------------------------------------------------------------------------------ |
| `id`        | `string`                     | Unique route ID inside this extension. The host namespaces it to prevent collisions. |
| `scope`     | `"application" \| "project"` | Settings scope where the page appears. Account routes are reserved for Nimbalyst.    |
| `label`     | `string`                     | User-facing sidebar label.                                                           |
| `group`     | `string`                     | Optional sidebar group. Defaults to `Extensions`.                                    |
| `icon`      | `string`                     | Optional Material Symbol name. Defaults to `extension`.                              |
| `order`     | `number`                     | Optional sort order within the extension group. Defaults to `100`.                   |
| `component` | `string`                     | Component name exported from the module's `settingsPanel` record.                    |

Project routes receive the active repository through `SettingsPanelProps.workspacePath` and the complete target through `projectTarget`. Application routes omit project context.

Use `settingsRoutes` when the extension owns a settings destination users should navigate to directly. Use `settingsPanel` for configuration that belongs inside the installed-extension detail.

### `themes`

Register selectable themes contributed by your extension.

```json
"themes": [
  {
    "id": "solarized-light",
    "name": "Solarized Light",
    "isDark": false,
    "colors": {
      "bg": "#fdf6e3",
      "text": "#657b83",
      "primary": "#268bd2"
    }
  }
]
```

### `nodes`, `transformers`, and `hostComponents`

These contribution arrays declare names of exports provided by your module.

```json
"nodes": ["MyLexicalNode"],
"transformers": ["myMarkdownTransformer"],
"hostComponents": ["MyFloatingToolbar"]
```

## Complete Example

```json
{
  "id": "com.nimbalyst.csv-tools",
  "name": "CSV Tools",
  "version": "1.0.0",
  "description": "Custom CSV editing and AI helpers",
  "author": "Nimbalyst",
  "main": "dist/index.js",
  "styles": "dist/index.css",
  "apiVersion": "1.0.0",
  "defaultEnabled": true,
  "permissions": {
    "filesystem": true,
    "ai": true
  },
  "contributions": {
    "customEditors": [
      {
        "filePatterns": ["*.csv", "*.tsv"],
        "displayName": "Spreadsheet Editor",
        "component": "SpreadsheetEditor",
        "supportsSourceMode": true
      }
    ],
    "aiTools": [
      "csv.get_schema",
      "csv.query"
    ],
    "fileIcons": {
      "*.csv": "table",
      "*.tsv": "table"
    },
    "slashCommands": [
      {
        "id": "csv.insert-table",
        "title": "Insert CSV Table",
        "handler": "insertCsvTable"
      }
    ],
    "configuration": {
      "properties": {
        "delimiter": {
          "type": "string",
          "default": ","
        }
      }
    },
    "settingsRoutes": [
      {
        "id": "csv",
        "scope": "project",
        "label": "CSV Tools",
        "component": "CsvSettingsPanel"
      }
    ]
  }
}
```

## File Pattern Syntax

File patterns use glob syntax:

| Pattern        | Matches                          |
| -------------- | -------------------------------- |
| `*.csv`        | Any file ending in `.csv`        |
| `*.{csv,tsv}`  | Files ending in `.csv` or `.tsv` |
| `data/*.json`  | JSON files in `data/`            |
| `**/*.test.ts` | Test files anywhere in the tree  |

## Validation Notes

Nimbalyst validates your manifest on load. Common errors:

* Missing required top-level fields: `id`, `name`, `version`, or `main`
* `aiTools` contains objects instead of tool-name strings
* `slashCommands` uses old `name` / `displayName` fields instead of `id` / `title`
* `fileIcons` is declared as an array instead of an object map
* Contribution component names do not match your exported module names

## Best Practices

1. Use a stable reverse-domain `id`.
2. Request only the permissions you actually need.
3. Keep `contributions.aiTools` and your exported `aiTools` array in sync.
4. Prefer adding `apiVersion` even though it is currently optional.
5. Validate on every build with `validateExtensionBundle()`.


# API Reference

TypeScript API reference for @nimbalyst/extension-sdk, covering ExtensionContext, custom editors, AI tools, panels, storage, and manifest types.

This document summarizes the main TypeScript exports from `@nimbalyst/extension-sdk`.

## Main Imports

```ts
import type {
  ExtensionContext,
  ExtensionManifest,
  ExtensionModule,
  EditorHostProps,
  ExtensionAITool,
  AIToolContext,
  ExtensionToolResult,
  PanelHostProps,
  SettingsPanelProps,
  SettingsRouteContribution,
  SettingsRouteProjectTarget,
  ResolvedTrackerReference,
} from '@nimbalyst/extension-sdk';

import {
  REQUIRED_EXTERNALS,
  TrackerReferenceChip,
  TrackerReferencePicker,
  navigateToTrackerReference,
  useResolvedTrackerReference,
  validateExtensionBundle,
} from '@nimbalyst/extension-sdk';
import { createExtensionConfig } from '@nimbalyst/extension-sdk/vite';
```

## Extension Entry Point

Your extension module can export any subset of these fields:

```ts
interface ExtensionModule {
  activate?: (context: ExtensionContext) => void | Promise<void>;
  deactivate?: () => void | Promise<void>;

  components?: Record<string, React.ComponentType<EditorHostProps>>;
  aiTools?: ExtensionAITool[];
  slashCommandHandlers?: Record<string, () => void>;

  nodes?: Record<string, unknown>;
  transformers?: Record<string, unknown>;
  hostComponents?: Record<string, React.ComponentType>;

  panels?: Record<string, PanelExport>;
  settingsPanel?: Record<string, React.ComponentType<SettingsPanelProps>>;
}
```

## `ExtensionContext`

Passed to `activate()` and available inside `AIToolContext.extensionContext`.

```ts
interface ExtensionContext {
  manifest: ExtensionManifest;
  extensionPath: string;
  services: ExtensionServices;
  subscriptions: Disposable[];
}
```

### `ExtensionServices`

```ts
interface ExtensionServices {
  filesystem: ExtensionFileSystemService;
  ui: ExtensionUIService;
  ai?: ExtensionAIService;
  configuration?: ExtensionConfigurationService;
}
```

```ts
interface ExtensionFileSystemService {
  readFile(path: string): Promise<string>;
  writeFile(path: string, content: string): Promise<void>;
  fileExists(path: string): Promise<boolean>;
  findFiles(pattern: string): Promise<string[]>;
}

interface ExtensionUIService {
  showInfo(message: string): void;
  showWarning(message: string): void;
  showError(message: string): void;
}

interface ExtensionConfigurationService {
  get<T>(key: string, defaultValue?: T): T;
  update(key: string, value: unknown, scope?: 'user' | 'workspace'): Promise<void>;
  getAll(): Record<string, unknown>;
}
```

### `ExtensionAIService`

Available when `permissions.ai` is `true`. Provides AI tool registration and direct access to chat/completion models.

```ts
interface ExtensionAIService {
  // Register AI tools that Claude can call
  registerTool(tool: ExtensionAITool): Disposable;
  registerContextProvider(provider: ExtensionContextProvider): Disposable;

  // Session-backed prompt (creates a session in history)
  sendPrompt(options: {
    prompt: string;
    sessionName?: string;
    provider?: 'claude-code' | 'claude' | 'openai';
    model?: string;
  }): Promise<{ sessionId: string; response: string }>;

  // List available chat models (Claude, OpenAI, LM Studio)
  listModels(): Promise<ExtensionAIModel[]>;

  // Stateless chat completion (no session created)
  chatCompletion(options: ChatCompletionOptions): Promise<ChatCompletionResult>;

  // Streaming chat completion (no session created)
  chatCompletionStream(options: ChatCompletionStreamOptions): Promise<ChatCompletionStreamHandle>;
}
```

### Chat Completion Types

```ts
interface ExtensionAIModel {
  id: string;        // e.g. "claude:claude-sonnet-4-6-20250514"
  name: string;      // e.g. "Claude Sonnet 4.6"
  provider: string;  // "claude" | "openai" | "lmstudio"
}

interface ChatCompletionMessage {
  role: 'user' | 'assistant' | 'system';
  content: string;
}

interface ChatCompletionOptions {
  messages: ChatCompletionMessage[];
  model?: string;           // Model ID from listModels(). Provider default if omitted.
  maxTokens?: number;
  temperature?: number;     // 0-1
  systemPrompt?: string;    // Prepended as system message
  responseFormat?: ResponseFormat; // Constrain output format (JSON, JSON schema)
}

type ResponseFormat =
  | { type: 'text' }                                          // Default: plain text
  | { type: 'json_object' }                                   // Valid JSON output
  | { type: 'json_schema';                                    // JSON matching a schema
      schema: JSONSchema;
      name?: string;     // Optional schema name (default: 'response')
      strict?: boolean;  // default: true for OpenAI
    };

interface ChatCompletionResult {
  content: string;          // Assistant response
  model: string;            // Model that was used
  usage?: {
    inputTokens: number;
    outputTokens: number;
  };
}

interface ChatCompletionStreamChunk {
  type: 'text' | 'error' | 'done';
  content?: string;         // Text delta (when type is 'text')
  error?: string;           // Error message (when type is 'error')
}

interface ChatCompletionStreamOptions extends ChatCompletionOptions {
  onChunk: (chunk: ChatCompletionStreamChunk) => void;
}

interface ChatCompletionStreamHandle {
  abort(): void;                        // Cancel the stream
  result: Promise<ChatCompletionResult>; // Resolves on completion
}
```

## Custom Editors

Custom editors receive a single `host` prop. Use the `useEditorLifecycle` hook (from `@nimbalyst/extension-sdk`) to handle all lifecycle concerns.

### useEditorLifecycle Hook

```ts
import { useEditorLifecycle } from '@nimbalyst/extension-sdk';

function useEditorLifecycle<T = string>(
  host: EditorHost,
  options: UseEditorLifecycleOptions<T>
): UseEditorLifecycleResult<T>;
```

```ts
interface UseEditorLifecycleOptions<T> {
  applyContent: (content: T) => void;       // Push content into the editor
  getCurrentContent?: () => T;               // Pull content from the editor (omit for read-only)
  parse?: (raw: string) => T;                // Parse raw file string into editor format
  serialize?: (content: T) => string;        // Serialize editor format to string
  binary?: boolean;                          // Use loadBinaryContent() for binary files
  onLoaded?: () => void;                     // Called after initial load
  onExternalChange?: (content: T) => void;   // Called on external file changes (not echoes)
  onSave?: () => Promise<void>;              // Custom save flow (replaces default)
  onDiffRequested?: (config: DiffConfig) => void;  // Custom diff handling
  onDiffCleared?: () => Promise<void>;       // Custom diff cleanup
}

interface UseEditorLifecycleResult<T> {
  isLoading: boolean;                        // True until initial content loads
  error: Error | null;                       // Load error
  theme: string;                             // Current theme (reactive)
  markDirty: () => void;                     // Call on user edit
  isDirty: boolean;                          // Unsaved changes exist
  diffState: DiffState<T> | null;            // AI edit diff (null when inactive)
  toggleSourceMode: (() => void) | undefined;
  isSourceMode: boolean;
}

interface DiffState<T> {
  original: T;                               // Content before AI edit
  modified: T;                               // Content after AI edit
  tagId: string;                             // History tag ID
  sessionId: string;                         // AI session that made the edit
  accept: () => void;                        // Accept changes
  reject: () => void;                        // Revert to original
}
```

### EditorHost Interface

The `useEditorLifecycle` hook wraps this interface. You rarely need to use it directly.

```ts
interface EditorHostProps {
  host: EditorHost;
}
```

```ts
interface EditorHost {
  readonly filePath: string;
  readonly fileName: string;
  readonly theme: string;
  readonly isActive: boolean;
  readonly workspaceId?: string;
  readonly supportsSourceMode?: boolean;
  readonly storage: ExtensionStorage;
  readonly fs?: EditorHostFileSystem;

  onThemeChanged(callback: (theme: string) => void): () => void;

  loadContent(): Promise<string>;
  loadBinaryContent(): Promise<ArrayBuffer>;
  onFileChanged(callback: (newContent: string) => void): () => void;

  setDirty(isDirty: boolean): void;
  saveContent(content: string | ArrayBuffer): Promise<void>;
  onSaveRequested(callback: () => void): () => void;

  openHistory(): void;
  openExternal?(url: string): Promise<void>;

  onDiffRequested?(callback: (config: DiffConfig) => void): () => void;
  reportDiffResult?(result: DiffResult): void;
  isDiffModeActive?(): boolean;
  onDiffCleared?(callback: () => void): () => void;

  toggleSourceMode?(): void;
  onSourceModeChanged?(callback: (isSourceMode: boolean) => void): () => void;
  isSourceModeActive?(): boolean;

  getConfig?<T>(key: string, defaultValue?: T): T;
  registerMenuItems(items: EditorMenuItem[]): void;
}
```

Supporting editor types:

```ts
interface EditorMenuItem {
  label: string;
  icon?: string;
  onClick: () => void;
}

interface DiffConfig {
  originalContent: string;
  modifiedContent: string;
  tagId: string;
  sessionId: string;
}

interface DiffResult {
  content: string;
  action: 'accept' | 'reject';
}
```

### Project Filesystem

`EditorHost.fs` provides workspace-bounded, versioned access to additional project files:

```ts
interface ProjectFileSnapshot {
  path: string;
  exists: boolean;
  content: string | null;
  sha256: string | null;
}

interface ProjectFileChange {
  path: string;
  expectedSha256: string | null;
  content: string | null;
}

interface ProjectFileEdit {
  label: string;
  actor: 'user' | 'agent';
  changes: ProjectFileChange[];
}

interface ProjectFileWriteReceipt {
  id: string;
  label: string;
  actor: 'user' | 'agent';
  timestamp: number;
  files: Array<{
    path: string;
    beforeSha256: string | null;
    afterSha256: string | null;
  }>;
  atomic: false;
}

interface EditorHostFileSystem {
  read(paths: string[]): Promise<ProjectFileSnapshot[]>;
  write(edit: ProjectFileEdit): Promise<ProjectFileWriteReceipt>;
  onChanged(callback: (paths: string[]) => void): () => void;
}
```

The service is optional and is unavailable for hosts without local project-file semantics. Writes use the SHA-256 returned by `read()` to prevent stale overwrites.

## Tracker References

The SDK exports host-owned Tracker UI so extensions can store portable issue keys while Nimbalyst owns search, live resolution, display, and navigation.

```tsx
import {
  TrackerReferenceChip,
  TrackerReferencePicker,
  useResolvedTrackerReference,
  navigateToTrackerReference,
} from '@nimbalyst/extension-sdk';

function TrackerField({
  value,
  onChange,
}: {
  value: string[];
  onChange(value: string[]): void;
}) {
  return (
    <TrackerReferencePicker
      value={value}
      onChange={onChange}
      multiple
      placeholder="Link Tracker items"
    />
  );
}
```

```ts
interface ResolvedTrackerReference {
  id: string;
  issueKey?: string;
  title: string;
  status?: string;
  type?: string;
  priority?: string;
  owner?: string;
  updatedAt?: string;
}
```

* `TrackerReferencePicker` provides the canonical typed search and selection UI.
* `TrackerReferenceChip` renders a live reference in default or compact form.
* `useResolvedTrackerReference(referenceKey)` resolves a stored key reactively.
* `navigateToTrackerReference(reference)` opens the item in Nimbalyst.

Persist the issue key or reference key, not a copied title or workflow state. The host resolves mutable fields when it renders the reference.

## AI Tools

```ts
interface ExtensionAITool {
  name: string;
  description: string;
  inputSchema?: JSONSchema;
  parameters?: JSONSchema; // legacy alias
  scope?: 'global' | 'editor';
  editorFilePatterns?: string[];
  handler: (
    params: Record<string, unknown>,
    context: AIToolContext
  ) => Promise<ExtensionToolResult>;
}
```

```ts
interface AIToolContext {
  workspacePath?: string;
  activeFilePath?: string;
  extensionContext: ExtensionContext;
}
```

```ts
interface ExtensionToolResult {
  success: boolean;
  message?: string;
  data?: unknown;
  error?: string;
  extensionId?: string;
  toolName?: string;
  stack?: string;
  errorContext?: Record<string, unknown>;
}
```

### JSON Schema Types

```ts
interface JSONSchema {
  type: 'object' | 'array' | 'string' | 'number' | 'boolean' | 'null';
  properties?: Record<string, JSONSchemaProperty>;
  required?: string[];
  items?: JSONSchema;
  description?: string;
}

interface JSONSchemaProperty {
  type: 'string' | 'number' | 'boolean' | 'array' | 'object' | 'null';
  description?: string;
  enum?: Array<string | number>;
  items?: JSONSchemaProperty;
  properties?: Record<string, JSONSchemaProperty>;
  required?: string[];
  default?: unknown;
}
```

## Panels

Panels are non-file-based extension UIs.

```ts
interface PanelExport {
  component: React.ComponentType<PanelHostProps>;
  gutterButton?: React.ComponentType<PanelGutterButtonProps>;
  settingsComponent?: React.ComponentType<PanelHostProps>;
}
```

```ts
interface PanelHostProps {
  host: PanelHost;
}

interface PanelHost {
  readonly panelId: string;
  readonly extensionId: string;
  readonly theme: string;
  readonly workspacePath: string;
  readonly isSettingsOpen: boolean;
  readonly ai?: PanelAIContext;
  readonly storage: ExtensionStorage;

  onThemeChanged(callback: (theme: string) => void): () => void;
  openFile(path: string): void;
  openPanel(panelId: string): void;
  close(): void;
  openSettings(): void;
  closeSettings(): void;
}
```

```ts
interface PanelAIContext {
  setContext(context: Record<string, unknown>): void;
  getContext(): Record<string, unknown>;
  clearContext(): void;
  notifyChange(event: string, data?: unknown): void;
  onContextChanged(callback: (context: Record<string, unknown>) => void): () => void;
}
```

```ts
interface SettingsPanelProps {
  storage: ExtensionStorage;
  theme: string;
  callBackendTool?: (
    toolName: string,
    args?: Record<string, unknown>
  ) => Promise<unknown>;
  workspacePath?: string;
  projectTarget?: SettingsRouteProjectTarget;
}
```

`workspacePath` and `projectTarget` are provided only for first-class project settings routes. Application routes and legacy nested settings panels do not receive project context.

```ts
type SettingsRouteProjectTarget =
  | { kind: 'workspace'; workspacePath: string }
  | { kind: 'organizationProject'; orgId: string; projectId: string };

interface SettingsRouteContribution {
  id: string;
  scope: 'application' | 'project';
  label: string;
  group?: string;
  icon?: string;
  order?: number;
  component: string;
}
```

## Extension Storage

`ExtensionStorage` is available to custom editors, panels, and settings panels.

```ts
interface ExtensionStorage {
  get<T>(key: string): T | undefined;
  set<T>(key: string, value: T): Promise<void>;
  delete(key: string): Promise<void>;

  getGlobal<T>(key: string): T | undefined;
  setGlobal<T>(key: string, value: T): Promise<void>;
  deleteGlobal(key: string): Promise<void>;

  getSecret(key: string): Promise<string | undefined>;
  setSecret(key: string, value: string): Promise<void>;
  deleteSecret(key: string): Promise<void>;
}
```

## Manifest Types

The manifest shape is defined by `ExtensionManifest` and `ExtensionContributions`. See [Manifest Reference](/extensions/building-extensions/manifest-reference) for field-by-field guidance.

```ts
interface ExtensionManifest {
  id: string;
  name: string;
  version: string;
  description?: string;
  author?: string;
  main: string;
  styles?: string;
  apiVersion?: string;
  permissions?: ExtensionPermissions;
  contributions?: ExtensionContributions;
  requiredReleaseChannel?: 'stable' | 'alpha';
  defaultEnabled?: boolean;
}
```

```ts
interface ExtensionContributions {
  customEditors?: CustomEditorContribution[];
  fileIcons?: Record<string, string>;
  aiTools?: string[];
  newFileMenu?: NewFileMenuContribution[];
  commands?: CommandContribution[];
  slashCommands?: SlashCommandContribution[];
  nodes?: string[];
  transformers?: string[];
  hostComponents?: string[];
  configuration?: ExtensionConfigurationContribution;
  claudePlugin?: ClaudePluginContribution;
  panels?: PanelContribution[];
  settingsPanel?: SettingsPanelContribution;
  settingsRoutes?: SettingsRouteContribution[];
  documentHeaders?: DocumentHeaderContribution[];
  themes?: ThemeContribution[];
}
```

## Vite Helper

Use `createExtensionConfig()` to get the correct externalization and output shape for extensions.

```ts
import react from '@vitejs/plugin-react';
import { createExtensionConfig } from '@nimbalyst/extension-sdk/vite';

export default createExtensionConfig({
  entry: './src/index.tsx',
  plugins: [react()],
});
```

## Validation Helpers

```ts
import { validateExtensionBundle } from '@nimbalyst/extension-sdk';

const result = await validateExtensionBundle('/path/to/extension');
```

```ts
interface ValidationResult {
  valid: boolean;
  errors: string[];
  warnings: string[];
  manifest?: ExtensionManifest;
}
```

## Required Externals

`REQUIRED_EXTERNALS` exports the package names that must stay external in your build because Nimbalyst provides them at runtime.


# Mobile App

Run your desktop coding agents from your phone with Nimbalyst Mobile. Start and resume sessions, review diffs, and edit markdown on the go.

Nimbalyst Mobile lets you run your AI coding agents from your phone. Start new sessions, resume existing ones, review diffs, edit markdown files (alpha-for now) — all from your phone. It's not just a viewer; it's a full remote workspace for your agents.

### Why Mobile?

You're running multiple parallel sessions. You step away from your desk — lunch, commute, a meeting. Your agents finished 20 minutes ago and you have no idea. Or worse, one hit a blocker and has been sitting idle for an hour.

Nimbalyst Mobile keeps you connected to your agents wherever you are. Start new work, continue existing work, or just keep an eye on things.

See [mobile agent management](https://nimbalyst.com/mobile-agent-management/) for what the phone app covers.

### How It Works

Nimbalyst Mobile is available for **iOS**. It securely links to your local desktop running Nimbalyst. Select which projects you want to sync and start running sessions, editing files, and managing your agents on the go.

### Setup

* Authenticate to Nimbalyst
* Select which projects you want synched

<figure><img src="/files/4J3UM4W8NQG5wIxHTDim" alt=""><figcaption></figcaption></figure>

* Download the Nimbalyst mobile app from the **iOS App Store**
* Sign in with your email; Nimbalyst sends a magic link to finish signing in
* Click on the Pair Device icon in the desktop app
* In the mobile app, scan the QR code
* Authenticate in the mobile app with the same credentials

**If QR scanning doesn't work** (camera issues, bright sunlight): Use the "Copy to Clipboard" option on desktop and paste the pairing data manually into the mobile app's text field.

### Use Multiple Accounts

You can sign in with more than one Nimbalyst account on iOS and switch between them from the account menu.

Each account keeps its own organizations, project access, paired-device state, and personal sync profile. Switch to the account that owns a project or received a team invitation when that content is not visible.

On desktop, manage accounts under **Settings > Account > Accounts** and choose mobile projects under **Settings > Account > Mobile App**.

***

### What Syncs to Mobile

**Sessions:** Full conversation history, session metadata (title, provider, model), status, and draft inputs you're composing.

**Project Files:** Markdown files (`.md`) from enabled projects sync to mobile. You can both read and edit them — update documentation, plans, and notes directly from your phone. Edits sync back to desktop immediately. \[Alpha for now]

**What doesn't sync:** Code files, images, Excalidraw diagrams, mockups, data models, PDFs, CSVs, app settings, and extension data. These remain on desktop only.

***

### Start New Sessions

You don't need to be at your desk to kick off work. Start a brand new AI session directly from your phone — pick a project, type a prompt, and the session runs on your desktop machine. You can start sessions while commuting, in a meeting, or wherever you get an idea.

### Choosing a Model

Pick which agent and model run your work right from your phone. The model you select becomes the default for new sessions you start on mobile.

1. Open a project and stay on its **Sessions** list.
2. Tap the **+** button in the top right to open the new session menu.
3. Tap the **Model** row at the bottom of the menu. It shows the current agent and model selection.

<figure><img src="/files/B5wgayiGjZw9teCJftzQ" alt="Mobile new session menu showing the Model row at the bottom"><figcaption></figcaption></figure>

4. In the **Select Model** sheet, tap the model you want. A checkmark marks the active choice.

Models are grouped under **Agents**:

* **Claude Agent (Claude Code)**
* **OpenAI Codex**

The list reflects the providers and models you have set up on your desktop, so what you see may differ.

<figure><img src="/files/ggEUqBp1SuPGXcWNmhzd" alt="Select Model sheet listing Claude Agent and OpenAI Codex models with the active one checked"><figcaption></figcaption></figure>

Each session in your list also shows its own model badge, so you can tell at a glance which agent is running each one.

### Session Dashboard

See all your active, completed, and paused sessions at a glance. Color-coded status. Sorted by activity. One tap to see details.

<figure><img src="/files/3hlqRUcVCfcr4plimSqE" alt="Mobile session dashboard showing active and completed agent sessions"><figcaption></figcaption></figure>

### Diff Review on Mobile

Swipe through file changes with visual red/green diffs optimized for mobile. Approve or reject individual changes. Leave comments for the agent.

<figure><img src="/files/8p93j9dKmSrkch9ZR1Xw" alt="Mobile diff review screen showing file edits ready for approval"><figcaption></figcaption></figure>

### Resume

Session stalled? Resume it with a voice note or typed instruction right from your phone. Redirect the agent. Continue the conversation just like you would on desktop.

* **Queue a prompt:** If the session is busy, your prompt queues and runs when the current task finishes. You can queue multiple prompts while offline.
* **Attach images:** Take a photo or choose from your camera roll — useful for screenshots of bugs, whiteboard sketches, or design references.
* **Draft sync:** Start typing a message on mobile, switch to desktop — your draft is there waiting.

<figure><img src="/files/sBgGkEM3fbEXDF4AX7rS" alt="Mobile composer for resuming a session with a new instruction"><figcaption></figcaption></figure>

### Voice on Mobile

Drive your desktop sessions by voice from your phone. Ask the voice agent to start a new session, find a session by topic, switch between sessions, summarize one (including any question it is waiting on), answer a pending question, or send a new coding task to your desktop.

There is no permanent mic button. Start voice from the **•••** menu inside a session (**Start Voice Mode**), or from the **+** menu on a project's **Sessions** tab (**Start Voice Agent**). The floating mic appears once it connects, with **Pause** and **Cancel** so you stay in control.

Voice runs in the iOS app and is in alpha. See [Voice on Mobile](/mobile/voice-on-mobile) for setup, controls, and troubleshooting, or [Voice Mode](/setup-nimbalyst/voice-mode) for the desktop side.

### Push Notifications

Get notified when sessions complete, hit errors, or need your approval. No more checking. No more FOMO. Your agents tell you when they need you.

**Smart routing:** Notifications only go to your phone when you're away from your desktop. If Nimbalyst is active on your Mac, your phone stays silent.

<figure><img src="/files/F0DpyC2fVLxCX1n3ruln" alt="Lock screen push notification from Nimbalyst Mobile"><figcaption></figcaption></figure>

### Desktop Sync

Everything syncs with your desktop Nimbalyst workspace. Changes you approve on mobile appear instantly on desktop. Sessions you queue from your phone start running on your machine.

<figure><img src="/files/0k1ETjFpGuYOZS7UfsB8" alt="Mobile settings screen showing connected desktop sync status"><figcaption></figcaption></figure>

### Sleep Prevention / Keep Awake

A common issue with mobile sync is your desktop going to sleep, which breaks the connection. In Nimbalyst Settings, you can enable **sleep prevention** to keep your desktop awake while syncing. Choose between:

* **Off** — default, no sleep prevention
* **Always** — keeps your desktop awake whenever Nimbalyst is running
* **When plugged in** — only prevents sleep when your computer is connected to power

### Clickable Links in Transcripts

Links in session transcripts on iOS are tappable, so you can open URLs directly from your mobile session view.

### Encryption and Privacy

All data synced between your devices is end-to-end encrypted:

* **Encryption:** AES-256-GCM per message, each with its own initialization vector
* **Key exchange:** Via QR code during setup — keys never touch our servers
* **Server access:** Our sync servers store and relay encrypted data. They cannot read your content.

Your encryption key is derived from the seed shared during QR pairing using PBKDF2 with 100,000 iterations.

### Offline Behavior

* **Reading:** Previously synced sessions and files are cached locally and readable without connectivity
* **Writing:** Compose and queue prompts while offline — they transmit automatically when you're back online
* **Limitations:** No push notifications or real-time updates while offline. New desktop sessions won't appear until you reconnect.

When you come back online, the app syncs incrementally — only fetching messages newer than what you already have.

### Troubleshooting

**Sessions not appearing on mobile**

* Verify the project is enabled under **Settings > Account > Mobile App** on desktop.
* Confirm that the same account is active on the desktop and phone.
* Check that mobile sync is enabled for that account.
* Ensure both devices are online

**Push notifications not working**

* Check that notifications are enabled in your phone's system settings for Nimbalyst
* Notifications are suppressed when Nimbalyst is active on desktop — this is intentional

**Sync feels slow**

* Large sessions with many messages take longer on first sync
* After initial sync, updates are incremental and near-instant
* Check your network connection on both devices

### Works With All Agents

Manage Claude Code and Codex sessions from one app. One interface for all your coding agents, wherever you are.

<figure><img src="/files/3rQfgxxPCcvpCJS2uvOw" alt="Model picker showing Codex model options inside the mobile app"><figcaption></figcaption></figure>


# Voice on Mobile

Talk to the coding agents running on your desktop from the Nimbalyst iOS app. Voice relays what you say and speaks the result back to you.

Talk to your desktop coding agents from your phone. The mobile voice agent listens, relays what you say to a session running on your desktop, and speaks the result back to you. Voice Mode is in **alpha** while we polish it.

Voice is part of the mobile workflow described on the [mobile agent management page](https://nimbalyst.com/mobile-agent-management/).

Voice runs in the **iOS** app.

### Before you start

Three things need to be in place.

1. **Your phone is paired and signed in.** See [Mobile App](/mobile/mobile-app) for pairing and sync setup.
2. **Your desktop is running and connected.** Voice on mobile drives sessions on your computer, so the desktop app has to be awake and syncing. Sleep prevention under **Settings > Account > Mobile App** on desktop keeps the connection alive while you are away from your desk.
3. **An OpenAI API key has synced to your phone.** Voice Mode runs on OpenAI's realtime voice models, and your phone gets the key from your desktop rather than from a field you type into.

To check the key, open **Settings → Voice Mode** in the mobile app. The **OpenAI API Key** row should read **Synced from desktop** with a green check.

If it reads **Not synced yet**, set an OpenAI key on the desktop under **Settings > Application > Voice Mode**. A Claude or Codex agent login on its own is not enough. See [AI Provider Setup and Notifications](/setup-nimbalyst/ai-provider-setup-and-notifications). Your desktop pushes the key a few seconds after your phone connects, and again on every reconnect, so reopening the mobile app is the quickest way to trigger a resync.

### Start a voice session

There is no permanent mic button on the main screens. Voice stays off until you start it from a menu, and the floating mic appears once it connects.

**Project-wide**, where the voice agent can work with any session in the project or create a new one:

1. Open a project so you are on its session list, **Sessions** tab.
2. Tap **+** in the top right.
3. Tap **Start Voice Agent**.

**Focused on one session**, where everything you say targets that session:

1. Open the session.
2. Tap **•••** in the top right.
3. Tap **Start Voice Mode**.

The first time you start voice, iOS asks for microphone permission. Voice cannot connect without it.

To end a session, tap **Cancel** on the floating mic, open a session's **•••** menu and choose **Stop Voice Mode**, or just tell the voice agent to stop.

### The floating mic

Once connected, a floating mic sits at the bottom of the screen and a small status pill appears in the navigation bar.

| Control    | What it does                                                                                       |
| ---------- | -------------------------------------------------------------------------------------------------- |
| **Mic**    | Tap to talk, to resume after the mic has gone idle, or to interrupt the agent while it is speaking |
| **Pause**  | Releases the mic while listening, or stops the agent mid-sentence while it is speaking or thinking |
| **Resume** | Brings the mic back after an idle timeout                                                          |
| **Cancel** | Ends the voice session                                                                             |

The mic ring pulses amber with a small badge while the voice agent runs a tool, so you can watch it look something up instead of wondering whether it heard you. The status pill mirrors the same states: a filled mic while listening, a speaker while speaking, and dots while it is thinking.

### Sending a task to a session

Coding requests are not fired off the instant you finish talking. A card slides up showing the target session and the exact prompt, with a countdown running. **Cancel** drops it, **Send Now** skips the wait, and doing nothing sends it when the countdown ends. The pause gives you a chance to catch a misheard request before it reaches the agent.

Set the length of the countdown under **Settings → Voice Mode → Confirm Delay**. Once sent, the prompt queues on your desktop like any other mobile prompt and runs on your machine.

### What you can ask for

* Start a new session. The device that asked for it opens the session once it exists, and your other devices just see it appear in their list.
* Find a session by topic, described in your own words.
* Switch between sessions.
* Summarize a session, including any question it is waiting on.
* Answer a session's pending question by voice.
* Send a new coding task to a session.
* Ask the coding agent a question and wait for the spoken answer.
* Look something up in your project's docs, plans, and decisions, answered from your desktop's project memory when it is available.

### Idle and wake

After a stretch with nothing happening (30 seconds by default) the mic goes idle. The connection stays up and the microphone is released, so the app is not listening in the background. Tap the mic or **Resume** to pick up where you left off.

With **Auto-Announce Completions** on, a session finishing wakes voice back up and speaks the result. You can kick off work, put the phone in your pocket, and hear how it went.

### Mobile voice settings

Under **Settings → Voice Mode** in the mobile app:

* **OpenAI API Key.** Status of the key synced from your desktop. Read-only.
* **Voice.** The spoken voice. Your desktop's voice preference syncs here, so both devices sound the same unless you pick a different one on the phone.
* **Idle Timeout.** How long the mic stays open with nothing happening, from 10 to 120 seconds.
* **Auto-Announce Completions.** Whether a finished session wakes voice to speak its result.
* **Confirm Delay.** The countdown on the pending prompt card, from 1 to 10 seconds.

The spoken language follows the preferred agent language configured on your desktop, whatever language you speak in, and falls back to English when no preference is set.

### Troubleshooting

**No Start Voice Agent in the + menu.** The item appears on the **Sessions** tab of a project and only while voice is off. Switch back from the **Files** tab if you are on it. If voice is already running, the session menu offers **Stop Voice Mode** instead.

**"Sync an OpenAI API key from Nimbalyst on your Mac."** Your phone has no key yet. Set one on the desktop under **Settings > Application > Voice Mode**, confirm the desktop is running, then reopen the mobile app to trigger a resync. The row under **Settings > Voice Mode** on mobile should change to **Synced from desktop**.

**Microphone permission denied.** Grant it under iOS Settings → Nimbalyst → Microphone, then start voice again.

**Voice ends when the connection drops.** Mobile does not silently reconnect the way desktop does. If the connection is lost, the voice session ends and you start it again from the menu.

**Nothing reaches the desktop.** Check the connection indicator in the project list. Voice relays through the same encrypted sync channel as your sessions, so if sessions are not updating, voice commands will not land either. A sleeping desktop is the usual cause, which is what sleep prevention is for.

### A note on stability

Voice Mode is alpha and may change, break, or be removed without notice. If you hit a problem, share feedback via Discord or our support channels. See [Feedback, Discord, Support, Releases](/getting-started/feedback-discord-support-releases).

For the desktop side and the full settings panel, see [Voice Mode](/setup-nimbalyst/voice-mode).


# AI Provider Setup and Notifications

Connect Claude, Codex, Copilot, and other AI providers in Nimbalyst, add keys or subscriptions, and set up session completion notifications.

### **Supported AI Providers**

Nimbalyst is meant to work with your coding agents. The following are currently supported:

* Claude Agent
* OpenAI Codex
* Claude Code CLI (opt-in)
* OpenCode (Alpha)
* GitHub Copilot (Alpha)

Alpha providers are toggled on individually from their own settings panels. See [Alpha Features](/setup-nimbalyst/alpha-features).

Nimbalyst works with the agents you already pay for. See [Claude Code and Codex subscriptions](https://nimbalyst.com/claude-code-codex-subscriptions/) for how existing plans are used.

You can configure Nimbalyst to also access AI Models directly.

### OpenAI Codex

OpenAI Codex is enabled by default for new Nimbalyst installations. Existing provider choices are preserved when you upgrade.

Open **Settings > Application > OpenAI Codex** to sign in, review the discovered models, or provide an API key override. By default, Codex uses the signed-in Codex or ChatGPT subscription.

Codex sessions support the same core Nimbalyst workflow as Claude Agent:

* **Inline edit cards** — Codex `file_change` tool calls render as red/green edit cards in the transcript, matching how Claude's Edit tool already renders.
* **Slash command autocomplete** — Codex slash commands surface in the same unified `/` picker as Claude Code commands.
* **Cross-agent skills and commands** — Skills and commands written for one agent run in the other, so workflow discovery is unified across providers.
* **Reasoning blocks** — Codex reasoning items map into transcript thinking blocks.
* **Worktree isolation** — sessions started in a worktree run inside that worktree and keep their edits on its branch.

### Claude Agent

<div align="left"><figure><img src="/files/SUs9Hznjb8NgBjpSl4O9" alt="" width="563"><figcaption></figcaption></figure></div>

Claude Agent is Nimbalyst's integrated Claude coding agent. Open **Settings > Application > Claude Agent** to authenticate, choose visible models, and configure its behavior.

Use your Claude subscription login or an Anthropic API key that you explicitly add in Nimbalyst. Nimbalyst does not import API keys from environment variables.

Claude Enterprise SSO is supported when your organization provides it.

#### Claude Code CLI

The raw Claude Code CLI provider is opt-in for new installations. Turn it on from the Claude Agent settings when you specifically want the native CLI terminal experience. Upgrading does not disable it if you already selected it.

When enabled, Claude models appear under separate Claude Agent and Claude Code CLI groups in the model picker.

<figure><img src="/files/CzmBI06KiOrNnxjZKnLI" alt="Nimbalyst model picker showing the Claude Agent and Claude Code CLI groups" width="189"><figcaption></figcaption></figure>

#### Effort Level

Claude Agent and Claude Code CLI support an effort selector. Higher levels let the model spend more reasoning effort on a turn at the cost of additional latency and usage.

Pick from five levels:

* **Low**
* **Medium**
* **High**
* **Extra high**
* **Max**

The selector is part of the session controls.

#### Extended Thinking

Supported Claude Agent models also show **Extended: On** and **Extended: Off**. Extended thinking stays on by default. Turn it off per session when lower latency and token use matter more than additional reasoning.

Press **Cmd/Ctrl+Shift+M** in the chat input to open the model picker from the keyboard. Search by model name or ID, then use the arrow keys and Enter to select a model.

### OpenCode (Alpha)

OpenCode is an open-source coding agent with multi-model support — it works with Claude, OpenAI, Gemini, and local models through a unified interface.

Select **OpenCode** under **Settings > Application > OpenCode**:

1. Install the OpenCode CLI (use the **Install OpenCode CLI** button or follow the OpenCode docs).
2. Toggle **Enable OpenCode** on.
3. Optionally provide an API key — model selection and provider configuration are managed through OpenCode's own settings, so no additional configuration is required here.

<figure><img src="/files/eLCzyG7jFKghKqG1ldPg" alt=""><figcaption><p>OpenCode agent provider settings</p></figcaption></figure>

### GitHub Copilot (Alpha)

GitHub Copilot is supported as a coding agent via the ACP (Agent Communication Protocol) server mode. It uses your existing Copilot CLI login for authentication.

Select **GitHub Copilot** under **Settings > Application > GitHub Copilot**:

1. Install the Copilot CLI (`npm install -g @github/copilot`, or use the **Install Copilot CLI** button).
2. Toggle **Enable GitHub Copilot** on.
3. Authenticate by running `copilot` and using the `/login` command. Model selection is managed by Copilot — no additional API key is required.

<figure><img src="/files/geM7ihq6HZsWxxQs6AJ8" alt=""><figcaption><p>GitHub Copilot agent provider settings</p></figcaption></figure>

### Integrate other AI Models with Nimbalyst (optional)

* Nimbalyst can integrate with Anthropic, OpenAI or LM Studio for Local Models
* You must provide your API key to integrate with each
* As these are not coding agents, only some features will be supported
* For LM Studio, you must have this installed locally
* Return to **Settings > Application** to change the configuration later.

### Notification that AI response is complete

Open **Settings > Application > Notifications**.

<div align="left"><figure><img src="/files/ACVA5PLsaqvTNjdagopG" alt="" width="563"><figcaption></figcaption></figure></div>

By default:

* You are notified when an AI session completes.
* When Nimbalyst is not the active window, a system notification can appear. Clicking it takes you to the workspace and session that needs attention.
* Agents can also request an attention notification during a longer workflow.

Use the Notifications page to control these behaviors.

### Completion Sounds

Nimbalyst can also play a sound when the AI or an agent finishes a turn and is ready for you again. Find it under **Settings > Application > Notifications > Completion Sounds**.

* Turn it on with **Enable Completion Sounds**.
* Pick a built-in **Sound Type** (chime, bell, or pop), or choose **custom** to use your own audio file.
* For a custom sound, click **Choose File** and pick an audio file. Supported formats are MP3, WAV, OGG, M4A, AAC, and FLAC.
* Adjust the **Volume**, and use **Test Sound** to hear your choice.


# Application, Account, and Project Settings

Nimbalyst splits settings into application, account, and project scopes, so it is clear whether a change applies everywhere or to one project.

Nimbalyst separates settings into three scopes so it is clear whether a change applies everywhere, to a signed-in identity, or only to the current project.

Open Settings with **Cmd/Ctrl+,** or from the account menu, then choose **Application**, **Account**, or **Project** at the top.

## Application

Application settings follow this Nimbalyst installation across projects. Use this scope for:

* Notifications and themes
* Voice Mode and agent features
* Agent and chat providers
* The extension Marketplace and installed extensions
* Application-level MCP servers
* Tools and token-cost controls
* Advanced and database settings

Choose Application when a provider, extension, MCP server, or preference should be available in every project you open.

## Account

Account settings manage signed-in Nimbalyst identities and personal device sync:

* Add, reconnect, switch, or sign out of accounts
* Choose the account used for personal and mobile sync
* Pair and manage devices
* Choose projects and documents that sync to mobile
* Manage shared links owned by an account

You can sign in with multiple accounts. A project, organization, or shared link can belong to a different account from the one used for personal mobile sync.

## Project

Project settings apply only to the current workspace:

* Sharing and organization membership
* Agent permissions
* Tracker configuration
* Project-specific AI provider overrides
* Project-level MCP servers
* GitHub integration
* Project extension settings

Project-level MCP servers and provider overrides are useful when a tool or model should be available only inside one repository.

## Organization Management

Organizations have a dedicated management dialog rather than a fourth Settings scope. Open it from the organization switcher (**Manage organization…**), the account menu, or **Manage** on an organization row in **Settings > Account > Accounts**.

Use it to manage:

* Members, invitations, and roles
* Projects in the organization and who can access each one
* Organization messaging, security, and encryption
* Billing, and organization deletion under Danger zone

**Window > Organization Messages** is separate. It opens the messaging window for rooms and direct messages, not administration.

See [Set Up Nimbalyst Teams and Organizations](/team-collaboration/setup-teams-and-orgs) for the full walkthrough.

## Extension Settings

Extensions can add their own first-class pages under Application or Project settings. A Project extension page receives the current repository as context, so the same extension can keep different configuration in different projects.

If an extension page is missing, confirm that the extension is installed and enabled in the same scope.

## Choosing the Right Scope

| You want to change…                                                 | Use                 |
| ------------------------------------------------------------------- | ------------------- |
| Theme, notifications, default agent, or a tool used everywhere      | Application         |
| Signed-in accounts, mobile sync, devices, or shared links           | Account             |
| Permissions, Trackers, sharing, GitHub, or tools for one repository | Project             |
| Team roster, invitations, or organization projects                  | Organization dialog |


# Claude Code in Vertex, Bedrock

Configure Claude Code in Nimbalyst to run through Google Vertex AI or Amazon Bedrock using your own cloud account and existing credentials.

#### AI Provider Expansion

Use Claude through your preferred cloud provider like Claude on Vertex AI (Google Cloud) or Amazon Bedrock

### **How to configure:**

1. Open **Settings > Application > Claude Agent**
2. Scroll to the **Environment Variables** section
3. Add the required variables for your provider:

<figure><img src="/files/k5Rho05cgtse1AC2wSKs" alt=""><figcaption></figcaption></figure>

**For Google Vertex AI:**

| Variable                      | Value                                           |
| ----------------------------- | ----------------------------------------------- |
| `CLAUDE_CODE_USE_VERTEX`      | `1`                                             |
| `CLOUD_ML_REGION`             | `global` (or a specific region like `us-east5`) |
| `ANTHROPIC_VERTEX_PROJECT_ID` | Your GCP project ID                             |

Prerequisites: Enable the Vertex AI API in your GCP project, request access to Claude models in the Model Garden, and authenticate via `gcloud auth application-default login`.

**For Amazon Bedrock:**

| Variable                  | Value                                  |
| ------------------------- | -------------------------------------- |
| `CLAUDE_CODE_USE_BEDROCK` | `1`                                    |
| `AWS_REGION`              | `us-east-1` (or your preferred region) |

Prerequisites: Enable Bedrock access in your AWS account, request access to Claude models, and configure AWS credentials (via AWS CLI, environment variables, or SSO profile).

### **Benefits:**

* Use existing cloud credentials and billing
* Meet enterprise compliance requirements
* Choose the provider that fits your infrastructure
* No separate Anthropic API key required


# MCP

Add MCP servers to Nimbalyst so your coding agent can reach GitHub, Linear, Slack, and other services. Covers install, config, and permissions.

MCP (Model Context Protocol) servers extend what your coding agent can do in Nimbalyst. They give your agent access to external services like GitHub, Linear, Slack, and more.

<figure><img src="/files/d7laVp8u4Y9YbZi4S48x" alt=""><figcaption></figcaption></figure>

### What Are MCP Servers?

MCP servers are connectors that let your coding agent interact with other apps and services. When you connect an MCP server, the agent gains new abilities like:<br>

* Creating issues in Linear
* Searching your GitHub repositories
* Querying your database
* Accessing files in Google Drive

For setup walkthroughs and a list of servers worth connecting, see [Claude Code MCP setup](https://nimbalyst.com/blog/claude-code-mcp-setup/) and [best Claude Code MCP servers](https://nimbalyst.com/blog/best-claude-code-mcp-servers/).

### Built-in MCP Tools

Nimbalyst ships its own MCP tools that any agent can call to interact with the editor:

* **AskUserQuestion** — pops up one or more multiple-choice questions in the transcript and blocks the agent until you answer.
* **PromptForUserInput** — collects several inputs at once through a single structured-prompt widget. Five field types are available: multi-select, single-select, reorder, edit-text, and confirm. Voice mode honors a `voiceFriendly` hint and defers to the screen widget for long drafts or large reorders. See [Interactive Prompts](/session-management/interactive-prompts) for examples and trigger phrases.
* **display\_to\_user** / **capture\_editor\_screenshot** — render charts, images, or screenshots inline in the transcript.
* **developer\_git\_commit\_proposal** — surfaces the interactive commit proposal widget instead of running `git commit` from a shell.

### Calling a Configured MCP Server from Chat

Just refer to the MCP server in your chat and your coding agent will figure out you need to use it

For example:

* "Add these to a Linear ticket"
* "Analyze this cohort in PostHog"

### Application vs Project Servers

You can configure servers at two levels:

**Application**

* Available in all your projects
* Good for personal tools you always want access to
* Example: Your personal GitHub account
* Configure under **Settings > Application > MCP Servers**

**Project**

* Only available in a specific project
* Good for project-specific services
* Example: A project's database connection
* Configure under **Settings > Project > MCP Servers**

Project servers receive the current repository as their scope and do not automatically appear in other workspaces. See [Application, Account, and Project Settings](/setup-nimbalyst/settings-scopes).

### Node Runtime for MCP Servers

MCP servers configured with `command: "node"` use Electron's bundled Node runtime. You don't need a system-wide Node.js install for MCP servers to work on a fresh Nimbalyst install.

### Adding MCP Servers

Some servers require authentication:

1. Open **Settings** with the account menu or `Cmd/Ctrl+,`.
2. Choose **Application > MCP Servers** or **Project > MCP Servers**.
3. Click **Add Server**
4. Choose from a template or configure manually

<figure><img src="/files/tNlXrWA2McW6GsJtHbh2" alt=""><figcaption></figcaption></figure>

#### Available Templates

Nimbalyst includes ready-to-use templates for popular services:

* **GitHub** - Work with repositories, issues, and pull requests
* **GitLab** - DevOps and repository management

**Productivity**

* **Linear** - Issue tracking and project management
* **Notion** - Access your workspace and pages
* **Asana** - Task management
* **Atlassian** - Jira and Confluence

**Data & Analytics**

* **PostgreSQL** - Query databases
* **PostHog** - Product analytics

**Design**

* **Figma** - Access Figma designs and assets

**Search**

* **Brave Search** - Web search capabilities

**Files**

* **Google Drive** - Access your documents
* **Filesystem** - Access local files

#### From the Settings Panel

* **API Key**: Enter your API key in the server settings
* **OAuth**: Click "Authorize" and sign in through your browser

### Checking Server Status

In the MCP Servers settings, each server shows its status:

* **Connected** - Working and ready to use
* **Not authorized** - Needs authentication (click Authorize)
* **Error** - Something went wrong (check the error message)

### Troubleshooting

**Server not appearing in your agent's tools?**

* Make sure the server is enabled (not disabled)
* Check that authentication is complete
* Try restarting Nimbalyst

**OAuth authorization failed?**

* Complete the sign-in process in your browser
* Try revoking and re-authorizing
* Check your internet connection

**API key not working?**

* Verify the key is correct (no extra spaces)
* Check that the key has the required permissions
* Some services require specific scopes or access levels

### Privacy & Security

* All MCP connections are made locally from your computer
* API keys and tokens are stored securely on your machine
* OAuth tokens can be revoked at any time from settings
* No credentials are sent to Nimbalyst servers

<br>


# Alpha Features

Alpha features in Nimbalyst are off by default while we polish them. Where to find each toggle and what to expect from alpha functionality.

Nimbalyst ships some capabilities as **Alpha** while we polish them. Alpha features are turned off by default and may be unstable.

### Where to enable Alpha

Alpha features are now opt-in per user from each feature's own settings panel — you no longer need to switch your release channel to Alpha to try them, and there is no master "enable everything" toggle.

To turn one on, open **Nimbalyst → Settings**, find the panel for the feature you want (e.g. Voice Mode, OpenCode, GitHub Copilot, Agent Features), and flip its toggle.

What has shipped out of alpha is listed on the [changelog](https://nimbalyst.com/changelog/).

### How Alpha features are labeled

Anywhere an alpha feature appears in the UI, it is tagged with an `alpha` chip next to its name. For example, in the Settings sidebar Voice Mode, OpenCode, and GitHub Copilot all show the chip:

<figure><img src="/files/lUYyKXqnxMUjF1SrAsUQ" alt=""><figcaption><p>Alpha-tagged entries in the Settings sidebar</p></figcaption></figure>

This makes it easy to tell at a glance which capabilities are in early access.

### Update Channel

The **Update Channel** selector lives inline in **Settings > Application > Advanced**. Choose **Stable** for production-ready releases, or **Alpha (Internal Testing)** for rough developer-focused builds. The release channel is independent from alpha features — switching to the Alpha channel is only needed if you want pre-release builds of Nimbalyst itself.

### Currently in Alpha

The following features are available in Alpha today:

#### Voice Mode

Talk to your coding agent and have it talk back, on desktop and mobile. Turn it on under **Settings > Application > Voice Mode**. For everything it can do, the settings, and the mobile voice actions, see [Voice Mode](/setup-nimbalyst/voice-mode).

#### OpenCode (Agent Provider)

OpenCode is available as an additional agent provider alongside Claude Agent and OpenAI Codex. Select it under **Settings > Application > OpenCode**. See [AI Provider Setup and Notifications](/setup-nimbalyst/ai-provider-setup-and-notifications) for configuration details.

#### GitHub Copilot (Agent Provider)

GitHub Copilot is available as an additional agent provider. Select it under **Settings > Application > GitHub Copilot**. See [AI Provider Setup and Notifications](/setup-nimbalyst/ai-provider-setup-and-notifications) for configuration details.

#### Agent Features

A consolidated panel for opting into experimental agent capabilities, including super-loops, blitz, the meta-agent, Auto-approve Commits, and Developer Options. Find it under **Settings > Application > Agent Features**.

### A note on stability

Alpha features may change, break, or be removed without notice. If you hit a problem, please share feedback via Discord or our support channels — see [feedback-discord-support-releases.md](/getting-started/feedback-discord-support-releases).


# Voice Mode

Talk to your coding agent and hear it reply. How to turn on Nimbalyst Voice Mode on desktop and mobile, pick a voice, and run hands-free.

Talk to your coding agent and have it talk back, on desktop and mobile. Voice Mode is in **alpha** while we polish it.

### Turn it on

Open **Settings > Application > Voice Mode** and flip the toggle. There is no separate release channel to switch. The panel also shows microphone permission status, with a deep link to macOS System Settings if you need to grant access.

<figure><img src="/files/RawCRMM4NUtzm7qaxPMC" alt="The activity bar mic button highlighted while Voice Mode is active"><figcaption><p>The mic button in the activity bar lights up while Voice Mode is active.</p></figcaption></figure>

### What the voice agent can do

* **Start a new coding session by voice.** Say something like "create a new session" and the agent creates one and makes it active, so any follow-up such as "ask the coding agent to..." or "run this prompt" targets the new session without you navigating there.
* **Run "Commit with AI" by voice.** The agent surfaces the same commit-proposal widget you get from the UI. Approve or reject by voice.
* **Use workspace slash commands.** Ask the voice agent to run a slash command that is available in the current project, such as "run the commit command" or "use slash track for this bug."
* **Generate a project summary** without an Anthropic API key. "Generate Project Summary" launches a new session in your configured agent (Claude Code, Codex, and so on) rather than calling the Anthropic API directly.

The voice agent reads the same workspace command catalog as the chat composer. A command must be available in the current project before voice can use it. See [/ Commands and Skills](/session-management/commands-and-skills) for built-in, extension-provided, and custom commands.

### On mobile

The voice agent runs in the iOS app too, and can drive your desktop sessions hands-free:

* Start a new coding session on your desktop.
* Find a session by topic, spoken in your own words.
* Switch between sessions.
* Summarize a session, including any question it is waiting on.
* Answer a session's pending question by voice.
* Send a new coding task to your desktop agent.

There is no permanent mic button on mobile. Start voice from the **+** menu on a project's **Sessions** tab (**Start Voice Agent**) or from the **•••** menu inside a session (**Start Voice Mode**). The API key comes from your desktop rather than a field on the phone. For setup, controls, and troubleshooting, see [Voice on Mobile](/mobile/voice-on-mobile).

#### The floating mic

While the voice agent is working, a floating mic shows what it is doing at each step. **Pause** stops it listening or speaking, and **Cancel** ends the turn, so you always stay in control.

### Settings

Voice Mode has its own settings panel under **Settings > Application > Voice Mode**:

* **Realtime Model.** `gpt-realtime-2` is the newer model, with stronger reasoning, a larger context window, and more consistent voice. `gpt-realtime` is the fallback for accounts without access to it.
* **Reasoning Effort.** Choose from minimal, low, medium, high, and extra high. Higher is smarter but slower and more expensive; low is a good default for a responsive voice relay. This applies to `gpt-realtime-2`.
* **Voice.** Pick the spoken voice, with a Preview button to hear a sample.
* **Turn detection.** Tune how the agent decides you are done speaking: input mode, voice-detection sensitivity, pause before processing, whether it can be interrupted, and how long the mic keeps listening (the listen window, 5 to 30 seconds).
* **Command submission.** Set a review delay before a voice command is sent to the coding agent, from immediate up to 10 seconds, so you can catch and edit a misheard request.
* **Language.** The voice agent always speaks in your configured preferred language, whatever language you speak to it in.

<figure><img src="/files/00U8A6vlSR2i4amGw7vk" alt="The Voice Mode settings panel showing turn detection, command submission, project summary, and pricing"><figcaption><p>The Voice Mode settings panel under Settings > Application > Voice Mode.</p></figcaption></figure>

The panel also shows a **Project Summary** (an AI-generated overview of your project that the voice agent uses for context, which you can regenerate) and OpenAI's **usage pricing** for voice, since Voice Mode runs on OpenAI's realtime voice models.

### The listen window

On desktop, the listen window (15 seconds by default) starts when audio playback drains in your speakers, not when the server finishes streaming, so the mic stays open through the end of the agent's reply. Turns that only call a function also wake the mic, with a short readiness cue when there is no audible reply.

### A note on stability

Voice Mode is alpha and may change, break, or be removed without notice. If you hit a problem, share feedback via Discord or our support channels. See [Feedback, Discord, Support, Releases](/getting-started/feedback-discord-support-releases).


# Open Data, Workflow, File Storage

Nimbalyst keeps your documents, metadata, and settings in open formats on your own machine, and the app itself is open source on GitHub.

All Your Documents (and Metadata and Settings) Are Belong to You!

### Open Source App

Nimbalyst itself is open source. The full source code is published at [github.com/nimbalyst](https://github.com/nimbalyst) so you can audit how your files, sessions, and settings are handled, build your own version, or contribute back.

More on the license and what is open is on the [open source page](https://nimbalyst.com/open-source/).

### Open Storage of Content and Status in Markdown

<div align="left"><figure><img src="/files/azMYwJsCZCe6pDgVpoqk" alt="" width="375"><figcaption></figcaption></figure></div>

* **Human-readable format**: All plans, documents, tasks, and status tracking use standard markdown files
* **Version control ready**: Plain text files work seamlessly with Git for history and collaboration
* **YAML frontmatter**: Structured metadata stored as YAML at the top of markdown files
* **No proprietary formats**: Edit your files with any text editor, never locked into a specific tool
* **Transparent tracking**: Plan status, progress, and metadata all visible and editable in the markdown source

### Open Storage of Workflow and Config in Coding Agent Commands

<div align="left"><figure><img src="/files/OesaQjOm0jvh1biTx18s" alt="" width="375"><figcaption></figcaption></figure></div>

* **Slash commands**: Custom workflows stored in `.claude/commands/` directory as markdown files
* **Project instructions**: Repository-specific guidance in `CLAUDE.md` checked into your codebase
* **Local configuration**: Settings and preferences stored in standard application directories
* **Portable workflows**: Share your custom commands and workflows by committing them to version control
* **No vendor lock-in**: All configuration uses open standards and readable formats

### Open Storage of Your Files in Your File Tree or Github

<div align="left"><figure><img src="/files/SC3pOrW6MG8YgsAN2fAg" alt=""><figcaption></figcaption></figure></div>

* **File system first**: Local documents are stored directly in your local file system
* **Optional team workspace**: Files explicitly promoted to Nimbalyst Teams gain a shared copy that flows through Cloudflare encrypted in transit and at rest
* **Git integration**: Full support for Git version control and GitHub synchronization
* **Your choice of sync**: Use GitHub, GitLab, Bitbucket, or any Git hosting service you prefer
* **Standard file structure**: Local project content stays in files and folders you control
* **Backup friendly**: Standard file storage works with any backup solution

### Open Storage of your Images

A link to your images is stored in your markdown file

Your image is stored in your project in the .nimbalyst/assets folder


# Permissions and Safety

How Nimbalyst permissions keep AI agents in bounds by approving file writes and shell commands, and guarding against prompt injection.

### Why Permissions Matter

AI agents can execute code, modify files, and run shell commands. Without guardrails, a prompt injection or mistake could delete files, leak secrets, or run malicious code. Permissions ensure you stay in control.

How Nimbalyst surfaces and enforces agent permissions is covered on the [security feature page](https://nimbalyst.com/features/security/).

### Claude Code's Built-in Permissions

Claude Code uses settings files to define what the agent can do:

* **`.claude/settings.json`** - Project settings (shared with team)
* **`.claude/settings.local.json`** - Personal project settings (gitignored)
* **`~/.claude/settings.json`** - Global user settings

Each file can specify:

* `allow` - Patterns that auto-approve
* `deny` - Patterns that always block
* `additionalDirectories` - Folders outside the project the agent can access

Nimbalyst supports this.

### What Nimbalyst Adds

In addition, Nimbalyst adds a **workspace trust layer** on top of the coding agent's permissions:<br>

1. **Trust Gate** - Projects must be explicitly trusted before the agent can do anything
2. **Permission Modes** - Choose how much autonomy to grant the agent
3. **Inline Confirmations** - Approve or deny actions as they happen

### Permission Modes

When you first use an agent in a project, Nimbalyst presents four autonomy levels:

| Mode                             | Behavior                                                                                                                                                      |
| -------------------------------- | ------------------------------------------------------------------------------------------------------------------------------------------------------------- |
| **Agent-verified** (Recommended) | Routine work proceeds without interrupting you. Risky or uncertain actions are evaluated by the provider's automatic reviewer and can still require approval. |
| **Allow everything**             | Operations run without approval prompts or automatic review. Use only in a project and environment you fully trust.                                           |
| **Allow edits only**             | File edits proceed automatically. Shell commands and web requests ask first.                                                                                  |
| **Ask every time**               | Approve each agent action before it runs. Your saved approvals are remembered.                                                                                |

**Agent-verified** is the default. It keeps normal workflows moving while retaining a second review step for destructive or uncertain operations. Claude Agent and OpenAI Codex use their native automatic reviewers behind the same Nimbalyst mode.

### Allowing Web Searches in Allow Edits Only

To allow your coding agent to search and fetch websites, add approved domains to the URL allow list in Agent Permissions. You can use wildcard domain patterns such as `*.github.com` to allow subdomains, or use **Allow All Domains** when broad web access is appropriate for the project.

<figure><img src="/files/bldAdPwPEKhPDN1gNJws" alt=""><figcaption></figcaption></figure>

### How Approval Works in Ask Every Time

When the agent wants to perform an action in **Ask every time**:

1. An inline confirmation appears with the action details
2. You choose:

* **Deny** - Block this request.
* **Allow Once** - Allow only this request.
* **Session** - Allow the displayed pattern until you close Nimbalyst.
* **Always** - Save the displayed pattern to `.claude/settings.local.json`.

### Managing Permissions

Open **Settings > Project > Agent Permissions** to:

* Change your permission mode
* View and remove approved patterns
* Add additional directories
* Reset to defaults

Permissions are project-specific. Giving an agent more autonomy in one repository does not grant the same access in every project.

### Pattern Examples

* `Bash(git:*)` - Allow git commands
* `Bash(npm:*)` - Allow npm commands
* `Edit` - Allow file edits
* `WebFetch(domain:github.com)` - Allow fetching from github.com

### Security Notes

* Sensitive paths (`~/.ssh`, `~/.aws`, etc.) are always blocked
* Compound bash commands get one-time patterns that don't persist
* Untrusted projects deny agent actions until you choose a permission mode

<br>


# Privacy

Nimbalyst is local first. Files, app state, and agents stay on your machine, and online features move only the data that feature needs.

### Local First, Shared When You Choose

Nimbalyst starts with local files, local application state, and agents configured on your machine. You can use the desktop app without moving a project into a hosted workspace.

Online features move only the data needed for the feature you choose:

* **Local workspace by default**: Project files remain outside Nimbalyst Teams unless you explicitly promote them into the shared team workspace.
* **Nimbalyst Teams**: Shared files and Trackers flow through Nimbalyst's Cloudflare sync service. Team data is encrypted in transit and at rest, isolated per team, and available only to authenticated, authorized members.
* **Personal device sync**: Personal sessions, prompts, drafts, and settings use a separate end-to-end encrypted channel.
* **Optional telemetry**: Nimbalyst collects anonymous product analytics to improve the app. You can opt out under **Settings > Application > Advanced > Analytics**. Telemetry does not include file contents, file paths, API keys, authentication tokens, document content, session content, or chat content.
* **Accounts are optional for local use**: An account is required for online services such as Nimbalyst Teams and personal device sync, not for local editing.
* **Open source**: Verify how these boundaries are implemented in the source at [github.com/nimbalyst](https://github.com/nimbalyst).

The [trust page](https://nimbalyst.com/trust/) lists the subprocessors involved when you turn on team features.


# Session and Window State Storage

Where Nimbalyst stores AI session history and window state on your machine, including the local database location on macOS, Windows, and Linux.

Session history and window state are stored in a local database on your own machine.

#### **Database**

**Database:** SQLite on newer installs. Installs that predate the SQLite migration stay on PGLite until they migrate.

**Tables:** `ai_sessions` for the sessions themselves, `ai_agent_messages` for the message log behind each one.

**Location:** inside the Nimbalyst application data folder.

| Platform | Application data folder                   |
| -------- | ----------------------------------------- |
| macOS    | `~/Library/Application Support/Nimbalyst` |
| Windows  | `%APPDATA%\Nimbalyst`                     |
| Linux    | `~/.config/Nimbalyst`                     |

The database itself is `sqlite-db/nimbalyst.sqlite` on SQLite, or the `pglite-db/` folder on PGLite. Development builds use a `@nimbalyst/electron` folder in the same location.

#### What a session record holds

* Session id, title, and workspace
* Provider and model
* Session type, mode, and agent role
* Document context and the last document state
* Draft input you typed but have not sent
* Parent, branch, and worktree links
* Status, pinned and archived flags, and created and updated timestamps

Conversation messages are stored separately in `ai_agent_messages` and linked back to the session id, so a long transcript does not have to be rewritten every time the session changes.

#### Backups

Nimbalyst backs this database up automatically every 4 hours and on quit, keeping three rolling snapshots. See [Database Backups and Restore](/troubleshooting/database-backups-and-restore) for the backup locations and the restore steps.

<br>


# Security

How Nimbalyst handles files, sessions, and credentials, with open source code your security team can audit and encryption for shared data.

### Open Source: Audit the Code Yourself

Nimbalyst is open source. The full source code is published at [github.com/nimbalyst](https://github.com/nimbalyst), so you (or your security team) can review exactly how the app handles your files, sessions, credentials, and network traffic.

### Nimbalyst is SOC 2 Type 2 Certified

* **Security compliance**: SOC 2 Type 2 certification demonstrates commitment to security controls
* **Audited standards**: Independent verification of security, availability, and confidentiality practices
* **Enterprise ready**: Meets compliance requirements for business and enterprise use
* **Continuous monitoring**: Ongoing audits ensure sustained compliance with security standards
* **Trust and transparency**: Third-party validation of our security and privacy practices

Current certifications, subprocessors, and policies are published on the [trust page](https://nimbalyst.com/trust/), and the [security feature page](https://nimbalyst.com/features/security/) covers how data is handled in the app.

### Nimbalyst Teams Data Security

Nimbalyst Teams is a shared layer over each teammate's local Nimbalyst installation and locally configured agents. Only files and Tracker items explicitly shared with a team enter the team collaboration flow.

* **Cloudflare infrastructure**: Shared team data flows through Nimbalyst's Cloudflare sync service.
* **Encrypted in transit and at rest**: Team documents, Tracker data, and collaboration updates are encrypted while moving across the network and while stored.
* **Isolated per team**: Team data is stored in team-specific infrastructure and access requires an authenticated, authorized membership.
* **Server-managed team keys**: Nimbalyst-hosted Teams manages encryption keys so authorized web, CLI, and agent experiences can access team work. Hosted team data is encrypted but is not zero-knowledge.
* **Separate personal sync**: Personal device sync uses end-to-end encryption with keys that stay on your devices.


# FAQs

Answers to common Nimbalyst questions about open source, supported coding agents, Claude Code commands, file storage, pricing, and privacy.

### **Is Nimbalyst open source?**

Yes. Nimbalyst is open source and the code lives at [github.com/nimbalyst](https://github.com/nimbalyst). You can read the source, file issues, and contribute pull requests.

The [open source page](https://nimbalyst.com/open-source/) covers the license and what is included.

### **Can I use my existing Claude Code custom commands**

Yes

### **Can I have multiple workspaces open?**

Yes, unlimited windows. Each workspace is independent. Switch with window shortcuts.

### **Is my data sent to AI providers?**

Only when you use AI features, then document context is sent with messages.

API keys are sent only to authenticate.

If you use LM Studio, then nothing is sent (local)

### **Nimbalyst keeps opening my .md files instead of VS Code (or another app)**

This is a macOS behavior, not a Nimbalyst issue. On Mac, the "Always Open With" option in the right-click menu only applies to **that specific file**, not all files of that type.

To change the default app for **all** `.md` files:

1. In Finder, select any `.md` file
2. Press **⌘ + I** (Get Info)
3. Under **Open with**, select your preferred app (e.g., Visual Studio Code)
4. Click **Change All...**

This tells macOS to open every `.md` file with your chosen app going forward.

### **Can I use Nimbalyst offline?**

Full markdown editor functionality is available offline.

AI features require internet (except LM Studio).

### **What languages does Nimbalyst support?**

English today

### **How does Nimbalyst compare to my current tools?**

Side-by-side comparisons against editors, task trackers, diagram tools, and agent harnesses are on the [comparison pages](https://nimbalyst.com/compare/).

<br>


# Troubleshooting

Fix common Nimbalyst problems, including agents not responding, provider outages, API key and login errors, sync issues, and install trouble.

### Claude or Codex isn't responding — check the provider status pages first

Before you dig into Nimbalyst settings, your network, or your API key, check whether Anthropic or OpenAI is having an outage. When their APIs are degraded or down, sessions will hang, time out, or return errors that look like a Nimbalyst bug but aren't.

* **Anthropic (Claude):** [status.anthropic.com](https://status.anthropic.com)
* **OpenAI (Codex / ChatGPT):** [status.openai.com](https://status.openai.com)

If either provider is reporting an incident on the affected component (Messages API, Claude Code, Codex, etc.), the fix is to wait for them to recover — there's nothing to change on your end.

### Nimbalyst is crashing — increase the heap size

If Nimbalyst is crashing, freezing, or you're seeing out-of-memory errors (especially in large projects, long sessions, or while working with big diffs), the V8 memory limit is likely the culprit. The default heap size is **4 GB**, which is enough for most projects but can be too small if you keep many sessions, tabs, or files open at once.

**How to increase it:**

1. Open **Nimbalyst > Settings > Application > Advanced**.
2. Scroll to the **Tools & Environment** section.
3. Find **Max Heap Size** and pick a larger value (6 GB, 8 GB, 12 GB, or 16 GB).
4. Restart Nimbalyst — the new limit takes effect on the next launch.

<figure><img src="/files/rEjPNeHAF3aa6qDRLMWT" alt="Application settings, Advanced, Tools and Environment, with the Max Heap Size dropdown open"><figcaption><p>Settings > Application > Advanced > Tools &#x26; Environment: Max Heap Size dropdown</p></figcaption></figure>

Pick the smallest size that comfortably fits your workload — going higher than you need doesn't make Nimbalyst faster, it just lets V8 hold more in memory before garbage collecting. If you're routinely hitting the ceiling at 4 GB, 8 GB is a reasonable next step. Reach for 12–16 GB only if you're working with very large repos or many parallel sessions.

If raising the heap doesn't fix the crashes, share details (project size, what you were doing, any error messages) via Discord or support — see [Feedback, Discord, Support, Releases](/getting-started/feedback-discord-support-releases).

Still stuck? The [Nimbalyst site](https://nimbalyst.com/) has feature walkthroughs and demo videos that often show the setting you are looking for, and support is at <support@nimbalyst.com>.


# Database Backups and Restore

Where Nimbalyst stores its automatic database backups on macOS, Windows, and Linux, and how to restore one by hand for both the SQLite and PGLite backends.

Nimbalyst keeps rolling backups of its local database so a corrupted database does not cost you your session history. This page covers where those backups live, how often they are taken, and the exact restore steps for both database backends.

## Which backend you are on

Nimbalyst ships two local database backends. Newer installs use **SQLite**. Installs that started before the SQLite migration stay on **PGLite** until you migrate.

Check in this order, inside the Nimbalyst application data folder (paths below). Nimbalyst itself resolves the backend the same way, so stop at the first line that matches:

1. **`database-backend.json` exists.** Open it and read the `backend` field. It says either `sqlite` or `pglite`, and it wins over everything else on disk.
2. **No `database-backend.json`, but a `pglite-db` folder exists.** You are on PGLite.
3. **Neither.** You are on SQLite.

Do not judge by the presence of a `sqlite-db` folder alone. If you migrated to SQLite and later rolled back from **Settings → Database**, that folder stays behind while `database-backend.json` says `pglite`, and restoring into it would do nothing.

You may also see a `pglite-db.migrated-<timestamp>` folder. That is the pre-migration copy of your old PGLite database, kept as a safety net. It is not the live database and it is not a backup slot, so ignore it when following the steps below.

Each backend has its own backup folder, so follow the section that matches yours.

## Where the files live

The application data folder is:

| Platform | Application data folder                   |
| -------- | ----------------------------------------- |
| macOS    | `~/Library/Application Support/Nimbalyst` |
| Windows  | `%APPDATA%\Nimbalyst`                     |
| Linux    | `~/.config/Nimbalyst`                     |

If you run a development build instead of the installed app, the folder is `@nimbalyst/electron` in the same location (for example `~/Library/Application Support/@nimbalyst/electron`).

Inside that folder:

| What          | SQLite                                                                                                  | PGLite                                                                                |
| ------------- | ------------------------------------------------------------------------------------------------------- | ------------------------------------------------------------------------------------- |
| Live database | `sqlite-db/nimbalyst.sqlite` (plus `-wal` and `-shm` siblings)                                          | `pglite-db/` (a folder)                                                               |
| Backups       | `sqlite-db.backups/`                                                                                    | `db-backups/`                                                                         |
| Backup slots  | `nimbalyst.backup-current.sqlite`, `nimbalyst.backup-previous.sqlite`, `nimbalyst.backup-oldest.sqlite` | `pglite-db.backup-current/`, `pglite-db.backup-previous/`, `pglite-db.backup-oldest/` |
| Backup index  | `backup-metadata.json`                                                                                  | `backup-metadata.json`                                                                |

`backup-metadata.json` records the timestamp, size, and verification result for each slot, which is the quickest way to see how fresh your newest backup is.

## How backups are taken

* **Every 4 hours** while Nimbalyst is running.
* **On quit**, as part of the shutdown sequence.
* **At startup and on wake from sleep**, if the last successful backup is older than 4 hours. A laptop that slept overnight still gets a fresh snapshot on wake.
* **Three rolling slots.** A new backup becomes `current`, the old `current` becomes `previous`, and the old `previous` becomes `oldest`.
* **Verified before it is kept.** Nimbalyst opens each new backup and reads from it before promoting it into the rolling slots, and rejects a snapshot that has shrunk to less than half the size of the one it would replace.

On PGLite, a database that fails to open at startup triggers an automatic restore from the newest valid backup. On SQLite, restore is a manual step, which is what the rest of this page walks through.

## Restore a SQLite backup

Only follow this section if you confirmed SQLite is your active backend above.

Quit Nimbalyst completely first. Restoring while the app is running will not work, and can leave you with a half-written database.

### macOS and Linux

```bash
# 1. Quit Nimbalyst completely (Cmd+Q on macOS)

# 2. Go to the application data folder
cd ~/Library/Application\ Support/Nimbalyst     # macOS
# cd ~/.config/Nimbalyst                        # Linux

# 3. Move the bad database aside, including its WAL and SHM siblings
mv sqlite-db/nimbalyst.sqlite sqlite-db/nimbalyst.sqlite.bad
rm -f sqlite-db/nimbalyst.sqlite-wal sqlite-db/nimbalyst.sqlite-shm

# 4. Copy the most recent backup into place
cp sqlite-db.backups/nimbalyst.backup-current.sqlite sqlite-db/nimbalyst.sqlite

# 5. Start Nimbalyst
```

### Windows (PowerShell)

```powershell
# 1. Quit Nimbalyst completely

# 2. Go to the application data folder
cd "$env:APPDATA\Nimbalyst"

# 3. Move the bad database aside, including its WAL and SHM siblings
Rename-Item sqlite-db\nimbalyst.sqlite nimbalyst.sqlite.bad
Remove-Item sqlite-db\nimbalyst.sqlite-wal, sqlite-db\nimbalyst.sqlite-shm -ErrorAction SilentlyContinue

# 4. Copy the most recent backup into place
Copy-Item sqlite-db.backups\nimbalyst.backup-current.sqlite sqlite-db\nimbalyst.sqlite

# 5. Start Nimbalyst
```

Deleting the `-wal` and `-shm` files matters. They belong to the database you just replaced, and leaving them behind can corrupt the restored copy.

## Restore a PGLite backup

Only follow this section if you confirmed PGLite is your active backend above. If `database-backend.json` says `sqlite`, Nimbalyst never opens `pglite-db` and restoring it changes nothing. Use the SQLite steps instead.

Quit Nimbalyst completely first, the same as for SQLite.

PGLite stores its database as a folder rather than a single file, so every copy here is recursive.

### macOS and Linux

```bash
# 1. Quit Nimbalyst completely (Cmd+Q on macOS)

# 2. Go to the application data folder
cd ~/Library/Application\ Support/Nimbalyst     # macOS
# cd ~/.config/Nimbalyst                        # Linux

# 3. Rename the corrupted database (keeps it around just in case)
mv pglite-db pglite-db.bad

# 4. Copy the most recent backup into place
cp -r db-backups/pglite-db.backup-current pglite-db

# 5. Start Nimbalyst
```

### Windows (PowerShell)

```powershell
# 1. Quit Nimbalyst completely

# 2. Go to the application data folder
cd "$env:APPDATA\Nimbalyst"

# 3. Rename the corrupted database
Rename-Item pglite-db pglite-db.bad

# 4. Copy the most recent backup into place
Copy-Item -Recurse db-backups\pglite-db.backup-current pglite-db

# 5. Start Nimbalyst
```

## If the newest backup is also bad

Open `backup-metadata.json` in the backup folder before you pick. It lists each slot with its `timestamp`, `sizeBytes`, and `verified` flag, so you can see how much work each choice costs you rather than guessing.

Then work back through the slots. `previous` is one backup window older, `oldest` is two.

```bash
# SQLite
cp sqlite-db.backups/nimbalyst.backup-previous.sqlite sqlite-db/nimbalyst.sqlite
cp sqlite-db.backups/nimbalyst.backup-oldest.sqlite   sqlite-db/nimbalyst.sqlite

# PGLite
cp -r db-backups/pglite-db.backup-previous pglite-db
cp -r db-backups/pglite-db.backup-oldest   pglite-db
```

Repeat the same quit, clear, copy, launch sequence each time.

## What a restore brings back

The database holds:

* AI session and conversation history
* Document edit history behind the History sidebar
* Session metadata, prompts, and drafts
* Local tracker data

The following live outside the database and are untouched by a database problem or a restore:

* Your document and project files on disk
* Application and workspace settings
* Anything already synced to a Nimbalyst team

Because a restore rewinds to the last snapshot, work done between that snapshot and the failure is not recovered. Files on disk are unaffected either way.

## Cleaning up

Once you have confirmed the restore worked and your sessions are back, delete the copy you set aside.

macOS and Linux:

```bash
rm -f  sqlite-db/nimbalyst.sqlite.bad     # SQLite
rm -rf pglite-db.bad                      # PGLite
```

Windows (PowerShell):

```powershell
Remove-Item sqlite-db\nimbalyst.sqlite.bad            # SQLite
Remove-Item -Recurse -Force pglite-db.bad             # PGLite
```

You may also see `temp-backup-*` entries in a backup folder after a crash. They are leftovers from an interrupted snapshot, Nimbalyst sweeps them on the next launch, and they are safe to delete.

## Still stuck

If none of the three backups will open, send us the contents of `backup-metadata.json` and the main log from the `logs` folder in the same application data directory. Reach out on Discord or at <support@nimbalyst.com>, see [Feedback, Discord, Support, Releases](/getting-started/feedback-discord-support-releases).


# Windows: Detailed Install Guide

A step-by-step Windows install guide for Nimbalyst, with screenshots covering the installer, first launch, and setting up Claude Code on Windows.

What follows is a detailed guide to installing Nimbalyst

Grab the Windows installer from the [Nimbalyst download page](https://nimbalyst.com/download/) first, then follow the steps below.

### Initial Install

**Download the Nimbalyst-Windows.exe. Open the File**

<figure><img src="/files/5MmF7T1Ofg1wFvoNwcFu" alt="" width="369"><figcaption></figcaption></figure>

**Choose Installation Options**

<figure><img src="/files/9tnZQQJkAPeHQpIxMRCW" alt="" width="375"><figcaption></figcaption></figure>

**Open Nimbalyst from your Applications**

<figure><img src="/files/x6dng5CCemDUI4LzRGIQ" alt="" width="375"><figcaption></figcaption></figure>

**Finish Nimbalyst Setup**

<figure><img src="/files/nPwMFchc7eNJyRJyKxew" alt="" width="344"><figcaption></figcaption></figure>

### Initial Nimbalyst Config

Choose what Project you will work on. A Project is a folder on your local file system. It could be a Git folder or just another folder. You have different projects for different folders. Open one or create a new one.

<figure><img src="/files/TIVmUnQ0UDMMLWze6Y1a" alt="" width="563"><figcaption></figcaption></figure>

**Read and click through Nimbalyst's onboarding screens, Click Get Started**

<figure><img src="/files/TRXxjkyLj6cd3pocOUJx" alt=""><figcaption></figcaption></figure>

**Let Nimbalyst know your role and email.** We will only send you product updates occasionally.

<figure><img src="/files/2D4aRrgmkU8OiN6UpOsT" alt=""><figcaption></figcaption></figure>

### Installing your coding Agent

Next you need to install a coding agent. If you already have Claude Code or Codex installed, Nimbalyst will use it. If you don't, follow the instructions by the coding agent provider.

### Example for Claude Code

#### Installing Git for Windows

Git for Windows is a requirement Claude Code has to run on Windows.

**Follow the Steps laid out in this screen. Click to Install Git for Windows.**

<figure><img src="/files/ZdndjoRz4lldc4VgBdgS" alt=""><figcaption></figcaption></figure>

**Click to download the latest vesion of Git for Windows**

<figure><img src="/files/qZVtC3NCB8HyaAgcrks7" alt=""><figcaption></figcaption></figure>

**Open the downloaded .exe**

<figure><img src="/files/GzyiXutigRJQL1zmGWKV" alt=""><figcaption></figcaption></figure>

**Allow the Git for Windows app to install**

<figure><img src="/files/f3K05cMHBCivfBBXc1Ym" alt=""><figcaption></figcaption></figure>

**NOTE: There are about 12 config screens for Git for Windows. These are not shown here**

* If you are just downloading Git for Windows because you want Claude Code, then just accept the defaults for Git for Windows and click through these screens
* If you know what you want, then select what you want

**Finally, after these config screens, Git for Windows will install**

<figure><img src="/files/JVGySiKnFc8xGdU3hNco" alt="" width="375"><figcaption></figcaption></figure>

<figure><img src="/files/YtmNqclDBEV4qsWZywd0" alt="" width="375"><figcaption></figcaption></figure>

#### Install Claude Code

**Return to Nimbalyst and Click on Step 2. Install Claude Code for Windows**

<figure><img src="/files/FP255iwYZr16Teu6yACe" alt="" width="563"><figcaption></figcaption></figure>

**Nimbalyst opens the browser and takes you to the Claude Code instructions page**

<figure><img src="/files/YgI53kfeurBbz4k1vHKJ" alt=""><figcaption></figcaption></figure>

**Copy the install instructions that look like this**

<figure><img src="/files/LukeeduQxkShbw2YeeQP" alt=""><figcaption></figcaption></figure>

**Open the terminal / command prompt on Windows**

<figure><img src="/files/qDAl1uRPvErC4a8ucEgy" alt=""><figcaption></figcaption></figure>

**Paste the copied command to install Claude Code, hit enter**

<figure><img src="/files/XcL9GLcvxifkrxxgnOLO" alt=""><figcaption></figcaption></figure>

**Claude Code will be installed**

<figure><img src="/files/73P7jM6gbguOecNneEvZ" alt=""><figcaption></figcaption></figure>

**Verify Claude Code installation by clicking on the button**

<figure><img src="/files/eGZ0MPMAhZuxclz8owEW" alt=""><figcaption></figcaption></figure>

#### Authenticate to Claude

**Nimbalyst takes you to the Settings screens. Click Blue Login Button to Login to your Claude Plan (Nimbalyst requires a Claude Pro or Max plan)**

<figure><img src="/files/O8GSJ3uwTVWtHDnztVri" alt=""><figcaption></figcaption></figure>

**Nimbalyst opens your Claude Code in the terminal/shell and gives you an authentication link.**

* Click on the link and it will open the browser
* NOTE: Often, you have to triple click onto that link to select the whole link in white. Then use your keyboard shortcuts to copy (Command C or Control C) the linke

<figure><img src="/files/hOtYiNRuM1zihlAgiPn2" alt=""><figcaption></figcaption></figure>

<figure><img src="/files/vIasqxcWLuFaBlO4oEjt" alt=""><figcaption></figcaption></figure>

**Open browser window and insert the copied link (or browswer will open when you click link)**

<figure><img src="/files/vdpBV82H9NP8PpgE9lPl" alt=""><figcaption></figcaption></figure>

**Authenticate to your Claude Pro or Max accounts**

* Google Auth or
* Email Auth

**Authorize Claude Code to connect to your Claude account**

<figure><img src="/files/QaSe7dynPbAZjXhocJQR" alt="" width="375"><figcaption></figcaption></figure>

**Get an authentication Code from Claude Code**

<figure><img src="/files/bz8STJjVZaos2eB70qP8" alt=""><figcaption></figcaption></figure>

**Paste the copied Code into the Claude Code terminal/shell window and hit enter**

<figure><img src="/files/reyCWsfvIQoVDkF4YArH" alt=""><figcaption></figcaption></figure>

**Claude Code is now authenticated to Claude and you can use it**

<figure><img src="/files/AJpyVB3EqbfOgXpAnv7r" alt=""><figcaption></figcaption></figure>

**In Nimbalyst Settings, you are now authenticated with Claude**

<figure><img src="/files/tEGVZdcObBOZ7tyh7rdC" alt=""><figcaption></figcaption></figure>

#### Claude Code in Nimbalyst

**Claude Code now works in Nimbalyst. Type into the right agent panel**

<figure><img src="/files/PFPxHC2gIbzvbEzcuAwh" alt=""><figcaption></figcaption></figure>

**Use Nimbalyst**

* Type into the Agent panel and have your coding agent research, write, edit, mockup, diagram and more
* Work in documents and code in the center panel
* To set up Codex as an additional coding agent, see [ai-provider-setup-and-notifications.md](/setup-nimbalyst/ai-provider-setup-and-notifications)

### Windows-Specific Settings

**Spellchecker Toggle**

Nimbalyst on Windows uses the Electron spellchecker, which defaults to English. If you'd like to disable it, go to Settings and toggle the spellchecker off.


# Mac: Detailed Install Guide

A step-by-step Mac install guide for Nimbalyst, with screenshots covering the DMG download, first launch, and setting up Claude Code on macOS.

What follows is a detailed guide to installing Nimbalyst and setting up Claude Code on Mac

Grab the installer from the [Nimbalyst download page](https://nimbalyst.com/download/) first, then follow the steps below.

### Initial Install

**Download the Nimbalyst-MacOS.dmg and click to install it**

<figure><img src="/files/ofdyMBLe96f85d7EtLdC" alt=""><figcaption></figcaption></figure>

**Drag Nimbalyst into your Applications**

<figure><img src="/files/LxQbaMCuklIziBNp2TW3" alt=""><figcaption></figcaption></figure>

**Open Nimbalyst from your Applications**

<figure><img src="/files/v2VUEhnwA25yaOSTqhH3" alt=""><figcaption></figcaption></figure>

**Open Nimbalyst**

<figure><img src="/files/dwFIS4z1dQJrp4XXCWOv" alt=""><figcaption></figcaption></figure>

### Initial Nimbalyst Config

Choose what Project you will work on. A Project is a folder on your local file system. It could be a Git folder or just another folder. You have different projects for different folders. Open one or create a new one.

<figure><img src="/files/YLT1xprvkpnRK4q9IHGD" alt=""><figcaption></figcaption></figure>

**In this example, I create My Project, to work on with Nimbalyst**

<figure><img src="/files/0FO1McHw32rGmIxPLQUJ" alt=""><figcaption></figcaption></figure>

**Read and click through Nimbalyst's onboarding screens, Click Get Started**

<figure><img src="/files/TRXxjkyLj6cd3pocOUJx" alt=""><figcaption></figcaption></figure>

**Let Nimbalyst know your role and email.** We will only send you product updates occasionally.

<figure><img src="/files/2D4aRrgmkU8OiN6UpOsT" alt=""><figcaption></figcaption></figure>

**Type something into the Agent panel to test your coding agent**

* If you already have the coding agent installed, it should just work
* If not, Nimbalyst will give you a link to install the coding agent

<figure><img src="/files/WHZ8H2clel0Fr0KXSrfb" alt=""><figcaption></figcaption></figure>

### Installing Claude Code

**Click LogIn to be guided through Claude Code setup**

<figure><img src="/files/iDadGqmJ7n8vGDLGGV4H" alt=""><figcaption></figcaption></figure>

**Nimbalyst pops up the terminal. Click Allow to allow it to install Claude Code for you.**

<figure><img src="/files/0MhHkJqxl4gGGF1qVMBI" alt=""><figcaption></figcaption></figure>

**Nimbalyst opens your browser and asks you to authenticate to your Claude Pro or Max accounts**

* Google Auth or
* Email Auth

<figure><img src="/files/8p7t35BV2cNJ874KE8cN" alt=""><figcaption></figcaption></figure>

**Authorize Claude Code to connect to your Claude account**

<figure><img src="/files/1JdUVVaaLUpoWSCpmFZp" alt=""><figcaption></figcaption></figure>

**Success installing Claude Code and connecting it to Claude**

<figure><img src="/files/Nw3K9O9bxdZpgewrqeBs" alt=""><figcaption></figcaption></figure>

### Claude Code in Nimbalyst

**These two terminal windows can be closed. Hit the red dot to close them.**

<figure><img src="/files/rfcSWobftU38a1SibRY0" alt=""><figcaption></figcaption></figure>

**Hit the Check Status box in Nimbalyst to Check Status of your Claude Code Setup**

<figure><img src="/files/O4Vxl0Ne7mTeX6URxr4Q" alt=""><figcaption></figcaption></figure>

**Success. Claude Code now works in Nimbalyst.**

<figure><img src="/files/zlWjxR9dqu1l1zjIjAz0" alt=""><figcaption></figcaption></figure>

**Use Nimbalyst**

* Type into the Agent panel and have your coding agent research, write, edit, mockup, diagram and more
* Work in documents and code in the center panel
* To set up Codex as an additional coding agent, see [AI Provider Setup](/setup-nimbalyst/ai-provider-setup-and-notifications)